In this tutorial, we will be showing you how to install PHP on an Ubuntu operating system.

PHP is a dynamic programming language that helps drive a lot of the modern web. It allows you to write fast and flexible web applications.
If you have browsed much of the internet, you will have run into a website that PHP drives. For example, any website that uses WordPress is driven by PHP.
Best of all, PHP easily integrates into the Nginx and Apache web servers, complementing the features both provide.
To install PHP on Ubuntu we will be utilizing the pack repository provided by Ondrej. This repository includes newer and older PHP versions that may or may not be included in the official Ubuntu repository.
By the end of this tutorial, you will have your desired version of PHP installed on Ubuntu.
The following steps will work on currently supported versions of Ubuntu. Some of the versions of Ubuntu you can install PHP on are 22.04, 20.04, and 18.04.
Adding the PHP PPA to Ubuntu
Before we install PHP on Ubuntu, we will add the Ondrej PPA. This repository is actively maintained and contains the latest releases of PHP that might not be available on your current release of Ubuntu.
1. Our first task is to update our package list cache to ensure we are downloading the latest versions of any packages.
You can update the package list by using the following command.
sudo apt updateCopy2. Next, let us ensure we have all the packages we need to connect the PHP repository on Ubuntu. Most of these should be installed by default, but it is better to be safe than sorry.
The packages that we will be installing are the following.
software-properties-common– This package contains the tools we need to add the PHP package repository to Ubuntu easily.ca-certificates– We install this package to ensure we have numerous certificates. These certificates are crucial to validating HTTPS connections.lsb-release– This package is used to identify information about your system such as the current version of the operating system.apt-transport-https– By default, the APT package manager does not support the HTTPS protocol. This particular package extends this functionality and adds support for this protocol.
Use the command below to install all of the packages we just listed on Ubuntu
sudo apt install software-properties-common ca-certificates lsb-release apt-transport-httpsCopy3. We can finally add the Ondrej PHP PPA to Ubuntu using the following command.
With this command, we temporarily set the locale to UTF-8 and then run the “add-apt-repository” tool to add the “ondrej/php” package.
sudo LC_ALL=C.UTF-8 add-apt-repository ppa:ondrej/phpCopy4. After adding a new repository to Ubuntu, you will need to perform another update of the package list.
Without updating the list, the package manager will be unaware of our new packages.
sudo apt updateCopyInstalling PHP on Ubuntu
Now that we have added the PHP package repository, we can move on to installing PHP on Ubuntu.
We will split this into a couple of different sections. Each covers installing PHP on Ubuntu for different uses, such as for the Nginx or Apache webservers.
Thanks to the repository we added earlier in this guide, you will have access to all currently maintained versions of PHP.
Some of the versions of PHP that you can install to your Ubuntu 22.04 and the earlier system are PHP 8.1, PHP 8.0, PHP 7.4, and even the rather old PHP 5.6.
Installing PHP for Apache on Ubuntu
This section will show you how to install PHP for Apache on the Ubuntu operating system. The base packages for this web server differ slightly from what is needed for Nginx.
First, you must decide what PHP version you want to install.
If you want to write your application from scratch, we highly recommend starting with PHP 8.1.
However, if you are using this for an existing web application, check what version of PHP it officially supports. Most well-maintained PHP scripts will support PHP 8.1.
Installing your Flavor of PHP for Apache
Below are the commands you can use to install PHP for Apache on an Ubuntu system.
You only need to run whichever command installs the version of PHP you require.
PHP 8.1
You will install PHP 8.1 alongside the required Apache module to Ubuntu using the command below.
sudo apt install php8.1 libapache2-mod-php8.1CopyPHP 8.0
If you want to use PHP 8.0 with Apache, you will want to use the below command.
sudo apt install php8 libapache2-mod-php8.0CopyPHP 7.4
The following command will install PHP 7.4 alongside its equivalent Apache module to your Ubuntu system.
sudo apt install php7.4 libapache2-mod-php7.4CopyPHP 5.6 (Old and should be avoided)
This final command will install the somewhat outdated PHP 5.6 to Ubuntu alongside the relevant Apache module.
sudo apt install php5.6 libapache2-mod-php5.6CopyRestarting Apache to Load PHP
After installing PHP and the relevant Apache module, you will need to restart your web server.
Using the following command, you can restart Apache without restarting your whole Ubuntu machine.
sudo systemctl restart apache2CopyInstalling PHP for Nginx on Ubuntu
Within this section, we will be showing you how to install PHP on Ubuntu for Nginx. Nginx requires some extra configuration and utilizes a different PHP module.
The PHP module that Nginx relies on is “PHP-FPM”. FPM stands for FastCGI Process Manager and has various features that help it deal with heavy websites.
Like with Apache, you must choose the PHP version you want to install. At the time of publishing, PHP 8.1 is the latest available version. If you have a specific application you are setting up, you should verify what version of PHP it supports.
Installing PHP for NGINX
You can install your desired version of PHP for Nginx with the following steps. We have steps that cover PHP 8.1, PHP 8.0, PHP 7.4, and PHP 5.6.
PHP 8.1
You can install the FPM module for PHP 8.1 to Ubuntu using the command below.
sudo apt install php8.1-fpmCopyPHP 8.0
To install the PHP 8.0 FPM module to Ubuntu you will want to use the following command in the terminal.
sudo apt install php8-fpmCopyPHP 7.4
With the following command you can install the PHP 7.4 FPM module to your Ubuntu device.
sudo apt install php7.4-fpmCopyPHP 5.6 (Old and should be avoided)
If you rely on an old PHP script that requires PHP 5.6 FPM, then you can install this old version of PHP by using the command below.
sudo apt install php5.6-fpmCopyConfiguring Nginx to use PHP
After installing PHP-FPM on Ubuntu, you must configure your Nginx web block to utilize PHP.
Before proceeding you will need to remember the version of PHP that you installed. For example, we installed “PHP 8.1”.
1. Start by editing one of your Nginx server blocks. With the following example, we will be adjusting the “default” block.
We will use the nano text editor as it is one of the easiest to utilize within the terminal.
sudo nano /etc/nginx/sites-available/defaultCopy2. Within this file, you will need to add the following to the server block. You should insert the code block between “server {” and the closing curly bracket “}“.
Additionally, you need to replace “[VERSION]” with the version number of PHP you are using. For example, if you are using PHP 8 then you will use 8.0. Alternatively, if you are using 8.1, you would use “8.1“.
    location ~\.php$ {
        include snippets/fastcgi-php.conf;
        fastcgi_pass unix:/run/php/php[VERSION]-fpm.sock
    }Copy
For example, if you were to write this for PHP 8.1, the block that we would add would be the following.
    location ~\.php$ {
        include snippets/fastcgi-php.conf;
        fastcgi_pass unix:/run/php/php8.1-fpm.sock;
    }Copy
The location block is written so that Nginx will direct any traffic to a “.php” file to PHP-FPM to handle.
3. Additionally you will want to adjust the “index” directive within this file by adding “index.php” to it.
After modifying the line it should look a bit like what we have shown below.
index index.php index.html index.htm index.nginx-debian.html;Copy4. Once you have made this change, you can quit and save by pressing CTRL + X, then Y, followed by the ENTER key.
5. After making changes to your server block, you need to restart the Nginx web server service.
Without this, Nginx will not be aware of our changes.
sudo systemctl reload nginxCopyInstalling PHP Extensions
Within this section, we will be showing you how to install extensions for PHP. This is a straightforward process as long as that particular extension is available in the package repository.
Of course, at this stage, you will need to know what PHP version you use on Ubuntu. So replace “[VERSION]” with the version number and “[EXTNAME]” with the name of the extension.
sudo apt install php[VERSION]-[EXTNAME]CopyFor example, if you want to install the PHP 8.1 MySQL module on Ubuntu, you can use the command below.
sudo apt install php8.1-mysqlCopyIf you want some excellent extensions to start with, you can use the following command within the terminal. If you aren’t using PHP 8.1, make sure to swap out the version number,
sudo apt install php8.1-{gd,mysql,mbstring,bcmath,xml,curl,zip}CopyChecking Your Version of PHP on Ubuntu
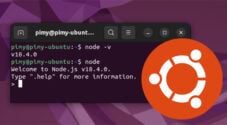
If you have forgotten which PHP version you installed on Ubuntu, you can check it easily.
All you need to do is make a call to the “php” command line interface using the “-v” option. This option tells PHP to output its version information.
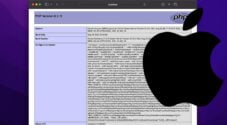
php -vCopyBelow you can see the reported version after running this command on our system.
PHP 8.1.8 (cli) (built: Jul 11 2022 08:30:39) (NTS)
Copyright (c) The PHP Group
Zend Engine v4.1.8, Copyright (c) Zend Technologies
    with Zend OPcache v8.1.8, Copyright (c), by Zend Technologies
Conclusion
This guide showed you how to install the PHP runtime on Ubuntu.
We gain access to different versions of PHP by adding a third-party repository.
Please comment below if you have any questions about installing PHP.
Be sure to check out our many other Ubuntu tutorials. Alternatively, we have Linux guides that teach you various things.