This tutorial will show you how to install and configure the Apache web server on Ubuntu.
Apache is a popular and powerful HTTP web server. In fact, it is one of the most widely used web servers around.
One of the things that have made Apache so popular is its many powerful dynamic modules, easy integration, and robust support.
If you want an alternative to Apache, be sure to check out our guide on installing Nginx on Ubuntu.
These steps for installing Apache will work on all Ubuntu versions, including Ubuntu 22.04, 20.04, and 18.04.
Installing Apache on Ubuntu
Installing Apache on the Ubuntu operating system is a very straightforward process. This ease of installation is primarily thanks to it being available as part of the official package repository.
This installation will be done entirely within the terminal. If you are using Ubuntu desktop, you can open this by pressing CTRL + ALT + T.
1. We will need to update the package list before we can install Apache to Ubuntu.
The package list tells the package manager what packages it can install, what versions they are, and where to download them from.
You can update the package list by using the following command within the terminal.
sudo apt updateCopy2. With the package list updated, we can move on to installing Apache.
All we need to do is use the command below to install Apache to Ubuntu.
sudo apt install apache2Copy3. You can verify that Apache has now been successfully installed by checking the status of its service.
When you install Apache on Ubuntu, the service will automatically start during installation.
Grab the status of this service by utilizing the command below in the terminal.
sudo systemctl status apache2CopyIf everything is fine, you should see something like we have shown below within the terminal. The main thing to look for is that the status is marked as “Active: active (running)“.
● apache2.service - The Apache HTTP Server
     Loaded: loaded (/lib/systemd/system/apache2.service; enabled; vendor preset: enabled)
     Active: active (running) since Sun 2022-07-10 15:46:18 AEST; 25s ago
       Docs: https://httpd.apache.org/docs/2.4/
   Main PID: 144168 (apache2)
      Tasks: 55 (limit: 9455)
     Memory: 5.1M
        CPU: 27ms
     CGroup: /system.slice/apache2.service
             ├─144168 /usr/sbin/apache2 -k start
             ├─144169 /usr/sbin/apache2 -k start
             └─144170 /usr/sbin/apache2 -k start
Allowing Apache Through the Ubuntu Firewall
Now that you have installed Apache on Ubuntu, you might need to allow it through your firewall.
You can skip this section if you don’t have UFW running on your device. However, to ensure the security of your device, we do recommend that you use a firewall.
1. With a firewall enabled, you will find that you likely can’t access your Ubuntu apache web server from another device.
This is because the ports Apache uses are likely not allowed by default. These ports are port 80 (HTTP) and port 443 (HTTPS).
2. Let us start by allowing port 80. This is the port Apache will use by default for HTTP connections.
Even if you only plan on dealing with HTTPS connections, it can be helpful to allow connections on port 80 still so you can redirect them to HTTPS.
To allow access to port 80 using UFW, we can utilize the following command within the terminal.
sudo ufw allow 80Copy3. If you plan on using HTTPS with the Apache web server on Ubuntu, you will also need to allow port 443.
Port 443 is what HTTPS operates through by default. So if you visited a website using the “https://” protocol, this is the port your web browser will utilize.
You can allow this port by using the command below.
sudo ufw allow 443CopyVisiting your Apache Web Server
Now that you have installed the Apache web server on Ubuntu and have unblocked it from your firewall, let us try visiting it.
At the moment, all you will see is the default page, but it is a good indicator that everything is working correctly.
1. Before proceeding, you will need to know the IP address of your Ubuntu device. There is a couple of ways that you can get this address.
One of the easiest ways is to use the hostname command with the “-I” option. This should list all of the IP addresses assigned to your device.
hostname -ICopyFor example, our test server only has a local IP address assigned to it, which we can see below.
192.168.0.2152. Go to the following address in your favorite web browser. Make sure you replace “IPADDRESS” with the IP you got in the last step.
If you are accessing this directly from your Ubuntu server, you can use “127.0.0.1” or “localhost” instead.
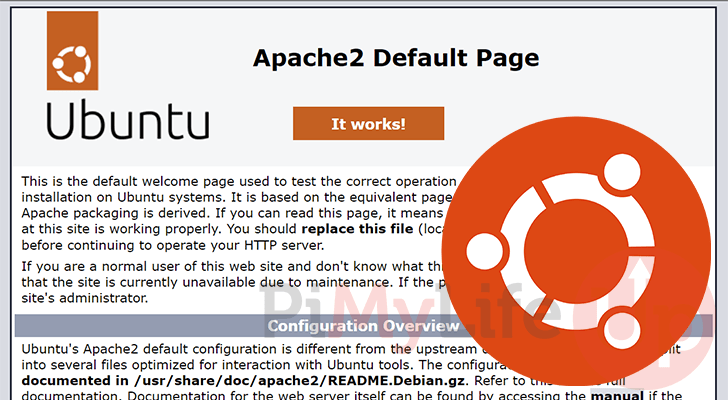
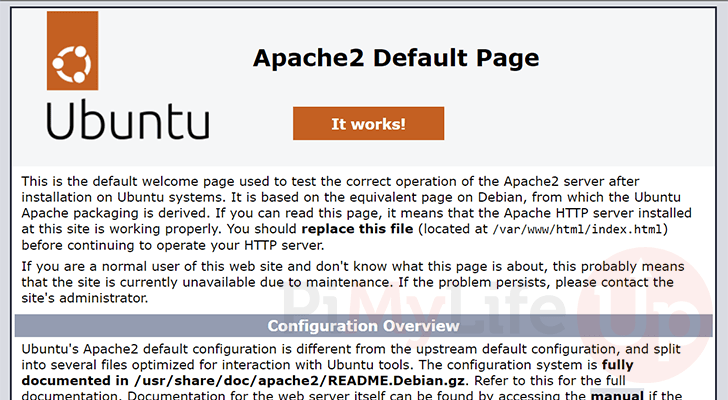
http://IPADDRESS3. After browsing to that address, you should see a similar page as what we have shown in the screenshot below.
This indicates to you that you have successfully got Apache running on Ubuntu. The screenshot below is from Apache on Ubuntu 22.04.
4. You can now move on to setting up Apache to display your desired content.
The directory Apache servers its content by default is from the “/var/www/html/” directory.
Setting up your First Apache Virtual Host on Ubuntu
An Apache virtual host allows you to configure the web server for a particular domain name. This allows you to run multiple websites on a single machine. Additionally, it allows you to do specific configurations very easily.
Without a virtual host, the Apache web server on Ubuntu will use the default configuration for everything. While this might be fine for super basic setups, it can quickly become problematic.
Creating a Directory to Store your Website
Our first step is creating a Ubuntu directory to store your website. We will set up the Apache virtual host to serve content from this new directory.
1. We can create a new directory within the “/var/www/” directory by using the mkdir command.
For this example, we will be calling this new directory “website_domain“. However you can name it whatever you like, just be sure to replace all occurrences of it over the following steps.
sudo mkdir /var/www/website_domain/Copy2. With the directory created, let us quickly write a simple HTML file so we can tell that our new Apache virtual host is working.
By naming this file “index.html“, Apache will automatically service this file when you hit the base of your virtual host.
We will be using the nano text editor as it is one of the easiest terminal-based text editors to use.
sudo nano /var/www/website_domain/index.htmlCopy3. Now within this file, type in the following lines. This is a super simple bit of HTML that is basically here to tell us our virtual host works.
<html>
    <head>
        <title>Welcome</title>
    </head>
    <body>
        <h1>Your website_domain Virtual Host is working!</h1>
    </body>
</html>Copy
4. Once you have typed in this little bit of HTML, quit and save out of the file by pressing CTRL + X, then Y, followed by the ENTER key.
5. Finally we need to assign this directory and its files to the “www-data” user. If you end up setting up PHP, this will be a critical step.
We can use the following chown command to give the “www-data” ownership of the directory and the files within it.
sudo chown -R www-data:www-data /var/www/website_domain/CopyCreating your New Virtual Host
With a directory created, our next step is to create an Apache virtual host on our Ubuntu system.
Virtual hosts on Ubuntu are stored within the “/etc/apache2/sites-available/” directory.
1. We will create this new file with the name “website_domain.conf“.
You can name this whatever you like, but you should keep it relevant for that particular website. The only catch is that it must end in “.conf“.
sudo nano /etc/apache2/sites-available/website_domain.confCopy2. You will want to enter the following lines within this file. These lines are what sets up the virtual host, configures the domain name it listens under, as well as where Apache will serve files from.
You will need to adjust this configuration to suit your exact needs. The first is to replace “website_domain” with the domain name you want to use.
For example, if we were setting this up for our website we would use “pimylifeup.com“.
<VirtualHost *:80>
    ServerAdmin webmaster@localhost
    ServerName website_domain
    ServerAlias www.website_domain
    DocumentRoot /var/www/website_domain
    ErrorLog ${APACHE_LOG_DIR}/error.log
    CustomLog ${APACHE_LOG_DIR}/access.log combined
</VirtualHost>CopyVirtualHost– A virtual host is always started with this tag. In our example, this is followed by “*:80“. This tells Apache to listen on all IP Addresses (*), on port80.ServerAdmin– With this option, you can configure the email address shown when the web server runs into an error.ServerName– This is the domain name you want to associate with this website. Typically this is a fully qualified domain name (FQDN) such as “pimylifeup.com“.ServerAlias– This is an additional domain name Apache will route to this virtual host. One of the main ways to utilize this is to add the “www.” subdomain.DocumentRoot– Using this option, you specify the directory the Apache web server will serve files from.ErrorLog– The location where Apache will log any errors. The Apache logs are typically stored within the “/var/log/apache2/” directory on Ubuntu.CustomLog– The final option allows you to set where a custom log will be saved and the options used to specify what will be logged. By default, this is used for logging any access to the Apache server on Ubuntu.
3. Once you have typed in the above lines, save your new Apache virtual host by pressing CTRL + X, then Y, and finally, the ENTER key.
4. With our new virtual host created, we need to enable it by utilizing the “a2ensite” tool, as shown below.
sudo a2ensite website_domain.confCopyAfter running the above code, you should see the following appear within the terminal, indicating we enabled the new config file.
Enabling site website_domain.
To activate the new configuration, you need to run:
  systemctl reload apache2
5. Now, before we reload Apache on Ubuntu, we should verify that our configuration has no errors. This is useful when you add a new virtual host as it will prevent a reload from taking the server offline.
We can do this by utilizing the “apache2ctl” tool and its “configtest” option.
sudo apache2ctl configtestCopyIf your new virtual host is fine to run, you should see the following appear within the terminal. If you see any warnings check your configuration.
Syntax OK6. If everything is fine, you should be able to reload Apache.
The reload option with systemctl will make the web server reload all configuration files.
sudo systemctl reload apache2Copy7. Now, if you go to the specified domain name, you should see the contents of the HTML file we created in the previous section.
In our case, Apache displayed the following text on the web page.
Your website_domain Virtual Host is working!Conclusion
Throughout this tutorial, we have shown how you can install and configure the Apache web server on Ubuntu.
You might want to take this further by setting up HTTPS or PHP to drive dynamic websites.
Please comment below if you have any questions about installing Apache on Ubuntu.
We also have numerous other Ubuntu tutorials you might want to check out. That or you can explore our many general Linux tutorials.