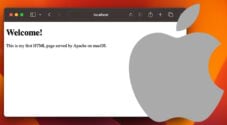
In this tutorial, I go through all the steps of installing the PHP programming language on macOS.
A development server running on your local machine is extremely useful for rapidly testing your programs. This tutorial will take you through the process of installing PHP without using any extra packages apart from Homebrew. We also show you how to configure Apache and NGINX to use PHP.
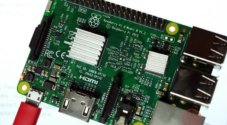
There are plenty of alternatives for setting up a web development environment on your Mac. For example, you could set up a virtual machine running Ubuntu, Docker, or something like Xampp. However, we like to run our web development on a low-powered Raspberry Pi.
These instructions have been tested on an Intel-based Mac, but we have noted any changes for use on an Apple silicon Mac (M1 and M2). We recommend using the latest version of macOS for the best experience.
Table of Contents
- Installing PHP on macOS
- Configuring PHP for Apache on macOS
- Configuring PHP for Nginx on macOS
- Conclusion
Installing PHP on macOS
Installing PHP onto a computer running macOS is relatively straightforward. However, a prerequisite is that you have Homebrew installed on your Mac computer. Thankfully, the homebrew installation is relatively easy to do.
It is important to note that versions of macOS 10.0.0 to 12.0.0 (Monterey) have PHP preinstalled. This tutorial focuses on installing PHP on the latest version of macOS via the Homebrew package manager.
1. Load the terminal application on your Mac. You can find it by going to launchpad and searching terminal. Click on Terminal.
Alternatively, you can go to finder and open the Applications folder and then the Utilities folder. Then, find and load the terminal application.
2. You need to have Homebrew installed before you proceed any further. You can check that Homebrew is installed by simply checking the version. If you get a “command not found” error, you may need to install Homebrew.
brew --versionCopy3. To install PHP, enter the following line into the macOS terminal.
brew install phpCopyDepending on the speed of your internet connection, it will take a minute or longer to install PHP.
Check the Version of PHP on macOS
The following steps will show you how to get the PHP installed version by using the terminal application.
4. In the terminal, enter the following command.
php --versionCopyIf PHP is installed correctly, you should get output in the terminal similar to the example below.
Gus-MBP:~ gus$ php --version
PHP 8.1.11 (cli) (built: Sep 29 2022 20:02:53) (NTS)
Copyright (c) The PHP Group
Zend Engine v4.1.11, Copyright (c) Zend Technologies
    with Zend OPcache v8.1.11, Copyright (c), by Zend TechnologiesCopy
Configuring the php.ini File
If you wish to configure the php.ini or the php-fpm.conf file, you can find it in the location shown below. This location may change if the PHP version differs from the version we use in this tutorial.
For an Apple silicon Mac, change /usr/local to /opt/homebrew.
/usr/local/etc/php/8.1/Copy5. You can edit the file within the terminal or use a code editor such as Xcode or Visual Studio Code.
For this tutorial, we will use the terminal. To edit the php.ini file, enter the following line into the terminal. I like to use the nano editor, but you can use the vim editor instead.
nano /usr/local/etc/php/8.1/php.iniCopyInside the ini file, you can change the settings of PHP so it is configured to your liking. There are quite a few different settings, so we will not cover them in this guide.
You can enable and disable settings by removing the semicolon (;) from in front of the line. If a line starts with the semicolon (;) the setting is commented out and disabled.
If you plan on doing web work, you will want to remove the semicolon from in the front of the following extensions.
extension=curl
extension=gd
extension=mbstring
extension=exif
extension=mysqliCopy
Configuring PHP for Apache on macOS
You must have the Apache web server installed on macOS for this section. The process is relatively straightforward, as you will use something like Homebrew to install the software.
6. We will need first to load the httpd.conf file that is located in the /usr/local/etc/httpd/ folder.
There are several directives that we will need to add to this file. I will briefly touch on each of them below.
- PHPIniDir is where you can specify the directory where the
php.inifile is located. - LoadModule is where we specify the module we wish to load and its location. In this case, it is the PHP Apache module.
- AddType allows us to map the PHP file extension to our PHP module.
We will edit the file in the terminal, but you can use your favorite code editor.
For an Apple silicon Mac, change /usr/local to /opt/homebrew.
nano /usr/local/etc/httpd/httpd.confCopyIn this file, add the following settings. You may need to update the paths below to match your Mac. For example, for an Apple silicon Mac, change /usr/local to /opt/homebrew.
#PHP
PHPIniDir "/usr/local/etc/php/8.1/php.ini"
LoadModule php_module "/usr/local/opt/php/lib/httpd/modules/libphp.so"
AddType application/x-httpd-php .phpCopy
Save and exit the file.
7. For changes to take effect, we will need to restart the httpd service. You can do this by entering the following command into the terminal.
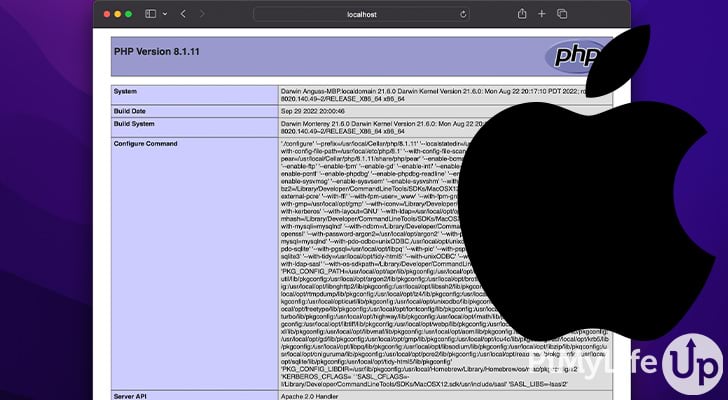
brew services restart httpdCopy8. To test that our Apache installation is set up correctly with PHP, we create a PHP script that outputs the phpinfo() data. The default web folder for Apache is located at /usr/local/var/www/.
Create and edit a test.php file in the Apache web document directory by entering the following line into the terminal.
nano /usr/local/var/www/test.phpCopy9. Inside the test.php file, enter the following PHP code.
<?php
 phpinfo();
?>Copy
Save and exit the file.
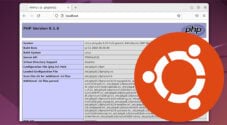
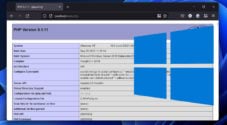
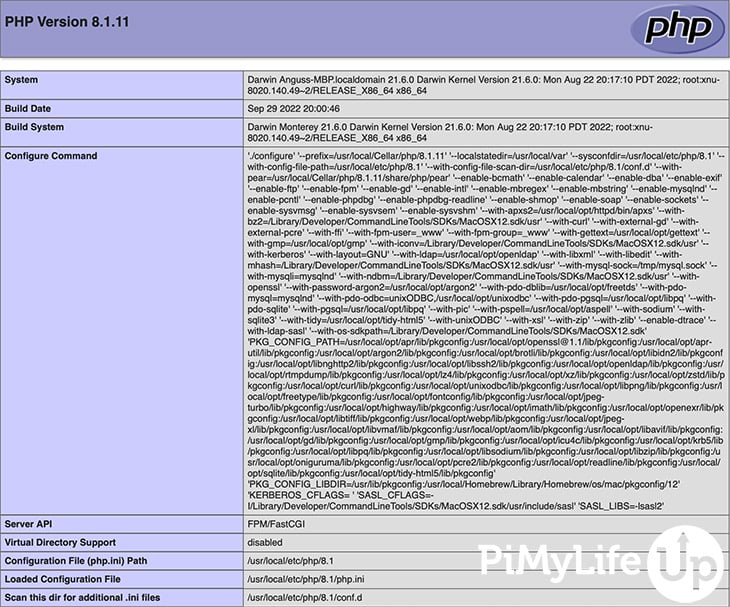
10. To test the file, navigate to the following URL in your browser, http://localhost:8080/test.php. You should get a screen that looks like the one below.
Configuring PHP for Nginx on macOS
In this section, we will go through the process of configuring Nginx so that it will make use of PHP. To proceed, you will need to ensure you have Nginx installed on your Mac computer.
12. To begin, open the nginx.conf file by running the following command. For an Apple silicon Mac, change /usr/local to /opt/homebrew.
nano /usr/local/etc/nginx/nginx.confCopy13. Inside the nginx.conf file, find and replace the server block with the code below. Alternatively, add the “location ~ \.php$” block to your existing server block.
    server {
        listen       8080;
        server_name  localhost;

        location / {
            root   html;
            index  index.html index.htm;
        }
        location ~ \.php$ {
            fastcgi_pass   127.0.0.1:9000;
            fastcgi_index  index.php;
            fastcgi_param  SCRIPT_FILENAME  $document_root$fastcgi_script_name;
            include        fastcgi_params;
        }
    }Copy
You may need to update the address for fastcgi_pass if you have changed the port away from the default. You can find the PHP-fpm config at the following location.
For an Apple silicon Mac, change /usr/local to /opt/homebrew.
/usr/local/etc/php/8.1/php-fpm.d/www.confCopy14. For changes to take effect, you will need to restart the Nginx service. You can restart the service by running the following command.
brew services restart nginxCopy15. Nginx uses FastCGI (Fast Common Gateway Interface) for communicating with the PHP software, so you will need PHP to run as a service in the background for it to work. To start the PHP service, enter the following line into the terminal.
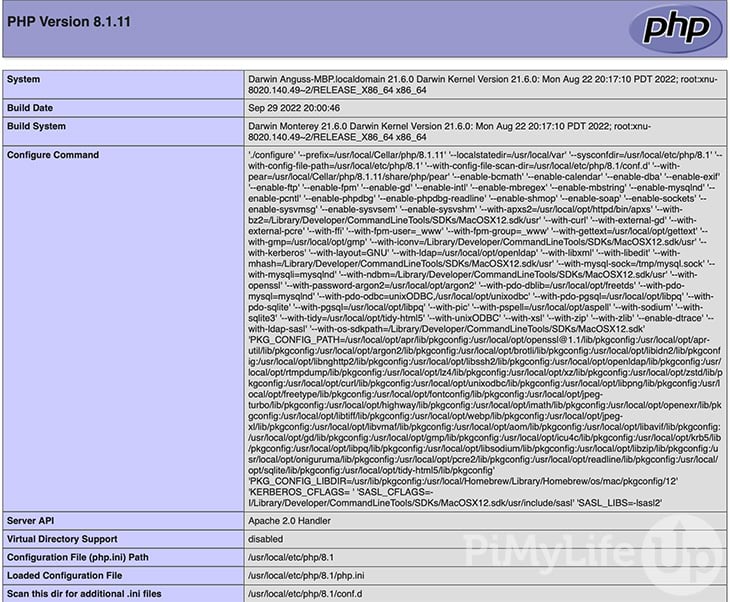
brew services start phpCopy16. To test whether our Nginx and PHP connection is working correctly, we will create a simple test file that will output information about PHP. To create and edit the file, enter the following into the terminal.
nano /usr/local/var/www/test.phpCopy17. Inside the file, add the following code.
<?php
 phpinfo();
?>Copy
Save and exit the file.
18. To test the file, navigate to the following URL in your browser, http://localhost:8080/test.php. You should get a screen that looks like the one below.
Conclusion
You should now have PHP installed on your macOS computer and configured correctly.
If you are having trouble, double-check each step detailed in this tutorial. It is very easy to mistype something, or there have been slight changes to the PHP setup since this tutorial was published.
I recommend checking out some of our other PHP tutorials if you are looking to learn more about the programming language. If you are getting started, our tutorial on if else statements, data types, and using echo are great starting points.
Please let us know if you notice a mistake or an important topic is missing from this guide.