In this guide, we will take you through the steps of how to install the PHP programming language on Windows.

You can set up a web development environment on your Windows PC in many different ways. For example, you can use the Windows Subsystem for Linux (WSL2) and install PHP on Ubuntu. On the other hand, you could use something like Docker or Xampp, WampServer, or one of the many other pre-bundled solutions.
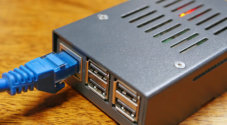
One of our favorite ways to set up a development server running PHP is to use a Raspberry Pi. We have a guide on setting up PHP on the Raspberry Pi and a few more tutorials on general web server setups. I recommend checking it out if you like the idea of a dedicated Linux development machine.
These instructions have been tested on the latest version of Windows 11. Therefore, the steps may differ slightly from previous versions of Windows.
Table of Contents
- How to Install PHP on Windows
- Configure PHP for Apache on Windows
- Configure PHP for NGINX on Windows
- Conclusion
How to Install PHP on Windows
The process of installing PHP on a Windows operating system is relatively straightforward. The steps below will take you through installing, configuring, and making PHP usable within the command prompt.
Download and Extract the PHP ZIP Package
1. To begin, you will need to head to the Windows PHP website and download the latest thread-safe x64 zip file. I recommend sticking to the latest version of PHP.
2. Once downloaded, you will need to extract the zip file using the inbuilt Windows zip tool or an alternative such as 7zip.
You can extract the PHP zip anywhere on your computer, but to make things convenient, I recommend within the system drive, typically C:\.
To extract the zip file, right-click on the file and select “Extract All...”

Next, change the folder location to your desired location. I recommend C:\PHP\.

3. The PHP files should now be extracted and viewable in your chosen directory. In my case, it is the C:\PHP\ folder.
Add PHP as a Path Environment Variable
To make PHP useable within the command prompt and other tools, you will want to set it as a path environment variable.
4. First, load up the environment variable tool by clicking the Windows button in the taskbar and searching “Environment Variables“. Click on “Edit Environment Variables for your account“.

5. In the next window, select “Environment Variables“.

6. Now, select “Path” in the system variables section and click Edit.

Now, select new and enter the location of our PHP directory. Once done, select OK on every screen until you have exited all the option windows.

You should now be able to run PHP commands within the command prompt on your Windows computer.
Check your Version of PHP on Windows
The following steps will confirm the version of PHP installed and that you can use it within the command prompt.
7. Load up the command prompt in Windows by clicking the Windows button and entering cmd. Click on command prompt to open it.

8. To check the version of PHP, enter the following into the Windows command prompt.
php -vCopyYou should get the following output from the above command.
php -v
PHP 8.1.11 (cli) (built: Sep 28 2022 11:08:17) (ZTS Visual C++ 2019 x64)
Copyright (c) The PHP Group
Zend Engine v4.1.11, Copyright (c) Zend TechnologiesCopy
If you get an error, such as the command not being recognized, you may not have the environment variable set up correctly, or there is an issue with your PHP package.
Configuring the php.ini File
The php.ini file will not exist on the first setup, so we will need to create one in the next few steps.
9. In File Explorer, navigate to the C:/PHP/ directory or your chosen PHP installation directory.
In this directory, there will be two .ini files. The first is php.ini-development, which contains settings that better suit a development environment. The second is php.ini-production, which contains settings better suited for a production environment.
Since we are setting up a development environment, copy the php.ini-development and rename it to php.ini.
10. If you want to edit the php.ini file, open it in a text editor such as Visual Studio Code.
You can enable and disable settings by removing the ; from in front of the line. If a line starts with the semicolon (;) the setting is commented out and therefore disabled.
If you plan on doing web work, you will want to remove the semicolon from the front of the following extensions.
extension=curl
extension=gd
extension=mbstring
extension=exif
extension=mysqliCopy
Configure PHP for Apache on Windows
To configure PHP for the Apache web server, you must first ensure that Apache is installed on Windows. This section assumes you are using Apache Lounge, so instructions may differ if you use a different package. For example, the location of our Apache directory is C:\Apache24.
11. In your favorite code editor, open the httpd.conf file located in the C:\Apache24\conf directory.
We will need to specify several directives inside this config file, which I will quickly touch on now.
- PHPIniDir is where you will need to specify the directory where the
php.inifile is located. - LoadModule is where we specify the module we wish to load and its location. In this case, it is the PHP apache module.
- AddType allows us to map the PHP file extension to our PHP module.
At the bottom of this file, enter the following code.
#PHP
PHPIniDir "C:/php"
LoadModule php_module "C:/php/php8apache2_4.dll"
AddType application/x-httpd-php .phpCopy
Once finished, save and exit.
12. To test the code above, first turn on the Apache server by entering the following lines into the command prompt.
cd C:\Apache24\bin
httpdCopy
Next, create a new file called test.php in the htdocs directory (C:\Apache24\htdocs). Inside this file, add the following code.
<?php
 phpinfo();
?>Copy
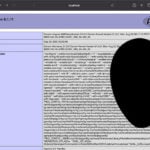
13. In your favorite web browser, navigate to http://localhost/test.php. If everything worked correctly, you should see a page like the one below.

Configure PHP for NGINX on Windows
Lastly, we will cover configuring PHP for NGINX on a Windows operating system. For this section, we require you to have NGINX installed on your computer. For this tutorial, we use the default package of NGINX for Windows stored in the C:\NGINX directory.
NGINX uses a FastCGI daemon to communicate with PHP on a Windows operating system. This setup requires a bit more configuration than Apache but is still relatively straightforward. The steps below will take you through how to set up PHP and NGINX on your Windows computer.
14. Load the nginx.conf file in the code editor of your choice. You can find this file in the C:\nginx\conf directory.
Find the server config block and replace it with the config below.
    server {
        listen       80;
        server_name  localhost;

        location / {
            root   html;
            index  index.html index.htm;
        }
        location ~ \.php$ {
            fastcgi_pass   127.0.0.1:9123;
            fastcgi_index  index.php;
            fastcgi_param  SCRIPT_FILENAME  $document_root$fastcgi_script_name;
            include        fastcgi_params;
        }
    }Copy
15. We will need to start our PHP CGI script and bind it to the local address with the port 9123.
You can start the PHP CGI by entering the following into the command prompt.
php-cgi -b 127.0.0.1:9123Copy16. Start the NGINX server by opening a new command prompt and navigating to the nginx directory.
cd c:\nginxCopyNow start the Nginx server by running the following command.
nginx.exeCopy17. To test the code above, create a new file called test.php in the html directory (C:\nginx\html). Inside this file, add the following code.
<?php
 phpinfo();
?>Copy
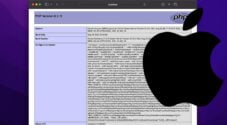
18. In your favorite browser, navigate to http://localhost/test.php. If everything worked correctly, you should see a page like the one below.

Conclusion
I hope by now you have PHP installed on your Windows machine and configured correctly to your liking.
Unfortunately, configuring software can be tricky so if you are having trouble, double-check all your settings to see if you can find a mistype causing your issues.
If you are new to PHP, I recommend checking out our many PHP tutorials that will help you learn the basics. For example, learning about PHP data types, if else statements and operators will help a lot.
Please let us know if you notice a mistake or an important topic is missing from this guide.


