In this tutorial, we will teach you how to install the Apache web server on macOS.
Apache is one of the world’s most popular web server software packages. The software is open-source and compatible with most operating systems, including macOS. Also, having Apache installed locally is perfect if you do a fair bit of web development.
The number of features that Apache boasts is staggering. For example, it supports reverse proxy, IPv6, HTTP/2, GZIP compression, URL rewriting, load balancing, bandwidth throttling, user and session tracking, and more. Typically, you will combine Apache with additional software such as PHP, MYSQL, and more.
You can install Apache on other operating systems such as Windows, Ubuntu, Linux, or even the Raspberry Pi OS. Each has pros and cons, but for this tutorial, we will focus on macOS.
This tutorial will cover the basics for setting up Apache on your Mac computer. For example, we cover installation, basic configuration, and how you can control the server. You will need to install the Homebrew package manager for this tutorial.
Installing Apache on macOS
Installing Apache on macOS is pretty straightforward but will require you to have the Homebrew package manager installed.
If you plan on doing a lot of software development, having Homebrew installed will be super beneficial as it opens up access to hundreds of different software packages.
We last tested this tutorial on macOS Ventura. However, the tutorial should also work fine on previous and future versions of macOS.
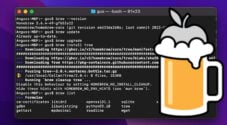
1. Installing Apache on macOS can be done by simply entering the following line into your Mac’s terminal. You will need to ensure that Homebrew is installed. Otherwise, the command will fail.
brew install httpdCopy2. The default port for Apache running on macOS is 8080 for HTTP. You should be able to access the web server at the following addresses.
http://localhost:8080
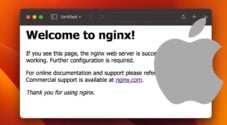
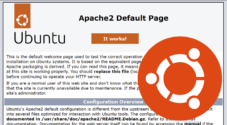
http://127.0.0.1:8080CopyYou should see a page that displays “It Works or “Welcome to Apache” if you navigate to the above URLs.
3. If the server has not started, you will need to enter the following line into the terminal.
brew services start httpdCopy4. If you require additional packages, such as PHP, you will need to install them. We have a guide on installing PHP on macOS that you will find extremely useful. We take you through the steps of configuring PHP for Apache.
Configuring Apache
An important part of installing Apache is the configuration. Since you can configure dozens, if not hundreds, of different settings, we will keep this tutorial brief. However, we will touch on some basics, such as editing the default config file, creating files in the web directory, and mentioning any important files or directories you should know.
Editing the Default Config for Apache
Enter the following command to open and edit the default config file for Apache. For an Apple silicon Mac, change /usr/local to /opt/homebrew.
nano /usr/local/etc/httpd/httpd.confCopyIn this file, you can edit a vast number of settings, such as the listening port, document root, enable and disable modules, and loads more.
You can save and exit by pressing CTRL + X, Y, then ENTER.
Whenever you make changes to the config file, you will need to reload Apache for the changes to take effect. So first, you might want to test if the config is valid by using httpd -t. You will get a “Syntax OK” message if everything is fine.
Gus-MBP:~ gus$ httpd -t
Syntax OKCopy
To reload Apache on macOS, enter the following line into the terminal.
brew services reload httpdCopyCreating your first HTML File
The default web directory is the same as Nginx and is located at /usr/local/var/www on Intel Macs or /opt/homebrew/var/www on Apple silicon Macs.
This directory is where you can store all your HTML, PHP, images, CSS, JS, and other files that you want accessible via the browser.
You can enter the following line into the terminal if you want to create a new HTML file. We will make use of the nano text editor, but there are plenty of alternatives that will work just fine.
nano /usr/local/var/www/welcome.html
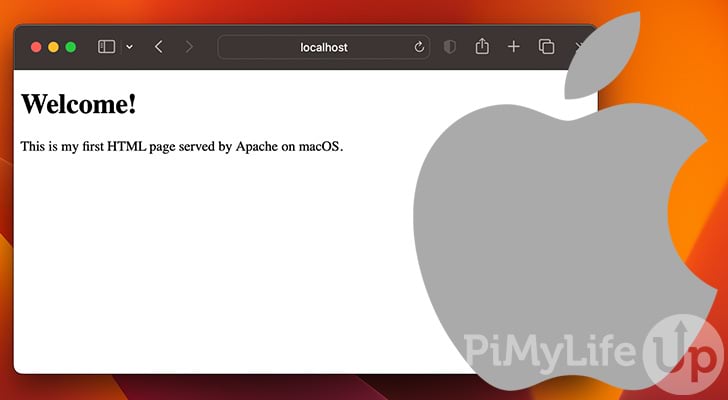
CopyInside this file, you can enter the HTML for the page. For this tutorial, we will copy and paste some basic HTML.
<!DOCTYPE html>
<html>
<body>

<h1>Welcome!</h1>
<p>This is my first HTML page served by Apache on macOS.</p>

</body>
</html>Copy
You can save and exit by pressing CTRL + X, Y, then ENTER.
In your web browser, navigate to the URL of the newly created web page. The URL below should take you to the web page unless you have changed the port Apache is listening to.
http://localhost:8080/welcome.htmlApache Important Files and Directory locations
A few directories and files are important to an Apache installation, and we have touched on a few of these in the text above.
You will need to update the path depending on the type of Mac you are using. For example, /usr/local/ (Intel) will need to be replaced with /opt/homebrew/ if you are using Apple Silicon.
- Default Apache Config File –
/usr/local/etc/httpd/httpd.conf - Default Home Web Directory –
/usr/local/var/www - Apache Log Files –
/usr/local/var/log/httpd
Controlling Apache on macOS
Being able to control Apache on macOS is critical, as there will be times when you need to stop, start, or restart the server. Below we go through several ways you can control the Apache software.
Start
To start the Apache web server on Mac, enter the following command.
brew services start httpdCopyIf the service is already running, you will see a message like the one below.
Service 'httpd' already started, use 'brew services restart httpd' to restart.CopyStop
Enter the following line into the terminal to stop the Apache web server. In most cases, the server should stop within a few seconds of issuing the command.
brew services stop httpdCopyIf you try to stop the service when it is not running, you will see a warning like the one below.
Warning: Service 'httpd' is not started.CopyRestart
Restarting the web server is easy and can be done by entering the following line into the terminal. This command is useful for reloading configuration files, debugging, and anything else that requires a server restart.
brew services restart httpdCopyIf the server is not running, the restart command will start it again. Otherwise, if the server is running, the command will stop it and start it again.
Reload
You can use the reload command to restart the Apache server and ensure that any changes to the configuration files have been loaded.
brew services reload httpdCopyConclusion
By now you should have Apache installed on macOS and have a basic understanding of configuring it to your liking. This server will work best for development rather than production. However, if you have a good understanding of macOS, there is no reason you cannot use it as a production server.
We have plenty more Mac tutorials that I highly recommend checking out. We touch on many different topics, mainly based on software development or software projects. For example, learning how to use traceroute on macOS may come in handy.
Please let us know if you notice a mistake or if an important topic needs to be added to this tutorial.