In this Python guide, we will be walking you through the first initial steps of getting started with Python.
This guide will walk you through the process of setting up Python on your device as well as give you a quick rundown on the Python programming language.
You will also learn how to make use of an IDE, such as the popular Visual Studio Code to write and run your Python scripts.
If you already have Python and an IDE set up on your computer, then you can proceed to our first guide which gives you a rundown on Pythons syntax.
What is Python?
Python is a versatile and popular programming language that was created by Dutch programmer Guido Van Rossum back in the 1980s.
The Python language was designed from the ground up to be easily readable with it relying heavily on whitespace.
Unlike most other programming languages where a semicolon often designates the end of a command (;), Python instead uses new lines.
It’s also important to note that because of Python’s design, it is sensitive to whitespace. This sensitivity means that when you are indenting code, it all must have the same amount of whitespace at the start of the line to designate its part of the same block of code.
As Python is an interpreted language and not a compiled one, it is relatively easy to get it to run on any system that the Python interpreter runs on.
Being an interpreted language means you need the programming languages interpreter to sit on the computer and read it in real-time.
This is unlike a compiled language where the code is compiled down into something that the targeted operating system can run natively.
Another popular interpreted language that many should know about is Java with its required installation of the Java Runtime Environment.
Python is one of the best programming languages to get started with, as it is straightforward to read and relatively simple to grasp.
Using Python as a starting point, you can get an understanding of the fundamentals of programming.
Getting setup with Python
Before we begin learning how to use Python, we must first set up our system to make use of it.
To make use of Python we must first have its interpreter installed to our development system of choice.
We have three guides showing the process of installing Python on different operating systems.
- The first guide touches on installing and setting up Python on Windows
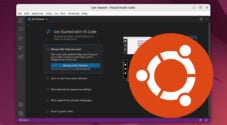
- The second guide shows you how to install Python on various Linux distributions
- Our final guide shows you the steps of installing and setting up Python on macOS.
Installing an IDE for Python
For our Python tutorials, we will be making use of Visual Studio Code as our IDE.
The reason we chose to use Visual Studio Code is that it is available on all major operating systems and is a highly capable code editor.
1. The first step of this guide is to install Visual Studio Code.
You can download the latest version of Visual Studio Code by going to its official website.
On this website, you should find versions of Visual Studio Code for Windows, macOS, and Linux.
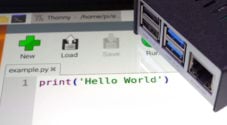
You can also follow our guide on installing Visual Studio Code to the Raspberry Pi.

2. With Visual Studio Code downloaded and installed, we can now proceed to set it up for Python.
Begin by opening up Visual Studio Code on your device.
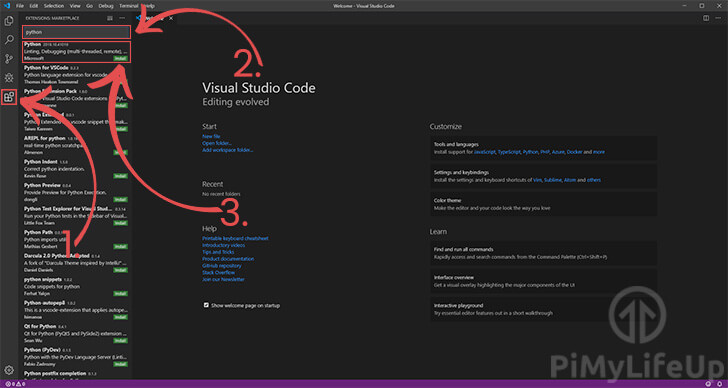
3. With Visual Studio Code open, let’s now proceed to install the Python extension.
Begin by first clicking the extension icon (1.) in the sidebar to bring up the menu.
Next, use the search bar (2.) to search for “Python“, this will display many different results.
Finally, click the “Install” (3.) button for the Python extension developed by Microsoft. This is the best extension available and is actively maintained by Microsoft.
Writing your first Python script in Visual Studio Code
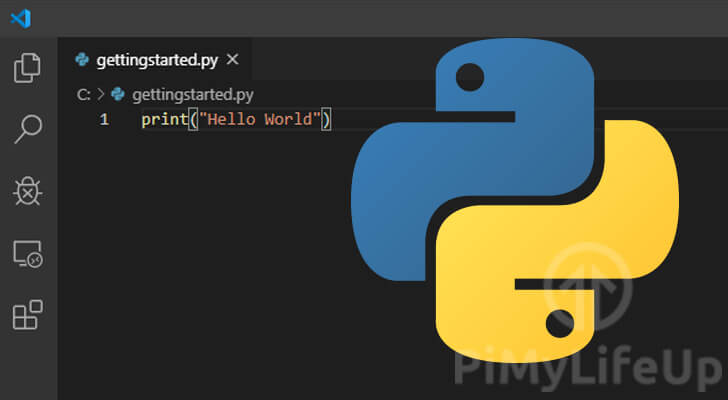
1. With Visual Studio open, we will need to first create a Python file to store our script.
To create this new file, begin by pressing CTRL + N (or COMMAND + N on macOS).
2. With the new file created, we should now save it as a Python file.
Saving this file will allow Visual Studio Code to automatically work out that it needs to use the Python extension to understand the file.
To save the file press CTRL + S (or COMMAND + S on macOS), give the file a name such as “gettingstarted.py“.
3. Now that we have gone ahead and created our gettingstarted.py file, you will notice that Visual Studio Code has automatically detected that it should use Python.
For our first example script, we are going to write one incredibly simple line of code.
Add the following line of code to the file.
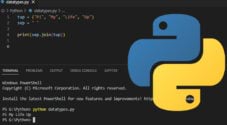
print("Hello world")CopyThis code is super simple and makes use of Python’s “print()” function to print the text "Hello World" into the command line.
3. With our little one-line Python script ready to run, we will go ahead and run it.
Since this line is so simple, we can just run it by pressing CTRL + F5 (or COMMAND + F5).
Pressing these buttons will tell Visual Studio Code to run the file.
4. After running the script, you will see the text “Hello World” appear in the terminal at the bottom of Visual Studio Code.
To get a clearer view of the text outputted by the script you can change to the “DEBUG CONSOLE” tab.
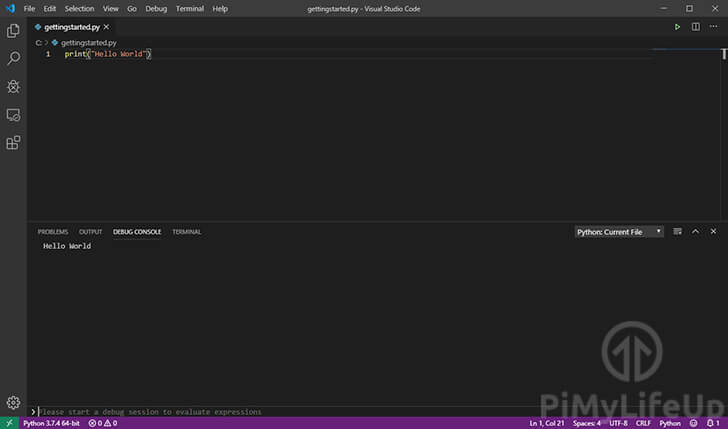
If you see the “Hello World” text, then you have set up both Python and Visual Studio Code on your device successfully.
You can now move on to our Python Syntax guide. This guide will walk you through some of the basics of programming and the Python language.
If you run into any issues or need any assistance in getting started with Python, then feel free to post a comment below.