In this tutorial, we will show you how to install and set up Python on the Ubuntu operating system.
Python is an incredibly useful and versatile scripting language used by numerous projects. We use Python quite a bit in our Raspberry Pi projects.
To run a Python script, you must have the Python interpreter installed on your Ubuntu system. This interpreter is what reads your scripts and executes the contents of them.
Typically, Ubuntu will already come with the interpreter pre-installed, but this is not always the case, or it may not be the version you want to use.
Throughout the next two sections we will cover three different things.
- First, we will show how you can check whether Python is already installed on your system. We do this by checking the version number.
- Secondly, we will show you how to install Python to Ubuntu. The simplest way is to use the official Ubuntu package repository.
- Third, we will show you an alternative way of installing Python that gives you access to newer versions. We will be achieving this using a third-party repository called Deadsnakes.
Checking if Python is Installed on Ubuntu
Let us start by checking if you have Python installed on the Ubuntu operating system. The easiest way to do this is to get Python to output its version number. If it can’t output a number, then it isn’t installed.
There is a benefit of checking where Python is already installed using this method. That is, you get to see exactly what version of Python is installed and whether it will suit your needs.
1. If you are using the desktop flavor of Ubuntu, you will need to open the terminal.
One of the quickest ways to open the terminal is to press CTRL + ALT + T on your keyboard.
2. With the terminal open, all you need to do to check whether you have Python installed on Ubuntu is to use the following command.
This command tells Python to output its version to the command line.
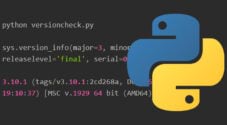
python3 --versionCopy3. If you have Python installed, you will get a message similar to the one below. This text tells you the version of Python you have installed.
Python 3.10.12With the above message you can see that we are running Python 3.10.2 on our system.
4. You will see the following message if you do not have Python installed on your Ubuntu system.
Command 'python3' not found, did you mean:Installing Python on Ubuntu
Within this section, we will explore a couple of ways to install Python on Ubuntu. We will start with the most straightforward method and move on to a slightly more complicated one.
Each method has its advantages and disadvantages. Mainly, these have to do with the version of Python that you can install.
If you require a newer version of Python on your system, jump down to our Deadsnakes repository guide.
Using the Ubuntu Package Repository
The easiest way to install Python on your Ubuntu system is to use the official package repository. You will have the Python interpreter installed in just a couple of commands.
One of the disadvantages of this method is that you are stuck with the version of Python provided in the repository. The newer the version of Ubuntu, the more recent the version of Python.
1. Before you install any package, you will need to run an update of the package list.
To update the package list, you will need to use the command below.
sudo apt updateCopyThe package list tells the package manager what packages can be installed, their version, and where the manager can download them.
2. After the update has been completed, all you need to do to install Python on Ubuntu is use the below command.
sudo apt install python3Copy3. You can verify that you have installed Python by running the following command.
python --versionCopyIf everything has worked correctly, you should see the Python version output to the terminal on your Ubuntu device.
Installing Python on Ubuntu using the Deadsnakes Repository
If you need a newer version of Python on your Ubuntu system, there is, luckily, an easy solution. That solution is to use the Deadsnakes PPA.
This repository contains newer versions of Python and allows you to install them on older releases of Ubuntu easily.
The downside of using a repository like this is that you are putting trust in a third party that maintains these packages. However, it is one of the best ways to install newer Python versions and is used by thousands every day. The team even provides a GitHub where you can report and track issues.
Adding the Deadsnakes Repository
1. Before we can install any new packages to Ubuntu, we need to update the package list.
Update the package list by running the command below in the terminal.
sudo apt updateCopy2. Our next step is to ensure the “software-properties-common” package is installed by using the following command.
This package basically makes adding and removing PPAs like Deadsnakes a very simple process.
sudo apt install software-properties-common
Copy
3. Now that everything is in place, we can add the Python repository Deadsnakes to our Ubuntu system with the command below.
sudo apt-add-repository ppa:deadsnakes/ppaCopyAfter running the command, you will be prompted to confirm the addition of this new repository. Press the ENTER key to proceed.
4. Since we have made changes to the available package repositories, we should run an update again.
Running the update ensures the apt package manager is aware of the new versions of Python to which it now has access.
sudo apt updateCopyInstalling A Specific Version of Python
5. To stop problems from occurring with the existing installation of Python on Ubuntu, Deadsnakes names its Python executables with the major and minor version number (3.12). Ubuntu names its Python version with just the major version number (3).
Below, you can see how you would write the syntax for installing a specific version of Python to Ubuntu. The asterisk symbols (*) are where you write the version number.
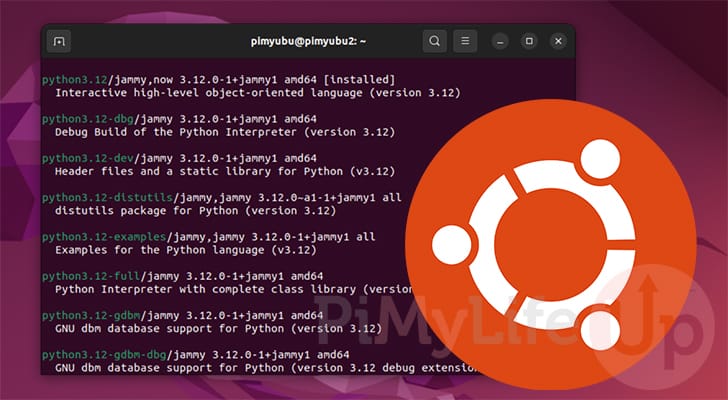
sudo apt install python*.*CopyFor example, if we wanted to install Python 3.12 to Ubuntu, we would use the following command
sudo apt install python3.12Copy6. We can now test our new version of Python on Ubuntu by using its package name followed by the “--version” option
python3.12 --versionCopyAfter running the command above, you can see we have successfully installed a newer version of Python to our Ubuntu system. Usually, we would be stuck with version 3.10.12 on Ubuntu Jammy.
Python 3.12.0Conclusion
Hopefully, you now have a good understanding of how you can install Python on Ubuntu.
We covered a few different ways that you can do this. The first is from the official Ubuntu package repository. This gives you a stable release, but not necessarily the newest.
The second is to use Deadsnakes. This is a third-party repository but gives you access to newer releases of Python.
To take this further, you will likely now want to install pip to your Ubuntu system. Pip is the package manager for Python.
Please feel free to comment below if you have encountered any issues installing Python to your system.
If you found this tutorial to be useful, be sure to check out our many other Ubuntu tutorials.