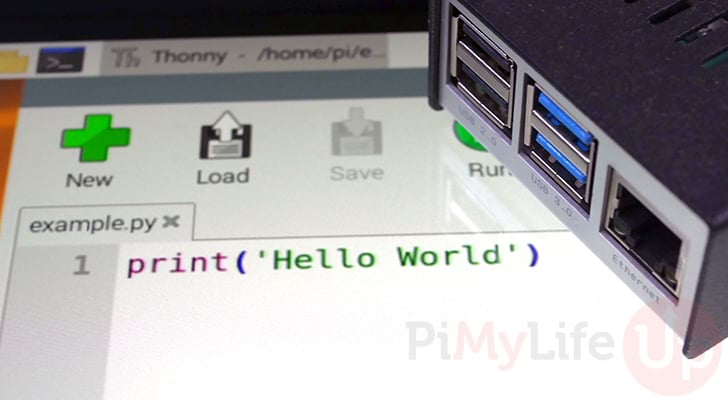
This guide will show you how to get started with the Python programming language on the Raspberry Pi.
Python is a powerful and versatile programming language that is also relatively easy for beginners to get started with. Its syntax is simple, and you don’t have to worry about many complicated concepts.
Within this guide, we will be showing you how to install the Python interpreter to your Raspberry Pi. Installing Python is a straightforward process, so we will get you up and running in no time.
Additionally, we will also show you how to write a simple Python script for you to get started with.
We personally use Python a decent amount, including our Internet Speed Monitor and Minecraft Pi Edition projects.
Equipment
Below is a list of equipment we used when we were installing and using Python on our Raspberry Pi.
Recommended
Optional
Installing Python on the Raspberry Pi
Our first section will show you how easy it is to install Python to your Raspberry Pi. As Python is available from the default package repository, this can be completed in a couple of steps.
If you are using the desktop versions of Raspberry Pi OS, Python will come pre-installed on your system, so skip to the next section.
If you use your Raspberry Pi as a headless device, you can complete the following steps over SSH. You do not need physical access to your device to be able to use Python.
1. Before we install Python, we should ensure that both our package list and existing packages are up to date.
You can update both of these by running the following two commands on your device.
sudo apt update
sudo apt upgrade
2. Our next step is to install the Python package to our Raspberry Pi. For this guide, we will be focusing on Python 3 as it is the currently supported version.
Run the following command to install Python to your system.
sudo apt install python3 -yOnce this step completes, you will now have Python installed on your Raspberry Pi. This will give you the bare basics of Python, but it is all you will need for now.
Later on, you will end up using a package manager such as pip to increase the functionality of Python.
Writing your first Python Script
Now that you have Python installed on your Raspberry Pi, we can now write a straightforward Python script to show it in action.
We won’t be delving a huge amount into the Python programming language here. Still, you can try following some of our Python tutorials.
This section will be split into two. One for those wanting to use the terminal and one for those who are running the desktop interface.
Using the Thorny Desktop IDE
The desktop versions of Raspberry Pi OS come pre-installed with a Python IDE called Thonny. An IDE makes writing code a cleaner, faster and better experience.
The following steps will show you how to open Thonny on your Raspberry Pi and how to write a tiny bit of Python.
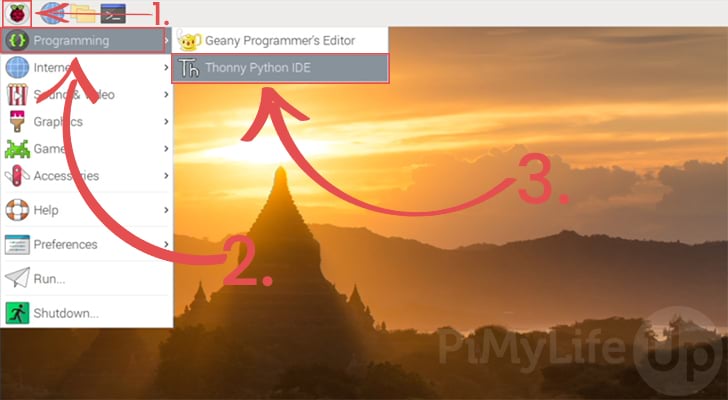
1. Before we start, we will need to open the Thonny IDE.
First, open up the start menu by clicking the Raspberry icon in the top-left corner (1.).
Next, you will need to hover over the “Programming” category (2.).
Finally, click the “Thonny Python IDE” option to open the editor on your Pi (3.).
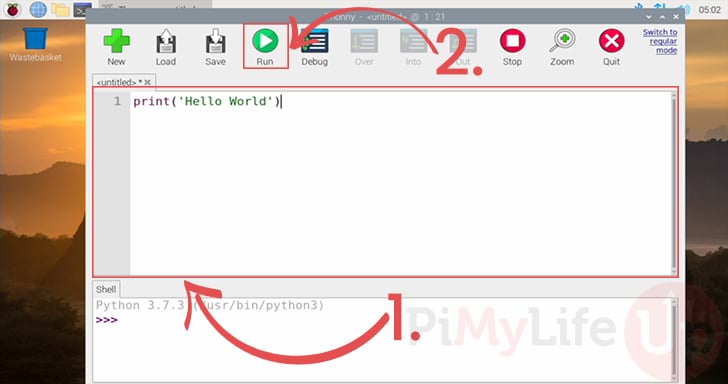
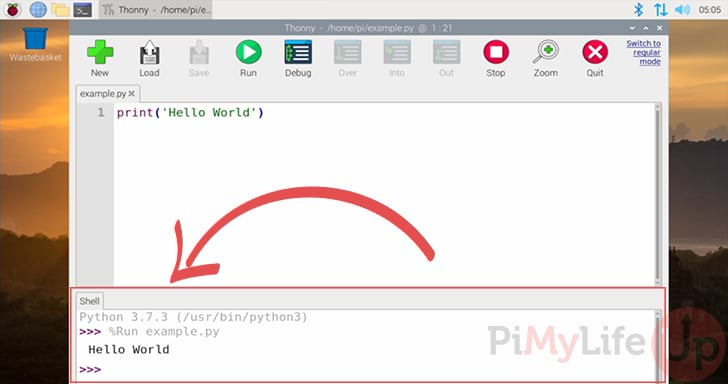
2. As this is likely the first time you are using Thonny, let us quickly run through its interface.
First, at the top is the toolbar. This includes all the buttons you need to quickly interact with the editor. The essential buttons that you will use here are the “Save” and “Run” buttons (1.)
Next is the big box in the middle. This is where you can write all of your Python code. (2.)
Finally, at the bottom is the Python shell. You can use this to directly interact with Python. It is also where you will find the output of your code (3.).

3. To show how this all works, we are going to write a straightforward script. All this script will do is output the text “Hello World” to the shell.
In the code editor in the middle of the screen (1.), enter the following line. This is a very simple line of code that uses the “print()” function to output some text.
print("Hello World")Once you have written this simple one-liner, we can execute the code by clicking the “Run” button (2.).
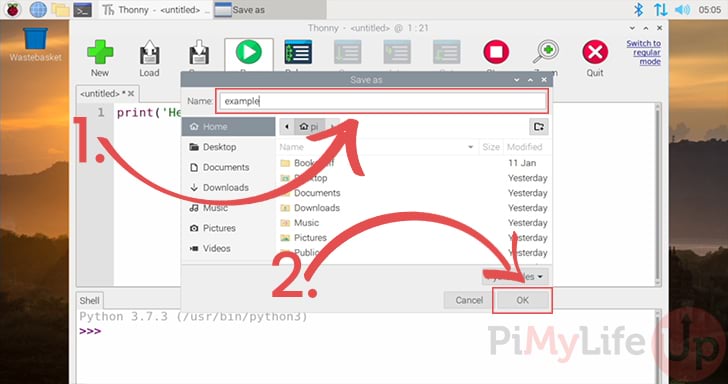
4. Before the Thonny IDE will let you run your Python code, it will require you to save the file.
To save the file, you must first enter a name for it by using the box at the top of the dialog (1.).
Once you have a filename selected, click the “OK” button to save it (2.).
5. As we clicked the “Run” button previously, your code will now be executed by the code editor.
You should see the text “Hello World” appear in the textbox at the bottom of the screen labeled “Shell“.
Using the Terminal
If you use the terminal on your Raspberry Pi, writing your Python code is a reasonably straightforward process.
It’s not as easy as using a code editor like Thonny or Visual Studio Code. These editors provide you some feedback on your code immediately.
1. Begin by using your favorite terminal based text editor to start writing a file.
For our example, we will be calling this file “example.py“. While the file extension is not necessary, it will help you identify that this is indeed a Python script.
Our choice of text editor is nano. It is a relatively easy-to-use terminal-based text editor. However, it is relatively feature lite.
nano ~/example.pyUsing “~/” at the start of our filename, we ensure that this will be written to the current users’ home directory.
Suppose you are following this with a default Raspberry Pi setup. In that case, this means your Python script will be created in the “/home/pi/” directory.
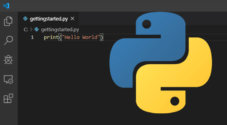
2. With the file now open in your text editor, we will write an incredibly simple one-line of Python.
print("Hello World")This line is incredibly simple and will just print the text “Hello World” to the terminal. We do this by simply passing the string "Hello World" into the “print()” function.
3. Once you have finished entering the code, you can save and quit out of the file.
If you are using nano, you can do this by pressing CTRL + X, then Y, followed by the ENTER key.
4. With your Python file now created on your Raspberry Pi, we can now run it.
To run our script, we need to call “python3” followed by the path to the file. For our example, this command should be the following
python3 ~/example.pyBy running this command, you should end up seeing the text “Hello World” appear in the command line. This indicates that the Python interpreter successfully ran your first bit of code.
Hello World5. If you would like to play around with Python without writing a script, you can launch the Python shell.
Launching the Python shell is as straightforward as running the following command.
python3Within this shell interface, you can try out various Python functions. You can even store values in variables that will persist till the shell is exited out of.
When you are done with the shell interface, you can either type in “quit()” or press CTRL + D.
Conclusion
Hopefully, you should now have a good idea of how you can get started with Python on your Raspberry Pi.
This guide touched on how you can install the Python interpreter to your devices, a task that can be completed with a couple of simple commands.
We also showed you two ways that you can write Python code on your Raspberry Pi. One is using an IDE like the one pre-installed on the desktop installation called Thonny. The other way is to use a terminal-based text editor like nano.
If you are just getting started with Python programming, you can not go past using a code editor like Thonny or Visual Studio Code. They will make your life easier and help you code more efficiently.
If you have had any issues with this guide, please leave a comment below.
Be sure to also check out some of our Python tutorials to better understand how to use the programming language. Additionally, we have some other great Raspberry Pi projects that will help you make the most of your device.


nicely presented intro to using python. thanks