In this tutorial, we will be showing you how to use the switch statement in JavaScript.
One of the most useful conditional statements that you will utilize in JavaScript is the switch statement.
The switch statement allows you to significantly simplify code with multiple “if…else” statements that check the same variable against a static value.
On top of being a cleaner way to code, it can also be more performance-friendly as the expression is only ever evaluated once.
Over the following few sections, we will explain exactly how the switch statement works in JavaScript and show you some examples of how to utilize it.
Table of Contents
Syntax of the switch Statement in JavaScript
Let us start by exploring the syntax of the switch statement within JavaScript. The syntax helps you see how you write this statement within your code.
To explain this, let us look at the following JavaScript snippet. This snippet shows what a typical switch statement would look like within JavaScript.
switch (expression) {
    case value:
        //If value matches expression, run code here
        break;
    default:
        //If no cases matched, run code here
}Copy
Let us break down each part of the switch statement to understand how it is written and what each part does.
- A switch statement starts with the “
switch” keyword, followed by two brackets “()“.
Within these brackets, you will specify an expression that you want to be evaluated by the switch structure. - After this, you will start a code block using two curly brackets (
{ }). Within these brackets is where you will specify each of your cases. - Consider a case to be like an if statement where you are checking whether the expression matches that value.
You write a case by using “case“, followed by a space (:).
JavaScript will jump to the specified case if the values match. If you have two cases with the same value, JavaScript will choose the first one. - You can then write any code you want underneath your case.
To stop JavaScript from falling through to the next case, you will need to end your code block using a break statement.
The break statement tells JavaScript that it should stop executing the code and break out of the structure. - JavaScript’s switch statement also supports the “
default” keyword in place of “case”. If you usedefault, the code below this case will beun when no other case is matched.
You could consider utilizing the “default” keyword almost the same as using an “else” statement at the end of anif...elsechain.
Typically, you will want to place the default case as the last case within your switch statement.
One last thing to note is that when JavaScript compares values, it checks to see if they are identical (Equivalent to using ===). This means your values must be of the same type. We will explore this further later in this guide.
Execution Flow of the switch Statement
Now that we have seen how the switch statement is written in JavaScript let us explore the execution flow.
To show the execution flow, we will utilize the following code snippet. It is a basic switch statement with a single case, followed by the default clause.
switch (1) {
    case 0:
        console.log("Value is 0");
        break;
    default:
        console.log("Undefined Value");
}Copy- The expression within the brackets will be evaluated for a value when the switch statement is run.
From this example, this means the value JavaScript will search for will be1. - JavaScript then checks against all of the cases within the switch structure.
If a case’s value is identical to1, JavaScript will execute the code under that case. JavaScript will run until the end of the switch structure or it hits a break, return, or exit statement. - If no case matches the expressions value, JavaScript will jump to the “
default” case if it exists and run the code underneath it.
If no default case exists, JavaScript will exit the switch statement.
Running the above example, you should end up with the text “Undefined Value“.
Using the switch Statement in JavaScript
Now that we know how to write a switch statement let us explore how to use it within JavaScript.
Over the following sections, we will explore the behavior of the switch statement in various cases.
Typical use of JavaScript’s switch Statement
For our first example, let us show you how a typical switch statement is written and utilized within JavaScript.
Here we start by declaring a constant variable with the name “fruit“. We will assign this variable the string “banana“.
Next, we create our switch statement, passing in our “fruit” variable as the expression.
Within this switch statement, we have four cases. The first three are defined using fruit names such as “apple“, “banana“, and “strawberry“. In each case, we will log to the console “Chosen fruit is ” followed by the fruit name.
At the end of our switch statement, we include the default branch. Within this branch, we log the text “Unknown fruit chosen“.
const fruit = "banana";

switch (fruit) {
    case "apple":
         console.log("Chosen fruit is banana");
         break;
    case "banana":
         console.log("Chosen fruit is apple");
         break;
    case "strawberry":
         console.log("Chosen fruit is strawberry");
         break;
    default:
        console.log("Unknown fruit chosen");
        break;
}Copy
After running the above snippet, JavaScript will run through the switch statement matching our expression “banana” with “case "banana":“, logging the following text to your console.
Chosen fruit is bananaIf you were to change our fruit variables value to, “kiwi” you would end up with the following result instead.
This is because JavaScript fell back to our “default:” case as it wasn’t found within the switch structure.
Unknown fruit chosenJavaScript switch Statements are Matched Identically
One important thing to remember is that values are always matched identically with switch statements in JavaScript.
This differs from JavaScript’s “equals” (==), which will type juggle values to see if they match. Being identical (===) means both their values and data types must match.
Simply put, an expression with the value of 1 will not match a case using the string "1".
To showcase this, let us write a quick switch statement. We will pass in the number 1 as the expression.
Within the JavaScript switch statement, we have two cases. One case is a string containing 1 ("1"), and the other one will be the number 1.
switch (1) {
    case "1":
       console.log("This is a string containing 1");
       break;
    case 1:
       console.log("This is the number 1");
       break;
}Copy
Since we passed in the number 1, JavaScript will jump straight to “case 1:” and the console.log() call will be fired.
You should end up with the following text within your console.
This is the number 1Likewise, if you change the expression to the string containing 1, you will end up with the following text in the terminal instead.
This is a string containing 1Missing break Statements within the switch Structure
You might wonder what occurs when you miss out on a break within your switch structure.
Simply put, JavaScript will just fall through to the next defined case, and it will continue to fall through until it hits a break statement or the switch statement ends.
The break statement helps tell JavaScript when it should jump out of the switch structure.
With the following switch statement, we have intentionally left out a break statement to help you see how JavaScript behaves.
const number = 1;

switch (number) {
    case 1:
        console.log("1")
    case 2:
        console.log("2");
        break;

}Copy
You will notice that for our first case, we didn’t place a break at the end of it. So when fired, it will print “1” then fall through to the next case and print “2” to the console.
1
2
This fall-through behavior does have its use cases. For example, you can use this to build a sentence depending on what point it falls into your switch structure.
Stacking Multiple Cases Within a switch Statement
When you have a piece of code that you want to run for multiple cases, you can simply stack them on top of each other. As discussed in the previous section, the fall-through behavior comes in handy here.
You can think of this as writing a conditional statement with multiple “or” statements. Any cases can be “true“, and JavaScript will run the code block.
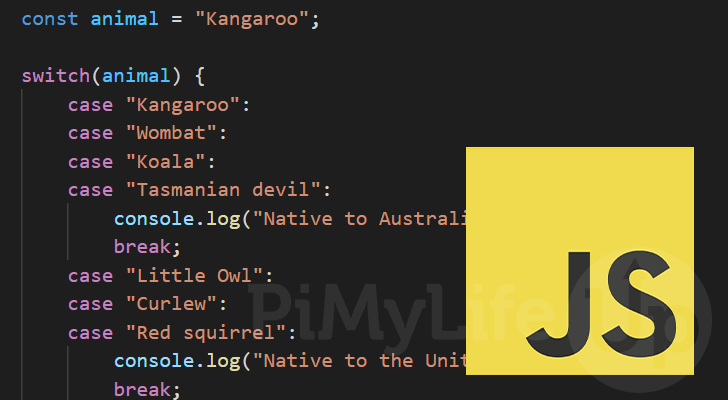
To showcase this, let us use the following switch statement example. We check for various animal names within this switch statement and print whether it’s native to a certain region.
For example, passing “Kangaroo” into this statement will print the text “Native to Australia“. The same will happen if you use “Wombat“, “Koala“, or “Tasmanian devil“.
const animal = "Kangaroo";

switch(animal) {
    case "Kangaroo":
    case "Wombat":
    case "Koala":
    case "Tasmanian devil":
        console.log("Native to Australia");
        break;
    case "Little Owl":
    case "Curlew":
    case "Red squirrel":
        console.log("Native to the United Kingdom");
        break;
    case "Swift fox":
    case "Coyote":
    case "Wild turkey":
        console.log("Native to the United States of America")
        break;
}Copy
If you were to run the JavaScript code above, you will end up with the following result.
You can play around with this example to see how the switch statement works by changing the “animal” variables value to another animal defined within the structure.
Native to AustraliaConclusion
Over this tutorial, we have shown you how to use the switch statement within JavaScript.
The switch statement is a powerful structure that lets you simplify a chain of nested if…else statements that are all checking the same value.
If you have any questions about using the switch statement in JavaScript, please comment below.
Be sure to check out our many other JavaScript tutorials, or if you want to learn a new language, browse our many other programming guides.
