In this tutorial, we will be showing you how to use a for loop within JavaScript.
For loops are a vital component of almost every programming language, and JavaScript is no exception. If you are familiar with languages like C or PHP, you will quickly pick up for loops.
Within JavaScript, a for loop allows you to repeat code until a specified condition becomes false.
The advantage the for loop has over other loops, like the while loop, is that it allows you to increase a value on every loop easily.
Throughout this tutorial, we will discuss how a for loop is defined within JavaScript and how you can utilize it.
Table of Contents
- Syntax of the for Loop in JavaScript
- Using the for loop within JavaScript
- Conclusion
Syntax of the for Loop in JavaScript
The for loop in JavaScript is quite powerful. This loop has three expressions that allow you to control its behavior. We will go over each of these expressions shortly.
Before we explain what each of these expressions does, let us look at the syntax for this loop. While it may look complicated to a new user, it is very simple.
for ([initialExpression]; [conditionExpression]; [incrementExpression]) {
   //Your Code Goes Here
}Copy
Now let us explore each of these expressions that you can utilize.
[initialExpression]– With the initial expression, you can create a variable and assign it a value.
If you don’t want to create or assign a value at the start of the loop, you can leave this expression blank (You must keep the semicolon).[conditionExpression]– Here, you can specify a condition that is evaluated at the start of every loop.
If you leave this expression blank (Only a semicolon), the loop will run until it is broken out of using a “break“.- If the condition is
true, that loop will continue to run. - When it is evaluated as
false, the loop will terminate.
- If the condition is
[incrementExpression]– The final expression you can set allows you to increase or decrease a value on every loop. A value is only increased or decreased at the end of every loop.
Like the other expressions, you can leave this blank if you don’t want the value increased or decreased.
Execution Flow of the for Loop
Before we get started, let us quickly explore the execution flow of the for loop. To showcase this, we will be using the following code snippet.
It’s a simple piece of JavaScript that showcases a very basic for loop.
for (let i = 0; i < 4; i++) {
    console.log(i);
}Copy- When the for loop first runs, it initializes any variables referenced in the “
initialExpression” part of the loop.
In our example code, the variable “i” is created and assigned the value “0“. - The condition expression is checked on every loop to see if it is “
true” or “false“.
In our case, the variable “i” is checked to see if it is less than4. If the value is less than4, the loop will be run. If it is equal to or greater than4, the loop will be terminated. - The code within your loop will be ran while the condition continues to be true.
With our example, we are simply using the “console.log()” function to log the value of our i variable. - Finally, the “
incrementExpression” is executed at the end of the loop.
With our example, this means the “i” variables value is increased by one. Once this expression has finished, the loop will return to step 2.
Using the for loop within JavaScript
Now that we understand how the for loop is defined within JavaScript, let us show you how to utilize it.
Throughout this section, we will give you a couple of examples of writing for loops, how to control them, and the scope of variables declared within them.
Writing a for Loop in JavaScript
The best way to learn how to write a for loop is to look at some simple examples.
Over the following examples, we will show you how to write a simple for loop, use a for loop to iterate through an array, and examples of what happens when you remove an expression.
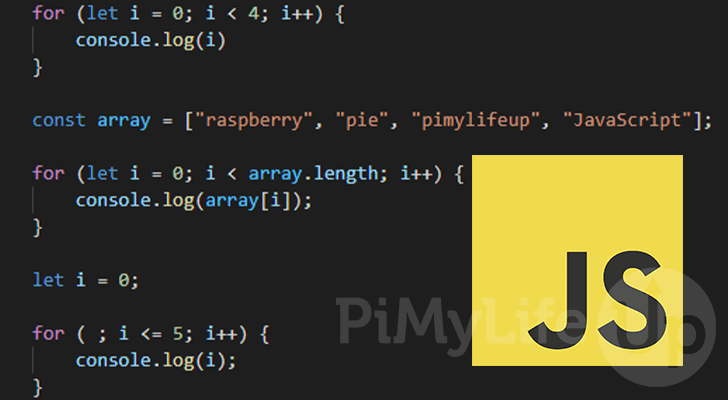
A simple for Loop
Let us start with the basic for loop within JavaScript. We will be setting all three of the loops parameters that we will quickly go over.
let i = 0– This declares a variable called “i” and assigns it the value of0when the loop starts.i <= 5– Here, we set a condition so that the loop will continue to run as long as the value of “i” is less than or equal to5.i++– For every loop, we increase the value of our “i” variable by one.
Within this loop, we use “console.log()” to log the value of the “i” variable on every loop. With this you will be able to see how the increment expression works.
for (let i = 0; i <= 5; i++) {
    console.log(i);
}Copy
After running this script, you should end up with the following output. You can see how our “i” variable started at 0. After every loop, the variable’s value was increased by one till it was equal to 5.
0
1
2
3
4
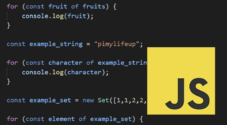
5Iterating through an array in JavaScript using a for Loop
The for loop in JavaScript is most useful when used to iterate through an array.
We start this example by creating a new array called “array“. In this array we set the values “raspberry“, “pie“, “pimylifeup” and “JavaScript“.
let i = 0– Here, we create the variable that we will use to iterate through the array. We name this variable “i” and assign it the value of0.i < array.length– For the loop to run, we check whether the value of “i” is less than the array’s length.
In JavaScript, arrays have a “.length” property that allows you to easily get the arrays length.i++– Every time we loop, we use the++operator to increase the value of the “i” variable. Allowing us to loop through each array element slowly.
In every loop, we print the array element corresponding to the value in the “i” variable. Doing this will allow us to print each value held within the array.
const array = ["raspberry", "pie", "pimylifeup", "JavaScript"];

for (let i = 0; i < array.length; i++) {
    console.log(array[i]);
}Copy
After running this script, you should see each value in the array was printed to the console.
raspberry
pie
pimylifeup
JavaScript
Writing a for Loop without the Initial Expression
In JavaScript, you can use the for loop without specifying an initial expression. Utilizing the for loop this way is useful if you have a value you want to iterate defined before the loop starts.
At the top of our code snippet, we will declare the variable “i” and assign it the value 0.
i <= 5– For the condition, we check if the value of the “i” variable is less than or equal to5.i++– At the end of every loop, we increment the value of our “i” variable by one.
Within each loop, we log the value of “i” to the console.
let i = 0;

for ( ; i <= 5; i++) {
    console.log(i);
}Copy
Below is the output you should see after running the JavaScript code snippet below.
0
1
2
3
4
5
Using a JavaScript for Loop without a Condition
It is also possible to write a for loop that does not have a condition. This will mean that your for loop will continue to run indefinitely.
The only way to stop the loop is by utilizing the “break” keyword within the loop.
let i = 0– When the loop first starts, our “i” variable will be created and assigned the value0.i++– Before the loop ends, the value of “i” is increased by1by using the++operator.
Within the loop, we use “console.log()” to print the current value stored in the “i” variable.
Then we use an if conditional statement to check if the value of “i” is currently greater than 5. If the value is greater, we stop the loop by using the “break” keyword.
for (let i = 0; ; i++) {
    console.log(i);

    if (i > 5) {
         break;
    }
}Copy
Below you can see the result of this script. You can see that our JavaScript for loop was stopped once “i” was incremented to greater than 5 and our if statement was executed.
0
1
2
3
4
5
6
Using a for Loop without an Increment Expression
Within JavaScript, you can use the for loop without the increment expression. This means you will need to adjust any values within the loop itself.
This is useful where you may want to adjust the “i” value differently than a simple increment or decrement.
let i = 0– We start the loop by creating a variable called “i“. This variable will be assigned the value0.i < 5– We check whether the current value of “i” is less than5.
Within the for loop itself, we log the current value of the “i” variable. Afterwards we increase the value of the “i” variable by using the ++ operator.
for (let i = 0; i < 5; ) {
    console.log(i);

    i++;
}Copy
Below you can see the output produced by this code snippet.
0
1
2
3
4
A JavaScript for Loop without Any Expressions
It is also possible to use the for loop without using any expressions. Of course, this is far from the best way to utilize the for loop within JavaScript, and instead, you should look at using something like a while loop.
When used this way, no variables are automatically created or incremented, and there is no condition for the loop to stop. This would be the equivalent of using a while(true) loop.
Within this loop, we use the if statement to check if “i” is currently greater than 5. If it is, we use the “break” keyword to break out of the loop.
If the value is less than or equal to 5, we continue running the rest of the code block. First, we log the value of “i” to the console, then increment it by 1.
let i = 0;

for ( ; ; ) {
    if (i > 5) {
        break;
    }

    console.log(i);

    i++;
}Copy
Shown below is the output from our JavaScript example.
0
1
2
3
4
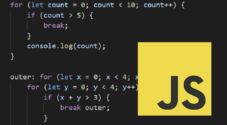
5Breaking out of a for Loop Within JavaScript
While running a for loop, there are times when you may want to break out of the loop before it finishes running.
For example, if you got the result you wanted early on in the loop, you can use the “break” keyword to stop the loop.
To showcase this, we have our simple JavaScript for loop below. Within the loop, we have an if statement that checks whether the value of “i” is equal to 5.
If the value is equal to “5” we break out of the loop so it will stop running before the loop hits its condition (i < 10).
for (let i = 0; i < 10; i++) {
    if (i == 5) {
        break;
    }

    console.log(i);
}Copy
With the output below, you can see that the result stopped being logged after the value was equal to 5.
0
1
2
3
4
Using the continue Keyword within the for Loop
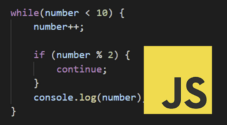
You can also control the for loop in JavaScript by utilizing the “continue” keyword. This keyword allows you to skip the current loop and return to the start of the loop.
Using the continue keyword is useful when you only want code to be run when certain conditions are met.
In the example below, we have set up a simple for loop. Within this loop, we have an if statement that checks whether “i” is not equal to 5.
While the value of “i” is not equal to “5” the script will use the “continue” keyword to move the skip running the rest of the code block.
If the value of “i” is equal to 5 then the rest of the code block will be ran.
for (let i = 0; i < 10; i++) {
    if (i != 5) {
        continue;
    }

    console.log(i);
}Copy
Below you can see the output of the above JavaScript example.
5The Scope of JavaScript Variables within for Loops
Your choice of using “var” or “let” to define a variable outside or within the loop will affect its scope.
In the following two sections, we will show you the difference between using “var” or “let” in code.
Using var Within a for loop
When using “var” to declare the variable in the loop, JavaScript will redeclare it outside of the loop with the new value.
This means that whatever changes you make to the “i” variable within the loop will be reflected outside of it.
The example for loop below will showcase this behavior. When printed outside of the loop, the value of “i” should end up being “5“.
var i = 0;

for (var i = 0; i < 5; i++) {
    console.log(i);
}

console.log(i);Copy
Below you can see the output from the above JavaScript example. Even though the for loop would of ended at “4“, the value of “5” was printed by our final “console.log()” call.
0
1
2
3
4
5
Using let Within a for Loop
The let declaration behaves drastically different from “var” when used with a for loop. This primary difference is that the “let” variable is localized to that loop.
When used in the for loop, the variable “i” is declared as a new variable. Unfortunately, this means you can’t access the “i” variable outside the loop.
Below is a small JavaScript example showing how “let” changes how the variable is declared.
let i = 0;

for (let i = 0; i < 5; i ++) { //Is declared as a new variable
    console.log(i);
}

console.log(i); //will be 0Copy
With the result from this example, you can see that the final “console.log()” ends up printing “0” as it refers to the original “i” variable that we declared outside of the for loop.
0
1
2
3
4
0
Conclusion
Within this tutorial, we have shown you the various ways to declare and use a for loop within JavaScript.
A for loop has a variety of uses and is especially helpful when you need to iterate over data.
We have shown some of the for loops behaviors, including how variable scope is affected by the for loop.
Please comment below if you have any questions about writing a for loop in JavaScript.
Be sure to also check out our other JavaScript tutorials or our many other coding guides.