This tutorial will show you how to install the Ubuntu operating system to a VirtualBox virtual machine.
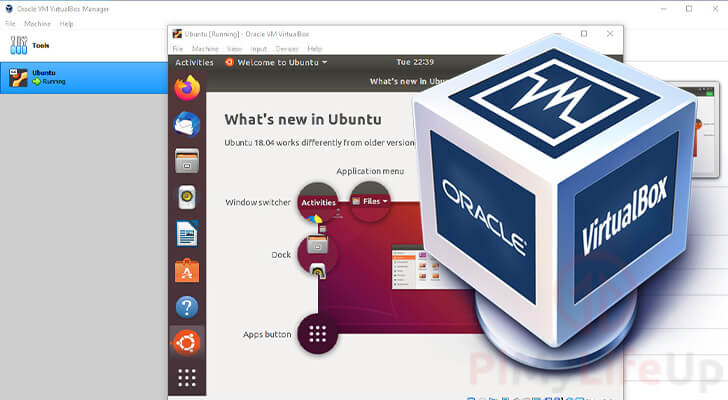
VirtualBox is a virtualization software that allows you to run other x86 based operating systems on top of your existing OS.
This software creates a virtual machine on top of your OS. This machine will have its own virtualized disk and access to a part of your system’s CPU and memory.
Installing Ubuntu to a VirtualBox machine is a relatively straightforward process.
For this to work, you will need to have the operating system’s image that you want to run on the virtual machine.
In our case, we will be using VirtualBox on our Windows PC to install Ubuntu 18.04.5.
By using a virtual machine, we can quickly experiment with stuff. If we managed to break anything, we could re-install Ubuntu in just a few minutes, all without leaving our existing OS.
Those running Windows might be wondering why you wouldn’t just use something like Windows Subsystem for Linux. While incredibly useful, this subsystem doesn’t allow you to use Ubuntu’s graphical interface.
Adjusting these steps slightly will allow you to install numerous other operating systems to your VirtualBox virtual machine, not just Ubuntu.
VirtualBox even offers support for the Windows operating system and can be run on Linux, macOS, and Solaris operating systems.
Installing VirtualBox to your Computer
Before we can get started, we need to install the VirtualBox software on your computer.
VirtualBox is a free and open-source virtualization software that is developed by the Oracle Corporation.
It is one of the most popular solutions for virtualizing an operating system within Windows, thanks to its feature set and constant development.
The only caveat to using VirtualBox is that your motherboard and CPU must support either Intel’s VT-x or AMD’s AMD-V.
Please note that by default, these features are often disabled. You will need to look within your bios settings to enable them.
You can download the latest version of VirtualBox from their official website.
Once downloaded, follow the instructions to install VirtualBox on your computer.
You will soon be able to get Ubuntu installed to your VirtualBox’s virtual machine.
Downloading the Ubuntu Image
With VirtualBox installed on your computer, you will now need an Ubuntu image to install to it.
You can use other operating systems with VirtualBox, but we will be focusing on Ubuntu for this guide.
It is possible to download Ubuntu Desktop from the operating systems official website.
If you are after an older version, you can look through the Ubuntu releases page. Remember to download the amd64 builds of Ubuntu.
Once you have the .iso downloaded, we can proceed to install Ubuntu to a VirtualBox virtual machine.
Setting up a Virtual Machine in VirtualBox
With VirtualBox now installed on our computer, we can now prepare VirtualBox for our Ubuntu installation.
By the end of this section, you should be ready to install Ubuntu to your newly created virtual machine.
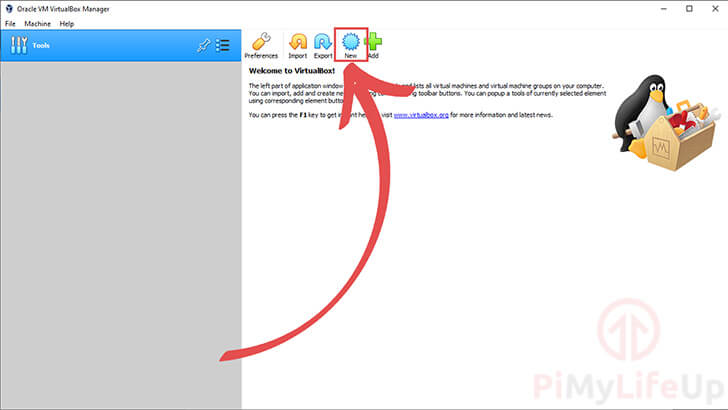
1. The first task we will need to do is create a new virtual machine.
With the VirtualBox manager opened, locate and click the “New” button.
You can also press CTRL + N.
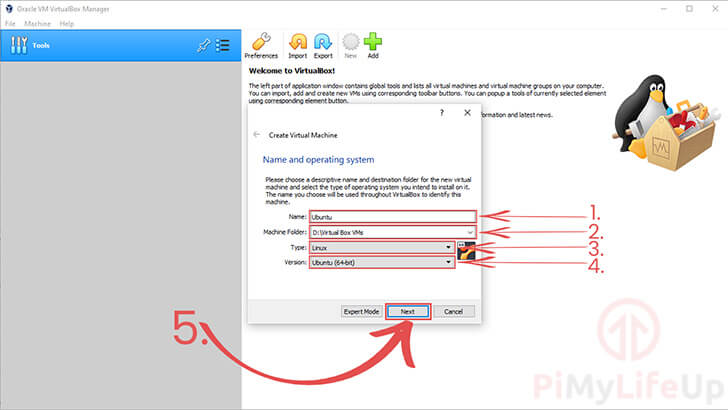
2. We will need to give our name for our new virtual machine and select the operating system template.
These options allow VirtualBox to understand how it needs to operate the virtual machine to run Ubuntu on your device.
1 – First, give your virtual machine a name (1.). For our example, we used the name “Ubuntu“.
You will notice that if your name matches an OS that VirtualBox supports out of the box it will automatically select it. Using our example, Ubuntu should be automatically set.
2 – Next, you need to select where you want to store your VirtualBox virtual machines (2.) on your computer. You can either go with the default path or select a specific location.
If VirtualBox hasn’t automatically set the type and version, we would need to choose the correct one.
3 – To start with, we need to tell VirtualBox that we are using a Linux-based operating system.
As Ubuntu is a Linux based operating system, use the “Type” dropdown box to select “Linux” (3.)
4 – Finally, you will need to select the Linux operating system you are using (4.).
In our case, we need to choose the “Ubuntu (64-bit)” option. This uses VirtualBox’s template for dealing with the Ubuntu operating system.
If you are using a Linux operating system that is not mentioned here, select the “Other Linux” option.
5 – Once everything is set, click the “Next” button (5.) to continue with the setup process.
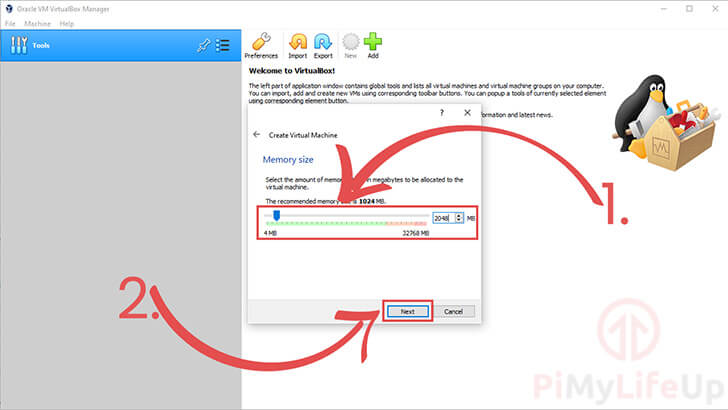
3. With the operating system selected, we need to decide how much of the system’s memory will be allocated to the virtual machine.
By default, this value is set to only reserve 1024mb for the virtual machine.
However, for the best experience, you should set this value to 2048mb as a minimum.
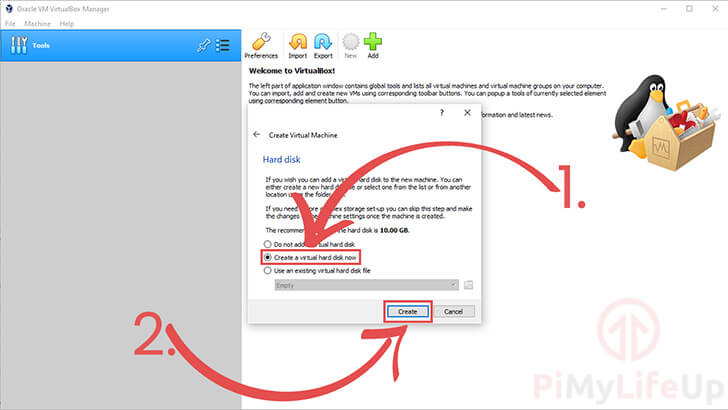
4. For a virtual machine to work, it needs to have a location that can act as its hard disk.
VirtualBox achieves this by creating a virtual disk to write everything to, including the operating system itself.
For this option, make sure you select the “Create a virtual hard disk now” option (1.). Selecting this option will let us start the process of creating this virtual disk now.
Once selected, click the “Create” button (2.).
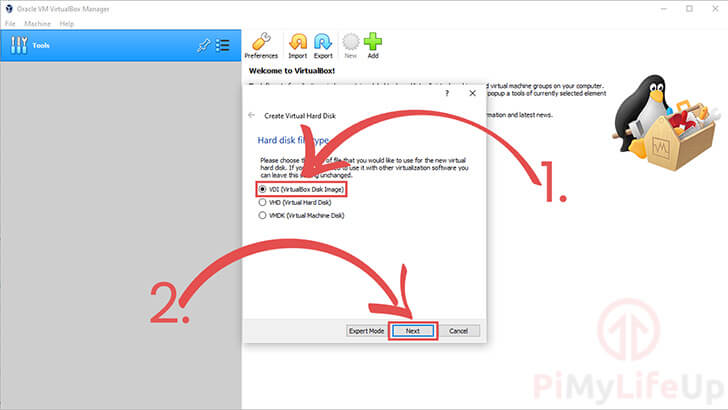
5. You will need to select the file type for VirtualBox’s virtual hard disk.
As we only plan on using the VirtualBox software, we will be selecting “VDI (VirtualBox Disk Image)” (1.)
If you think you will use different virtualization software, you should consider looking into the VHD or VMDK formats.
Once done, click the “Next” button to proceed with the VirtualBox setup process (2.).
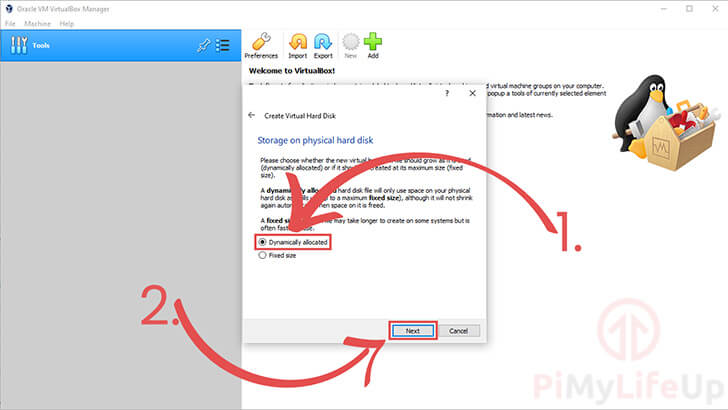
6. Next, we need to choose how VirtualBox will store the virtual disk on your hard drive.
There are two different options available to you here.
One is to allocate the file dynamically. This means that the file will only grow in size as it is written to. However, the virtual disk will still be capped at the size that you set.
The only disadvantage of a dynamically allocated disk is that it can slow down when many writes occur at once.
The second option allows you to create the entire virtual disk from the get-go. Generating the disk from the start will take considerable time.
To get up and running fast, we will be selecting the “Dynamically allocated” option (1.).
With a storage method selected, you can proceed by clicking the “Next” (2.) button.
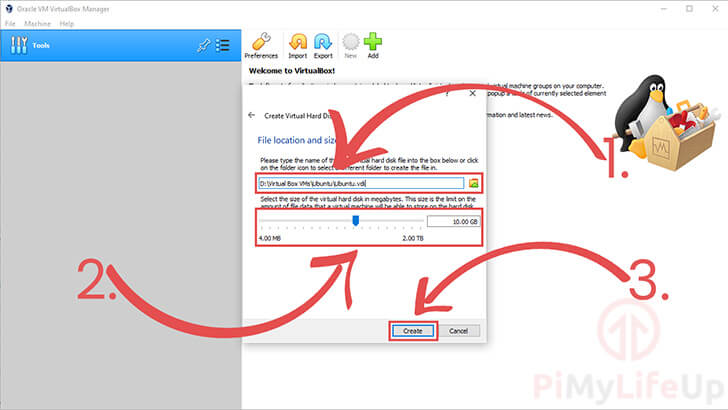
7. Finally, we can choose the disk size and location of the virtual disk.
By default, the virtual disk’s location is the same as where your virtual machine is stored. You can change this location to wherever you want (1.).
Next, you need to choose a size for your virtual disk (2.). By default, this disk size is set to 10GB.
Make sure this is set to a value larger than what you expect to use. You will not be able to increase this without creating a brand new virtual machine.
Once done, click the “Next” button to finish setting up your VirtualBox virtual machine,
8. At this point, you will have successfully created a virtual machine with VirtualBox.
The only problem now is that we need to install an operating system on our new empty virtual disk.
Selecting the Start-Up Disk for the Virtual Machine
Before installing Ubuntu to our VirtualBox virtual machine, we will need to select the start-up disk.
This disk is what we will be using to install Ubuntu itself to the virtual machine we just created.
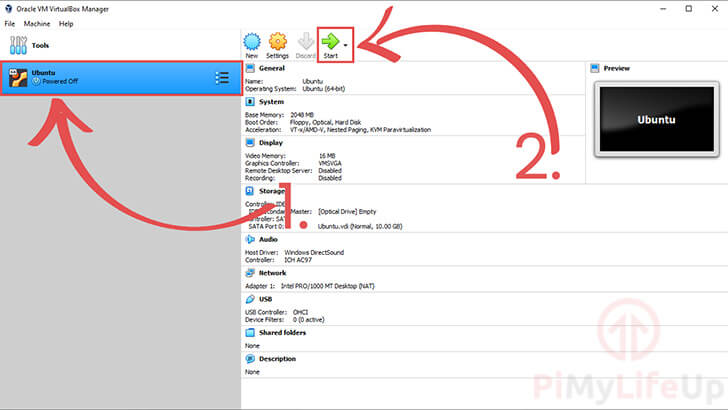
1. Our first task is to start up the virtual machine.
Make sure you have the machine selected in the sidebar (1.). You can select a virtual machine in VirtualBox by clicking it.
Next, start up the virtual machine by clicking the “Start” button (2.).
2a. When you first start a virtual machine, you will need to select a start-up disk.
If this dialog box doesn’t appear, and the message “No Bootable medium found! System halted.” appears skip to step 2b.
As this is the first time you are using VirtualBox, you will need to find and select the Ubuntu image you want to install.
Start this process by clicking the little folder icon.

2b. Only follow this step if the “Select start-up disk” box never appeared.
Start by clicking the “Devices” option in the top toolbar (1.).
Next, hover over the “Optical Drives” option on the dropdown menu (2.).
Finally, click the “Choose/Create a disk image...” option (3.).
Please note that after selecting an image using this menu, you may have to restart the virtual machine by closing it then restarting it.

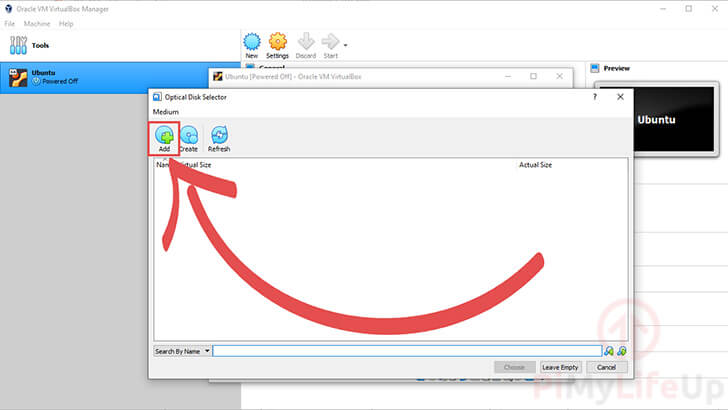
3. Within the optical disk selector dialog, you will see that we need to add our Ubuntu image.
Click the “Add” button to bring up a file dialog box.
Use this file dialog box to find and select the Ubuntu image that you downloaded earlier.
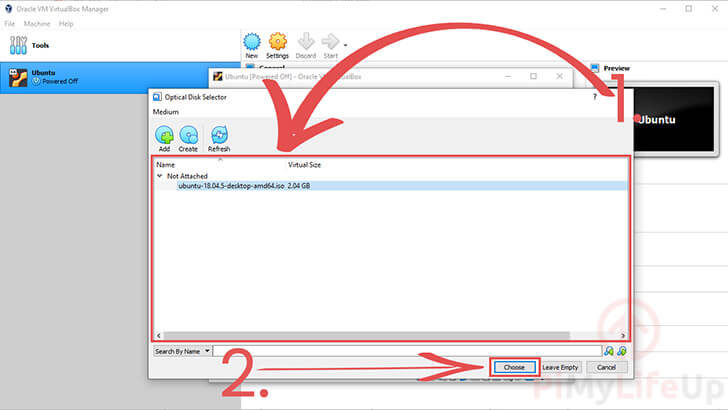
4. Now that we have added the Ubuntu image, you should now see it listed within the selector (1.).
With the Ubuntu image selected, click the “Choose” button at the dialog box’s bottom (2.).
5. You should now have the Ubuntu disk selected in the dropdown box (1.).
With the Ubuntu disk selected, click the “Start” button (2.).
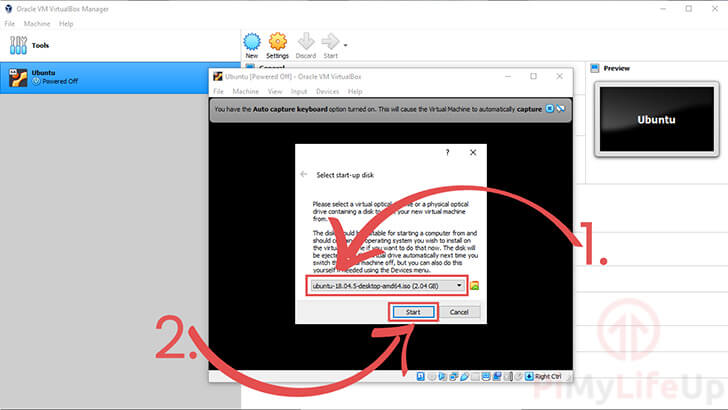
VirtualBox should now begin booting into Ubuntu’s initial setup experience, where you will be able to set up and configure the operating system.
Installing Ubuntu to your VirtualBox Virtual Machine
Finally, we can install the Ubuntu operating system to our VirtualBox’s virtual machine.
By the end of this section, we will be able to play around with Ubuntu without having to restart our computer.
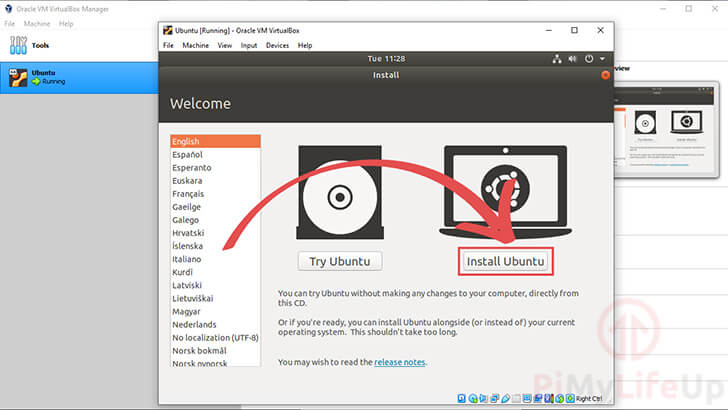
The following screenshots were taken using Ubuntu 18.0.4. These steps may differ if the out of box experience has been changed.
1. When asked if you want to try or install Ubuntu, make sure that you click the “Install Ubuntu” option.
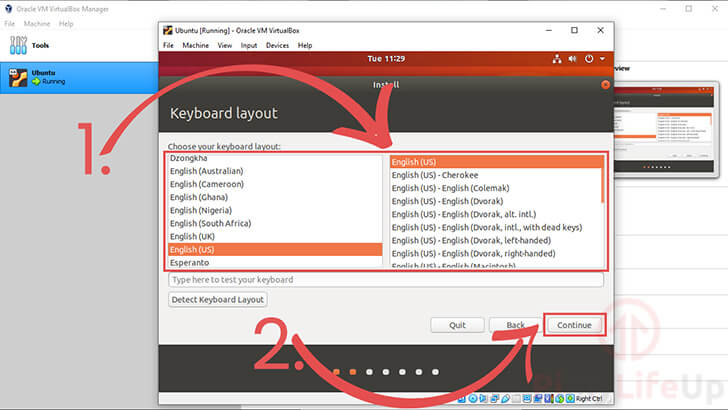
2. Next, you will have the chance to select the keyboard layout to use for Ubuntu.
Typically the operating system would attempt to guess the correct keyboard layout. However, the virtual machine may interfere with this behavior.
You can use the box in the middle of the screen to choose between the various keyboard layouts (1.).
With a keyboard layout selected, click the “Continue” button to proceed (2.).
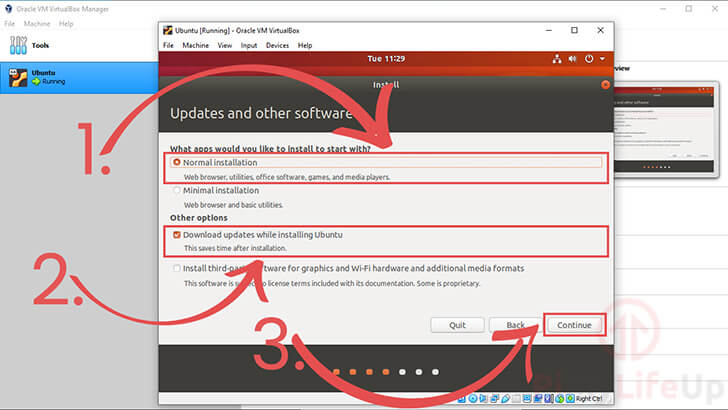
3. Now, you can choose how Ubuntu handles its installation process
Typically you will want Ubuntu to be installed on your VirtualBox virtual machine as a normal installation (1.).
Additionally, it can also help ensure that the “Download updates while installing Ubuntu” option is enabled (2.).
This option means you should have everything up to date when you boot into Ubuntu’s desktop interface.
Once you have configured the install method, click the “Continue” button (3.).
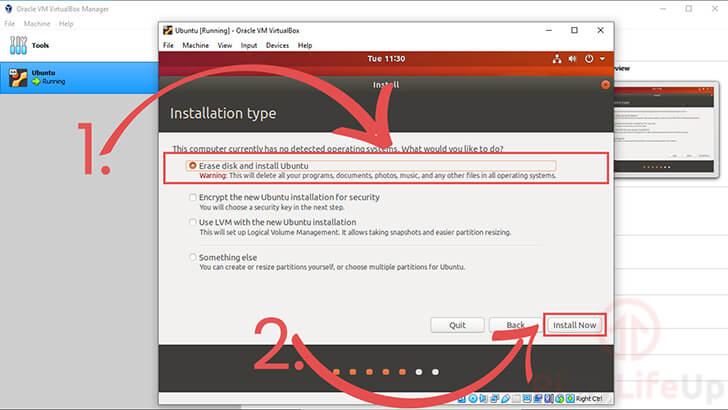
4. You will select how exactly Ubuntu is installed to VirtualBox’s virtual disk on this screen.
Since our virtual disk is empty and is created just for this virtual machine, it is safe to go with the “Erase disk and install Ubuntu” option (1.).
Once you have selected the installation type, you can start the install process by clicking the “Install Now” button.
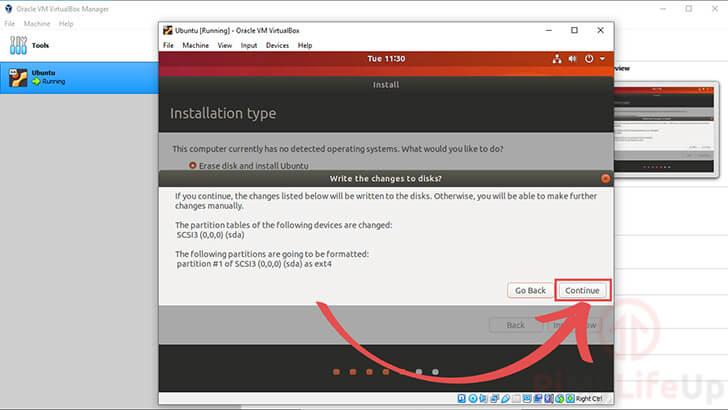
5. You will now see a warning that the Ubuntu installer is about to make changes to your disk.
Again, it is safe to click the “Continue” button as our virtual disk is empty, and changes will not damage anything.
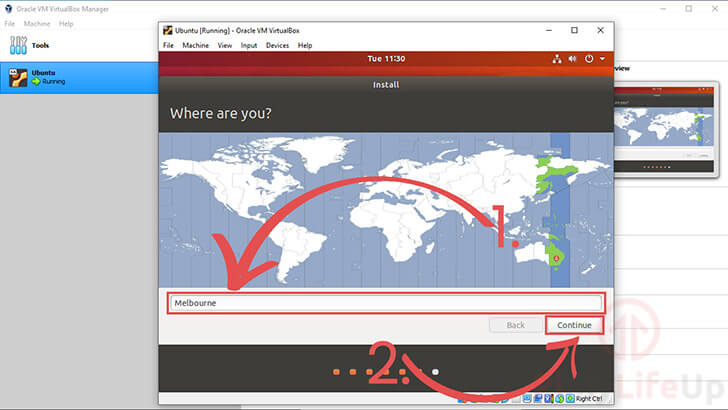
6. Before the installation process begins Ubuntu will ask you to provide your time zone.
Ubuntu will attempt to select the correct time zone automatically. You can also set this yourself using the provided textbox (1.).
With the correct time zone selected, click the “Continue” button (2.).
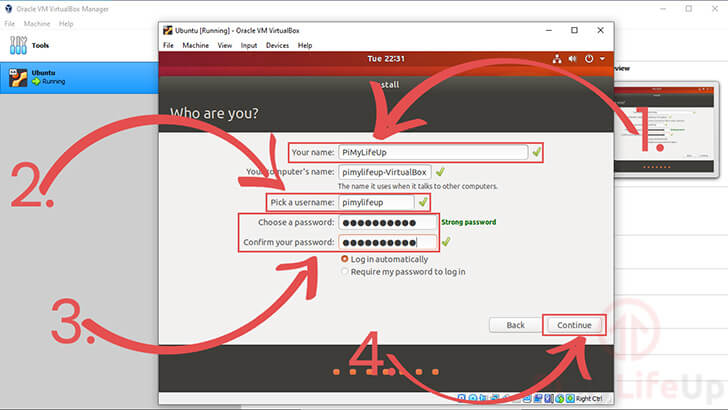
7. The last thing we need to do is create an account to login to Ubuntu.
On this page, you need to provide a name (1.).
With a name filled out, the installer will try to generate a name for your computer and user (2.).
We need to set a password for this new account (3.).
Lastly, click the “Continue” button (4.) to install Ubuntu to your VirtualBox virtual machine.
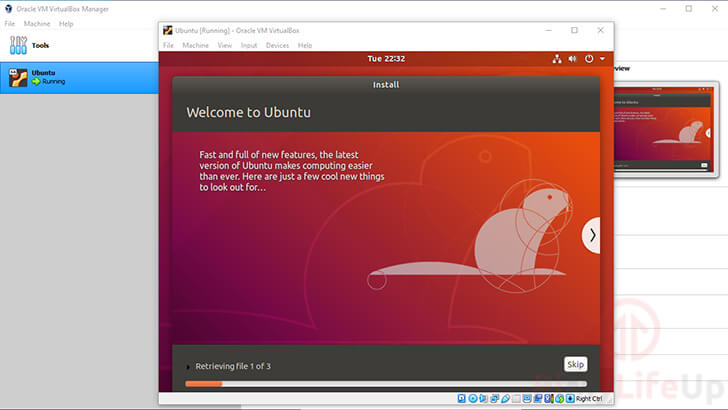
8. Wait patiently for Ubuntu to be installed on your VirtualBox’s virtual disk.
Depending on your disk’s speed, this process can take anywhere between a minute and 15 minutes.
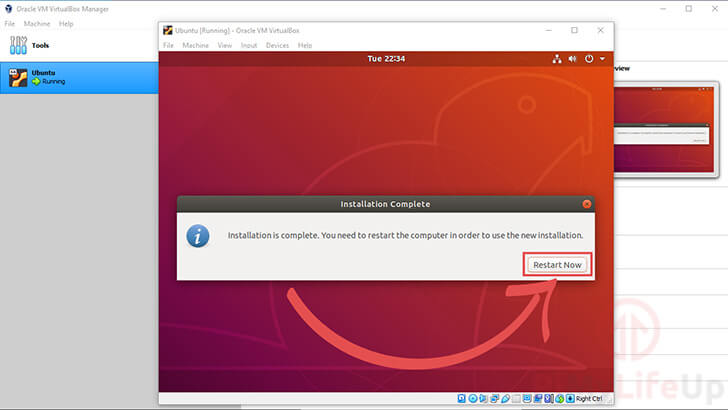
9. Once Ubuntu has finished installing itself to the virtual disk, the following message should appear.
To proceed, you can click the “Restart Now” button.
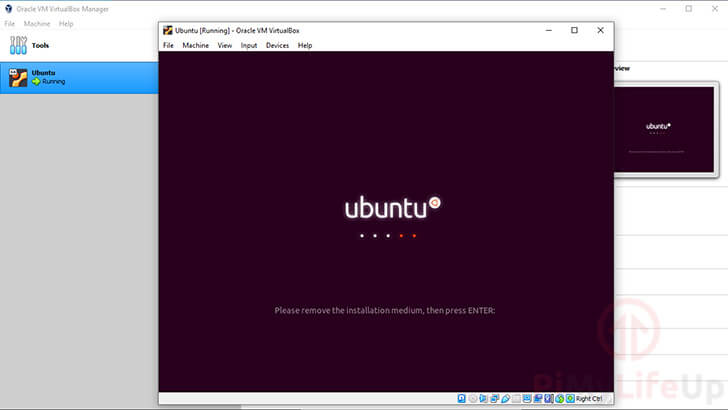
10. Upon restarting, you will see a message about removing the installation medium.
You should be safe to press the ENTER key.
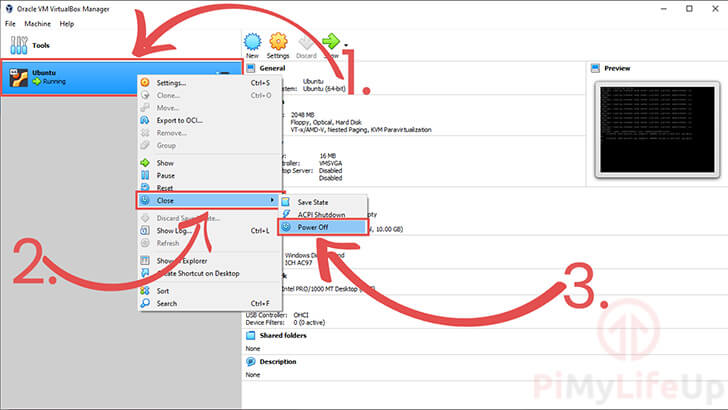
11. If your VirtualBox virtual machine appears to hang after pressing ENTER, you should restart the virtual machine.
To close the virtual machine, right-click the machine in the VirtualBox manager’s left sidebar (1.).
In the menu that appears, hover over the “Close option (2.).
Finally, click the “Power Off” option to shut down your Ubuntu virtual machine (3.).
After the virtual machine has shut down, you are safe to restart it and begin using Ubuntu.
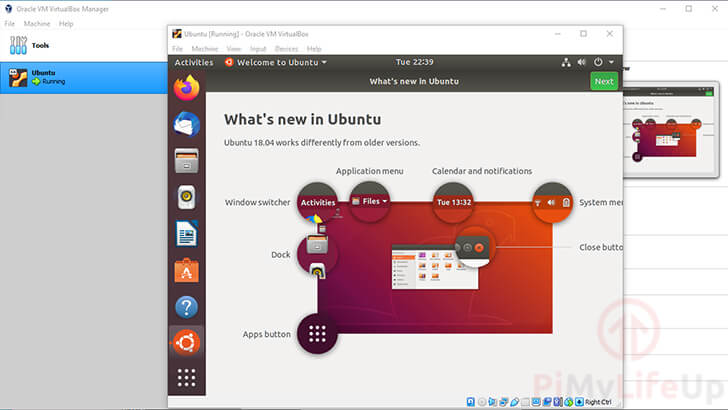
12. Ubuntu should now be set up and running on your virtual machine.
There are ways to improve Ubuntu’s performance running through VirtualBox by installing additional software called “Guest Additions“.
These guest additions allow the operating system to better interact with the virtual engine that its running under.
Conclusion
Hopefully, at this point, you should now have a good idea of how to install the Ubuntu operating system to a VirtualBox virtual machine.
VirtualBox is a powerful and free virtualization software that allows you to run different operating systems within its virtual machines.
It is an incredibly useful piece of software that has a wealth of different uses.
Some of these potential uses are the following:
- Testing out other operating systems without having to format every time or set up dual booting
- Developing applications that need to run under a specific operating system
- Experimenting with things that may typically break the OS
Personally we use VirtualBox so that we can rapidly test tutorials out without having to continually reboot our computers.
If you have had any issues with getting Ubuntu to install as a VirtualBox virtual machine, please leave a comment below.