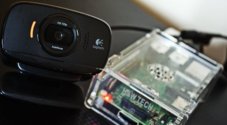
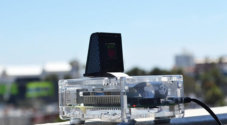
In this project, I will set up a Raspberry Pi security camera network using the motionEye software. You can use the standard Pi camera, such as the one I used in the time-lapse tutorial.
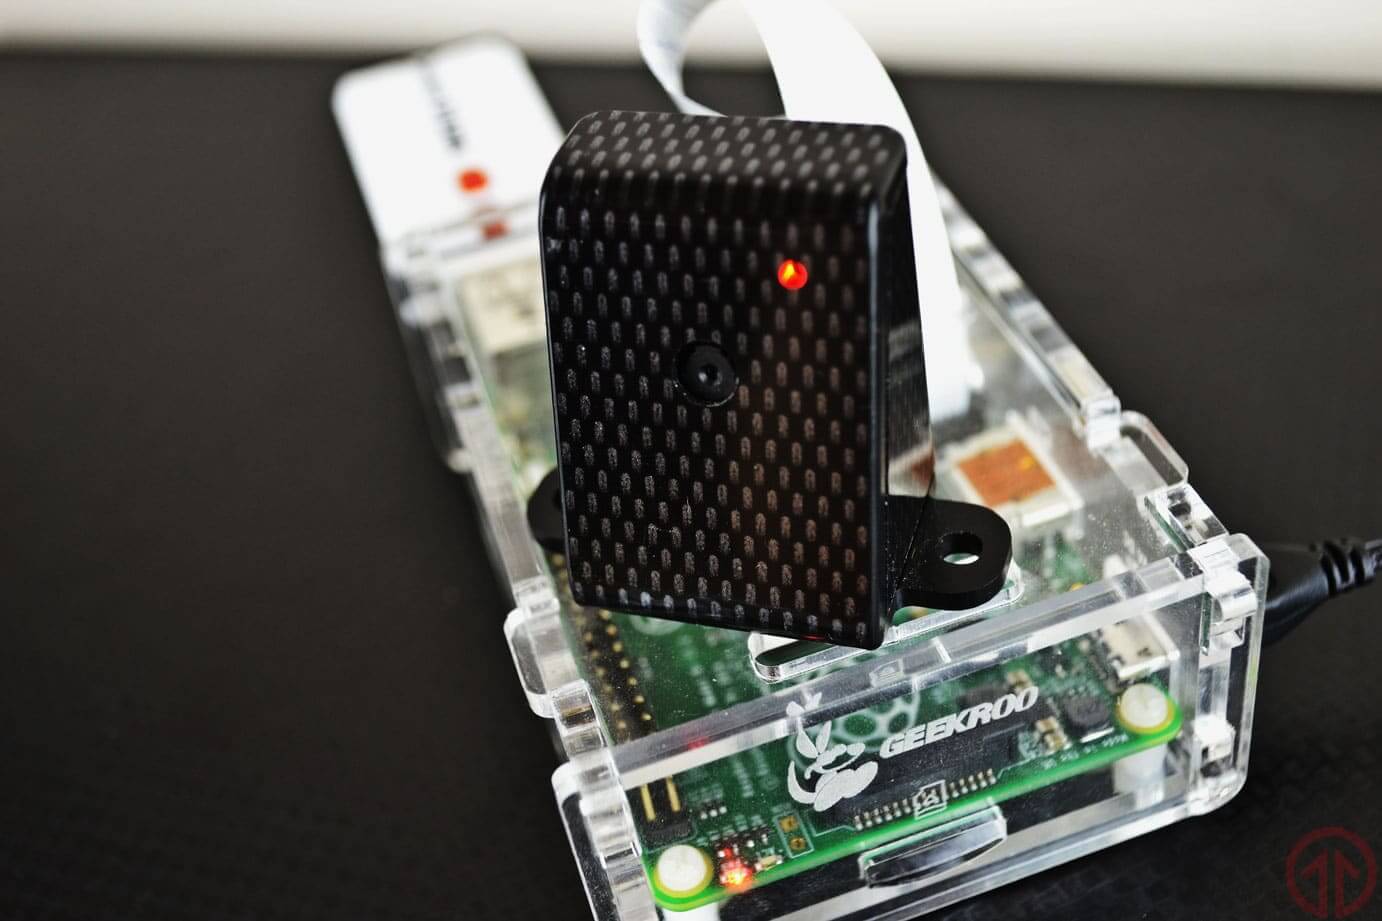
This project is a cost-effective way of getting a security camera network up and running. You can view the cameras over the network and have them record based on motion.
Remember, the Raspberry Pi isn’t a powerhouse, so performance will degrade if you try to do too much, such as adding too many high-definition cameras.
This tutorial previously used MotionEye OS, but as it is no longer maintained, we have updated it to use the underlying MotionEye software on the default Raspberry Pi OS.
If you want to use the Raspberry Pi camera, follow our webcam guide before starting this tutorial. The process is relatively simple but does require a bit of tweaking.
Other security camera software that is compatible with the Raspberry Pi and worth looking at is Frigate or ZoneMinder,
With all that said, motionEye still an excellent way of building an affordable camera network. So, let’s get to it.
Equipment
You will need the following equipment to complete this Raspberry Pi security camera project.
Recommended
- Raspberry Pi Amazon
- Raspberry Pi Camera Amazon or USB WebCam Amazon
- Power Supply Amazon
- Micro SD Card Amazon
- Ethernet Cable Amazon (Recommended) or Wi-Fi Amazon
Optional
- Raspberry Pi Case Amazon
This tutorial was last tested on the Raspberry Pi 5, running the latest version of Raspberry Pi OS Bookworm.
Installing MotionEye on the Raspberry Pi
For this tutorial, we will be installing motionEye on Raspberry Pi OS. I settled on using MotionEye as it is an all-in-one solution that fits my requirements, and it also didn’t involve as much fiddling around to get it to work.
It is best to install this software on a clean version of the Raspberry Pi OS. If you are installing on an existing operating system, you may run into conflicts with other software.
1. First, update the packages on the Raspberry Pi to the latest version by running the following commands.
sudo apt update
sudo apt upgradeCopy
2. First, we must install the required packages for the motionEye software to work. Enter the following command to install the packages.
sudo apt --no-install-recommends install ca-certificates curl python3 python3-dev libcurl4-openssl-dev gcc libssl-devCopy3. The Python package manager pip software should already be installed. You can check if pip is installed by entering the following command.
pip --versionCopyIf pip is installed, you should get a response like the one below.
pi@gusdevpi:~ $ pip --version
pip 23.0.1 from /usr/lib/python3/dist-packages/pip (python 3.11)Copy
If pip is not installed, you will see an error message. To install pip, run the command below.
sudo apt install python3-pip -yCopy4. Due to the requirements of MotionEye, you will need to update the settings to allow Python packages to be installed outside a virtual environment when using pip. You can read more about the pip external environment changes.
The command below will allow these packages to be installed without encountering the “Externally Managed Environment” error. Also, the command below will make the change systemwide as motionEye requires it.
sudo python3 -m pip config set global.break-system-packages trueCopy5. Prepare MotionEye for installation by running the following Python command.
sudo python3 -m pip install --pre motioneyeCopyYou will see warnings about not using a virtual environment. You can safely ignore these warnings. If you see an error about mismatching hashes, run sudo apt update and sudo apt upgrade and try running the command again.
6. The installation process will take a while.
Once done, enter the following command to install and start MotionEye.
sudo motioneye_initCopy7. You can now check to see if motionEye successfully started by running the following command.
systemctl status motioneyeCopyYou should see some output indicating the service is active and running without errors.
8. Now get the IP of the Raspberry Pi so you can access the web interface of motionEye. To do this, use the hostname command.
hostname -ICopyConfiguring MotionEye on the Raspberry Pi
Now we are ready to configure the software and connect to our cameras. We will need to communicate to the Raspberry Pi over the network rather than directly as I have done in most of the previous tutorials.
Logging into motionEye
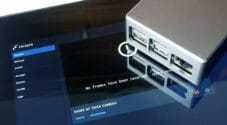
1. First, we will need the IP of the Raspberry Pi. Once you have the IP, enter it into your favorite web browser. You will need to use the port 8765.
For example, I access my instance using the following IP.
http://192.168.0.16:8765/Copy2. You should be greeted with a login page. The username is admin, and the password is blank. The password should be updated once you have logged into the admin.
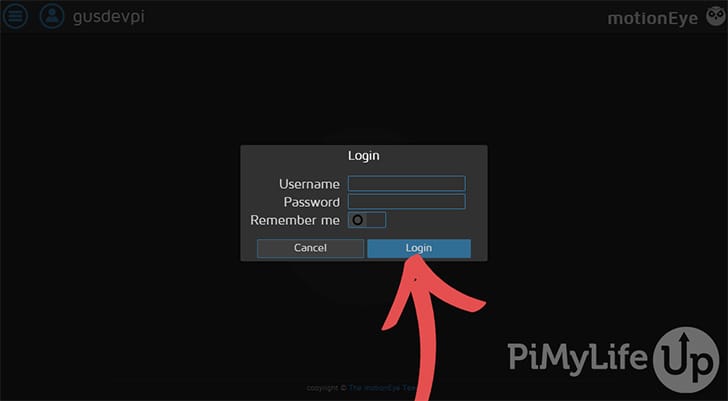
3. Once logged in, you can access all the settings for the camera streams. If you want to alter these settings, keep reading, and I will explain them as much as possible below. Now, we should have a working security hub that we can configure.
How to Set Up Multiple Network Security Cameras
In this section, we go through how to set up multiple cameras within motionEye. You can view all the camera feeds within a single web interface.
You can even add a stream that has been set up using the Raspberry Pi Webcam server tutorial.
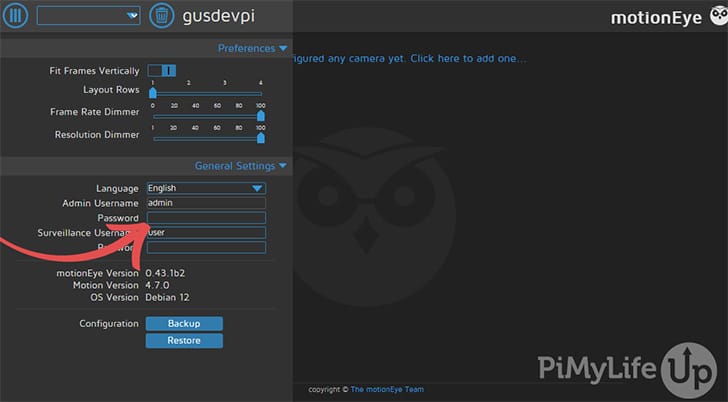
1. First, click on the three vertical lines in the upper left-hand corner.
2. Under the general settings tab, you can update the password to something more secure. Once you update the password, you will need to log in again with the new details.
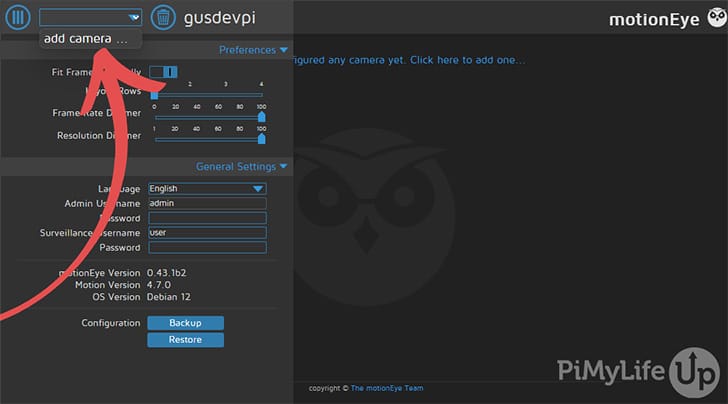
3. Click the three lines in the top left-hand corner of the screen to open the settings.
Next, in the top left-hand corner, click the drop-down box and select “add camera“.
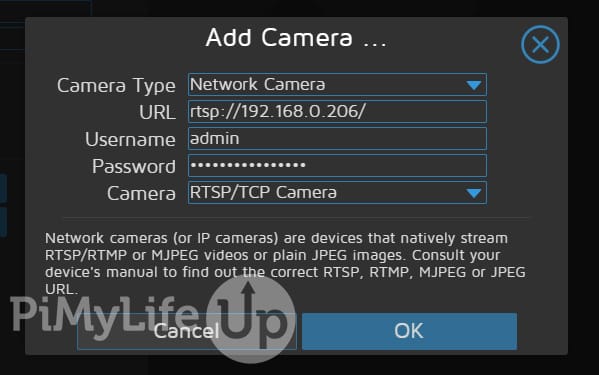
4. In the pop-up, you have five settings to configure.
- Camera Type: This allows you to select the camera type you wish to connect.
- URL: This is the URL to the other network camera. E.g.
http://othercamera:8080 - Username: This is the username of the camera device. If no username/password is required, then leave the fields blank.
- Password: This is the password for the username chosen above.
- Camera: Select the camera you wish to add.
Below is an example of adding a Reolink network camera with RTSP enabled.
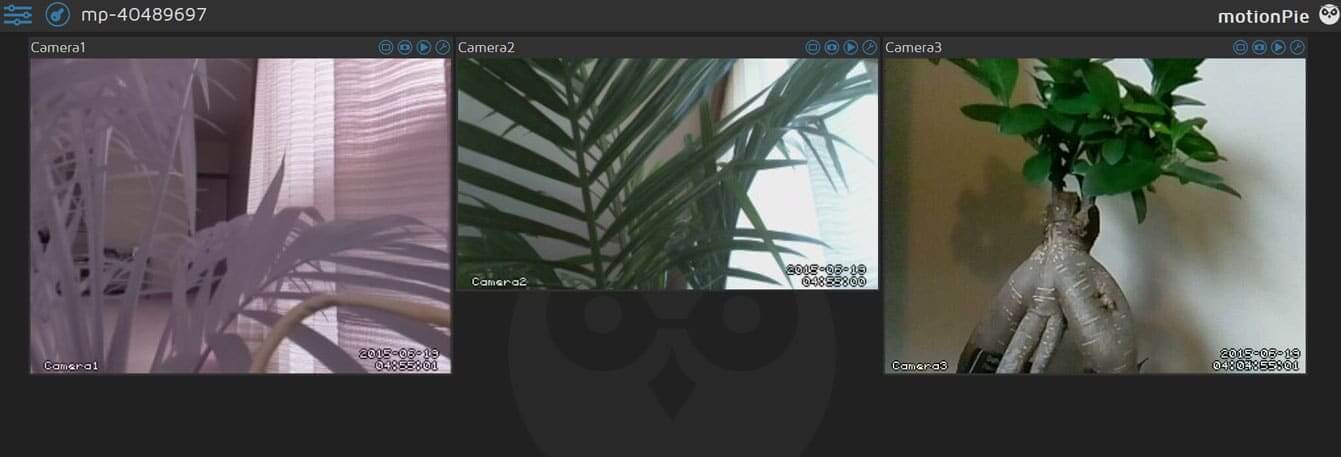
In the example below, camera1 (Pi Camera) and camera2 (USB WebCam) are connected to the Raspberry Pi running MotionEye. At the same time, camera3 comes from a different Raspberry Pi set up using our webcam server tutorial.
This method is great for setting up a strong Raspberry Pi security camera network.
Configuring the Settings in MotionEye
You can configure a vast range of settings within MotionEye. I will briefly go through them in this section.
General Settings
You can set the administrator username and password in the general settings tab. This account will have access to all the settings you see at the moment.
A surveillance username and password can be set in here. This can be used to access the camera interface.
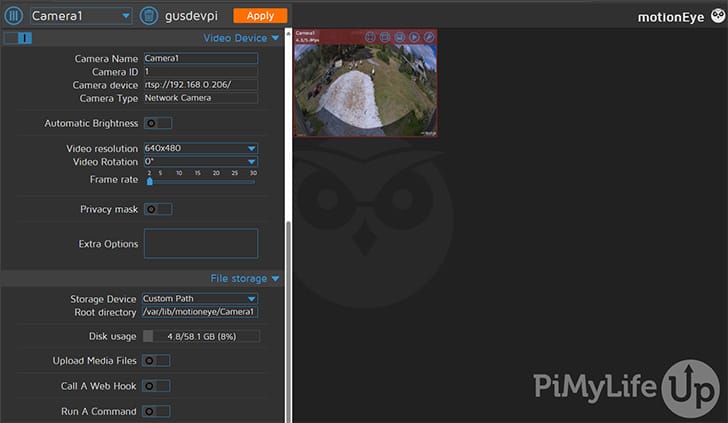
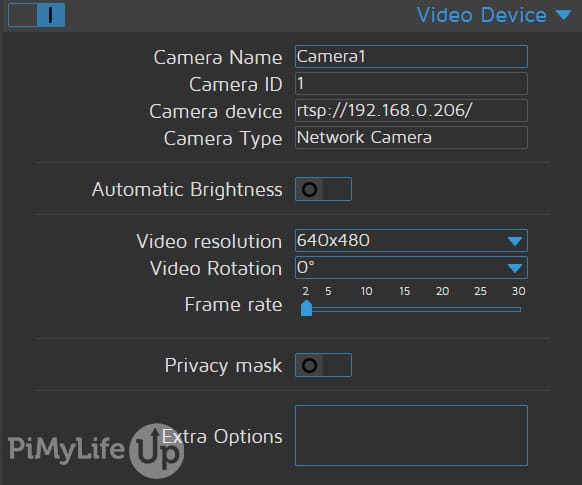
Video Device
Under this menu, you are able to set certain settings regarding the cameras.
- Camera Name: Set this to whatever you want the camera to be named. For example, the name kitchen would work well for a camera in a kitchen.
- Camera Device: You’re unable to edit this one, but this is the device name of the camera.
- Automatic Brightness: This will enable automatic software brightness, which means the software will adjust for the brightness. You do not need to activate this if your camera already handles it. In here, you change the brightness, contrast, and saturation of the camera’s video.
- Video Resolution: Here, you can set the camera’s video resolution. The higher the resolution, the more room it will take up and the more bandwidth it will need to use to stream the footage. I set mine to 1280×800, and that seems to work perfectly fine.
- Video Rotation: You can rotate your video if it faces the wrong way.
- Frame Rate: This sets the number of frames that will be sent every second. The higher this is, the smoother the video, but again, this will increase the storage and bandwidth used.
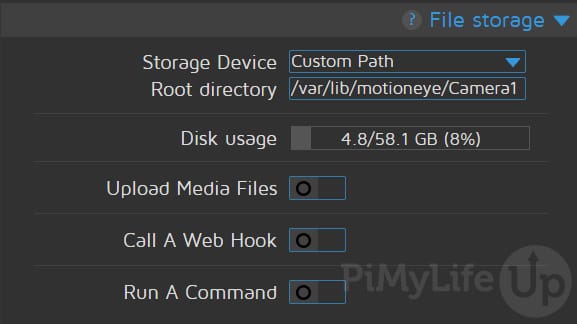
File Storage
Under this menu, you can specify where you would like the files stored for the Raspberry Pi security camera network.
This location can be a custom path on the Pi, the predetermined path, or the network path.
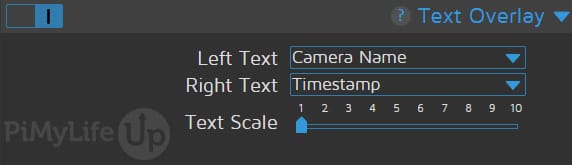
Text Overlay
Within the text overlay tab, you can set the text overlay on the camera’s output.
By default, the left text displays the camera name, and the right text displays the time stamp (Today’s date and current time).
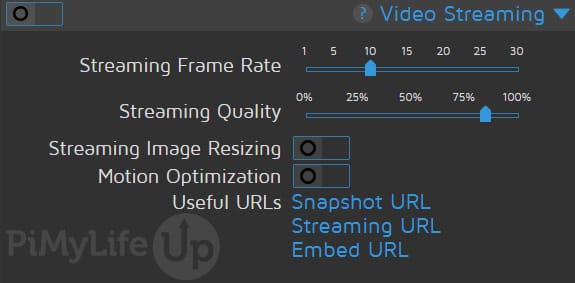
Video Streaming
In this menu, you can set the video streaming options. This is the video stream you see in the browser.
- Streaming Frame Rate: This is the same as mentioned above under video device.
- Streaming Quality: This setting is good to reduce if you need to access the camera on a low bandwidth device often.
- Streaming Image Resizing: Enable this if you want MotionEye to resize the images before sending them to a browser.
- Streaming Port: This is the port that the device will listen to for connections looking to view the stream. Eg.
http://192.168.0.16:8081 - Authentication mode
- Motion Optimization: This will reduce the frame rate whenever no motion is detected. This setting will save you bandwidth.
You can also see three URLs that can be used to access different footage.
These URLs are very important if you have multiple cameras per Pi as each camera will have a unique port that you listen to the stream.
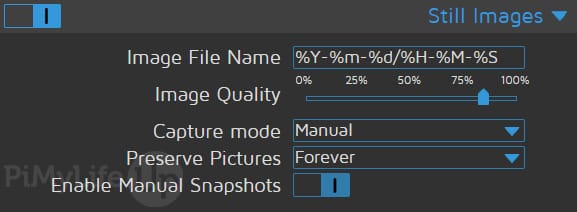
Still Images
In this tab, you can set the Raspberry Pi security camera network to take still images whenever motion is triggered, during specific intervals, or all the time.
Movies
Within this section, you can set the software to record movies whenever motion is detected. There are several settings you can change, such as the movie quality, file name, and more.

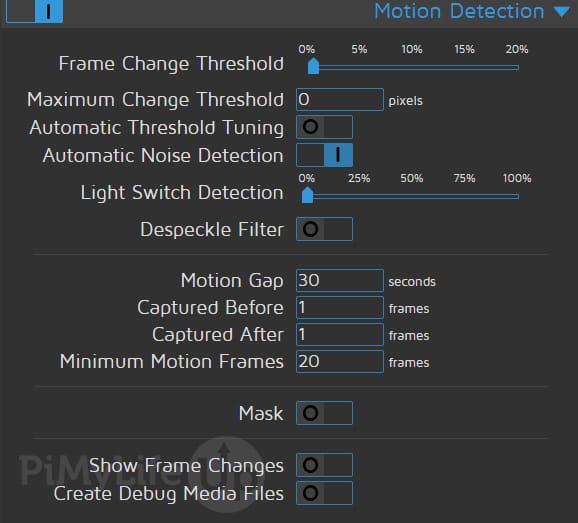
Motion Detection
In here, you can activate the security camera motion detection that is included in the software.
You can make adjustments to the settings here to get better motion detection.
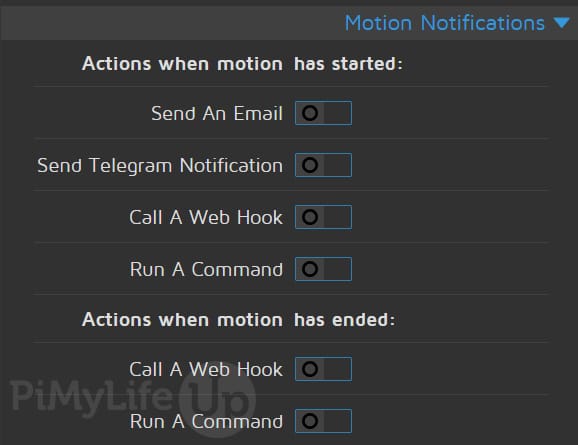
Motion Notifications
You can set up email notifications, webhook notifications, or even run a command whenever motion is detected.
This option will notify you whenever activity is detected on the cameras, perfect if they are monitoring areas with low traffic.
Working Schedule
Here, you can set the days and the hours of operation you would like the system to be monitoring (If you leave this off, then it is 24/7).
This option is perfect if you only need it running during specific hours.

Connecting to the Surveillance Outside Your Network
Now that you have your Raspberry Pi security cameras set up it might be worth considering allowing access to the central Pi so you can monitor your cameras elsewhere.
To do this, head over to our guide on how to set up port forwarding and dynamic DNS. You can find the guide at Raspberry Pi Dynamic DNS & Port Forwarding.
You will need some important information to set up the port forwarding.
- The IP of your Raspberry Pi. For example, mine is
192.168.0.16 - The internal port is
8765.
Ensure you also have set up passwords on both the admin and the surveillance user to help avoid unwanted visitors.
Once set up, you should now be able to connect using your external IP address such as XXX.XXX.XXX.XXX:8765.
Summary
The Raspberry Pi security camera system is a great way to have multiple cameras hooked up locally and over a network.
All the extra settings MotionEye provides allow you to have a strong functioning security hub for your home, office, or wherever you are setting this up.
I hope this tutorial has helped you in creating a fantastic Raspberry Pi security camera network.
If you have had any problems, want to provide feedback, or have a great setup you would like to share, please feel free to comment below.
If you’re after more great Raspberry Pi projects, check out many other great tutorials.

I have a Pi3 with the Pi NoIR Camera V2. When I load everything up and fire it on – I get a gray image with the nasty message “Unable to open video device”. Any clues?
If this happened to me, here are the things I would try, in order (I understand that you may not have all the hardware to do some of these things):
1. Check the physical connections. Remove the cable and put it back in. Make sure that the cable is connected correctly. Look at pictures on the web of how others connected it.
2. Try other programs that access the camera. If I recall correctly, there is a simple command that will retrieve a single still image from the camera.
3. Reformat and re-flash the MicroSD storage unit with a fresh copy of the latest version of Raspbian and try to grab an image from the camera.
4. Try a different camera in the RPi.
4. Try the camera in a different RPi.
Thanks for sharing this setup, works as you have stated except for one issue I had. Windows 10 would not show it under Network, and my router did not list it as a device. I had to boot motionPie with a monitor attached to get the name of the device and ip address. Once that was done it worked like a charm. Thanks so much.
Thanks for the tutorial!
Is there a way to turn the camera off when it is not in use?
It seems to stay on even though I have set up the Working Schedule.
I getting this error whenever I attempt to connect via my browser:
{“error”: “internal server error”}
I’ve tried both with and without specifying a port.
I tried connecting via IP and name as shown using my Netgear network map. I then tired making a SSH connection via Putty and that failed.
Well, when I changed powering the raspi from two GPIO pins to the micro USB all started working. I’d been using the GPIO pins (RasPi model B, old 512 MB jobbie) for some time to ease connections with a 5 volt PS) but never with the camera. I read someplace the camera uses some GPIO pins and this must cause some conflict so back to microUSB.
Rick
Pardon my ignorance, is it correct to assume each camera needs to have its own Pi board?
Is it possible to connect two USB cams and create each of them as an IP cam with different IPs over a single ethernet line ?
Hey – GREAT tutorial. Thanks for putting this together. I am having an issue regarding Networking. I have a Raspberry Pi 3b using the latest build of MotionPie (from 20160605) and I cannot get this to work over wi-fi.
Plugged directly into the router, I can access the admin page and even followed directions to setup the wireless network. I then shut down the Pi and removed the Ethernet cable. I cannot access the camera from the IP in a browser, like I could when it was plugged in to the Ethernet Cable.
Any clue what I’m doing wrong? Thanks for your help.
Can I access it anywhere on internet as I needed to surveillance my villa in another place so I’m thinking to buy a pi zero and put a USB camera along it to surveillance my place.so my query was to can I look through internet to my camera
Hi again, thank you very much for this awesome tool. I have been having some flickering issues since the last update (20160410) which were not present before. I have 2 USB cameras hooked up and have tried experimenting with different resolutions, motion optimization etc but the flickering does not go away. It is intermittent but I do have some captures of when it happens that I can send over email/post to a fileshare. Any known issues around this or recommendations?
When I boot with motionpi (and only motionpi is on the card) on a PI3, it loads and stops after here:
# Defaultr gateway is 192.xxx.x.x (I put the x’s there)
# DNS server address is 75.75.75.75
at this point:
Welcome to meye-2b5ac9b0!
meye-2b5ac9b0 login:
Password:
Any idea what is going on ? Thanks
I have read the wiki, watched every tutorial, asked many folks for the solution and their answers are either technically over my head, or I’m an idiot and just don’t understand what they’re trying to say. Can someone please explain to me in terms an idiot would understand, the solution to the login and password question I posted above ? Thanks.
Hi. I’m trying to set up this project but the Pi will not boot once the SD card is installed. Can you give me any ideas what I might be doing wrong?
reading through al the posts, I got a bit confused. so I would like to confirm a few this.
the motion PI software, = will it record anything that changes within it view of vision, and save it to a mounted storage location. in a format that is easy viewable.
can you set up the software so that it it onlys saves a limited amouth of recorded time.
and lastly, can you use any type of Cam feed ?
Hi,
First thanks a ton for this project. Its really very detailed blog guiding all the steps and also the features are just fantastic. I had this up and running in no time.
I would need help in couple of settings which am facing issue with
a. I am using a r-pi and using a wifi dongle along with it. I entered the SSID and PWD in the web and saved/rebooted but when i remove the ethernet the motioneye is not getting detected on browser ( am sure there is no change in ip after the reboot ). Is there a way to test or check if the wifi is connected or not like we do in rasbian using UI ? Or any other backend way of setting the wifi ?
a2. Is there a way we can start this off with directly connecting to WIfi than with ethernet ? I want to be using this with 4g dongle in remote locations than using ethernet. Any pointers on how to do it ?
b. Can someone guide me on how to set it up to be running over on internet and how to define the access.
Thanks a lot for the answers.
-Shiv
hello sir i am facing trouble with login? Can anyone help me to solve this problem….
Hi, I have a raspberry Pi 2 with version 20160320, I use the image “motioneyeos-raspberrypi2-20160320.img.gz”
I have 2 usb webcam and camera raspberry. 3 cameras work well until active the option “Advanced Settings”.
As active this option the camera raspberry “unable to open video device”
I can not fix it, until I return to record the image in the SD.
Regards!
Is it possible for MotionPi, say with a 32GB micro SD card, to have the RPI constantly recording and looping video back in itself, kind of like a dash cam?
Hello,
Thanks for the tutorial, I love the way you build the tutorials (youtube videos especially). My question is if it is possible to have motionpie installed inside a raspbian? This was I can you the raspberry pi for other project at the same time.
Thanks
Hello,
The tutorial was great! I only had one issue, the time and date stamp overlaid on the video is incorrect. It shows a date starting at the year 2000 and the wrong time. In the Expert Settings it is set to the default which is HTTP and the host is google.com
If anybody has some advice it would be greatly appreciated!
Hi! your tutorial is a 10 out of 10. I have some problems tho… i cant reach the files through the local network. i looked at the network page on my pc but i didnt see the pi in it. I have a Raspberry Pi 3.
Hi, I was curious to know if you were planning on having a RPi3 version out at any point in the near future. I tried to run this on an RPi3 and unfortunately, it looks like the current version is not compatible.
Hi Joel,
I have updated the tutorial to point to the new version of MotionPie OS (Now called motioneyeos), You can find it here (Scroll down and find the Raspberry Pi image, it’s roughly 50mb) > https://github.com/ccrisan/motioneyeos/releases
Thanks so much for getting back to me so soon Gus! and thank you also for this awesome solution! Much appreciated.