In this tutorial, we will be showing you how to install Raspberry Pi OS to an SD card or USB drive.
Raspberry Pi OS is the official operating system for the Raspberry Pi series of hardware. They offer the best compatibility for these small computers and are actively maintained by the foundation.
While other operating systems will work on your Pi such as Ubuntu. These other operating systems don’t offer the same level of compatibility as the official one. This is especially true around new hardware releases.
The best way to install any operating system for your Pi is to utilize the official Raspberry Pi Imager.
Thanks to the Raspberry Pi Imager, installing an operating system is an incredibly simple. You can even use this tool to create your user, set up SSH, and enter your Wi-Fi details.
Best of all this tool is incredibly easy to utilize. Over the following section we will show you where to find the latest version of Raspberry Pi OS to install and the imager tool.
Equipment
Below is a list of the equipment we used when installing Raspberry Pi OS to our Pi.
Recommended
Optional
- Raspberry Pi Case Amazon
- USB Drive Amazon
- USB Keyboard Amazon
- USB Mouse Amazon
- HDMI Cable Amazon
- Monitor Amazon
- Network Connection Amazon
This tutorial was tested on a Raspberry Pi 400 and a Raspberry Pi 5 with the latest version of Raspberry Pi OS Bookworm.
Installing Raspberry Pi OS to your Pi
Over the following steps, we will show you how to use the Raspberry Pi Imager to install an operating system for your Raspberry Pi.
The Imager is the best tool for installing any OS for the Pi as it handles everything for you. Best of all it also supports the major three operating systems.
You can follow this tutorial on Windows, macOS, Ubuntu or even your Raspberry Pi. All you need before you continue is either an SD Card and a reader, or alternatively a USB drive. Newer Pi’s can boot from a USB rather than the SD Card.
Installing Raspberry Pi Imager
1. You must first download and install the Raspberry Pi Imager to your operating system.
To do this, you will want to head to the official software page in your favourite web browser.
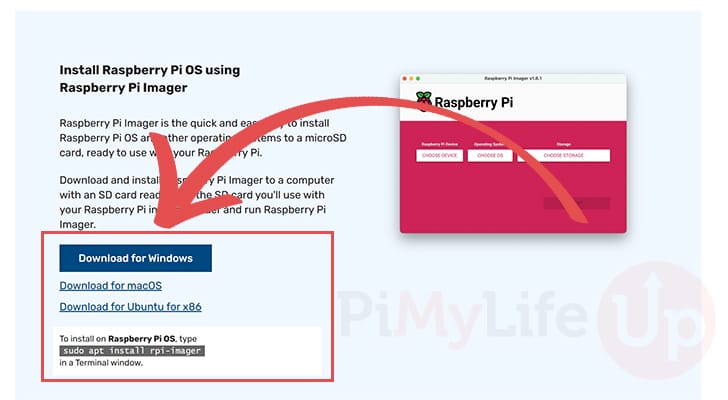
https://www.raspberrypi.com/software/2. Once you are on the software page, scroll down until you see the heading “Install Raspberry Pi OS using Raspberry Pi Image“.
You should see a list of links, click the one relevant to the operating system you are currently running.
3. After downloading the installer, follow the prompts to install the software to your device.
We won’t be covering these steps here as they are relatively simple and are different for the three major operating systems.
Using Pi Imager to Install your Raspberry Pi OS
4. After installing Imager to your device, let us walk you through the process of using it to install an operating system for your Raspberry Pi.
At this point, you will want the SD Card or USB device you want to write the operating system to be plugged in to your computer.
Selecting your Raspberry Pi
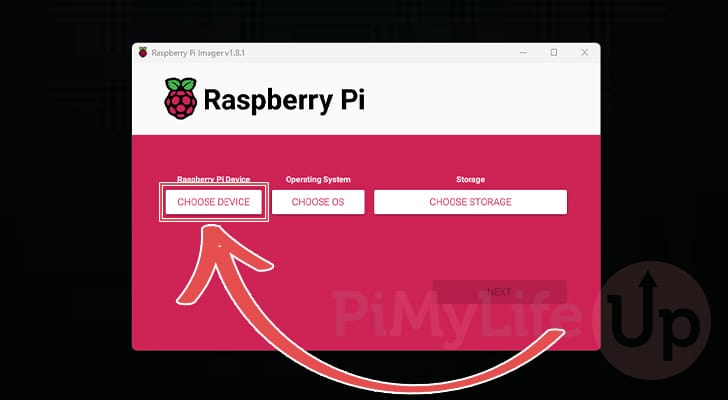
5. The first thing you will want to do is select the Raspberry Pi you want to download and install the operating system. While doing this is optional it ensures the software will only offer you compatible operating systems.
To start this process, click the “CHOOSE DEVICE” button.
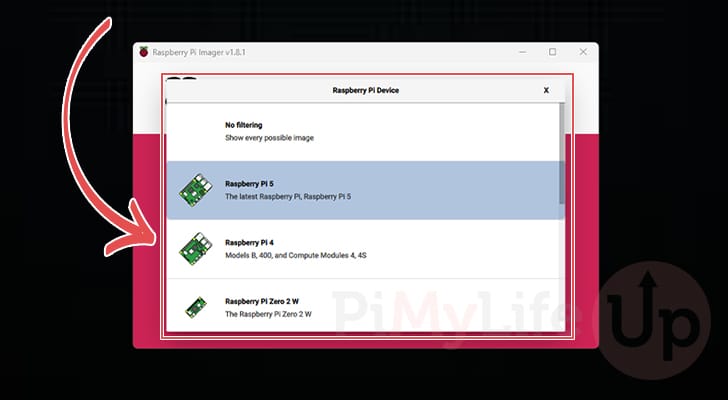
6. You will now see a list of the Raspberry Pi’s. Click the Pi that you want to install an operating system for.
In this example, we will be selecting the Raspberry Pi 5.
Selecting the OS to Install to the Raspberry Pi
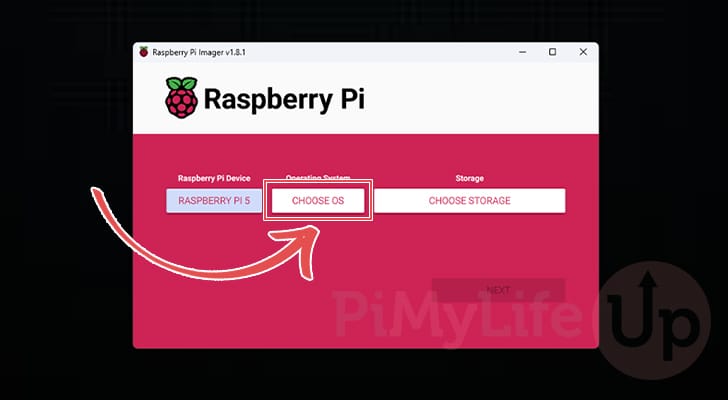
7. After selecting the Raspberry Pi you are using, the next step is to select the OS you want to download and install.
To begin the selection process, click the “CHOOSE OS” button.
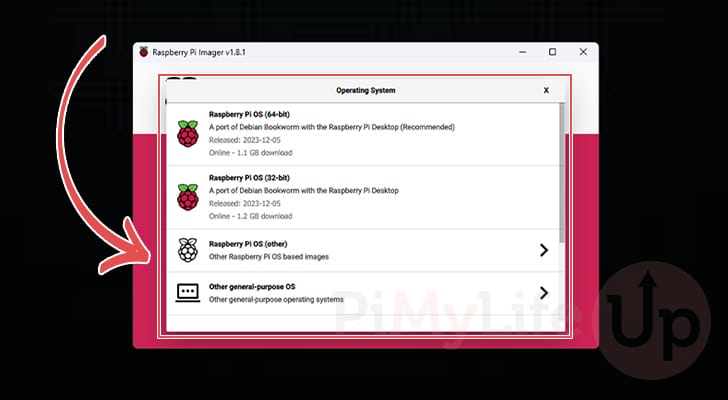
8. The recommended OS to install to your Raspberry Pi will be at the top of this list. For modern Pi’s the OS you will likely want to install is Raspberry Pi OS (64-bit).
This tool offers you other operating systems you can install such as Ubuntu, OSMC and more. But for our guide we will be sticking with the official operating system.
Choosing the Storage Location to Install to
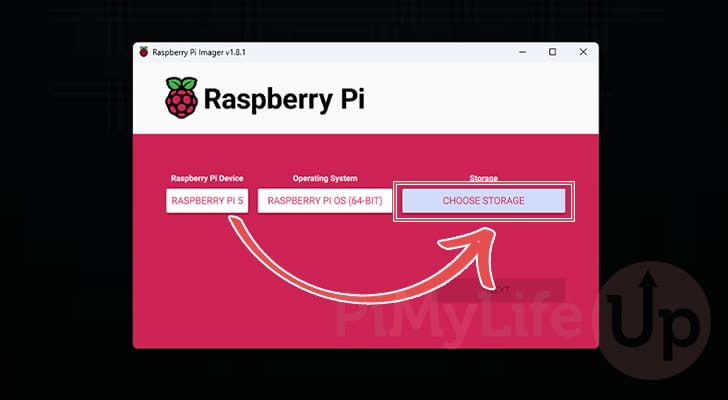
9. After selecting an operating system, you must now choose where you want this Raspberry Pi OS installed to.
To select the storage location, click the “CHOOSE STORAGE” button.
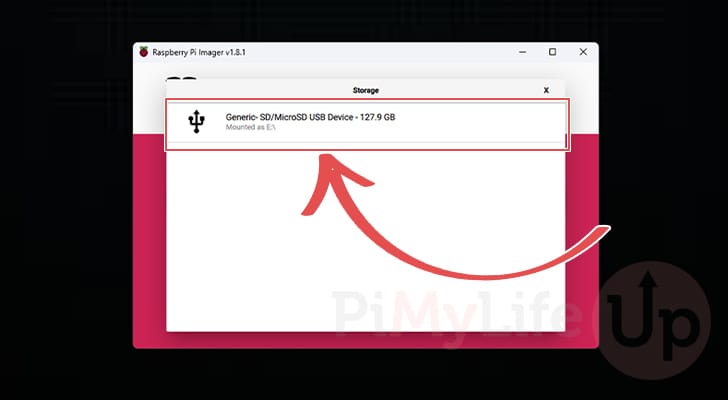
10. You should now see a list of available storage devices to which you can write the operating system.
Click the storage device you plan on using on your Raspberry Pi.
Start Installing Raspberry Pi OS
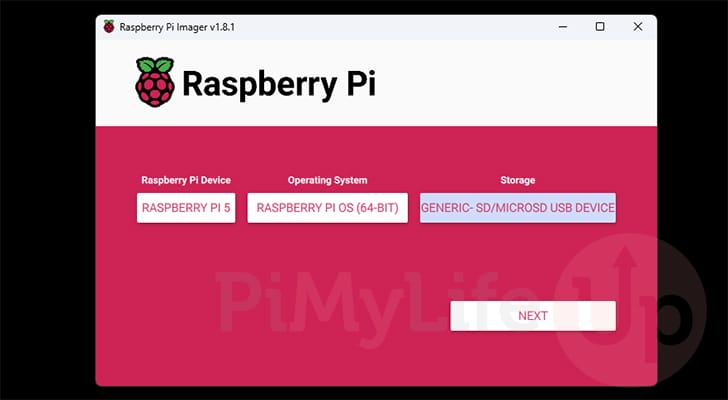
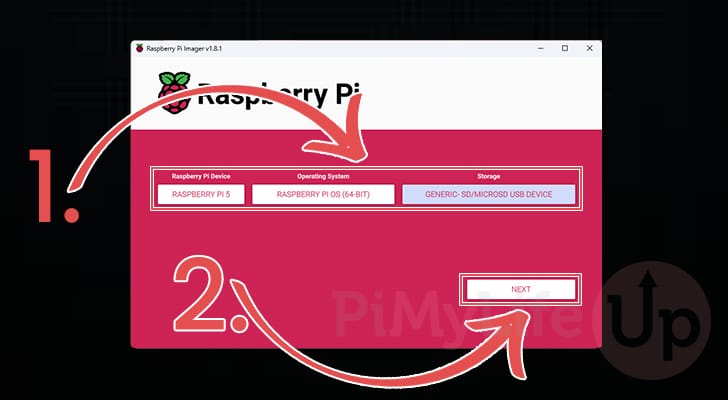
11. You should now have all three settings configured within Raspberry Pi Imager (1.).
If you are happy with your settings and want to install Raspberry Pi OS, click the “NEXT” button (2.).
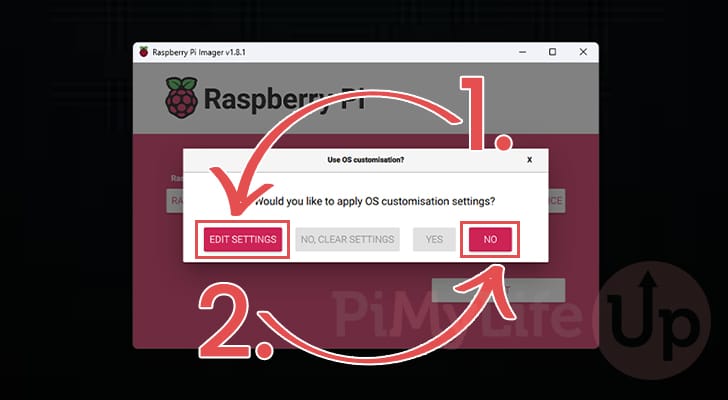
12. If the OS you install to your Raspberry Pi supports customization you will get a message asking if you want to apply changes.
To customize the OS, click the “EDIT SETTINGS” button (1.). This will allow you to set up your user, SSH and even your Wi-Fi settings. We recommend most people choose this option as it makes the initial setup experience of Raspberry Pi OS very easy.
If you want to avoid customizing the OS, click the “NO” button (2.) and skip to step 16.
Configuring your Raspberry Pi OS Installation
13. The ability to customize your Raspberry Pi OS install before you run it is a key feature of the Pi Imager.
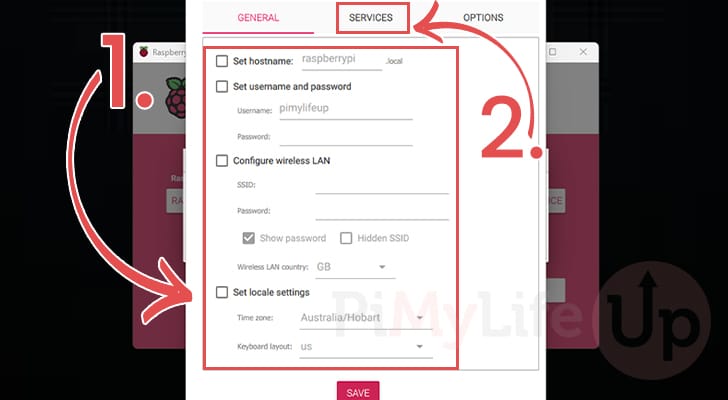
The first tab you are introduced to has settings to create the user, configure wireless and set your locale settings (1.). We recommend at least setting your user as well as your Wi-Fi details.
After configuring everything on this screen, swap over to the “SERVICES” tab (2.)
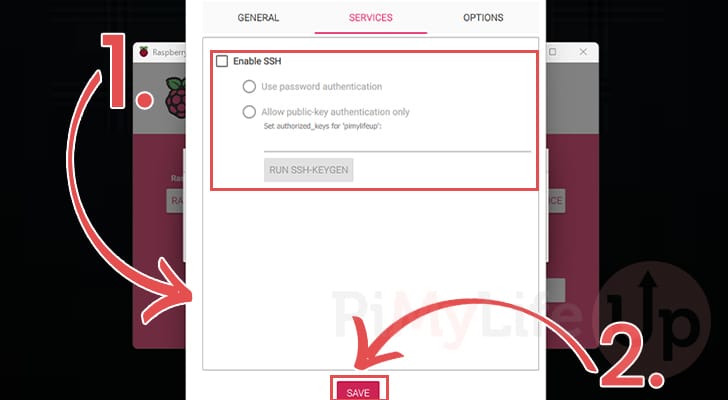
14. On this screen you can enable SSH on your Raspberry Pi (1.). We highly recommend using this option if you are running a headless Raspberry Pi.
If you enable SSH you must set your username and password in the previous tab.
After enabling SSH you can close and save by clicking the “SAVE” button (2.)
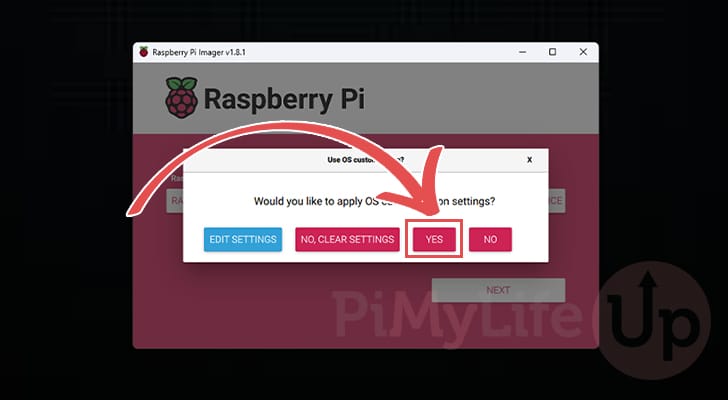
15. You will again be asked if you want to apply OS customization settings.
To proceed with installing Raspberry Pi OS, click the “YES” button.
Writing the OS to your Storage Device
16. Before the imager will install Raspberry Pi OS, you will be prompted that the data on your storage device will be erased during the writing process.
If you are fine with this, click the “YES” button.

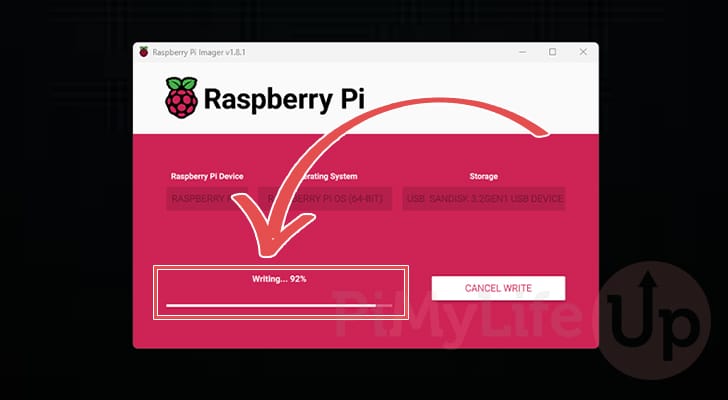
17. The Raspberry Pi Imager will install your chosen OS to the SD card or USB storage device.
During the writing step the tool will also be downloading the operating system itself, so it can feel like its taking longer than it should.
18. After the OS is installed to your storage device, the Raspberry Pi Imager will verify the device’s contents.
This is a crucial step that helps prevent you from running a corrupted operating system on your Pi.

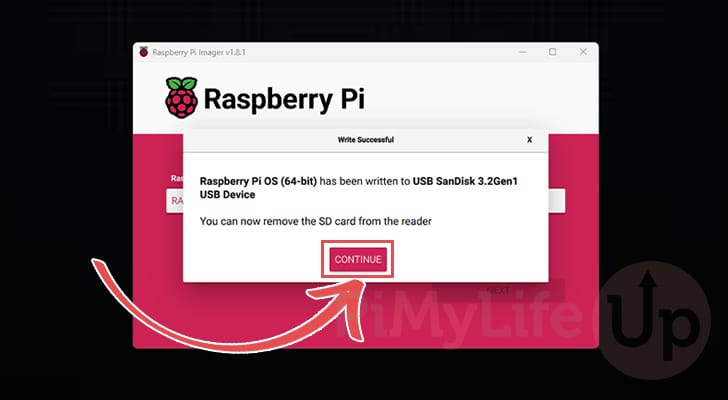
19. You have successfully installed Raspberry Pi OS on a storage device.
Now go and plug your SD Card or USB into your Raspberry Pi and power it on. It should detect the new operating system and launch using it.
Conclusion
Over the previous steps we have shown you how to install an OS to your Raspberry Pi.
Thanks to the Pi Imager tool, this process is incredibly straightforward and fair easier than it used to be in the early days of the Raspberry Pi.
Please feel free to leave a comment below if you have any questions about how you can install an OS to your Raspberry Pi.
After installing an operating system, we highly recommend exploring our many Raspberry Pi projects. You will be surprised with how much you can do with this tiny computer.