This tutorial will show how you can set up and run a Python Flask web application on the Raspberry Pi.
Flask is a web framework that enables you to write and run a web application using Python.
This framework is a great way to add a web interface to your Python scripts. For example, if you have a Raspberry Pi reading data from a temperature sensor, you can print that value straight to a web page.
If you are familiar with Python, developing a web app on your Raspberry Pi will be a pretty simple process. Flask is a really easy framework to get started with, and it allows you to define new routes with just a couple of lines of code.
We won’t be diving too deep into how to program with the Flask framework on your Raspberry Pi, but we will show and explain a simple hello world script and how you can host it using Apache.
If you are deciding between the Flask and Django frameworks, you will find that Flask is lighter, but you will have to basically write any extra functionality yourself. Django includes a huge amount of extra code that speeds up the development process.


Equipment
Below is a list of equipment we used when setting up Flask on our Raspberry Pi.
Recommended
Optional
This tutorial was last tested on a Raspberry Pi 5, running the latest version of Raspberry Pi OS bookworm.
Setting up a Python Flask Web App on your Raspberry Pi
In the following steps, we will show you how to install a Python-based Flask web app on your Raspberry Pi. You will learn how to easily install the required Python modules and write your own simple web application.
We won’t go too deep into how to use Flask; instead, we should give you just enough information to get started. If you would like us to expand this further in a new tutorial, feel free to drop a comment below.
Preparing your Pi
1. Before we can set up a Python Flask web app on our Raspberry Pi, we will need to ensure our operating system is up to date.
You can update your Pi’s package list cache and upgrade any out-of-date packages using the following two commands.
sudo apt update
sudo apt upgrade -yCopy
2. Once the package list cache is updated, we can install Python and Flask to your Raspberry Pi by running the following command.
We install Flask this way to avoid the extra hassle of dealing with using pip on newer versions of the Pi OS.
sudo apt install python3 python3-flaskCopyWriting your First Python Flask Web Application
3. Let us start this process by creating a directory to store our simple Flask Web application on our Raspberry Pi.
We can use the mkdir command to create a directory within the “/opt/” folder called “flaskapp“.
sudo mkdir -p /opt/flaskapp/Copy4. Now that you have the Flask Python library installed on your Raspberry Pi, we can move on to writing your first Python-powered web application.
You can begin writing a script called “app.py” by running the following command.
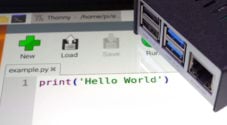
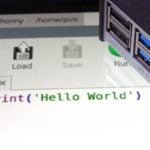
sudo nano /opt/flaskapp/app.pyCopy5. Now within this file, you will want to enter the following lines of Python. We will explain what each part of this code does so you can learn how to adjust it to suit your needs.
One thing to remember when programming with Python is that indentation is super important.
Explaining the Example Code
a. At the top of this script, we import the Flask library that installed on our Raspberry Pi earlier. This library is what will handle displaying HTML and handling routes.
Once we have imported the Flask library, we will instantiate the library in the “app” variable. This variable is how
from flask import Flask

app = Flask(__name__)Copy
b. Our next step is to define our first Flask route and the function that will be executed on that specific route.
A route is defined using “@app.route()” immediately before the function that is executed on this route. Within the parenthesis (( )), you specify the path this route will listen on. For this first example, we are using “/” so that this route will be executed when someone hits the index of your website, for example “http://pimylifeup.com/“.
After a route is defined, you need to define the function that will be executed on it. In this case we are creating a simple function called “index“.
Any text that is returned by this function will be displayed to the end user.
@app.route('/')
def index():
    return 'Hello world'Copy
c. After defining all your Flask routes, you will want to end the script with a call that will start up the Flask web server on your Raspberry Pi.
This call first checks to ensure that your Python script has been executed directly and not imported. This ensures you don’t run the internal web server when using something like Apache to handle your connections.
We then use the “app” variable we created at the start of the script and use Flask’s “run()” function to start up the web server. Here, we set “debug” to True so that it outputs additional information. We then set the host to “0.0.0.0” to bind the web server to all available addresses.
if __name__ == '__main__':
    app.run(debug=True, host='0.0.0.0')Copy
The Final Version of the Flask Example Code
6. Once you have finished writing out all the lines of code, your file should end up looking like what we have shown below.
from flask import Flask

app = Flask(__name__)

@app.route('/')
def index():
    return 'Hello world'

if __name__ == '__main__':
    app.run(debug=True, host='0.0.0.0')Copy
7. After you have finished with this file, you can save and quit by pressing CTRL + X, Y, and then ENTER.
Testing your new Python Flask Web App
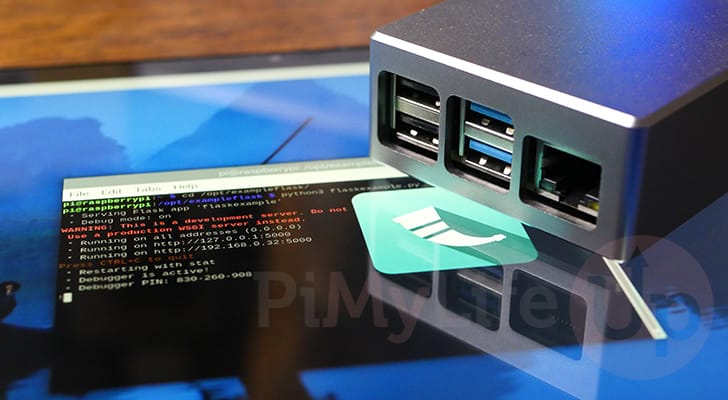
8. To start up our example Flask web application on your Raspberry Pi, run the following command in the terminal.
sudo python3 /opt/flaskapp/app.pyCopyYou will see some text appear within the terminal stating that the server has started and that debug mode is active. It will also tell you the IP addresses your server is currently running on.
 * Serving Flask app 'flaskexample'
 * Debug mode: on
WARNING: This is a development server. Do not use it in a production deployment. Use a production WSGI server instead.
 * Running on all addresses (0.0.0.0)
 * Running on http://127.0.0.1:5000
 * Running on http://192.168.0.32:5000
Press CTRL+C to quit
 * Restarting with stat
 * Debugger is active!
 * Debugger PIN: 114-446-032
9. Now, in your favorite web browser, go to the following address. Ensure that you replace “<IPADDRESS>” with the IP of your Raspberry Pi.
http://<IPADDRESS>:5000/10. You should now be greeted by a very simple screen that says, “Hello World“. At this point you have successfully written and started your very first Flask web app on your Raspberry Pi.
Hello WorldUsing Apache to Run your Python Flask Web App on the Raspberry Pi
While Flask does include its own web server, using this in actual production isn’t recommended. It’s mainly included to help with developing your web app. Luckily, setting up Apache to server your Flask web app on your Raspberry Pi isn’t super complicated.
This section will quickly walk you through the steps for running our previous example script through the Apache web server.
If you are using this for your own web app, the main thing you will need to do is update the “/opt/flaskapp” directory to the location where you are storing your web app.
Install the Required Modules
1. Before we can proceed any further, you must install the Apache web server.
You can follow our quick and easy guide to install Apache on to your Raspberry Pi.
https://pimylifeup.com/raspberry-pi-apache/2. After installing Apache, your next step is to install the mod wsgi library for Apache and Python 3. This is the core library that will allow us to run our Flask web app from our Raspberry Pi.
You can install this required by module by running the command below within the terminal.
sudo apt install libapache2-mod-wsgi-py3CopyWriting a WSGI app for your Flask App
4. With all the pieces in place, you must create a super simple “wsgi” file. This file is basically just a bit of Python that is used to start up your Flask web app.
You can begin writing this file by running the following command in the terminal.
sudo nano /opt/flaskapp/app.wsgiCopy5. Within this file, you will want to enter the following lines. The two key things here are the path to where our Flask web app is stored, and the module that we are importing.
import sys
sys.path.insert(0,'/opt/flaskapp')

from app import app as applicationCopy
6. Once you have filled out this file, you can save and quit by pressing CTRL + X, Y, and then ENTER.
Modifying the Apache Virtual Host to Run your Flask App on the Raspberry Pi
7. Your next step is to modify an Apache virtual host so that it will run your Flask app every time someone hits your Apache web server.
For this example, we will be modifying the default configuration file by using the command below.
sudo nano /etc/apache2/sites-enabled/000-default.conf8. Within this example, scroll down until you see the closing tag for the virtual host. You will want to add your new lines above this one.
</VirtualHost>Copy9. Above the virtual host line, you will want to add the following lines. These lines tell Apache how it should handle your Flask app and the “.wsgi” file we created earlier that it should run.
WSGIDaemonProcess app user=www-data group=www-data threads=4
WSGIScriptAlias / /opt/flaskapp/app.wsgi

<Directory /opt/flaskapp>
    WSGIProcessGroup app
    WSGIApplicationGroup %{GLOBAL}
    Require all granted
</Directory>Copy
10. Once you have finished filling out this file, save and quit by pressing CTRL + X, Y, and then ENTER.
11. Now, to get your Raspberry Pi’s Apache web server to start serving your Flask web app, you will want to use the command below.
This command will restart Apache so that it will load in your new configuration changes.
sudo systemctl restart apache2CopyTesting your Flask Web App is Reachable on your Raspberry Pi
12. Since Apache runs on port 80 by default, you should be able to see the results of your Flask web app by going straight to your Pi’s IP address.
http://<IPADDRESS>13. If you have been using our example script, then you should see the text “hello world” appear within the command line.
Hello WorldConclusion
Hopefully, at this point in the tutorial, you should hopefully have managed to set up a Flask web app on your Raspberry Pi.
Flask is a really easy-to-use, yet powerful mini framework. You can very quickly create a simple web application for your Python scripts.
Please feel free to leave a comment below if you have any questions about running a Flask app on your Pi.
If you liked this project, we highly recommend that you check out our many other Raspberry Pi projects.