This Raspberry Pi project, will show you how to install the open-source MQTT Server, Mosquitto.
MQTT stands for Message Queuing Telemetry Transport and is a network messaging protocol commonly used for messaging between IoT devices.
To get our Raspberry Pi to support the MQTT protocol, we will be using a server software called Mosquitto.
Mosquitto is a message broker that implements several versions of the MQTT protocol, including the latest 5.0 revision.
It is also a relatively lightweight software, making Mosquitto the perfect choice for dealing with the MQTT protocol on our Raspberry Pi.
The MQTT protocol works by having clients act as publishers and subscribers. The publishers send the messages through to a broker that serves as the middle man.
Subscribers connect to the MQTT broker and read messages that are being broadcast under a specific topic.
You can use MQTT for having multiple sensors to send their data to your Raspberry Pi’s MQTT broker, which client devices can then receive that data.
If you want to learn more about the MQTT protocol and why it is excellent for IoT devices such as the Raspberry Pi, be sure to check out the official MQTT website.
Equipment
Below you can view the list of equipment we used when installing the MQTT broker to our Raspberry Pi.
Recommended
Optional
We tested this tutorial on a Pi 400 running the latest version of Raspberry Pi OS Buster.
Installing Mosquitto to the Raspberry Pi
In this section, we will show you how to install the Mosquitto broker to your Raspberry Pi.
Before proceeding, it may be worth setting your Raspberry Pi up with a static IP address.
A static IP address provides you with an easy point of connection that should never change upon multiple reboots.
1. Before installing the MQTT broker to our Raspberry Pi, we need to update the operating system.
All we need to do to update the system is to run the following two commands.
sudo apt update
sudo apt upgradeCopy
2. Once the system has finished updating, we can now install the Mosquitto software.
Luckily for us, the Mosquitto MQTT broker is available as part of the Raspbian repository, so installing the software is simple.
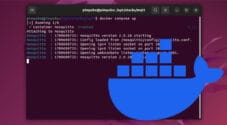
Run the following command to install Mosquitto alongside its client software.
sudo apt install mosquitto mosquitto-clientsCopyThe client software will allow us to interact with and test that our MQTT broker is running correctly on our Raspberry Pi.
During the installation process, the package manager will automatically configure the Mosquitto server to start on boot.
3. At this point, you will now have the Mosquitto MQTT broker up and running on your device.
You can verify that it is installed and running by using the command below.
sudo systemctl status mosquittoCopyThis command will return the status of the “mosquitto” service.
You should see the text “active (running)” if the service has started up properly.
Testing the Mosquitto Installation on the Raspberry Pi
Our next step will be to test that the service works as it should be and is now acting as an MQTT broker on our Raspberry Pi.
To do this, we will be making use of the Mosquitto client that we installed earlier in this guide.
For this section, you will need to open up two terminal sessions to your Raspberry Pi (Either locally or over SSH).
1. Our first task is to start up a subscriber. The subscriber is what will listen to our MQTT broker running on the Raspberry Pi.
We can use the Mosquitto client for subscribers that we installed earlier to do this.
In our example below, we connect to a localhost connection and wait for messages from the broker on the “mqtt/pimylifeup” topic.
mosquitto_sub -h localhost -t "mqtt/pimylifeup"CopyUsing the “-h” argument, you can specify the hostname you want to connect to. In our case, we are using the local MQTT broker that we installed on our Raspberry Pi.
Next, we use the “-t” argument to tell the Mosquitto subscriber what topic we should listen to from the MQTT broker.
For our example, we are listening to a topic called “mqtt/pimylifeup“.
2. Now that we have a client loaded up and listening for messages, let us try publishing one to it.
We need to use the MQTT publisher client that we installed on our Raspberry Pi earlier to publish a message to the topic.
Run the following command to publish the message “Hello World” to our localhost server under the “mqtt/pimylifeup” topic.
mosquitto_pub -h localhost -t "mqtt/pimylifeup" -m "Hello world"CopyTwo of the arguments are the same as the previous command, with “-h” specifying the server to connect to and “-t” specifying the topic to publish to.
The one additional argument that we are using here is the “-m” argument. This argument allows you to specify the message you want to send to the Raspberry Pi MQTT broker.
3. Back in the terminal session where you started the Mosquitto publisher, you should now see your message appear.
So if you were following our example, you should see the following text appear in the command line.
Hello worldConclusion
At this point, you should now have an MQTT server up and running on your Raspberry Pi.
We achieved this by making use of the free and open-source software called Mosquitto.
You will also have done a quick test to verify that everything is working as it is intended.
If you are using this alongside a firewall such as UFW, make sure that you open port 1883.
Please be sure to check out our other Raspberry Pi IoT projects and our other server ideas.
If you have run into any issues, feel free to leave a comment below.


I am having a tough time understanding what the topic is here, “ mqtt/pimylifeup”. Do we copy the exact topic you put there or is the topic unique to us? Or do we need to create the topic somehow?
Hi John,
The topic can be whatever you set it to. The topic is the way you sort MQTT messages. Typically you would name the topic relevant to what you are sending.
For example, if you wanted to track your living room temperature you might use the topic name “
LivingRoom/Temperature“. Then you would send and receive the temperature through that topic.You don’t have to manually create topics, they are automatically handled when you tell MQTT to subscribe to that particular topic. Additionally, MQTT topics are case sensitive, so “
livingRoom/Temperature” is different to “LivingRoom/Temperature“.Please let me know if you need this to be explained further.
Kind Regards,
Emmet
Great Mosquitto installation and test guide, thanks