In this tutorial, we will be showing you how to install and run the Heimdall application dashboard on your Raspberry Pi.
Heimdall is a software aimed at being a dashboard for all your web applications and is a perfect solution for your browser’s start page.
This web dashboard allows you to easily create what is essentially a bookmark for all your web applications, saving you from forgetting or losing them within your browser. It even allows you to set up a search bar to search straight from the dashboard easily.
Heimdall even has built-in name recognition for a huge range of web apps, meaning you will see icons and other fields populated automatically. For some applications, it will even show you additional information.
The Raspberry Pi is a perfect candidate for Heimdall as it is low-powered and is the perfect device to run many different web apps. Some examples of web apps you might use are PiHole, Plex, and PhotoPrism.
While you can install Heimdall by cloning the repository and setting up Apache/Nginx and PHP, we will instead by using Docker. Docker is one of the cleanest ways of running Heimdall, as all required software is set up correctly within the container.
This project is also great for those who are running a headless Raspberry Pi as it doesn’t require the desktop interface.
Please note that Heimdall requires you to be running a 64-bit operating system on your Raspberry Pi. 32-bit is not supported.
Equipment
Below is a list of the equipment you need when setting up Heimdall on your Raspberry Pi.
Recommended
Optional
This tutorial was tested on a Raspberry Pi 400 running the latest version of Raspberry Pi OS Bullseye.
Video Tutorial
If you prefer to watch a video on how to install and configure software, then the video below will take you through all the steps for installing Heimdall. Alternatively, the text tutorial is immediately below the video.
Setting up your Raspberry Pi for Heimdall
Before installing and running Heimdall on our Raspberry Pi, we will need to prepare by installing any required software.
Thanks to us using a Docker container, this section is relatively straightforward. All the software Heimdall needs will be packaged within its container.
1. Our first step is to perform an update of the package list and upgrade any out-of-date packages.
We can perform these tasks using the following two commands within the terminal.
sudo apt update
sudo apt upgradeCopy
2. Once the update completes, we will need to install any packages we require to run Heimdall.
Since we plan on using the Heimdall docker container on our Raspberry Pi, we only need to install Docker. Follow the linked guide to have your Pi setup correctly for the Docker software.
3. We have everything we need to set up and run Heimdall. You can now proceed to the next section of this tutorial where we will cover installing the software.
Installing Heimdall to the Raspberry Pi
With Docker installed on our Raspberry Pi, we can move on to setting up Heimdall.
These steps are relatively straightforward as we only need to create a “dock-compose” configuration file and run it. After that, Docker will handle most of the hard work for us.
1. Let us start by creating a directory called “heimdall” within our user’s home directory. This directory is where we will store our “docker-compose.yml” file.
We can create this directory by using the mkdir command in the terminal.
mkdir ~/heimdallCopy2. Our next step is to change into this newly created directory by using the cd command.
cd ~/heimdallCopy3. Our next step is writing our “docker-compose.yml” file. This file is what tells Docker how to set up the Heimdall container and allows us to easier control certain pieces of functionality.
You can use the following command to write this file using the nano text editor.
nano ~/heimdall/docker-compose.ymlCopy4. You will need to enter the following lines within this file.
There are two things in this file that you will want to modify, and we will cover this in the next step.
version: "2.1"
services:
  heimdall:
    image: lscr.io/linuxserver/heimdall:latest
    container_name: heimdall
    environment:
      - PUID=1000
      - PGID=1000
      - TZ=Europe/London
    volumes:
      - ./config:/config
    ports:
      - 80:80
      - 443:443
    restart: unless-stoppedCopy
5. Before you save this file, let us quickly review some details you might want to modify.
Setting the Time Zone
The default configuration file we use has the time zone set to London. However, changing this value to match your local region is possible.
You can find a list of time zones on Wikipedia. When viewing the list, you will want to use the value from the “TZ Database name” column.
For example, if you lived in Hobart, Australia we would replace “Europe/London” with “Australia/Hobart“.
- TZ=Europe/LondonCopyChanging the Ports
By default, Heimdall will run on ports 80 and 443 on your Raspberry Pi. If you have another application on your Pi using using these ports, you will want to change them.
To change these ports, you will want to replace the number on the left side of the colon (:).
The section that you would need to modify within this file is the following.
      - 80:80
      - 443:443Copy
If you wanted to use ports 8080 and 8443, you would use the following instead.
      - 8080:80
      - 8443:443Copy
6. Once you have finished inserting these lines into the file, you can save and quit by pressing CTRL + X, followed by Y, then ENTER.
7. Finally, we can use the “docker-compose” tool to get Heimdall running on the system.
Run the following command to get Docker to download and run the Heimdall container.
docker compose up -dCopyPlease note that this process can take a few minutes as it needs to download the various images that make up the Heimdall container.
Using your Raspberry Pi Heimdall Dashboard
Now that we have Heimdall installed on our Raspberry Pi and it is up and running, we can connect to it.
This section will explore how to access the interface and add your first application to the dashboard.
Connecting to the Heimdall Dashboard
1. Before we start you will need to know the IP address of your Raspberry Pi.
One of the easiest ways to get your IP is using the hostname command, as shown below.
hostname -ICopy2. Once you have your IP address handy, you will need to go to the IP address within your favorite web browser, as shown below.
http://YOURIPADDRESSPlease note if you are not using the default ports, you will need to specify that when connecting to your Raspberry Pi’s Heimdall dashboard.
http://YOURIPADDRESS:PORTAdding your First Application
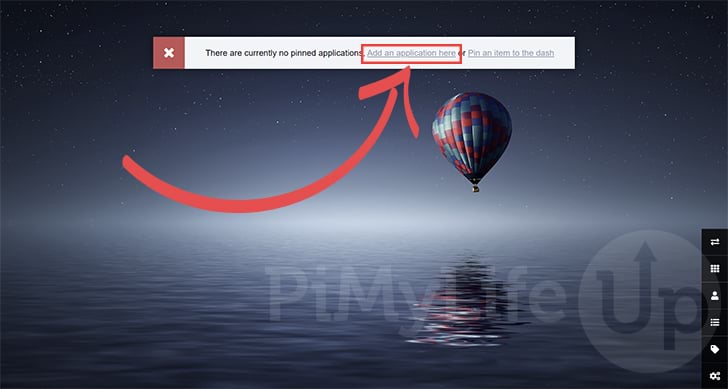
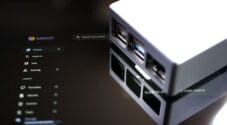
3. When you first load up the application, you will be greeted with an empty dashboard.
The first thing you will likely want to do is add an application to populate the dashboard. You can start this process by clicking the “Add an application here” link.
You can also access the application list from the sidebar on the bottom-right of the screen.
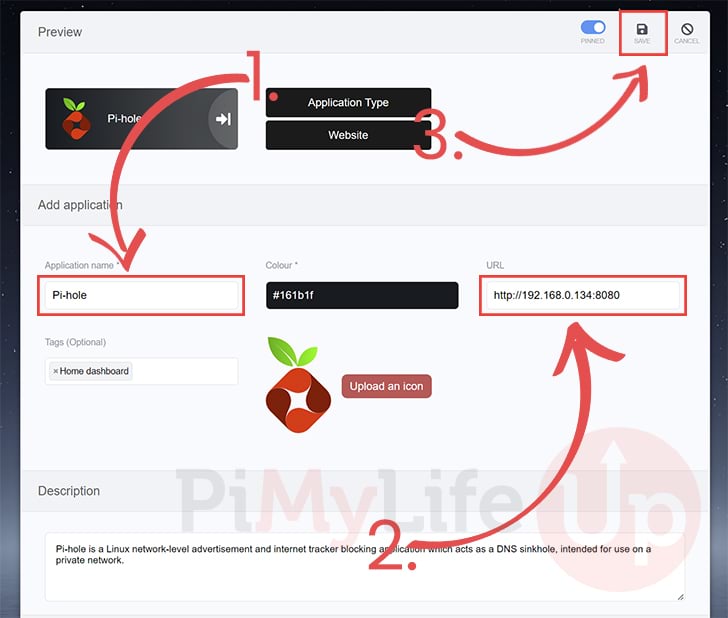
4. With the screen below you can add your first application. The two parameters that will be most important are the “Application name” and “URL” settings.
- The “
Application name” (1.) is where you will type in the name of your application. As you type, you will get suggestions on applications you can pick.
If you select one of these applications, Heimdall will automatically fill out various bits of information and include the relevant logo for that application. - Next, you need to fill out the URL for your application (2.). This is the URL that you will be redirected to when you click it on Heimdall’s dashboard.
- With everything done, you can save this new application by clicking the “
Save” button (3.) on the top-right of the screen.
Enabling the Search bar
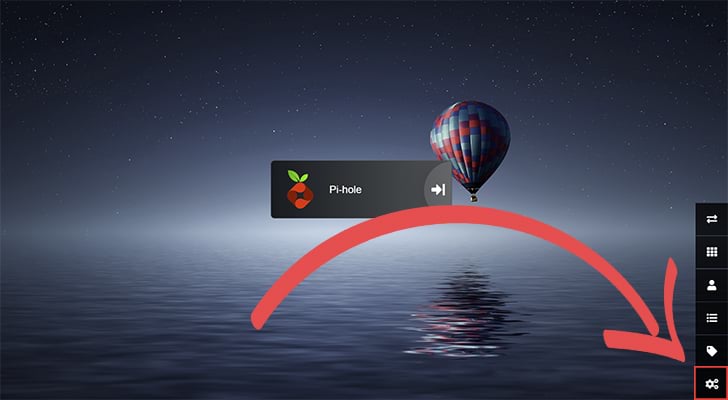
5. Now that we have added an application, let us go and enable the search box. While you don’t have to enable this functionality, we found it helped make it work as a good replacement for our homepage.
To enable this, we must first go to the settings page by clicking the cogs in the bottom-right corner.
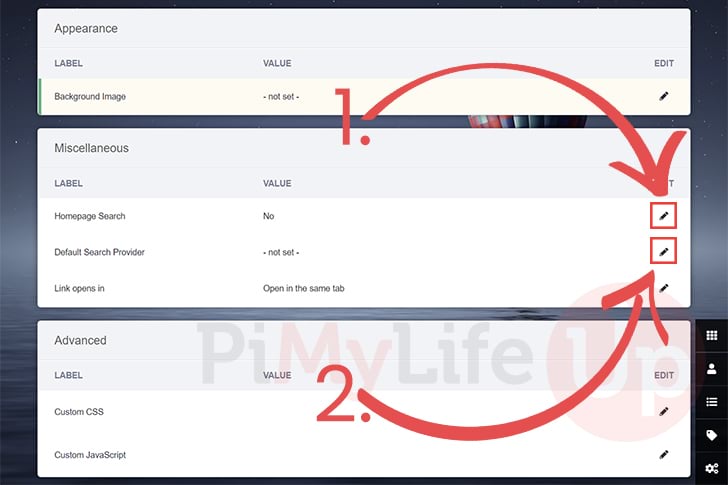
6. You want to find the “Miscellaneous” section on the settings page.
You can start by modifying the “Homepage Search” option by clicking the edit icon (1.).
Next, you can change the “Default Search Provider” by clicking the edit icon next to that option (2.).
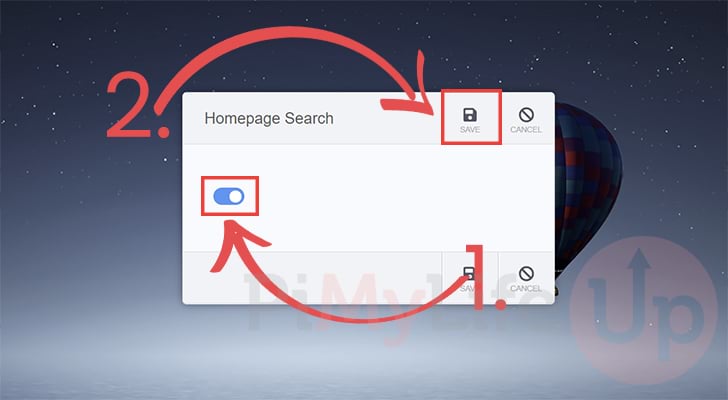
7. Enabling the search bar is simple. All you need to do is click the toggle (1.) located in the middle of the screen.
Once enabled, click the “Save” button (2.) to confirm this setting change.
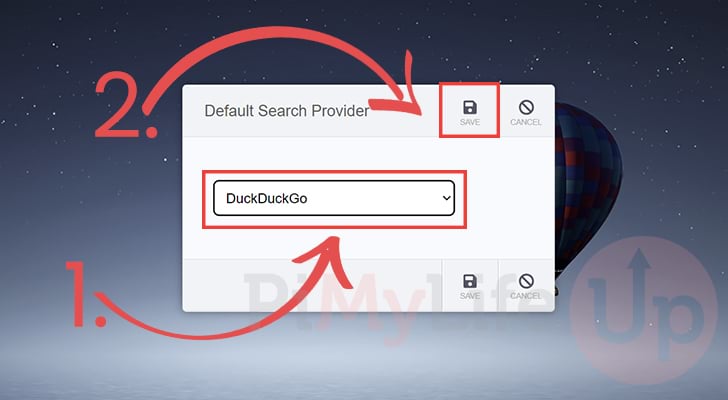
8. Once the search bar is enabled, you will likely want to set the default search provider. While Heimdall does let you change this on the fly on the dashboard, it’s easier to set it through the interface.
Use the box in the middle of the page to select the search engine (1.) you want to use by default.
Once you have set the search provider, click the “Save” button (2.).
Conclusion
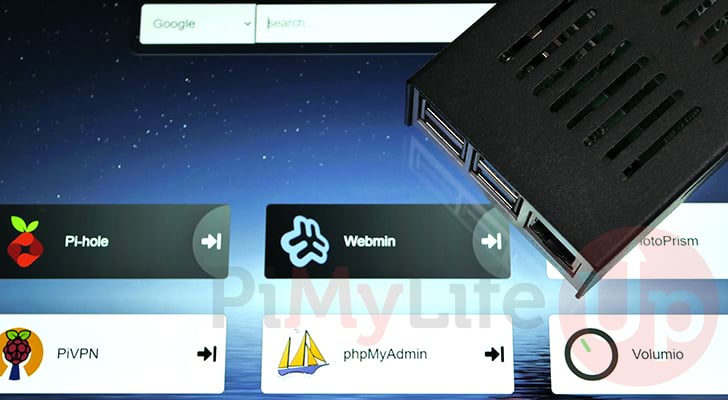
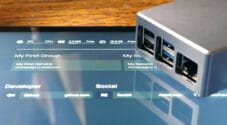
You should now have Heimdall running on the Raspberry Pi at this point in the tutorial. Below you can see how ours looked after we added numerous applications and enabled the search bar.
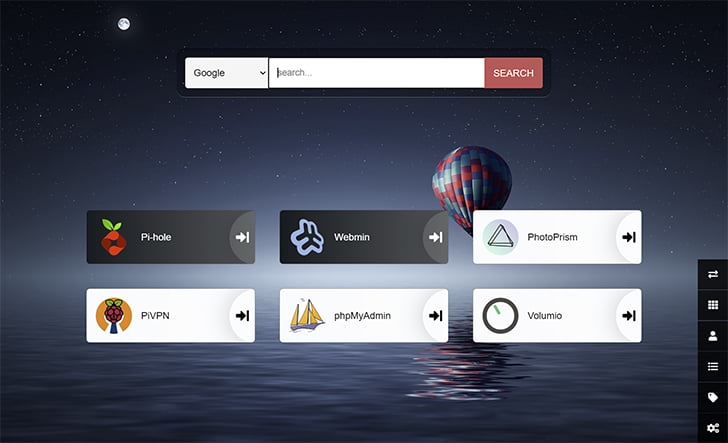
Heimdall is an elegant solution to providing all of your applications in one central location. It works as a perfect replacement for your homepage.
Please comment below if you have issues getting Heimdall to run on your Raspberry Pi.
Be sure to check out our many other Raspberry Pi projects. We also have a wealth of general Linux guides.


no matching manifest for linux/arm/v8 in the manifest list entries. On raspberry pi 4b not working
Hi Quick,
You must be running a 64-bit operating system on your Raspberry Pi to be able to run Heimdall. Unfortunately, they now only provide ARM64 builds.
Kind regards,
Emmet
Hi, thanks for the helpful tutorial. Having followed it when I try to pull the container docker compose up -d, I get the following error;
heimdall Error Get “https://lscr.io/v2/”: context deadline exceeded (Client.Timeout exceeded… 15.0s
Error response from daemon: Get “https://lscr.io/v2/”: context deadline exceeded (Client.Timeout exceeded while awaiting headers)
I checked online but couldnt find a solution to this problem. Adguard dns issue? I added the following to whitelist;
@@||lscr.io^
@@||ghcr.io^
@@||docker.io^
@@||registry-1.docker.io^
@@||production.cloudflare.docker.com^
Thanks for your help and time!
Hi Ken,
That would definitely point to some sort of DNS issue, I tested the tutorial to verify that Linux servers repository is still working.
The only workaround I could really tihnk of is to change the DNS of your Raspberry Pi to a different provider like 1.1.1.1.
Kind regards,
Emmet