In this tutorial, we will be showing you how to get Netflix up and running on your Raspberry Pi.
Netflix has been one of the hardest things to get working on the Raspberry Pi thanks to its reliance on a DRM (Digital Rights Management) that tends only to be distributed for closed platforms.
With this guide, we will be making use of a plugin for the popular media center Kodi. We found this plugin combined with Kodi is one of the best ways of getting Netflix to run on your Raspberry Pi.
Alternatively you can run Netflix within the Chromium web browser, all you need to do is install the Widevine DRM package to your Raspberry Pi.
Getting Netflix to run on your Raspberry Pi requires a few different steps as the software will need to obtain a version of the DRM library so that you can stream videos.
You can make use of operating systems that package Kodi, such as OSMC, as these same steps should work as long as you have terminal access.
Throughout this tutorial we will be making use of the Raspbian operating system.
Equipment List
Here is a list of all the equipment that we recommend you have for completing this Raspberry Pi Netflix tutorial.
Recommended
- Raspberry Pi Amazon 2 or Newer
- Micro SD Card Amazon 16GB+ recommended
- Power Supply Amazon
- USB Keyboard Amazon
- USB Mouse Amazon
- HDMI Cable Amazon
- Ethernet Cable Amazon or Wi-Fi Amazon
Optional
- Raspberry Pi Case Amazon
Preparing for Netflix on the Raspberry Pi
1. Before we can get Netflix working on the Raspberry Pi, we will have to do a few things.
The first thing we should do is update all the packages already installed on your Pi.
Doing this ensures that any out of date packages won’t end up breaking the tutorial.
To update all your packages, go ahead, and run the following two commands.
sudo apt update
sudo apt upgradeCopy
2. Once the update process has completed, we can now go ahead and install Kodi to the Raspberry Pi.
The reason that we are using Kodi is that it is currently the most reliable way of accessing Netflix on the Raspberry Pi.
Web browser methods for accessing Netflix appear to get broken often and can be painful to set up and maintain. Kodi is also pretty well optimized for the Raspberry Pi.
If you are running a distribution like OSMC, you can skip to the next step of this guide as you will have Kodi installed already.
To install Kodi and all the packages we require, run the following command.
sudo apt install kodi kodi-peripheral-joystick kodi-pvr-iptvsimple kodi-inputstream-adaptive kodi-inputstream-rtmpCopyYou will see that we are installing several other packages alongside Kodi. These extra packages are required for the Kodi Netflix plugin to function correctly on our Raspberry Pi.
3. We need to now install some extra packages to go alongside our Kodi installation.
These packages contain the Python package manager “pip” as well as some extras that are needed for us to run the Kodi Netflix Plugin.
Run the following command to install the last few packages we require.
sudo apt install build-essential python3-pip python3-dev python3-setuptools python3-wheel libffi-dev libssl-dev libnss3Copy4. Next, we will install the Python packages that are required by the Netflix plugin for Kodi.
We can install these Python packages to our Pi by making use of the pip package manager.
Use the follows two commands below to install all the required Python packages.
sudo pip3 install pycryptodomex win_inet_pton --break-system-packagesCopy5. With all the required packages now installed, there is one last thing we need to do.
We need to download the CastagnaIT repository. This repository will allow us to install the Netflix plugin for Kodi and have it automatically updated.
We can download the latest version of the repository directly from the project’s GitHub by running the following command.
wget https://raw.githubusercontent.com/CastagnaIT/repository.castagnait/kodi/repository.castagnait-2.0.1.zipCopyOnce the repository plugin has finished downloading, you can proceed with getting Netflix working on your Raspberry Pi.
Adding the Repository for Netflix on Kodi
In this section, we will be showing you how to make use of all the packages we just installed to run Netflix on your Raspberry Pi.
1. The first step is to launch Kodi on your Raspberry Pi.
You can do this by clicking the start menu icon in the top left-hand corner, hovering over “Sound & Video” then clicking “Kodi“.
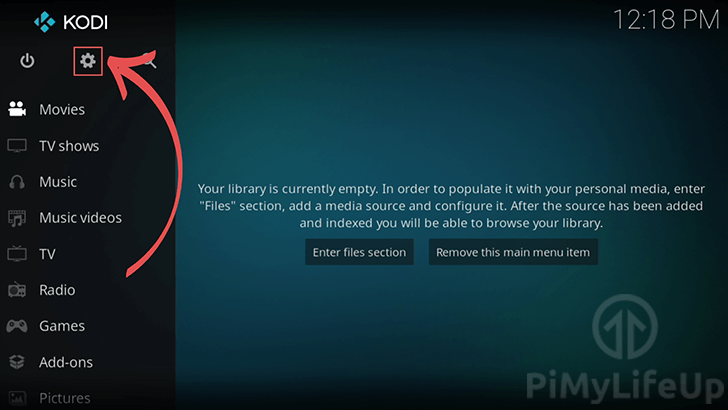
2. To get started, we will need to change Kodi’s settings to allow unknown sources to be installed. If we don’t change this option, we won’t be able to install the Netflix plugin.
To do this, we need to open up the settings page within Kodi. If you are using the default theme, the button to get to this page is the cog symbol at the top of the sidebar.
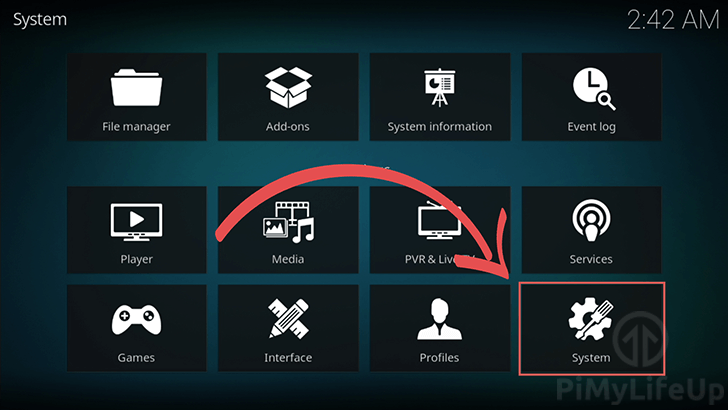
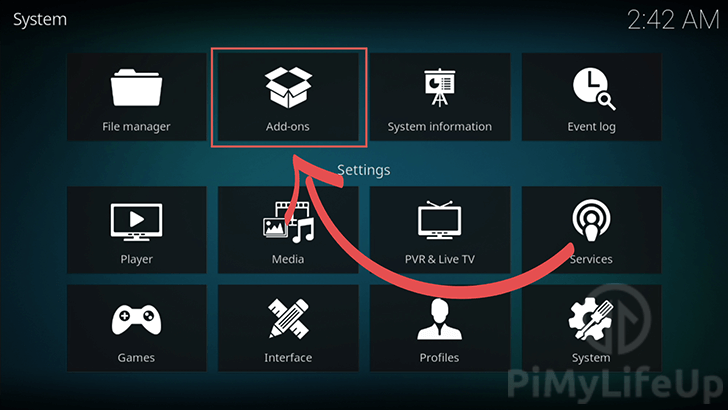
3. Within this menu, you need to click “System” in the bottom right-hand corner of the screen.
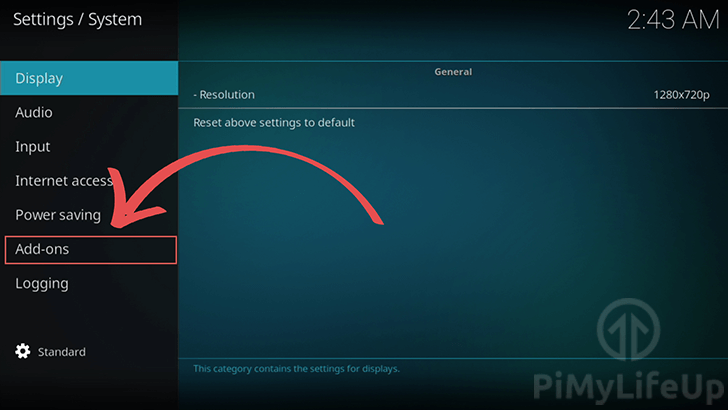
4. Now that we are in the system settings page we need to go and click “Add-ons” in the side bar.
5. Next, click the toggle for the “Unknown sources” option.
You will get a few warning messages. It is safe to ignore these warnings as long as you are only installing plugins from reputable sources like we are.
Changing this option will allow us to install the repository that we downloaded to our Raspberry Pi in the previous section.
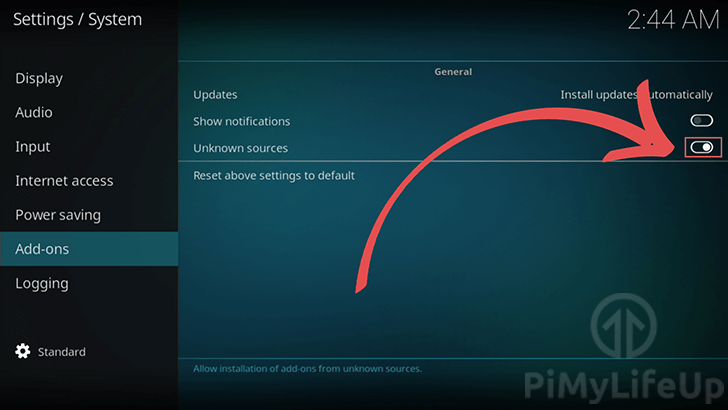
Once you have enabled “Unknown Sources“, press the ESC key to return to the main settings page.
6. Now that we are back on the main settings page, go ahead and click the “Add-ons” menu button.
This button will take us to the Add-ons settings page and allow us to install the CastagnaIT repository from which we can download the Netflix Plugin for our Raspberry Pi.
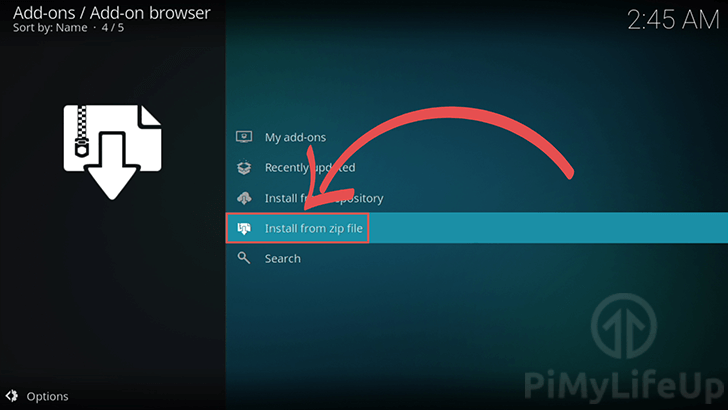
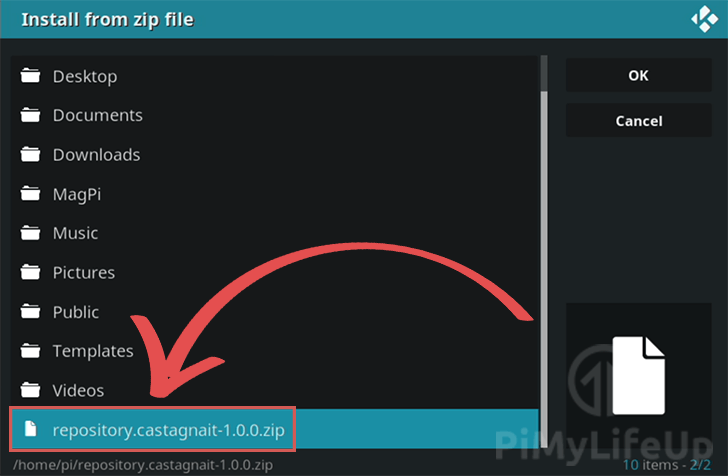
7. Once in the “Add-ons” settings page, click the “Install from zip file” option to continue.
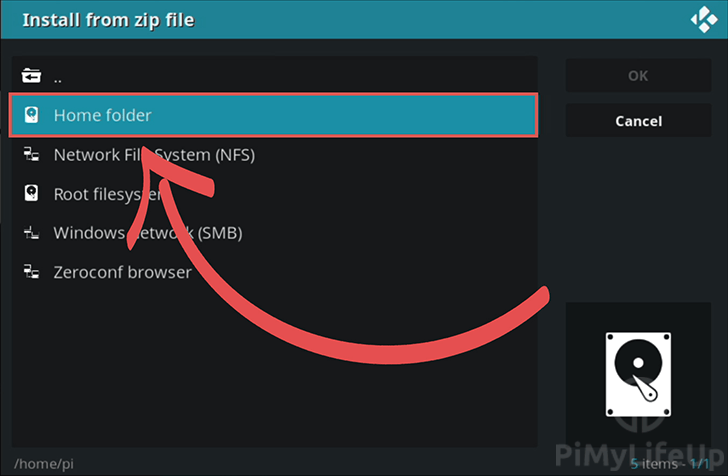
8. With the “Install from zip file” dialog now open, click “Home folder” as that is where we downloaded the repository to.
9. Scroll to the bottom of the next dialog, then double-click the file called “repository.castagnait-2.0.0.zip” to install the repository.
Now that we have set up the repository, we can proceed to install the Netflix Plugin to our Raspberry Pi and also set up anything else we may need.
Installing the Netflix Plugin to the Pi
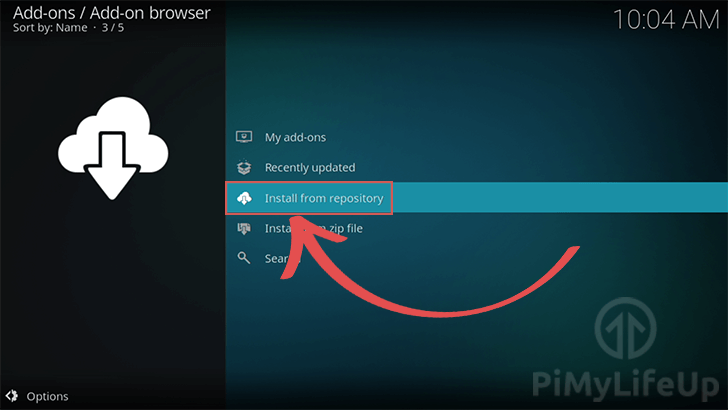
1. With the required repository now installed to our Raspberry Pi, we can go ahead and install the Netflix plugin through Kodi’s interface.
Click the “Install from repository” option in the “Add-ons” page to proceed.
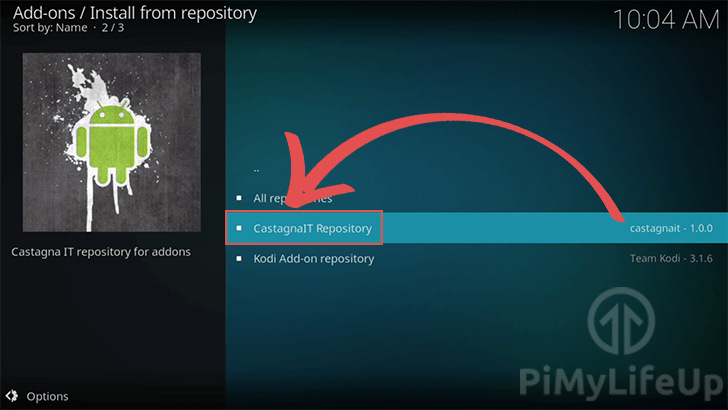
2. In this menu, look for the “CastagnaIT Repository” option and select it to open the repository.
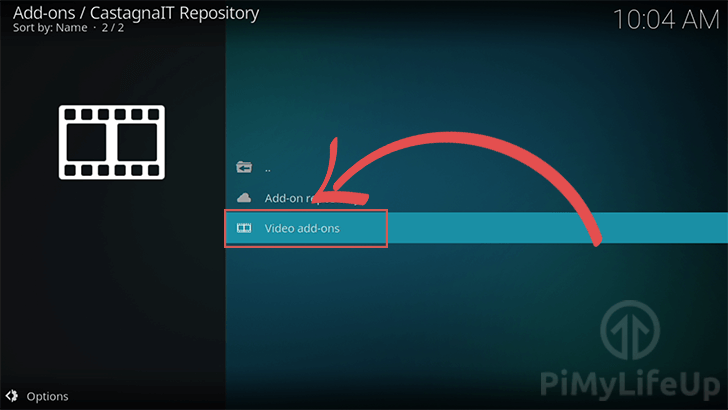
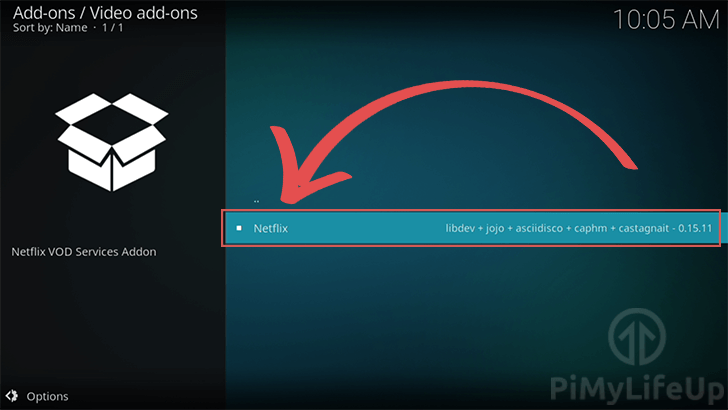
3. Now that we are within the CastagnaIT repository, we can now locate and install the Netflix plugin.
To find the Netflix plugin, we need to open the “Video add-ons” category.
4. Open the only entry on this page, the “Netflix” plugin.
We will be able to start the installation process on the next screen.
5. On this screen, click the “Install” button in the bottom right-hand corner.

6. Before the installation begins, you will be asked if you are okay with installing some additional plugins.
As the Netflix plugin relies on all of these to function, the only real option is to select “Ok“.
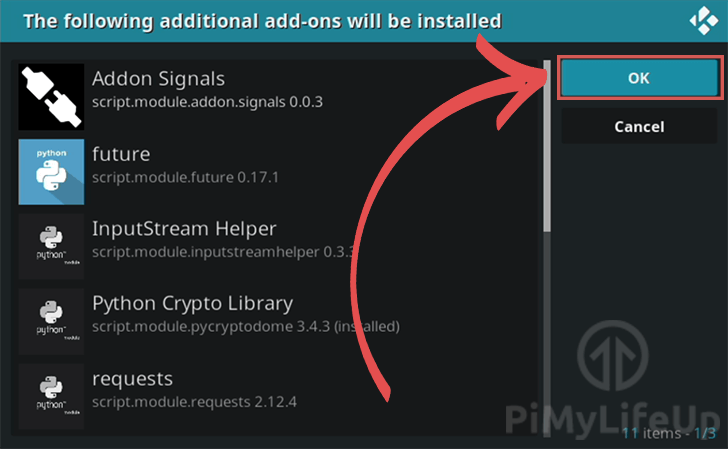
This process can take a little bit of time as it will need to install these additional add-ons that the Netflix plugin relies on.
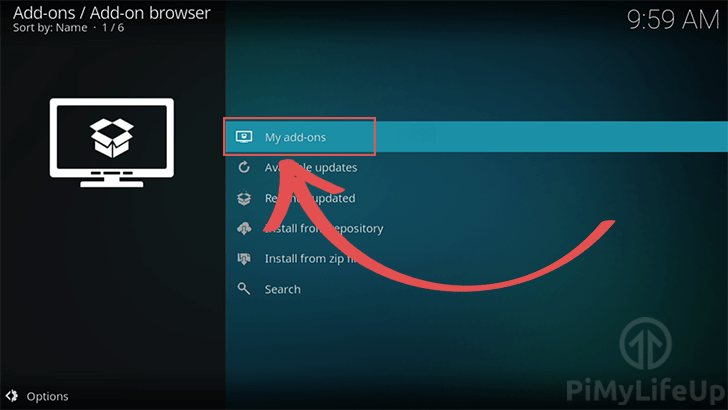
7. With the Netflix plugin now installed to the Raspberry Pi, there are a couple more things that we will need to do before we are ready to open it.
To start with, we need to go ahead and enable the “Adaptive Inputstream” plugin.
We can enable this plugin by first going into the “My Add-ons” page.
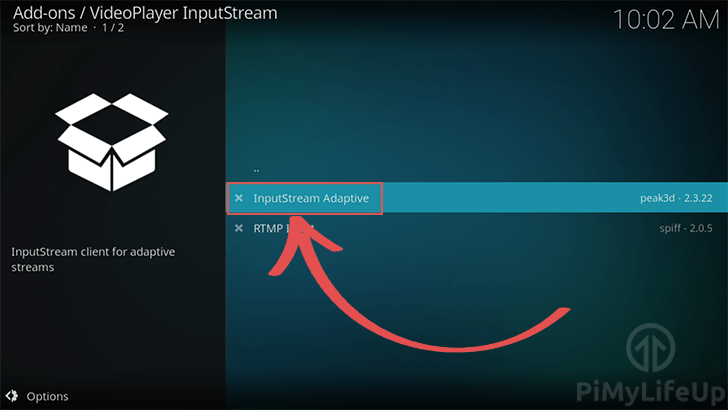
8. Now that we are in the “My Add-ons” page, we need to go into the “VideoPlayer Inputstream” category.
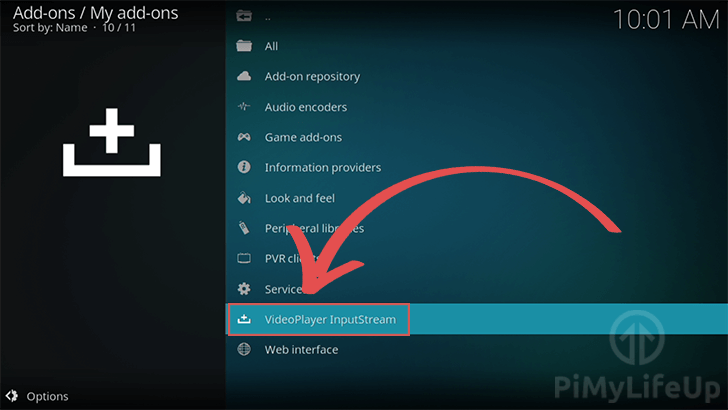
9. On this screen, go ahead and open up the “InputStream Adaptive” plugin.
This plugin is what the Netflix add-on relies on for streaming video data from the Netflix servers to your Raspberry Pi.
10. On this screen, click the “Enable” button to activate the InputStream Adaptive plugin.
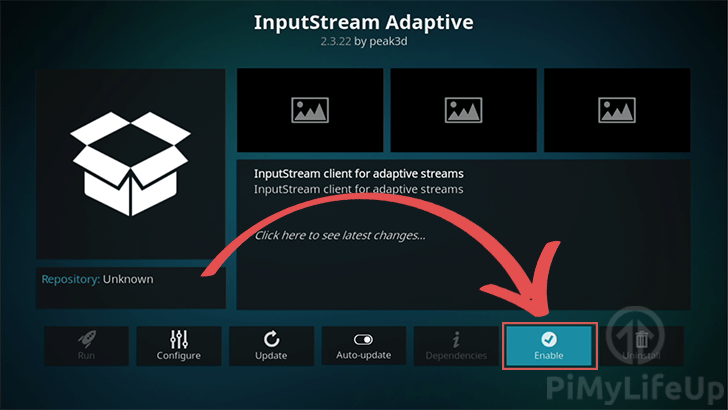
With the InputStream Adaptive plugin now enabled, we can finally go ahead and run the Netflix plugin. Return to the main menu for the next section.
Running Netflix on the Raspberry Pi
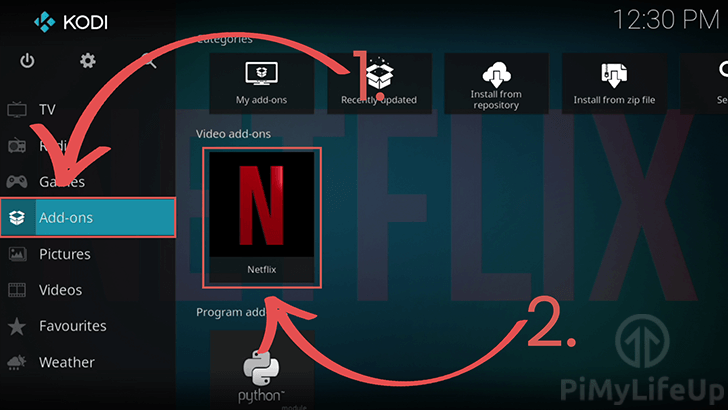
1. Back on the main menu, click “Add-ons” (1.) in the sidebar.
Once the “Add-ons” page is open, go ahead and click “Netflix” (2.) to open up the Netflix add-on.
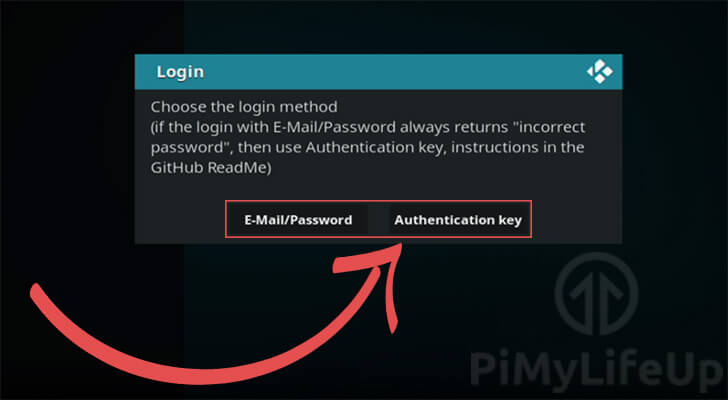
2. The first time you open the Kodi Netflix add-on you will be required to choose a login method.
The easiest method is the “E-Mail/Password“, this method allows you to enter your email and password to log in.
However, if you have any issues you will need to follow the steps to generating a authentication key for Netflix.
3. Now within the Netflix add-on, go ahead and pick a show that you want to watch.
The first time you watch a show, you will have to run through the process of installing the DRM modules the plugin requires to work.
Without these DRM modules the plugin will not be able to stream the video content from Netflix.
These modules are the same reason web browsers on the Raspberry Pi struggle to deal with Netflix.
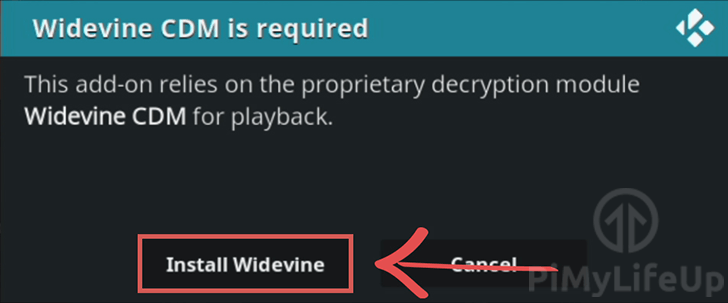
4. When notified that Widevine CDM is required, click the “Install Widevine” button to begin the installation process.
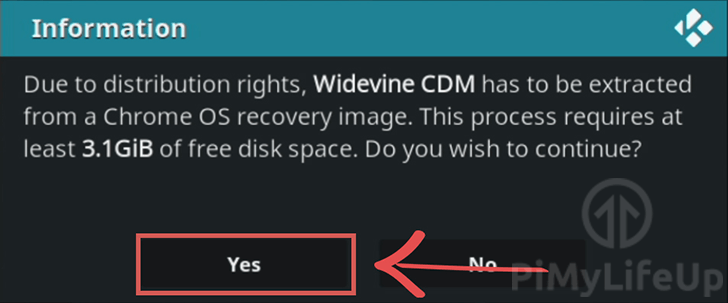
5. You will then see another notification stating that you must have at least 3.1GB of free disk space. The reason for this is that the installer has to obtain Widevine CDM from a ChromeOS image.
There are a few legal reasons why we can’t just download the Widevine CDM directly.
Click the “Yes” button to proceed with the installation process.
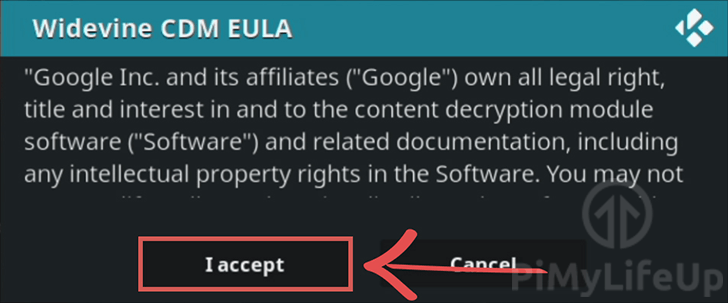
6. Before your Raspberry Pi can start the process of obtaining the required files to use Netflix, you will need to first agree to a EULA from Google.
Click “I Accept” to agree to the EULA and proceed with the download process.
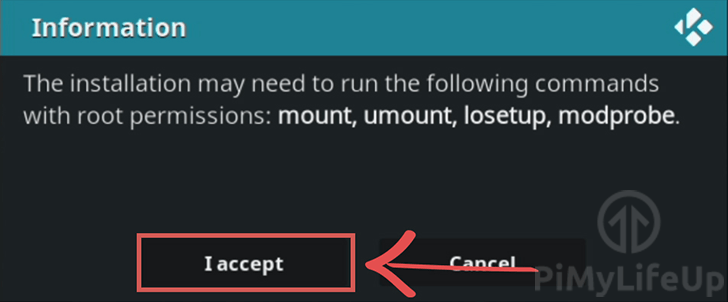
7. You will now see a message stating that the plugin will need to make use of tools with root permissions to be able to extract the required file from the ChromeOS image.
To proceed with this process, click the “I Accept” button.
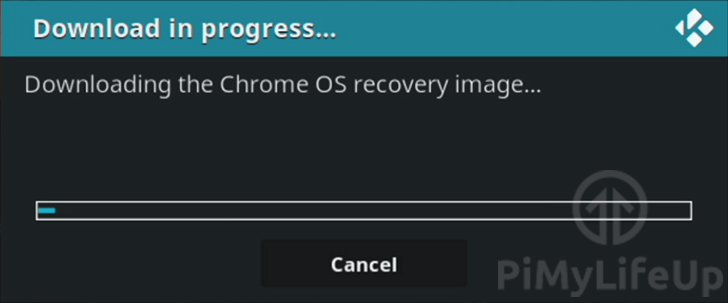
8. Now, wait for the download and extraction process to finish. This process can take some time, so now is a good time to grab a cup of coffee.
If it ever appears that the progress bar is stuck, please give the program more time to run, as it has to extract a single file from a large image.
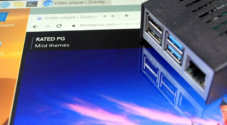
9. Once the Widevine process has completed, you will now be able to watch any videos that you want straight from Netflix to your Raspberry Pi.
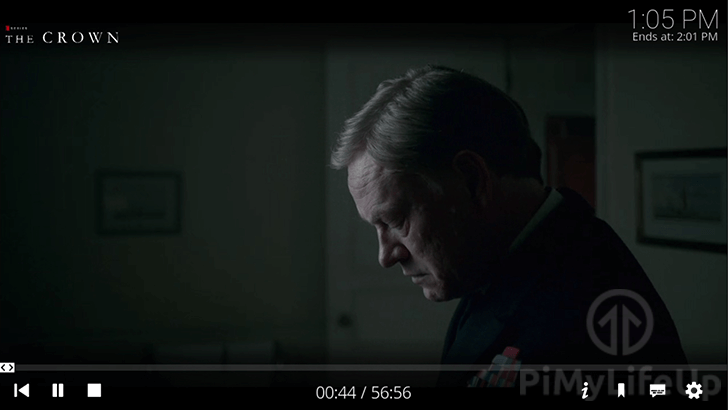
Below you can see us running the Netflix exclusive TV show, “The Crown” on our Raspberry Pi.
Using an Authentication Key for Logging into Netflix
It you are having trouble logging into the Netflix addon by using your email and password, there is an alternative solution that we will delve into now.
You will need to have a device with a desktop interface and access to a web browser for these steps.
You can run this script on a different device to your Raspberry Pi as we can copy the key over.
Generating the Netflix Authentication Key on Windows
For starters, we will show you how to retrieve this key when using a Linux system.
To use this method, you will need to be using the Chrome web browser as that’s the only browser the software supports.
This software is written by the Netflix for Kodi team. You can check out the source code of this tool by going to the NFAuthenticationKey repository for Windows.
1. Before we proceed, you need to download the NFAuthentication Key program that contains the program we need from our CDN.
You will find the download link on this page under the “For Windows” header.
After this download, you should have a zip file called “NFAuthenticationKey_Windows_1.0.2.0.zip” on your device.
2. Extract the folder from within the downloaded archive.
You should find an executable within these folders called “NFAuthenticationKey.exe“.
Double-click this file to run the program on your device.
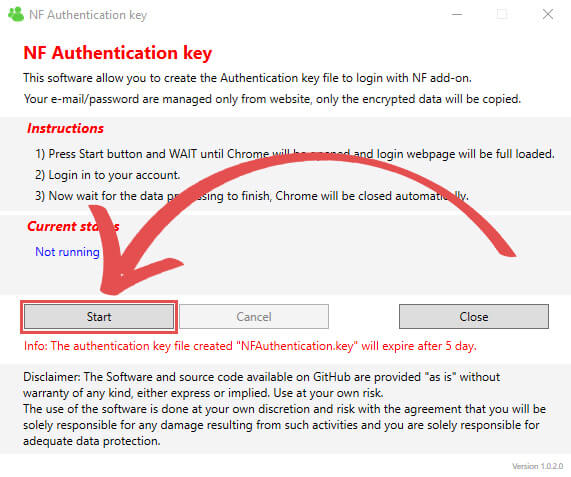
3. This program will instruct you on how to use it to generate the required Netflix authentication key.
Before proceeding, you will need to have all windows of Chrome closed.
Once closed, click the “Start” button.
4. Clicking this button will open the Chrome web browser on your device.
Wait till it automatically redirects you to the Netflix login screen. If, for some reason, it doesn’t redirect you, click the “Cancel” button and start again.
Do not manually go to the Netflix website. Manually changing the website will stop the application from being able to retrieve the information it needs.
5. After logging in, the application will quit out of Chrome once it has the data it needs.
It will generate a file called “NFAuthentication.key“. You will need to copy the contents of this file to your Kodi device.
Within the program, you should also see a message indicating a four-digit PIN (Eg. 1234). You need to remember this PIN to be able to use your authentication file.
Using Linux to generate your Netflix Auth Key
In this section, we will show you how to get the authentication key that you need to run Netflix on Kodi.
For this to work, you will need to be running a form of Linux where you have access to a Chrome-based web browser.
1. First, make sure you have a Chromium based web browser installed.
On an apt-based operating system, you can run a command like we have below to install Chromium. We also need to install the unzip package to
On Raspberry Pi OS, the required web-browser comes pre-installed.
sudo apt install chromium-browserCopy2. Once you have Chromium installed, there are a few other things we need to install.
We need to install Python, its package manager pip, and a few other addons.
sudo apt install build-essential python3-pip python3-dev libffi-dev libssl-dev libnss3Copy3. Finally, we need to install the two Python packages that we require to run the script to generate the authentication key for Netflix.
pip3 install pycryptodomex
pip3 install websocket-clientCopy
4. Finally, we can download the Python script we need directly from the CastagnaIT repository.
We can download this file to the current directory by using wget within the terminal.
wget https://raw.githubusercontent.com/CastagnaIT/NFAuthenticationKey/linux/NFAuthenticationKey.pyCopy5. With the script downloaded, let us now go ahead and run the Python script.
The script will automatically try to detect where Chrome is installed on your device and run it.
python3 NFAuthenticationKey.pyCopy6. Follow the prompts now displayed within your terminal to generate the required authentication file.
You will be required to login to Netflix to generate the code.
7. Once you have followed the prompts, you should end up with a file called “NFAuthentication.key” within the same directory as the script.
If you have followed the guide as we have written it, you can use the ls command to find it like below.
ls -lCopy8. If you have generated this key on a different device to your Raspberry Pi, we will need to copy it over.
To get the contents of the file, you can use nano or the cat command like below.
cat NFAuthentication.keyCopyLogging in to Netflix using the Key in Kodi
Before we proceed, make sure that you have the authentication key copied over to your Kodi device (In our case, this is a Raspberry Pi).
1. The easiest way to do this is to open the file up with a text editor and copy it over SSH to a new file on your device running Kodi.
For example, we can open up a new file to copy the contents over to our Pi with the following command.
nano NFAuthentication.keyCopy2. Once the key has been copied across to the file, save the file by pressing CTRL + X, then Y, followed by the ENTER key.
3. With the Netflix authentication key now in place, launch Kodi on your device.
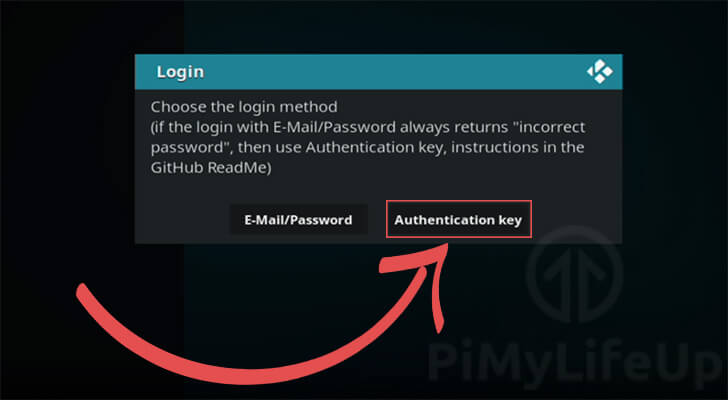
4. Navigate to the Netflix addon in Kodi and open it.
You should be greeted by the following message asking you to select “E-Mail/Password” or “Authentication key” for logging in.
To proceed, select the “Authentication key” option.
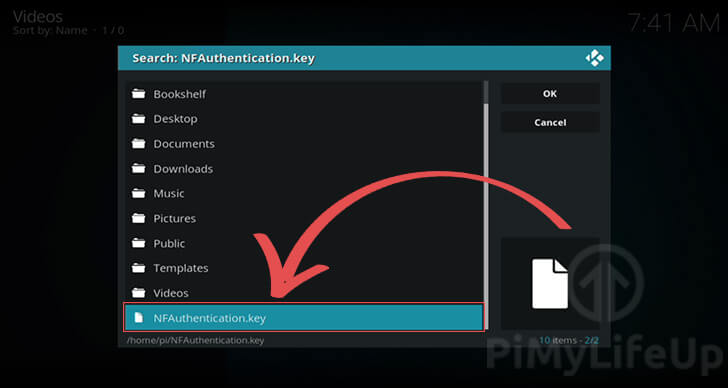
5. In the dialog that pops up, you will need to navigate to where you saved your Netflix Authentication key.
In our case, we saved it to our home directory, so it is relatively easy to find.
Once found, select it and press the ENTER key to proceed.
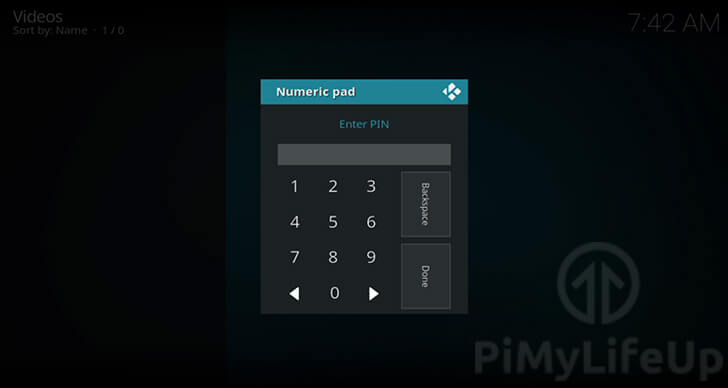
6. Before the Netflix Kodi addon can use your authentication key, you will need to enter the generated PIN.
Use the interface displayed on the screen to type in your PIN. Once done, either click “Done” or press the ENTER key.
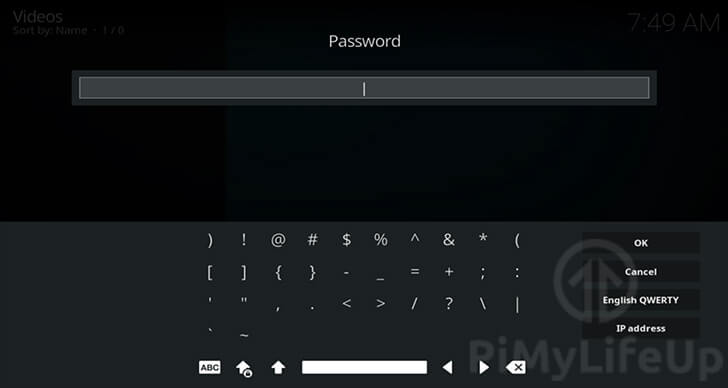
7. Finally, you will need to enter the password for your account.
Use the provided dialog to enter your password or use the keyboard.
8. You should now be successfully logged in to the Netflix addon for Kodi.
These steps should work for both your Raspberry Pi and any other device Kodi works on.
Hopefully at this point you will now successfully be able to watch Netflix on your Raspberry Pi.
If you have ran into any issues with running Netflix within Kodi, then feel free to drop a comment below.


Hi,
Is it safe to use this plugin, because last time I did use the Kodi plugin my account was hacked.
Thanks
Hi Raydex,
That is definitely something that shoudn’t of happened with this plugin and definitely worrying. Its completely open-source and I havent seen any complaints about it previously.
However, what I would suggest as a good alternative is to use Waydroid instead. Using that you can use the official Plex app and still get a decent experience (It will struggle a bit with HDR 4k files however).
Kind regards,
Emmet
It works until “Installing the Netflix Plugin to the Pi” step 2 where it says: “Could not Connect to repository
Hi Av3rige,
I’ve made some slight adjustments to the tutorial so it should point to the correct repository to use. Please let me know if you continue to run into issues.
Reading up on it, it does sound like the Kodi Netflix plugin doesn’t work as well as it used to so we may need to look into a cleaner / better solution.
Kind regards,
Emmet
One of the best “how to’s” I have seen. Well done!
Thank you for your help 🙂
Hello Emmet great guide, however Iam getting stuck on the installation of Kodi right at the beginning of the tutorial.
‘sudo apt install kodi kodi-peripheral-joystick kodi-pvr-iptvsimple kodi-inputstream-adaptive kodi-inputstream-rtmp
Reading package lists… Done
Building dependency tree… Done
Reading state information… Done
Some packages could not be installed. This may mean that you have
requested an impossible situation or if you are using the unstable
distribution that some required packages have not yet been created
or been moved out of Incoming.
The following information may help to resolve the situation:
The following packages have unmet dependencies:
kodi-inputstream-rtmp : Depends: kodi-api-inputstream (>= 3.2.0)
Depends: kodi-api-inputstream (< 3.3.0)
E: Unable to correct problems, you have held broken packages.'
Any idea if i am doing something wrong?
Using a Raspberry Pi 4 64 bit Raspbian Bookworm OS.
Hi Edward,
You definitely aren’t doing anything wrong. This appears to be a problem with the packages currently being delivered through the Raspberry Pi Bookworm repository.
Will try and look into a solution for this, but typically the Raspberry Pi team resolves these issues within a couple of weeks.
Kind Regards,
Emmet