by
by This tutorial will show you how to install and run Discord on your Raspberry Pi.
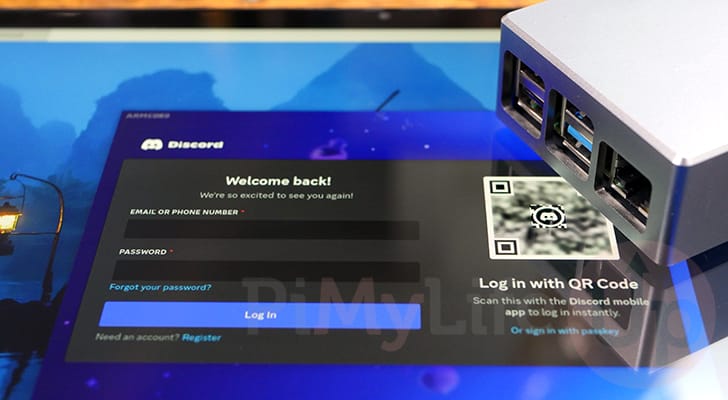
Discord is among the most popular video, audio, and chat platforms. It offers a ton of functionality right out of the box with basically zero cost of entry. You can create your very own Discord community in just a couple of clicks, or you can join many others.
While Discord does not offer an official client for Linux ARM systems, plenty of third-party solutions exist. These solutions are pretty simple; most just load the web browser version of Discord and make it act and feel like the native app.
In this guide, you’ll learn how to install and use a third-party Discord client called Legcord on your Raspberry Pi. Legcord is a lightweight Discord client that uses a newer version of Electron.
If you want to avoid a third-party Discord client on your Raspberry Pi, you can open the Discord web app in your favorite browser. It will look and feel like the official client, but you’ll need to keep your browser open.
It is important to note that Discord does not officially support third-party clients or client mods.
Equipment
Below is the equipment we used to set up Discord on our Raspberry Pi.
Recommended
- Raspberry Pi Amazon
- Monitor Amazon
- Micro SD Card Amazon
- Power Supply Amazon
- Ethernet Cable Amazon or Wi-Fi Amazon
Optional
We tested this tutorial on a Raspberry Pi 5 running the latest version of Raspberry Pi OS Trixie. You will need to be running a 64-bit operating system.
Installing and Running Discord on your Raspberry Pi
In the following steps, we will walk you through installing and running Discord on the Raspberry Pi.
Preparing your Raspberry Pi to run Discord
1. Before installing Discord, we must ensure that our Raspberry Pi is running an updated operating system.
Use the following two commands to update the package list cache and upgrade outdated packages.
sudo apt update
sudo apt upgrade -yCopy
Installing Legcord on your Raspberry Pi
2. While we cannot use the official Discord client on the Raspberry Pi, we can use a third-party alternative called Legcord.
Run the following command to download Legcord 1.3.0 for the 64-bit version of Raspberry Pi OS.
wget -O legcord.deb https://github.com/Legcord/Legcord/releases/download/v1.3.0/Legcord-1.3.0-linux-arm64.debCopyCheck the Legcord releases page for a newer release. If there is one, swap both version numbers in this link for the new one.
3. With the package downloaded, you can install Legcord by running the following command. Using apt to install the file also grabs any extra packages Legcord needs to run.
sudo apt install -y ./legcord.debCopyRunning the Third-Party Discord Client on your Raspberry Pi
4. If you want the easiest way to run Legcord on your Raspberry Pi, all you need to do is simply use legcord within the terminal.
legcordCopy5. Of course, using the desktop interface on your Raspberry Pi, you will want to find it without resorting to the terminal.
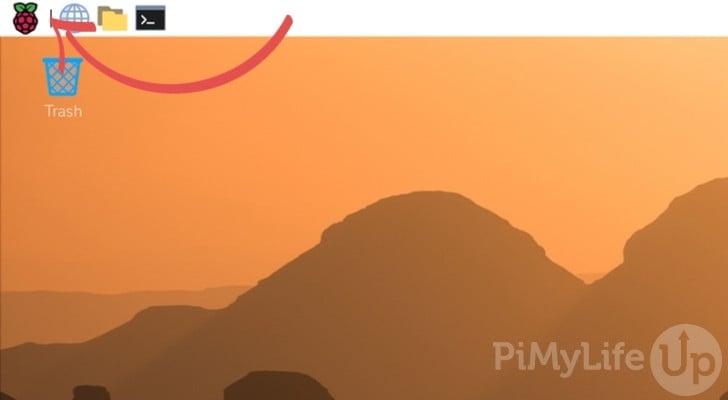
First, you will want to open the start menu by clicking the Raspberry icon in the top-left corner.
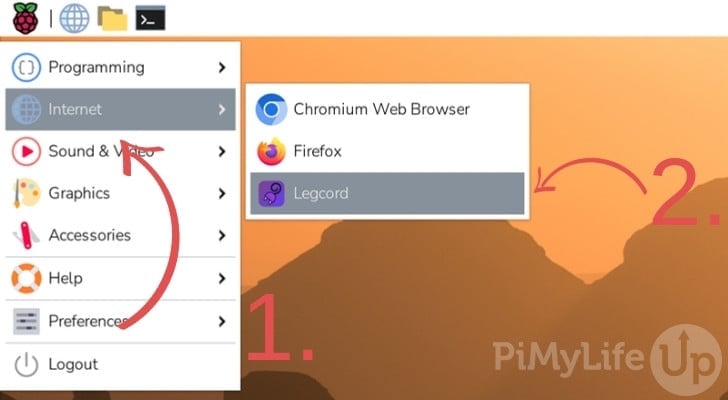
6. With the start menu open, hover over the Internet option (1.), and then click theLegcord icon (2.).
Initial Setup Steps of Legcord
7. Before you can log in to your Discord account through Legcord, you will need to go through its short setup wizard.
To start setting up this alternative Discord client on your Raspberry Pi, click the “Get Started” button.
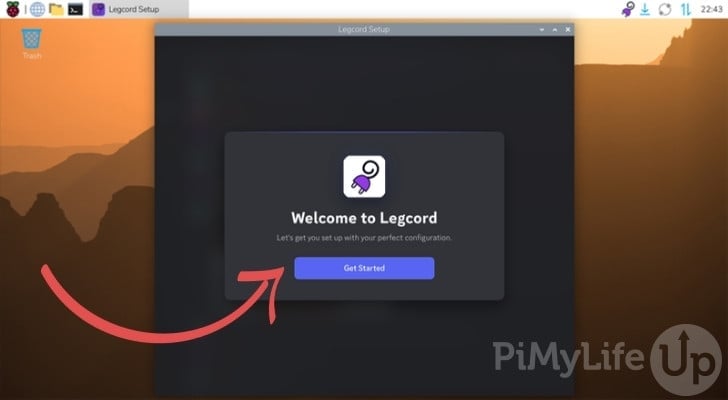
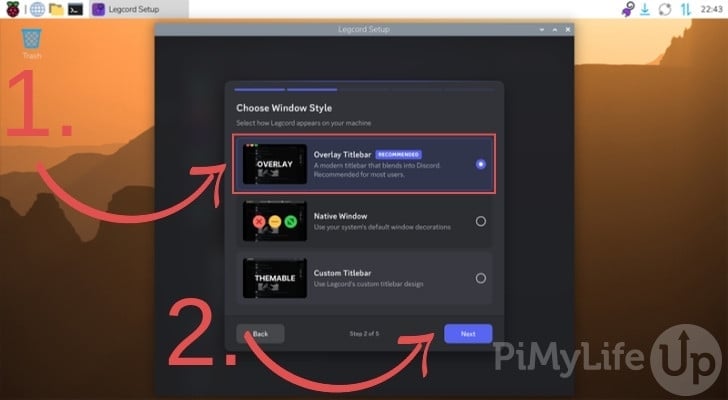
8. Next, you will be asked how you want the Legcord window to look (1.). We recommend sticking with the “Overlay Titlebar” option, as it blends the window controls into Discord.
After selecting a window style, click the “Next” button (2.).
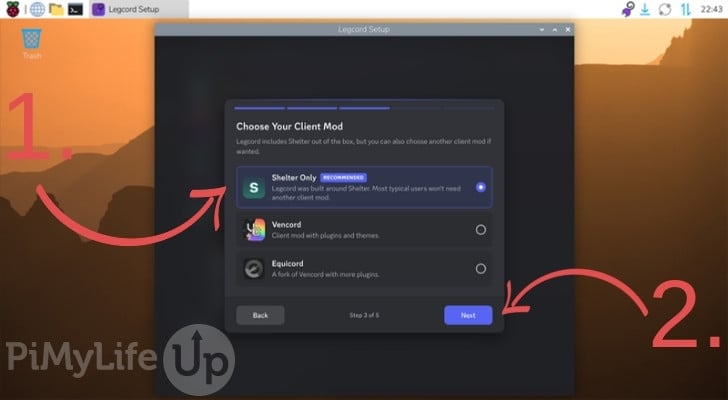
9. You will now be asked to select a client mod to install alongside Discord on your Raspberry Pi (1.).
These client mods add additional functionality to Discord. Legcord is built around a client mod called Shelter, so most people will want to stick with the “Shelter Only option. You can learn more about Vencord on their GitHub page.
When you have selected the client mod you want to use, click the “Next” button to proceed (2.).
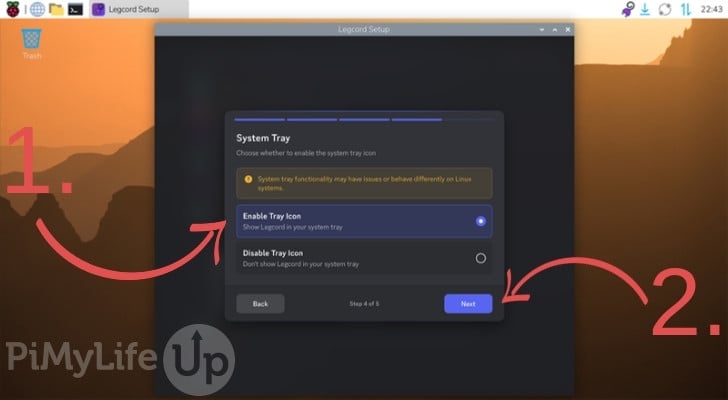
10. Next, decide whether you want Legcord to show an icon in your system tray. In our testing, the tray icon worked well on Raspberry Pi OS, so we selected “Enable Tray Icon” (1).
With the tray icon enabled, closing the Legcord window will keep it running in the background. To close it completely, right-click the Discord icon in the top-right corner of your screen and select “Quit Legcord”.
Once you have selected what you want to do, click the “Next” button (2).
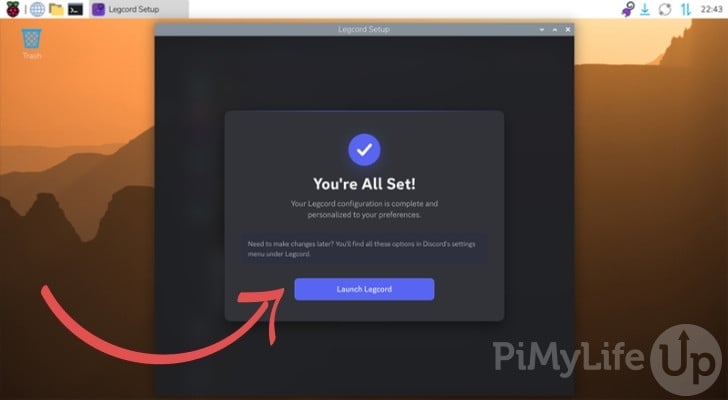
11. That is all the setup Legcord needs. Click the “Launch Legcord” button to start the client.
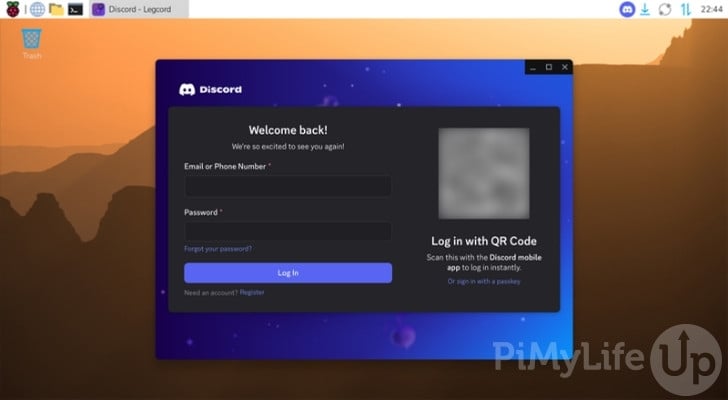
12. Below, you can see that we have successfully got Discord running on our Raspberry Pi by relying on a well-optimized third-party client called Legcord.
You should now be able to log in to your account and use it just like the official client.
Updating and Removing Legcord
1. As we installed Legcord from a package file instead of a repository, it will not be updated alongside the rest of your Raspberry Pi. To update it, download the newer package using the wget command from earlier with the new version number, then install it by using the following command.
sudo apt install -y ./legcord.deb2. If you no longer want Legcord on your Raspberry Pi, you can remove it by using the following command.
sudo apt remove -y legcordYour Legcord settings are kept in the ~/.config/legcord folder, which you can delete if you want to remove those as well.
Conclusion
Hopefully, you can now run Discord on your Raspberry Pi.
While we don’t have access to the official client, there are many well-maintained third-party Discord clients we can use. Since Discord has a web app, these clients can essentially wrap it and behave like the official client.
Please comment below if you have had any issues getting this Discord alternative to run.
If you liked this tutorial, we highly recommend exploring our many other Raspberry Pi projects.