This guide will show you how to install Django on to your Raspberry Pi.
For those who do not know, Django is a python-based web framework designed to be highly scalable.
Its ultimate goal is to allow web apps to be written quickly and with less code.
Being both open-source and free makes the Django framework an excellent choice for those wanting to build a web application using the Python language.
By following this guide, you will learn how to run Django web apps from your Raspberry Pi.
To get Django to run on your Raspberry Pi, we will need to install Apache and Python.
Equipment
Below you can view the list of equipment we used when setting up Django on the Raspberry Pi.
Recommended
Optional
We tested this tutorial on a Pi 400 running the latest version of Raspberry Pi OS Bookworm.
Preparing for Django on the Raspberry Pi
Before we install Django on our Raspberry Pi, we need to prepare it for the framework.
We need to set up two crucial components for Django, those being Apache and Python.
Setting up Apache2 for Django
In this section, you will quickly get Apache up and running on our Raspberry Pi so that we can use the Django software.
We will need to make some changes to our configuration file a bit further down the track but for now, let us get Apache installed.
1. Your first task is to set up and install the Apache webserver to your Raspberry Pi.
Our guide will walk you through the simple steps of getting the Apache software up and running.
You do not have to worry about setting up PHP as Django operates using Python.
2. In addition to the base version of Apache, we will need to install some additional packages so that Apache can talk with Python.
We can install the relevant package by running the following command, on your Raspberry Pi
sudo apt install libapache2-mod-wsgi-py3CopyThis command will install the Web Server Gateway Interface (WSGI) for interacting with Python 3.
3. After installing the WSGI module for Apache2, we will need to enable it by using the following command.
sudo a2enmod wsgi
Copy
Setting up Python 3 for Django
Our next step is to install and configure Python 3 on our Raspberry Pi for Django.
The reason for this is that the Django framework runs using the Python programming language.
4. Let us start by installing Python 3 and all of our required dependencies.
We will be installing Python, its package manager, and its virtual environment software by running the following command.
sudo apt install python3 python3-venv python3-pipCopyConfiguring Apache for Django
With both the Apache and Python software installed to our Raspberry Pi, let us now configure it all to run Django.
This configuration won’t work quite yet as we still need to get Django installed.
5. Let us begin by modifying the default configuration file for Apache.
You can edit this file using nano by running the command below.
sudo nano /etc/apache2/sites-enabled/000-default.confCopy6. Within this file, we will need to add some lines to tell Apache how it should handle our files.
In this case, we will be telling it to use Python to interpret the files within the directory.
7. First find the following line of text within the file
</VirtualHost>CopyOnce you have find the line, add the following text above it.
8. These lines are what sets up where our script will be stored and how it will be executed.
  Alias /static /home/<USERNAME>/pidjango/static
    <Directory /home/<USERNAME>/pidjango/static>
        Require all granted
    </Directory>

    <Directory /home/<USERNAME>/pidjango/pidjango>
        <Files wsgi.py>
            Require all granted
        </Files>
    </Directory>

    WSGIDaemonProcess django python-path=/home/<USERNAME>/pidjango python-home=/home/<USERNAME>/pidjango/djenv
    WSGIProcessGroup django
    WSGIScriptAlias / /home/<USERNAME>/pidjango/pidjango/wsgi.pyCopy
In this example, we will assume an app called “django” that will be stored within the folder “/home/pi/pidjango” on our Raspberry Pi.
We also set the home for Python to the location of our virtual environment which will eventually end up being stores in the “/home/pi/pidjango/djenv” directory.
9. With the details entered, you can save the file by pressing CTRL + X, then Y, then finally the ENTER key.
10. For our configuration changes to take effect, we will need to restart the Apache web service.
We can do that by running the following command to use the service manager to restart Apache.
sudo systemctl restart apache2CopyInstalling and Running a New Django Website
Now that we have Apache set up to run Django on our Raspberry Pi, we can now install the software we need.
Setting up Django requires us to do a few different steps, such as creating a folder for the project to sit in.
We will also be making use of a Python virtual environment. A virtual environment will allow us to install Python packages specifically for that environment.
Setting up Folders for Django
Let us set up some folder for us to keep the Django framework on our Raspberry Pi
1. Let us make a directory where we will store our Django scripts and our Python virtual environment.
For this tutorial, we will create it within our home directory in a folder called “pidjango“. By using the tilde (~) symbol, these folders will be created for the current user.
We will also change into our newly created directory by using the cd command.
mkdir -p ~/pidjango/static
cd ~/pidjangoCopy
2. Apache and Django can be quite finicky when it comes to permissions. For this to work properly we will need to make sure our users home directory can be searched.
To do this we simply need to change its file permissions to 755 by using the following command.
sudo chmod 755 ~Copy3. Within this directory, we can start by creating our new Python virtual environment.
python3 -m venv djenvCopyAfter running this command, you should now have a folder called “djenv” within the Django directory that we created.
When we install Django and any additional Python packages, they will be stored within this folder while using that virtual environment.
Installing Django on the Raspberry Pi
With all of our folders now setup and our virtual environment for Python ready, we can finally install Django.
By the end of the next couple of steps, you should have Django installed in your virtual environment and have a new project started.
4. With the virtual environment created, we need to use it as a source.
To use the virtual environment as a source, you need to run the following command.
source djenv/bin/activateCopyAfter running this command, you should see “(djenv)” at the start of the command line. This indicates that you are using our new virtual environment as a source.
5. Now that we are within our virtual environment, let us install the Django framework.
As Django is available as a Python package, let us run the following command to download it.
python3 -m pip install djangoCopyRunning this command will allow you to download the latest available version of Django.
If you want to download a specific version of the framework, add == followed by the version number.
6. With Django installed, we can now create a brand new project.
We can run the following command, with the last bit of text being the project name.
django-admin startproject pidjango .CopyThis will create all of the files you need to get started with Django and will allow us to verify we have set it up correctly.
Allowing Access to your Raspberry Pi Django Server
Before we can access our newly setup Django framework on our Raspberry Pi, we will need to modify its settings.
By default, Django is set up not to allow any access unless that specific IP or hostname has been added to the allowed list.
7. To allow access through our Raspberry Pi’s IP address, we need to retrieve it.
You can get the local IP address of your device by using the following command.
hostname -ICopy8. Let us edit the settings file. These settings are stored within a python file called “settings.py“.
We can begin editing the file using the nano text editor by running the following command.
nano ~/pidjango/pidjango/settings.pyCopy9. Within this file, you need to find the following line and modify it slightly.
Find the following line.
ALLOWED_HOSTS = []Replace with the following.
ALLOWED_HOSTS = ["YOURIPADDRESS"]Make sure you replace “YOURIPADDRESS” with the IP address for your Raspberry Pi.
You can add additional IP addresses or hostnames by using a comma to separate each entry. All of these values are stored within a Python array.
10. Once done, save the file by pressing CTRL + X, then Y, followed by the ENTER key.
Viewing your Django Web App
Now that we have Django set up on our Raspberry Pi, we can finally see it in action.
11. In your favorite web browser, you will need to go to the following address. We use the http protocol as we haven’t set up an SSL certificate for this connection.
http://[YOURPIIPADDRESS]Make sure that you replace “YOURIPADDRESS” with the IP address for your Raspberry Pi.
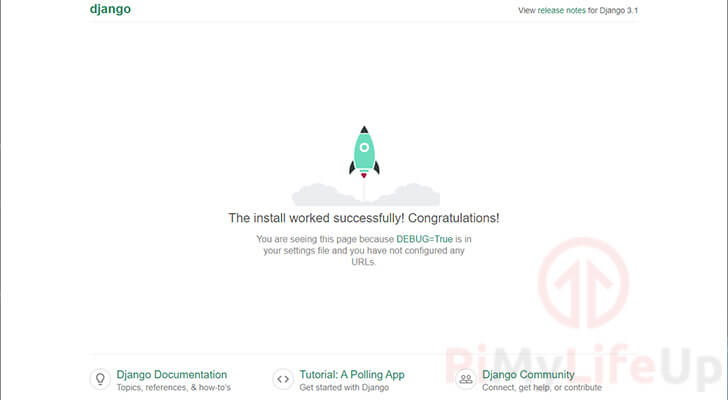
12. Upon going to the IP address, you should be greeted with the Django welcome screen.
This screen indicates that you have successfully got the Django framework running on your Raspberry Pi.
You can now proceed to write your Django app. The official Django website provides a solid tutorial to get you started.
Conclusion
At this point, you should have the Django framework installed on your Raspberry Pi.
You should also have Apache set up so that it can actively serve your Django website.
To help yourself deal with Django better, be sure to check out some of our Python tutorials.
If you have any issues with this tutorial, please feel free to leave a comment below


Will the guide be updated soon? I was using this to set-up my Django project.
Thanks for the great article
Hi Mas,
I finally got around to testing the tutorial and making some tweaks. It should hopefully now work fine but please let me know if there are still issues.
Had to play around with a few steps so I am hoping I haven’t managed to miss something when re-adjusting the written tutorial.
Kind Regards,
Emmet
To anyone else following this guide, make sure to use Bullseye. For some reason the above guide does not work with the latest version of Raspberry Pi OS, Bookworm.
Hi an1uk,
Raspberry Pi OS Bookworm introduces quite a few breaking changes. I will have to slowly go through tutorials as people report them to make sure they work on the new operating system.
Thank you for letting us know that this one doesn’t currently work.
Cheers,
Emmet
“2. Within this directory, we can start by creating our new Python virtual environment.” python3 -m venv djenv
“After running this command, you should now have a folder called “env” within the Django directory that we created.”
In the above line you say that “you should now have a folder called “env” within the Django directory that we created” But it created a folder called djenv not evn what should it be?
Then you say: “When we install Django and any additional Python packages, they will be stored within this folder while using that virtual environment.”
which fill name is the correct one?
Hi Dave,
Apologies for the typo, “djenv” is the correct directory name.
Cheers,
Emmet
Nice and clean, easy to set up.
Thank you again for this tutorial.
on a fresh install of raspbian it looks like you have to uninstall python 2.x “sudo apt remove python” otherwise apache will error when you try to restart the service for step 4 of Configuring Apache for Django.
Excellent article, everything worked until I got to the very last step… after setting up django and attmepting to visit “https://{my ip address}”, I get hit with a site can’t be reached page suggesting I try checking the proxy and the firewall. Pretty stumped so any assistance would be greatly appreciated!
Hi Karl,
There was a mistake in the guide where I said to use “https” instead of the “http” protocol.
It should load up fine if you use “http” instead.
Cheers,
Emmet
Great tutorial, I was able to get Django up and running without any issues, however in the last step “Viewing your Django Web App” it says to connect via HTTPS, but since we haven’t set up SSL it didn’t work for me. Normal HTTP was fine in this case.
Hi Christopher,
Thank you for pointing out this mistake! I must of mindlessly typed in https.
The typo has been corrected so no one else should run into the same issues.
Cheers,
Emmet
Probably the best instruction for this process I have seen. Fair play.
My main goal is to run a PI 4 to serve some Django pages and run some python scripts behind the scenes to control a whole array of different devices.
Your little write-up was well constructed, to the point, and everything actually works and functions as expected.
Excellent work!
Thank you…