In this tutorial, I go through all the steps to getting your very own Raspberry Pi plex server up and running.
This project is perfect for anyone who wants to have a media server that can be accessed by anyone within a household. You can also set it up to be accessed outside your local network.
Plex is a client-server setup where the client directly streams data from the Plex media server. This setup means you can have all your movies, music, and photos located on the one device, the server. In this case, we will be using the Raspberry Pi.
You can then have multiple clients connect to the same server. It is great as you don’t need to have multiple copies of the same media across several devices.
The Plex client is supported on a ton of devices including Windows, Apple, Android, Amazon Fire TV, Chromecast, Xbox, PlayStation, Linux, and so much more. It really is a fantastic home media solution.
If you just want a single client without the whole server setup, then something like the Raspberry Pi Kodi media center might interest you more.
If you are after an alternative completely free media server, you can also check out Jellyfin.
Equipment
You will need the following equipment to be able to complete this Raspberry Pi Plex server tutorial.
Recommended
- Raspberry Pi Amazon 2 or Newer
- Micro SD Card Amazon
- Power Supply Amazon
- Ethernet Cable Amazon (Recommended) or Wi-Fi Amazon
Optional
- Raspberry Pi Case Amazon
- USB Keyboard Amazon
- USB Mouse Amazon
- External Hard drive Amazon or USB Drive Amazon (For storing movies, music & photos)
NOTE: This tutorial will not work on older versions of the Pi. A Raspberry Pi 2 or later will work. It was last tested on a Raspberry Pi 5 running the latest version of Raspberry Pi OS Bookworm.
Video
In the video below we will walk you through the steps of installing the Plex Media Server to your Raspberry Pi.
Be sure to also check out the written version of our Plex guide below.
Setting up the Raspberry Pi Plex Server
In this tutorial, I will be using Raspberry Pi OS so if you haven’t got it installed then check out my guide on how to setup Raspberry Pi OS.
If you want to run a slim version of the operating system, you should take a look at installing Raspberry Pi OS Lite.
Preparing your Pi for Plex
1. Now before we install the Plex Media Server software to the Raspberry Pi, we need first to ensure our operating system is entirely up to date by running the following two commands.
sudo apt update
sudo apt upgradeCopy
2. To install the Plex packages to the Raspberry Pi, we will need to add the official Plex package repository.
Before we do that we need to install the “apt-transport-https” and “gnupg2” packages.
This package allows the “apt” package manager to retrieve packages over the “https” protocol that the Plex repository uses.
Install the package by running the command below.
sudo apt install apt-transport-https gnupg2Copy3. Let’s now add the Plex repositories to the “apt” keyrings directory.
This key is used to ensure the files that you are downloading are in fact from that repository and signed by that key.
Run the following command to download and save the key to our keyrings directory.
curl -L https://downloads.plex.tv/plex-keys/PlexSign.v2.key | sudo gpg --yes --dearmor -o /usr/share/keyrings/plexmediaserver.v2.gpgCopy4. With the Plex GPG key now added, we can finally add the official Plex repository to the sources list by running the following command.
echo "deb [signed-by=/usr/share/keyrings/plexmediaserver.v2.gpg] https://repo.plex.tv/deb/ public main" | sudo tee /etc/apt/sources.list.d/plex.listCopyIn the line we are adding, you can see that we refer to the keyring we downloaded in the previous step.
5. As we have just added a new repository to our sources, we will need to run the “update” command again to refresh the package list.
sudo apt updateCopyIf you get the error “/usr/lib/apt/methods/https could not be found.” Then the https transport package hasn’t been installed. Double check that it has been installed correctly.
Installing Plex to your Raspberry Pi
6. Now that we have set up our Raspberry Pi so that it can read from Plex’s official package repositories we can go ahead and finally install the Plex Media server package to the Pi.
To install the “plexmediaserver” package, run the command below.
sudo apt install plexmediaserverCopy7. The installation process for Plex sets up a few different things for us.
The first is that it creates a user and group for Plex to run under. This user and group is called “plex“.
It also will set up two directories, one where to store files temporarily that Plex is transcoding. You can find this folder at “/var/lib/plexmediaserver/tmp_transcoding“.
The second directory is where Plex will store all the metadata it retrieves for your media. This folder can be found at “/var/lib/plexmediaserver/Library/Application Support“
8. As Plex is running a different user to the Raspberry Pi’s default “pi” user, you will need to make sure you have permissions set correctly on your drive.
If you need help setting up your external drive with Plex, you can try following our guide on mounting a USB drive on the Raspberry Pi.
Setting a Static IP Address for your Plex Server
9. Now that we have installed Plex to our Raspberry Pi you will want to ensure that you have a static IP address for your Raspberry Pi. If you don’t have access to your router, you can still set a static IP on your Raspberry Pi itself.
There are two reasons to use a static IP. One is that the IP will be easier to remember. Second is that it will make sure your Plex server can always be found at the same address.
https://pimylifeup.com/raspberry-pi-static-ip-address/10. The Pi should now always start with the same IP. You can also set this on most routers by tying the mac address of your network device (WiFi or Ethernet) to an IP.
Now the Raspberry Pi Plex media server should be all set up and ready to scan your media and stream it any client that wishes to connect. I will go through some basics of setting everything up below.
Storing Media on the Raspberry Pi
Now there are several ways to store your media on the Raspberry Pi. I will mention each of the methods below.
You can hook up an external hard drive with all your music, movies and whatever else you may have. Setting the Plex program to run as the Pi user means you can plug a USB hard drive in and access the media in Plex without any issues.
You’re also able to mount drives permanently; I have already covered this in a previous tutorial, so be sure to check out my guide on how to mount a USB hard drive to the Raspberry Pi. Make sure you set the user & group owner of the drive to Pi.
Another option is to set your Pi up as a NAS. This will allow you to transfer your media across to it without needing to disconnect and reconnect a hard drive.
You can set this all up by following my tutorial on setting up a Raspberry Pi network attached storage.
Lastly, you can use the SD card for storage, but as you could imagine, this will quickly run out of space. You can set up a folder on the SD card to be accessed via the network.
Connecting Clients to The Plex Media Server on the Raspberry Pi
If you’re using an app on your phone, computer, Xbox, PlayStation, or any other device, then the Plex client should be able to pick up on the server automatically.
You will, unfortunately, find the official mobile Plex applications are behind a paywall. For example, you will need to pay money to get full access to all the features. However, all other apps, including the web app, should be free with only a small set of features requiring a subscription.
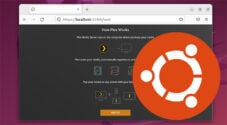
To connect to the browser, enter the IP followed by the port 32400 and /web/. For example, mine is.
192.168.1.100:32400/web/You will be prompted to log in, simply sign up or sign in to an existing plex account. You can skip this by just entering by entering the address above again.
Next, you will need to set up your music, movie, and TV show libraries. This process is incredibly easy and shouldn’t be too hard in getting it set up correctly.
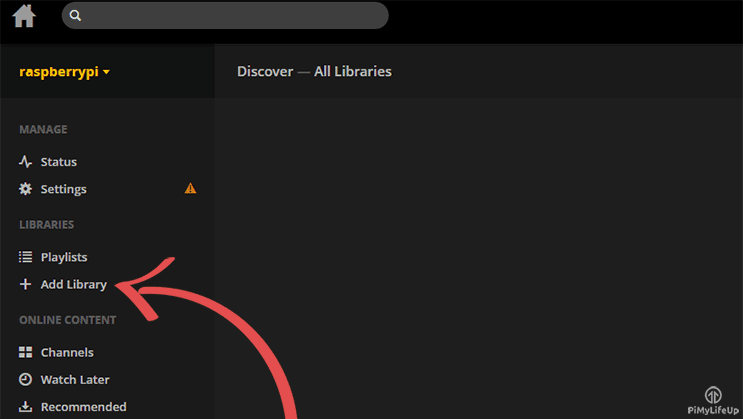
1. First select add library in the left-hand side column.
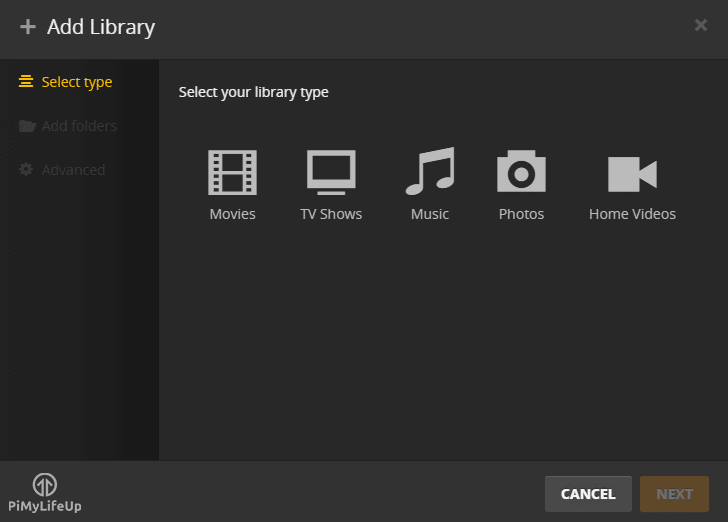
2. Next, select the type of media that is in the folder. If you have more than one type, then you will need to add a new library for each type of media.
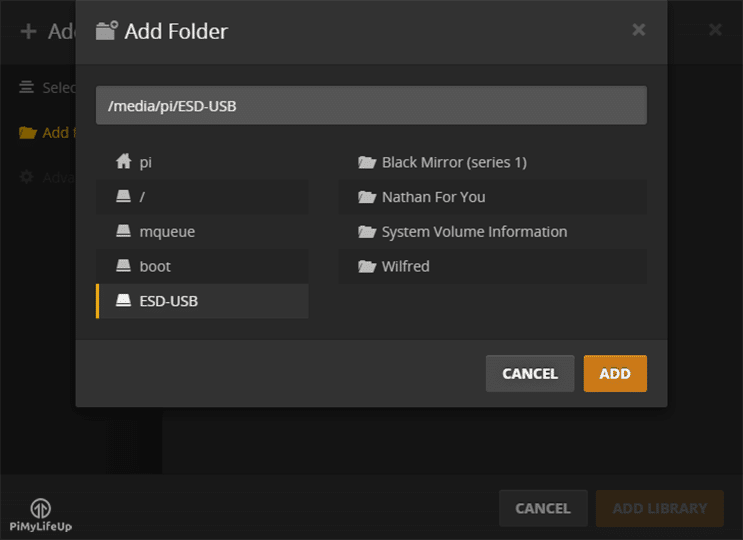
3. Next, you will need to select the folder that has all your media in it.
For example, mine is on a USB drive that is displayed in the left-hand side column or can be found at /media/pi/ESD-USB
4. Once you add the library, it will now organize your clips in a nice easy to browse interface.
If you need more information on how to setup, name and organize your media library, then Plex has an amazing amount of documentation on naming and organization.
Fixing File Permission Errors with Plex
One of the most common problems you may run into with Plex on your Raspberry Pi is with it being unable to access your files. The most common cause of this issue is incorrect permissions.
This section will show you how to modify the permissions for an ext4 drive.
If you are running an NTFS or FAT formatted drive, you will need to try remounting your disk drive and adjusting its mounting options. The reason for this is that the NTFS and FAT filesystems do not support the Linux permission system.
1. To begin, work out the location of the drive or folder that you want to adjust the permissions for.
For example, we have an ext4 drive mounted to our Raspberry Pi at the location /mnt/pimounteddisk/.
2. As the next two commands need to be executed as the superuser, let’s change to it by running the following command.
sudo suCopy3. With the path to your drive or folder in hand, we are going to make use of the following two commands.
Make sure that when you run these that you replace [YOURDRIVEPATH], with the path you want to adjust permissions on.
find [YOURDRIVEPATH] -type d -exec chmod 755 {} \;
find [YOURDRIVEPATH] -type f -exec chmod 644 {} \;Copy
The second command finds all directories and assigns the owner “read“, “write” and “execute” privileges and gives all other uses “read” and “execute” privileges.
The third command is used to find all files and will assign the owner “read” and “write” privileges, and all other users will get the “read” permission.
4. Once those commands have finished running, we can go ahead and exit out of the superuser mode.
exitCopy5. You should now be able to interact with your media files from within Plex successfully.
Conclusion
Hopefully, at this stage, you will now have Plex up and running on your Raspberry Pi without any issues.
If you come across any issues or have some feedback, then please don’t hesitate to leave a comment below.


thanks works fine, just had to manually adjust external access but that was expected.
Does anyone know if Plex works on Raspberry Pi, Trixie edition? Thanks.
Hi Ron,
Trixie shouldn’t have broken anything and Plex should continue to run fine. There was a brief issue with the GPG key but that seems to be fixed.
Kind regards,
Emmet
As of Jan 2026 the SHA1 standard is blocked by Debian. Can you upgrade the links with the new SHA256 ones please.
Hi Michel,
Unfortunately, there actually isn’t currently a link we can update to. The Plex team are still apparently in the process of setting up a brand-new key and repository. We will update this guide as soon as they have something concrete that actually works.
The only real alternative I could recommend is setting up Plex using Docker instead.
However, it might be possible to get away with using the old repository temporarily by re-adjusting the expiry date that is being enforced.
1. Open up the default settings for the apt package manager.
2. Find the following line within this file.
3. Once found, re-adjust the month/day/year so that the expiry is in the future. For example, if we changed the expiry to the first of march, we would do the following.
4. Now save and quit by pressing CTRL + X, Y, and then ENTER.
5. At this point, you should be able to safely update the package list and not run into the error about key being expired.
Kind regards,
Emmet
Hi Michel,
Just following up my previous comment. I have updated our steps so that they now use the newer Plex repository key as well as the new Plex repository itself. One thing that messed me up earlier when I was testing was that the URL has changed from “
downloads.plex.tv” to “repo.plex.tv“.1. Before you follow the updated steps, we must remove the old Plex sources file which you can do so by running the following command.
2. With that done, make sure to update the pacakge list cache to clear out this old entry before proceeding with the installation steps.
Kind regards,
Emmet
Awesome!, I have complete setup; Raspberry Pi 4b, 4GB as Plex server. I’ve been using mine for months, no problem with 4K. Remote access has trouble sometimes, but that is usually the receiving end. I found a pre-built at Zirocks.com. Works good as a file server to back up your phone too!
This is absolutely brilliant, thank you. Is the following warning after step 5 anything to worry about?
Warning: https://downloads.plex.tv/repo/deb/dists/public/InRelease: Policy will reject signature within a year, see –audit for details
Hi Neil,
Thank you for the kind words.
That warning isn’t anything that you will need to worry about for now but it will mean you will need to replace the package key down the track. At the moment the GPG key that Plex is utilizing is using SHA1 which is now considered insecure by the APT package manager and will eventually be rejected early next year.
I will update this guide to point to a new key when it comes available, but for now it should continue to work without issue.
Kind regards,
Emmet
Awesome. Thanks again. I’m chuffed to bits with my new file and media server.
I got a Raspi 3 as my Plex Server for around 5 years but today, the SD Card died.
Its lifespan has been reduced because Plex write a lot of stuff (metadatas, log, etc)
It would be a cool addition to your guide to write some optimizations to do in order to be able to extend the life of an SD Card when using Plex server.
I’m trying to set this up and I can’t get past booting up the plex server on the web interface. I get an error that says “A problem has been detected with a core component of Plex Media Server”. Not sure if this is a permissions issue or an issue with the current build of Plex, but I don’t know where to get a previous release to try it. I’m running it on Raspberry Pi 5 with Debian GNU/Linux 12 (Bookworm)
Any guidance is appreciated..I’m pretty new to Linux stuff.
Hi Jimmy,
Looking it up there is currently an issue with the latest version of the Plex Media Server that should hopefully be fixed properly soon. In the mean time the solution is to simply click “Name” during the setup wizard.
You can read up more about this issue here https://forums.plex.tv/t/pms-v1-42-1-core-component-error-workaround-and-information/928727
Kind regards,
Emmet
Hello. I am stuck at the point of adding a library (everything else was fine). I have tried to add /media/rob/EXTDISK as a library but Plex can’t see anything there. I have verified with a directory listing that the files are there and have set the permissions as you specify above, but to no avail.
I tried to mount the disk to /mnt/plexdisk but it errors saying “/dev/sda already mounted or mount point busy” but I think Plex should be able to see the files in /media/rob/EXTDISK anyway? The external disk is a large, powered WD external drive connected via USB 3.0 and is also used for writing an image file of the the Raspberry Pi every day as a backup (which it does without any problems).
It’s just Plex that can’t see anything in this drive. Let me know if you have any ideas or I can provide more info. Many thanks in advance!
Hi Rob,
This is definitely one of those more frustrating issues that like to rear there head. If the permissions are all as we set, then in theory everything should be working.
If your drive is already mounted, and you have set the permissions using the comamnds we set, everything in theory should work. But lets try and dive into this a bit more. Can you provide the output of the following command.
You can hide the directory names, the main thing im interested in is the user that owns these files/folders as well as the permissions that have been applied.
Kind regards,
Emmet
Thanks Emmet. Sorry about the delay getting back to you.
Here is the output of the command you requested:
There are two directories on the disk:
The “share” directory is the location of the files that Plex should have in its library.
I will check back here more regularly now. Thanks again!
Hey, I got the same issue, running on 3B model. Output is bellow
Hi Rob and Seth,
Sorry to see that both of you are running into the same issue. Let us try a little different way around this problem and this is to add Plex to your users group.
You should be able to achieve this by using the following command. This modifies the group of the “plex” user and adds (-a) it to the group (-G) that has the same name as your user ($USER).
After the group modification, restart your system to ensure the permission change is read in by the Plex server.
Please let me know if this helps out at all, or whether the issue continues to persist.
Kind regards,
Emmet
Sadly the issue still persists. What’s strange is that i have some directories in the external drive i want to use and those are not shown in the plex “directory add” menu.
Maybe it’s a disk permission thing?
Thanks for your reply Emmet. I have done as you suggested but I don’t see any difference; Plex still shows the library as empty.
FYI – In the Plex control panel: Manage Libraries > Edit Library > Add folders > Browse…
I can see the external drive (WD14TB) but when I select it, no directories are shown.
I was having the exact same problem. This is what worked for me:
You have to make sure the folder BEFORE where the media is located also have full permissions to read:
Thanks so much Sean; that was it! I can now see the folders when creating a library in Plex.
works with pi5!!