In this Raspberry Pi Samba tutorial, we will be showing you how you can share directories from your Raspberry Pi using the SMB/CIFS protocols.
Samba is a re-implementation of the SMB (Server Message Block) networking protocol and allows Linux computers to integrate into Microsoft’s active directory environments seamlessly.
CIFS or Common Internet File System is an implementation of the SMB protocol. In modern setups, CIFs or SMB is used interchangeably, but most people will use the term SMB.
By using Samba on our Raspberry Pi, we can easily share directories in a way that they can be accessed on almost every operating system.
Samba is one of the easiest to set up and configure file servers, which makes it one of the best solutions for setting up a NAS, especially when you intend on targeting Windows systems.
There are plenty of other NAS setups that you can run on your Raspberry Pi. I prefer Samba has I run into the least problems, but something else might appeal to you more.
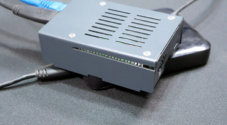
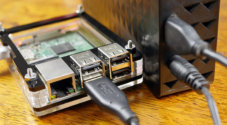
Equipment
Below is all the equipment that you will need for setting up Samba on your Raspberry Pi.
Recommended
- Raspberry Pi Amazon
- Micro SD Card Amazon
- Ethernet Cable Amazon or Wi-Fi Amazon
- External Hard Drive Amazon
Optional
Note: The USB ports on the Raspberry Pi might not be enough to power an external drive so you might need to invest in a powered USB hub.
Setting up Samba on your Raspberry Pi
Over the following sections, we will be showing you how to set up a Samba share on your Raspberry Pi.
If you prefer video, you can watch the video below to learn all the steps you need to take to install and configure Samba correctly. Otherwise, the full text instructions are immediately below the video.
Installing Samba on to your Raspberry Pi
1. The first thing that we must do before we setup a SMB/CIFS share on our Raspberry Pi is to make sure everything is up to date.
We can update the package list and all our packages by running the following two commands.
sudo apt update
sudo apt upgradeCopy
2. Now that we have Raspberry Pi OS entirely up to date, we can now proceed on to installing the Samba software.
We can install the packages that we require to setup Samba by running the following command.
sudo apt install samba samba-common-binCopyCreating a Directory to Share
3. Before we set up our network storage on our Pi, we need to first create a folder that we will share.
This folder can be located anywhere, including on a mounted external hard drive. For this tutorial, we will be creating the directory within our current users home directory.
Create this folder by using the mkdir command. By using the tilde (~) symbol, we will be creating this new folder within the current user’s home.
mkdir ~/sharedCopyEnsure that you don’t use “sudo” to create any directories you want shared. A directory created using “sudo” will be owned by the root user.
If you use sudo, you will need to use the chown command to give ownership of that directory to your actual user.
Configuring Samba on your Raspberry Pi
4. Now we can share this folder using the Samba software. To do this, we need to modify the samba config file.
The “smb.conf” configuration file is where you will store all your settings for your shares.
We can begin modifying the config file by using the nano text editor.
sudo nano /etc/samba/smb.confCopy5. Within this file, add the following to the bottom. This text defines various details of our share.
For this example to work, ensure that you replace “<USERNAME>” with the name of your user.
[pimylifeupshare]
path = /home/<USERNAME>/shared
writeable = yes
browseable = yes
public = noCopy[pimylifeupshare]– This block defines the start of a new Samba share. The text between the square brackets ([ ]) is the name that will be assigned to your share.
For example, by setting our share name to “pimylifeupshare” we would be able to access this by going to: “\\192.168.0.134\pimylifeupshare“.path– Use this option to specify the path of the directory you want to share using Samba on your Raspberry Pi.writeable– When this option is set to “yes“, it will allow the folder to be writable.
If you want to block users from being able to write to this share, set this to “no“.browseable– The browsable option allows you to control whether this share will be viewable by others on your network. Setting this option to “yes” will allow others to find this share on your network.
By setting this option to “no“, you will be required to enter the share path to connect to it.public– If this is set to “no” the Pi will require a connection to have a valid user to access the Samba share.
6. With the changes made to the file, you can now go ahead and save it by pressing CTRL + X then Y followed by ENTER.
Setting up a User to Access your Samba Shares
7. Next, we need to set up a user for our Samba share on the Raspberry Pi. Without it, we won’t be able to make a connection to the shared network drive
To assign a Samba password to your user we will need to utilize the “smbpassword” tool. Use the command below to set a password for your user, replace “<USERNAME>” with the name of your user.
sudo smbpasswd -a <USERNAME>Copy8. You will now be prompted to type in a new SMB password for your user.
New SMB password:
Retype new SMB password:
9. If you see the following message, then you can tell that you have successfully added an SMB password to your user.
You will be using this username and password to connect to your shares.
Added user USERNAMERestarting Samba on your Raspberry Pi
10. Finally, before we connect to our Raspberry Pi Samba share, we need to restart the samba service so that it loads in our configuration changes.
sudo systemctl restart smbdCopy11. The last thing we should do before we try connecting to our Samba share is to retrieve our Raspberry Pi’s local IP address.
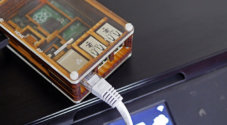
First, make sure you’re connected to a network by either connecting Ethernet cable or setup WiFi.
While you can connect using the Pi’s network name, we will grab the IP address just in case that option fails to work on your home network.
Run the command below to print out the Pi’s local IP Address.
hostname -ICopyIn the next couple of sections, we will walk you through the process of connecting to your network attached storage on Windows and macOS.
Connecting to your Samba Server on Windows
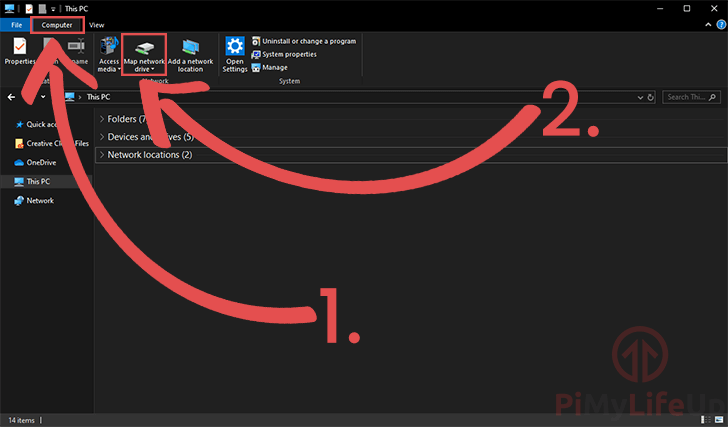
1. To connect to your Samba on Windows, begin by opening up the “File Explorer“.
Within the “File Explorer” click the “Computer” tab (1.) then click “Map network drive” (2.)
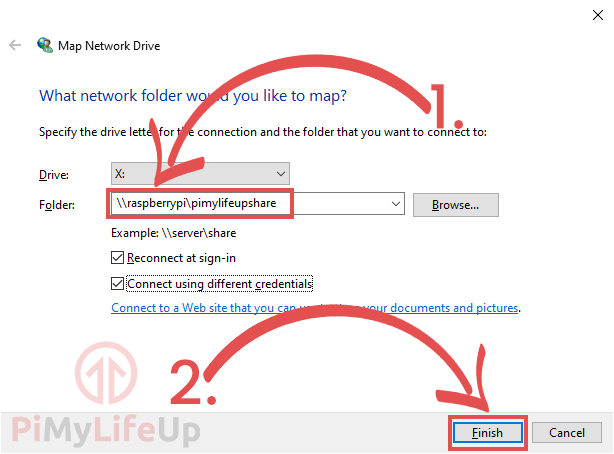
2. You will now be greeted by the dialog shown below asking you to enter some details.
Within the “Folder” textbox (1.) you will want to enter the following “\\raspberrypi\pimylifeupshare“.
Make sure that you replace “pimylifeupshare” with the name that you defined for your Samba share.
If for any reason the connection fails, you can switch out “raspberrypi” with your Raspberry Pi’s local IP address that you retrieved in step 9 of the setting up section of this tutorial.
Once done, click the “Finish” button to finalize the connection.
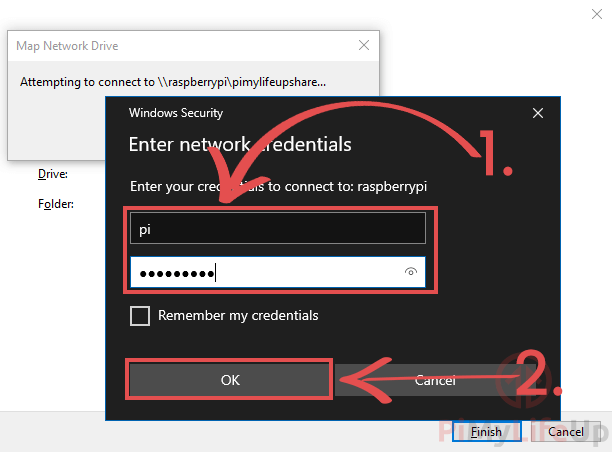
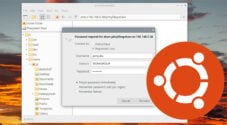
3. Finally, you will be asked to enter your login details to be able to finish the connection.
Enter the username and password (1.) you set using the “smbpasswd” tool earlier on in the tutorial.
Once done, click the “OK” button (2.) to continue.
Connecting to your Samba Share on macOS
1. Now to connect to your Raspberry Pi’s Samba server on a macOS system.
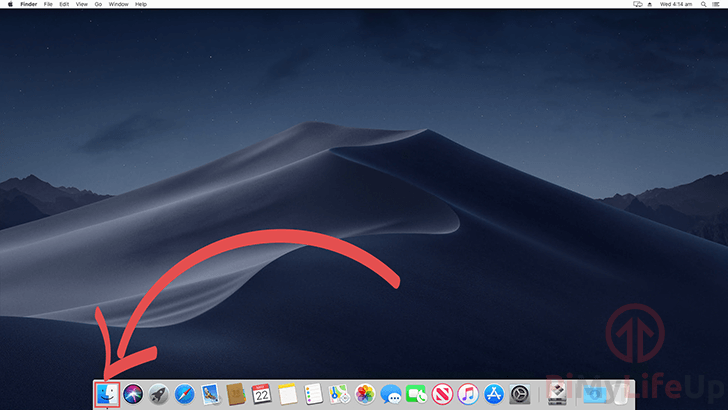
You will have to begin by opening the “Finder” application as we have shown in the screenshot below.
2. With the “Finder” application now open, click the “Go” button (1.) in the toolbar, then click the “Connect to Server…” option (2.).

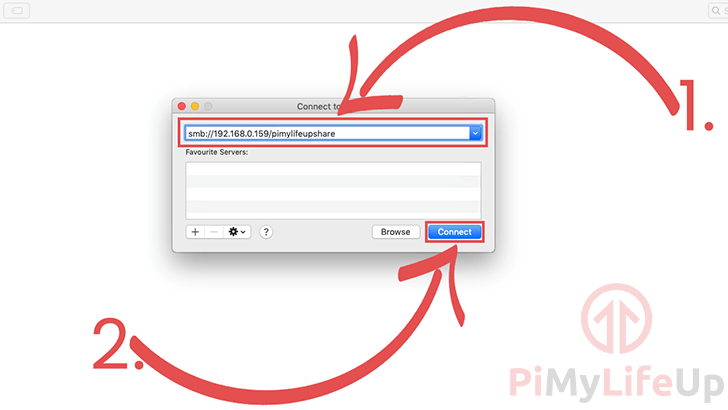
3. Now that the “Connect to server” dialog is now open on your device you can go ahead and enter in the details for your Raspberry Pi’s SMB share.
Within the address box (1.) you will need to enter “smb://192.168.0.159/pimylifeupshare“.
You will need to swap out the IP address “192.168.0.159” with the IP address of your Raspberry Pi that you retrieved in step 9 of the setting up section of this tutorial.
Also, if you changed the name of the share name from “pimylifeupshare“, you will need to change that section of the address.
Once you have entered the address, you can click the “Connect” button (2.) to begin the connection to your Raspberry Pi’s Samba share.
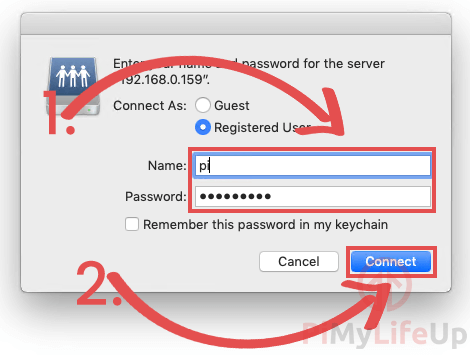
4. Before the connection is complete, you will be asked to enter both the username and password that you set up using the “smbpasswd” (1.) tool earlier in this guide.
Once you have entered in both of these details, go ahead and click the “Connect” button (2.) to finalize the connection.
Conclusion
By now you should have successfully set up a network drive that you can access on both a Windows PC or a Mac computer. You should also be able to access it on other devices such as mobile phones.
I hope that this Raspberry Pi Samba server tutorial has shown you everything you need to know to have your network storage up and working. If you have any feedback then please don’t hesitate to leave a comment below.
If you found this guide to be helpful, we recommend checking out our many other Raspberry Pi projects.
Why is the Linux-PC banned to connect?
Linux shouldn’t be banned from connecting. You might need to install CIFS utilities first and try connecting to the server.
Also, ensure you are connecting using a SAMBA user that exists and has a password set.
Lastly, ensure you are not running a firewall that might be blocking the software from connecting.
Wonderfully clear, thank you. I couldn’t get OpenMediaVault to function on my Pi4 (where it works fine on an old Pi3), and CopyParty is a crock – pundits say its ‘insanely good’; I think it’s just insane.
Your tutorial – top notch!
Your tutorials are extremely well done and easy to understand, thank you very much for your contribution!
Top quality tutorial, as always. Loved the Plex one, too!
Perfect. Works great on RPi4 with ‘bookworm’ on a SSD installed.
Success! (Definitely 3 times, partially on the 4th)
I’m running raspbian bookworm, and don’t have permissions to write/delete files. Is this a lasted update issue? Or have I potentially gone astray somewhere?!
Many thanks for the post though!!! It’s worked many times.
Are you sure you didn’t use sudo/root privileges when creating the directory “shared”?
Very helpful description. Worked for me
Many Thanks for the LMS workflow. After many hours of trial and error your explanations were simply perfect. Great!!!
Michael
Make sure you are not connected to a VPN when you try to connect in the last step or it wont work. That was my issue. solved!
I thought I followed your guide to a T. But i must have messed up because when i try to connect in the last step i get the message: “there was a problem connecting to the server “” “the server may not exist or it is unavailable at this time”
Please update this tutorial for Bookworm, SMB sharing and permissions to the home directory are completely broken and this guide no longer works for Bookworm.
Hi Dave,
I ran through this tutorial again and while the original version did work, I have re-adjusted some of the steps to hopefully be clearer.
Please feel free to comment again if you continue to have issues with this guide.
Cheers,
Emmet
One of the clearest tutorials on setting up samba. Brilliant-thanks for putting the time in to write this up.
[photoshare]
path = /home/pi/share
writeable=yes
create mask=0777
directory mask=0777
public=yes
Here is my error msg when I try to connect to my Windows “192.168.50.68” exists but Windows can’t find “home”. It gives me no matter how what I do.
What am I missing/did wrong?
Thanks
Hi Mike,
Sorry to see that you are having issues with this tutorial. I guess the only thing that. I can think of is that your username on your Raspberry Pi isn’t “pi”.
Try changing “pi” to the name of your user to see if that fixes the issue.
Cheers,
Emmet
On windows did you try \\192.168.50.68\photoshare
Don’t forget to enable the smb user:
sudo smbpasswd -e pi
Thanks for another great Tutorial on RPi-Samba.
As one of your oldest followers (age 79) i found this so easy to follow, and error free too. (Unlike some others).
I am 72, a youngster compared to you. Thank you for your endorsement for this tutorial. I am not a Linux expert, but I need to become one.I live in the Detroit area, a member of i3 Detroit, a makerspace. I really like the low-cost nature of the Raspberry Pi. The Raspberry Pi 5 is a game changer. Share your knowledge with your friends, family and the rest of your community!
This is a great guide. However, I would recommend adding a sentence under step 3. that specifically states not to use the command “sudo mkdir” because that will block you from editing anything in the folder when on a remote device. Took me 2 days to figure out lol.
Hi William,
Thank you for that suggestion. I have now added a note immediately after that command warning that the directory will be owned by the “root” user if you utilize “sudo”.
Cheers,
Emmet
Thanks for your excellent guide. I can get Samba running on my Pi (Bullseye) fine, but I cannot connect to Samba from my Mac (Big Sur). When I try to connect to the server, I get a long delay then the message “The server may not exist or it is unavailable at this time. Check the server name or IP address, check your network connection and then try again.”
My Pi and Mac can ping each other fine, and I can connect from my Mac to my Pi via VNC and Plex fine.
Any ideas what might be going wrong?
Hi Roger,
I have tried to replicate this issue but can’t seem to, the share seems to connect fine when connecting from my Mac to the Raspberry Pi. It could potentially be Plex’s SMB server conflicting with the server we installed. (Maybe check if the smbd service is running by using “
sudo systemctl status smbd“)One thing I have seen suggested online is changing “
smb://” with “cifs://” so maybe give that a try?Cheers,
Emmet
Hi Emmet
Turns out I had to run these commands on my Pi to get SSH & Samba working…. Hope this helps someone else!
thank you! this worked!