In this tutorial, we will show you how to install and run Organizr on your Raspberry Pi.
Organizr is an interesting approach to organizing your various self-hosted services in one place. Instead of a list of bookmarks like solutions such as Homepage, Homarr, or Dashy, Organizr shows each service as an iframe.
An iframe is a way of loading a website within a frame without leaving your current web page. Organizr handles this by providing a sidebar with an icon for each service you add. Clicking an icon will load that service up within its frame.
The basic idea of this approach is that you will never have to leave the one page to access all of your self-hosted services. Since the Raspberry Pi is a great device for running multiple small services, something like Organizr can be a great choice.
To run Organizr on our Raspberry Pi, we will use its official Docker container. This container makes running and updating this software incredibly simple.
The one catch to using Organizr on your Pi is that it only has builds for ARM64. This means you must be running a 64-bit version of Raspberry Pi OS. This also means that this guide will not work on all versions of the Raspberry Pi before the Raspberry Pi 3.
Equipment
Below is a list of equipment we used to set up and run Organizr on our Raspberry Pi.
Recommended
Optional
This tutorial was last tested on a Raspberry Pi 5 running the latest version of Raspberry Pi OS Bookworm 64-bit.
Installing the Organizr Software on your Raspberry Pi
Over the following few sections, we will walk you through the entire process of installing and running Organizr on your Raspberry Pi.
Preparing your Raspberry Pi to run Organizr
1. We should update the operating system before we install Organizr on the Raspberry Pi.
You can use the following two commands to update the package list cache and upgrade any out-of-date packages.
sudo apt update
sudo apt upgradeCopy
2. Your next step is to install Docker on your Raspberry Pi. Follow our guide to install this run time to your device.
If you already have Docker installed, you can simply skip this step.
https://pimylifeup.com/raspberry-pi-docker/3. With Docker installed, we can create a directory to store the Docker Compose file for Organizr on our Raspberry Pi. We will use this same directory to store the software’s configuration files.
You can use the mkdir command within the terminal to create this folder.
sudo mkdir -p /opt/stacks/organizrCopy4. After creating the Organizr directory, change into it by using the following command within the terminal.
cd /opt/stacks/organizrCopyWriting a Docker Compose File for Organizr
5. With everything ready, we can move on to writing the Docker Compose file for Organizr. This Compose file will tell Docker how to install and run Organizr on your Pi.
You can begin writing this Compose file using the nano text editor by running the following command.
sudo nano compose.yamlCopy6. Within this file, you will want to fill out the following lines. There is one placeholder you will want to replace while filling out this file.
<TIMEZONE>: Replace this placeholder with a valid timezone identifier for your region. You can find a good list of these on Wikipedia.
For example, if you are in Hobart, Australia, you would use “Australia/Hobart“.
services:
    organizr:
        container_name: organizr
        hostname: organizr
        image: organizr/organizr:latest
        restart: unless-stopped
        ports:
            - 8080:80
        volumes:
            - ./config:/config
        environment:
            - TZ=<TIMEZONE>Copy
7. Once you have finished filling out the file, save and quit by pressing CTRL + X, Y, and then ENTER.
Starting up Organizr on your Raspberry Pi
8. You can now start up Organizr on your Raspberry Pi by using the command below.
Docker will download the latest version of the Organizr container and start it immediately. By using the “-d” option, Docker will detach from the current terminal session.
docker compose up -dCopyAccessing the Web Interface
9. Now that you have Organizr installed on your Raspberry Pi, we can access its web interface.
To access this software, you will need to know the IP address of your Pi. The easiest way to do this is to use the hostname command, as shown below.
hostname -ICopy10. Once you know your Pi’s IP, go to the following address in your favorite web browser.
Ensure that you replace “<IPADDRESS>” with the IP of your Raspberry Pi.
http://<IPADDRESS>:8080Running through the Initial Setup of Organizr on the Raspberry Pi
11. The first time you access Organizr, you must run through some initial setup steps.
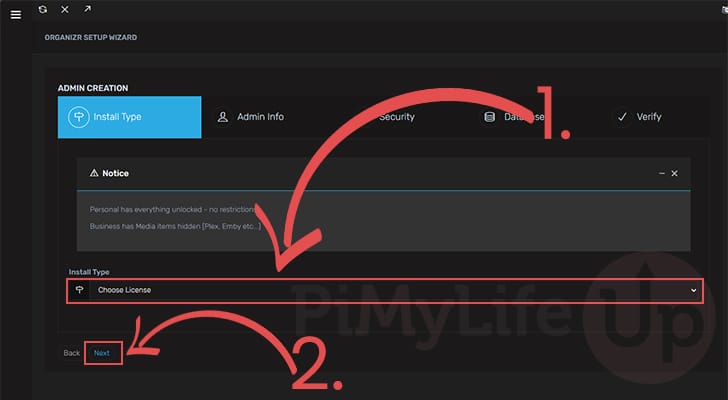
This first step requires selecting the “License type” (1.). Don’t worry Organizr doesn’t actually cost; this is just deciding whether you want the software in personal or business mode.
The main difference between these is that business mode disables media items.
Once you have set the license type, click the “Next” button (2.) to continue.
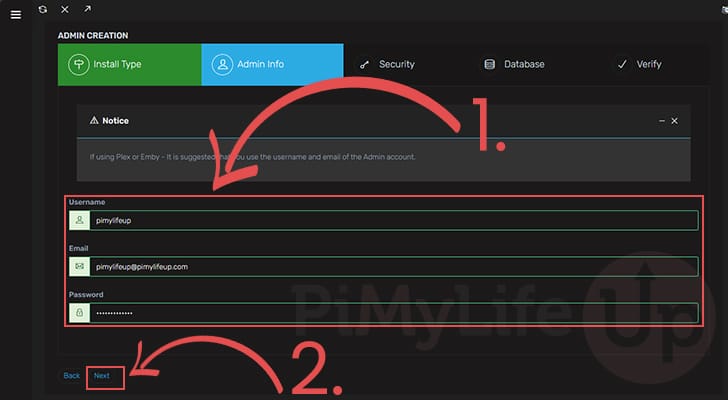
12. This next screen enables you to create your admin user. Fill out a username, email, and password (1.) that you want to use to access the Organizr software.
After filling out your information, click the “Next” button (2.).
13. This next screen is slightly more complicated as you must fill out two fields with your data (1.).
The first is the “Hash key“, which requires you to type in or generate a long random string of characters and numbers.
The second field is the “Registration Password“, fill out this field with a password for users to use when creating an account with Organizr.
Once you have filled out these fields, click the “Next” button (2.).

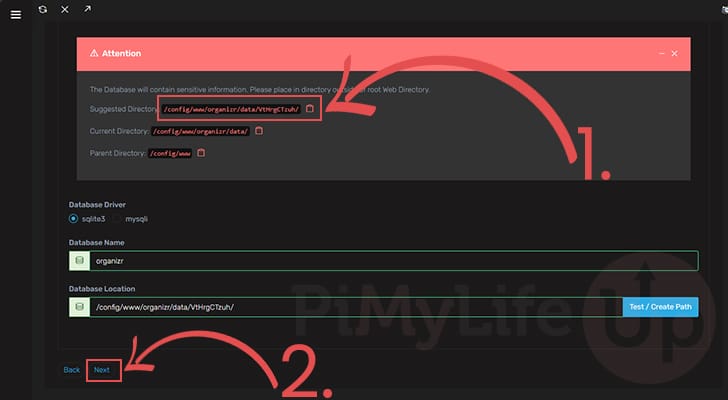
14. Using this screen, you can select the location where the database for Organizr is stored on your Raspberry Pi. We recommend clicking the “Suggested Directory” (1.).
Next, you will need to fill out a name for the database. We recommend using “organizr“.
Finally, with everything filled out, click the “Next” button (2.).
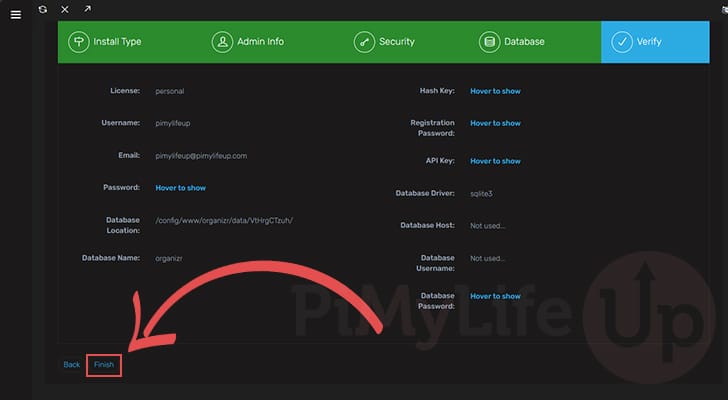
15. You will now be given a quick rundown of the settings you just configured.
To complete the setup process, click the “Finish” button.
Quick Run Down of Organizr
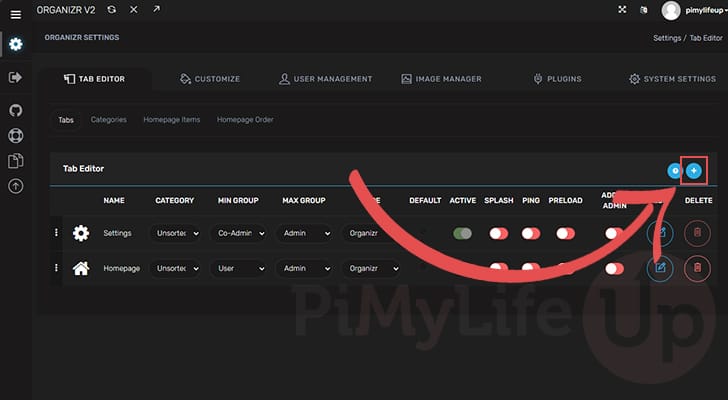
16. After installing Organizr and running through the initial setup process, you will be greeted with the “TAB EDITOR“.
This screen can be used to add additional services to the Organizr software. To add a new tab, click the plus sign (+) icon in the top-right corner.
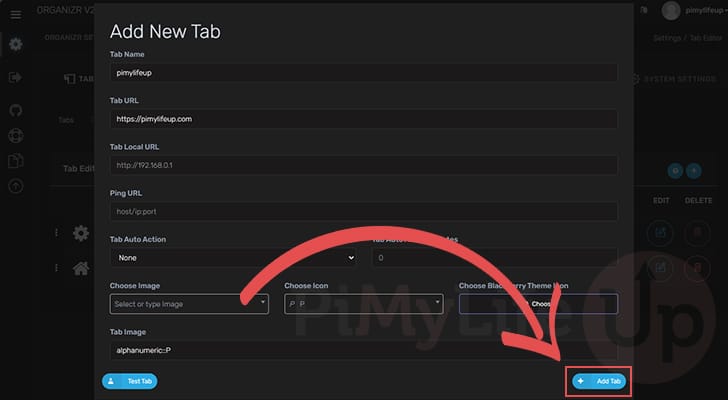
17. You can use this new screen to fill out additional information about this tab. The main two things you need to set here are a tab name and the tab URL.
Once you have filled out your information, click the “Add Tab” button.
18. Even though you have added a new tab, it will not be made active automatically.
Under the “Active” column, you must toggle on each tab you want to use.
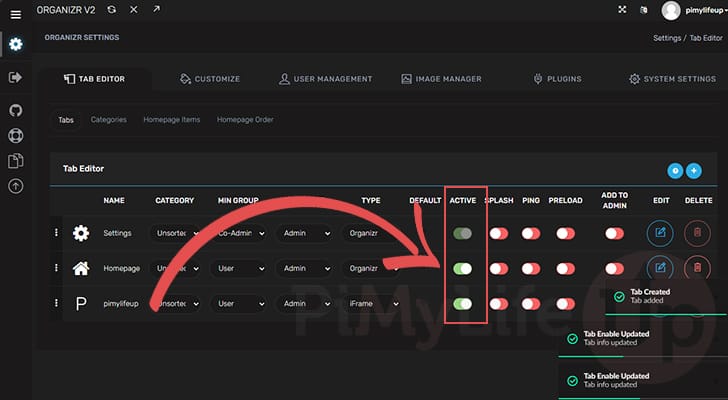
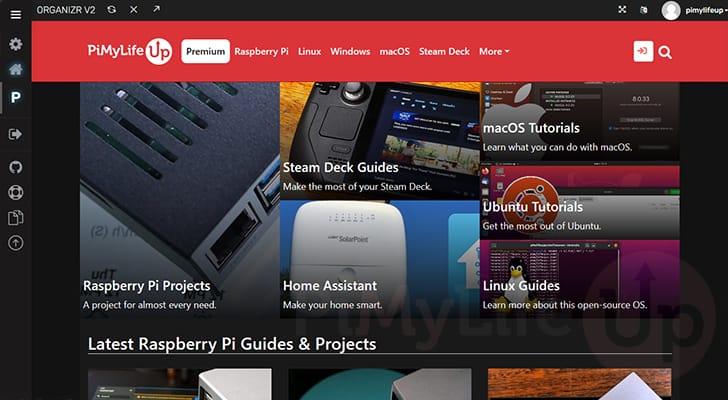
19. Below you can see that we have added our website through the Organizr software. You can view it by clicking the “P” icon in the sidebar.
Updating the Organizr Container on your Raspberry Pi
An advantage of using Docker to run software like Organizr on your Raspberry Pi is that it makes updating very simple.
As soon as you see that a new version is available, follow the steps below.
1. To update the Organizr Docker Container, change to the directory where you wrote the Compose file.
If you have been following our tutorial, you can use the cd command below to change to the correct folder.
cd /opt/stacks/organizrCopy2. Once you are in the correct place, you can use the following command to pull the latest version of Organizr to your Pi.
This command will only download a new image. It will not upgrade the already running version.
docker compose pullCopy3. To get Docker to move our container to the new version, run the command below within the terminal.
Docker will detect a new version of Organizr is available and restart the container.
docker compose up -dCopyConclusion
Hopefully, you will now have successfully gotten the Organizr software up and running on your Raspberry Pi.
This service is a great way to organize your various services into a single, easy-to-use dashboard. It differs from similar solutions in providing each service through an iframe, so you never need to leave the Organizr interface.
Please feel free to drop a comment below if you have any questions or concerns about running Organizr.
If you found this tutorial helpful, we highly recommend checking out our many other Raspberry Pi projects.