This tutorial will show you how to install the Homarr dashboard onto your Raspberry Pi.
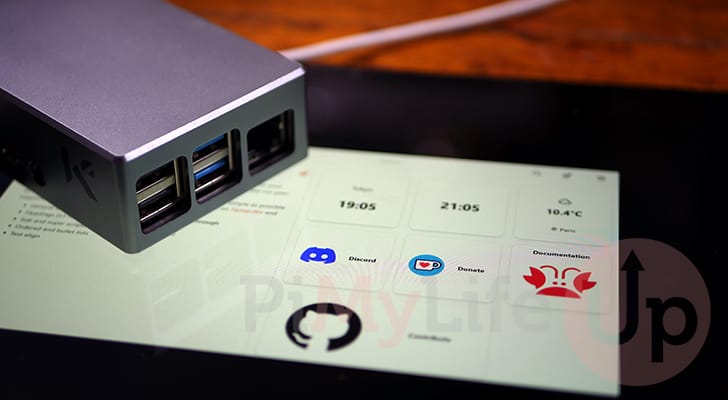
Homarr is a sleek and powerful dashboard that acts as a place to organize all the applications you are running on your Raspberry Pi.
It has been built as an easy-to-use dashboard with an interface you can adjust by dragging and dropping items around. This dashboard even has integrations with various pieces of software, including Plex and qBittorrent.
Installing Homarr onto your Raspberry Pi is made super simple thanks to it being provided by the team as a Docker image. An advantage of this is you don’t have to worry about it conflicting with other stuff you have installed on your Pi.
If you have ever tried out Heimdall on your Pi but found it a little lacking, we highly recommend checking out this tutorial.
The Homarr dashboard has support for ARMv7 and ARM64, meaning you can use the 32-bit or 64-bit versions of Raspberry Pi OS. However, if you are using a Pi
Equipment
We used the following equipment while installing the Homarr Dashboard to the Raspberry Pi.
Recommended
Optional
This tutorial was last tested on a Raspberry Pi 400 running the latest version of Raspberry Pi OS Bookworm 64-bit.
How to install Homarr on to your Raspberry Pi
Over these following steps, we will walk you through the relatively simple process of installing Homarr onto your Raspberry Pi.
Most of the hard work is writing a single config file that is used by Docker to install and run Homarr.
Preparing your Raspberry Pi
1. Before we begin installing Homarr onto the Raspberry Pi, we must first go through a few quick setup steps.
The first thing we need to do is ensure the current operating system is up-to-date by using the following two commands.
sudo apt update
sudo apt upgrade -yCopy
The first command updates the package list cache. The second command will upgrade any out-of-date packages.
2. After updating your Raspberry Pi, you must now follow our guide on installing Docker. This guide covers setting up Docker so it will run fine on your Pi.
Docker is the main software that we will be relying on to run Homarr.
3. Once you have finished following our tutorial on installing Docker, you may proceed with this tutorial.
We don’t require any additional packages, as everything you need to run Homarr is stored within the container.
4. Our next step is to create a directory using the mkdir command. This directory is where you will be storing a Docker compose file for Homarr.
You can create this directory within your current user’s home directory by using the following command.
mkdir ~/homarrCopy5. Since you will be running the rest of the commands within the directory we just created, we should change in to it.
You can change into the “homarr” directory we created by using the cd command, as shown below.
cd ~/homarrCopyInstalling Homarr to the Raspberry Pi
6. For this next step, we will be writing the Docker compose file that will set up Homarr on our Raspberry Pi. We use a compose file as it makes managing containers a more straightforward process.
You can begin writing this file by using the following command within the terminal. We chose to use the nano text editor as it is relatively straightforward to use.
nano docker-compose.ymlCopy7. Now, within this file, enter the following lines. These lines tell Docker that we want it to download and use the homarr image. We also define two volumes that maps the configs and icons directory to a place outside of the container.
version: '3'

services:
  homarr:
    container_name: homarr
    image: ghcr.io/ajnart/homarr:latest
    restart: unless-stopped
    volumes:
      - ./homarr/configs:/app/data/configs
      - ./homarr/icons:/app/public/icons
    ports:
      - '7575:7575'Copy
8. After entering the above lines, you can save and quit by pressing CTRL + X, Y, and then the ENTER key.
Starting the Homarr Dashboard on the Raspberry Pi
9. With our Docker compose file now created, starting Homarr is a really simple process.
While you are within the “homarr” directory we created earlier, run the following command to start up the Homarr dashboard on your Raspberry Pi.
Homarr is a pretty lightweight container so this process shouldn’t take very long.
docker compose up -dCopyBy using the “-d” option, Docker will detach from the current terminal session and continue to run in the background.
Accessing the Homarr Dashboard
10. Now that you have Homarr running on your Raspberry Pi, you will want to access this dashboard.
To access this dashboard, you will need to know the IP address of your Pi. If you don’t know this already, you can get the IP address by using the hostname command.
hostname -ICopy11. After getting your Raspberry Pi’s IP address, you will want to go to the following address. The port “7575” is important as that is what Homarr runs on.
Ensure you replace “<IPADDRESS>” with your Pi’s IP.
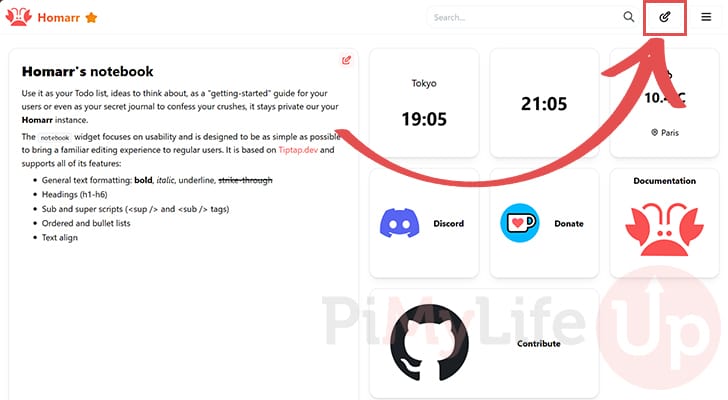
http://<IPADDRESS>:757512. You will be greeted with the default Homarr dashboard.
You can begin editing this dashboard by clicking the edit button in the top-right corner.
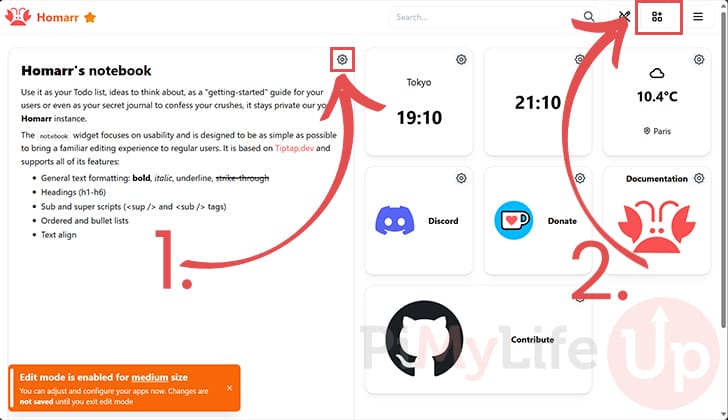
13. While you are in edit mode, all the existing widgets will have a little cog on them (1.). This cog allows you to adjust those elements or remove them completely.
To add new tiles to your Raspberry Pi’s Homarr dashboard, you will want to click the icon with the plus on it (2.) in the top-right corner.
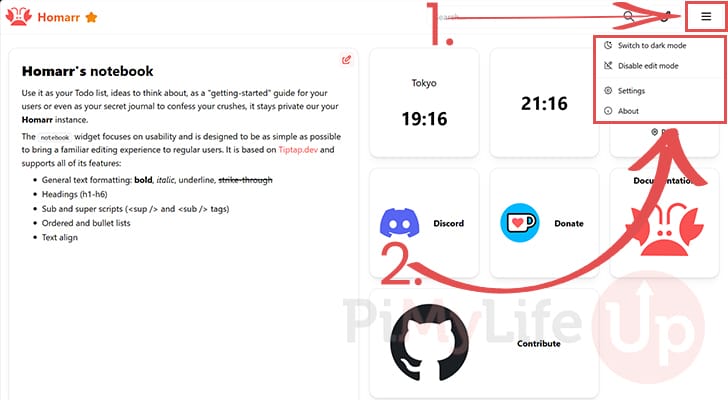
14. The edit tiles screen is not the only place you can adjust your Homarr setup. You will find more settings by clicking the hamburger icon (Three lines) (1.) in the top-right corner.
Under this context menu (2.), you can find the link to the settings screen as well as the ability to switch to dark mode.
Updating Homarr on the Raspberry Pi
The advantage of using Docker Compose to set up Homarr on the Raspberry Pi is that updating the software later is a simple process.
You don’t have to worry about remembering the original arguments you passed in. You simply need to pull the new image and then re-execute the compose file.
1. To start this update process, change to the “homarr” directory we created when installing the dashboard.
cd ~/homarrCopy2. Once you are in the “homarr” directory, use the following command to re-pull the Homarr image.
docker compose pull
Copy
3. After the image has finished being re-pulled. You will want to use the following command to restart your Homarr container.
During restart it will move over to using the new image you pulled using the previous command.
docker compose up -dCopyConclusion
At this stage, you should now have the Homarr dashboard up and running on your Raspberry Pi.
This dashboard is one of the more modern feeling ones that also comes with a wealth of integrations. On top of all of this, it is also straightforward to edit.
We highly recommend you check out the Homarr documentation to see how you can tweak its interface to suit your needs.
Please feel free to comment below if you have any issues with getting Homarr to run on your Raspberry Pi.
If you found this tutorial to be helpful, be sure to check out our many other Raspberry Pi projects.


The install instructions are easy to follow. It took me a while to finish as I was trying to understand app vs integration vs widgit in Homarr and put pi-hole on Homarr, but that was not the scope this tutorial.
Step 9, you’re missing the hyphen.
docker compose up -d
Should be:
docker-compose up -d
Hi Davros,
Both are technically correct, however, “docker compose” is how the Docker team expects it ot be used now and in the future.
The Compose functionality is now built into Docker and is a core part of it. “docker compose” missing would indicate that you are running an old version of Docker like the one that is provided through the Raspberry Pi OS repository.
Kind regards,
Emmet
Please, if possible provide a guide to set up a dynamic dns that allows a quick way to manage and access PI remotely with a constantly changing public IP.
Apologize if the following has been shared before, I have had a great time visiting almost all projects listed on this site, first time commenting, love this site.
Hi Alex,
We actually already have a guide that covers how to set up support for Dynamic DNS on a Raspberry Pi.
Let me know if you need any more assistance.
Kind Regards,
Emmet