In this guide, we will show you how to set up the Homepage dashboard on your Raspberry Pi.
Homepage is a stylish dashboard that you can use to display all your local applications in one central location.
This dashboard boasts a huge number of integrations, allowing you to display additional information from your Docker container or even software like Plex.
While easy to set up, this software is one of the trickier dashboards to configure. It does not feature web-based settings like Heimdall or Homarr and is entirely text-based.
However, once you learn how to write valid YAML and understand how to configure the Homepage, you will find this process quite simple. It is intimidating when you first utilize the software.
Best of all, Homepage is super lightweight, making it an excellent choice for maximizing the resources of your Raspberry Pi.
Equipment
Below is a list of the equipment we used when setting up the Homepage Dashboard on our Raspberry Pi.
Recommended
Optional
This tutorial was last tested on a Raspberry Pi 5 running the latest version of Raspberry Pi OS Bookworm 64-bit.
Running the Homepage Dashboard on your Raspberry Pi
Over the following steps, you will learn how to get the Homepage Dashboard up and running on your Raspberry Pi by using Docker.
Docker allows us to get Homepage running with a few short commands quickly.
Preparing your Raspberry Pi to run the Homepage Dashboard
1. Our first step is to update the package list cache and upgrade any out-of-date packages by using the following two commands within the terminal.
sudo apt update
sudo apt upgrade -yCopy
2. After updating your system, you must install Docker on your Raspberry Pi’s operating system.
We will be using Docker to run the Homepage dashboard on our system.
https://pimylifeup.com/raspberry-pi-docker/3. Once you have Docker installed on your Raspberry Pi, we can create a directory where we will store the Compose file for the Homepage and its config files.
You can create this directory by running the command below within the terminal.
sudo mkdir -p /opt/stacks/homepageCopy4. After creating the directory, you will want to change into it by using the cd command.
The rest of the tutorial assumes that you are within this directory.
cd /opt/stacks/homepageCopyWriting the Compose File for Homepage
5. At this point, we can finally begin to write the Compose file to run Homepage on our Raspberry Pi.
Start writing this configuration file by running the command below.
sudo nano compose.yamlCopy6. Within this file, you will want to enter the following configuration lines.
These lines tell Docker that we want to download and use the Homepage image while also telling it where to mount volumes for both the config files, so that Homepage can access Docker containers on your system.
services:
  homepage:
    image: ghcr.io/gethomepage/homepage:latest
    container_name: homepage
    ports:
      - 3000:3000
    volumes:
      - ./config:/app/config
      - /var/run/docker.sock:/var/run/docker.sock:ro
    restart: unless-stopped
Copy
7. After filling out all of the lines in this file, you can save and quit by pressing CTRL + X, followed by Y, and then the ENTER key.
Starting the Homepage Dashboard on your Raspberry Pi
8. Your next step is to start up the Homepage Dashboard on your Raspberry Pi.
Thanks to Docker, all we need to do to start the dashboard is use the following command. Docker will download the image and immediately begin to run.
Using the “-d” option, Docker will detach from the current terminal session and continue running in the background.
docker compose up -dCopyAccessing the Homepage Web Dashboard
9. Our next step is to grab the IP address for our Raspberry Pi so that you can access the web interface.
If you don’t know the IP address, you can use the hostname command in the terminal to get it.
hostname -ICopy10. Now go to the following address in your favorite web browser. Ensure that you replace “<IPADDRESS>” with the IP of your Raspberry Pi.
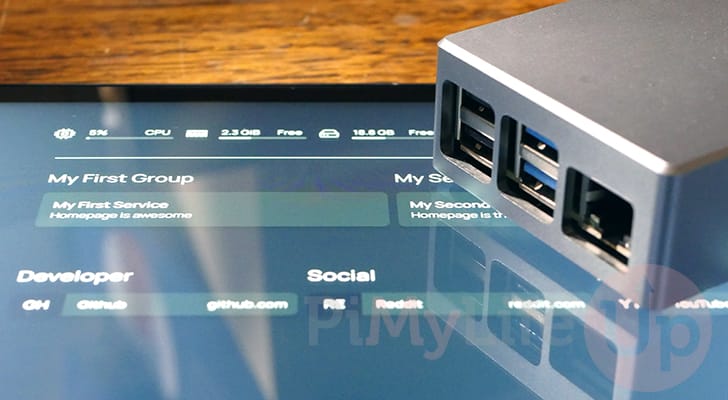
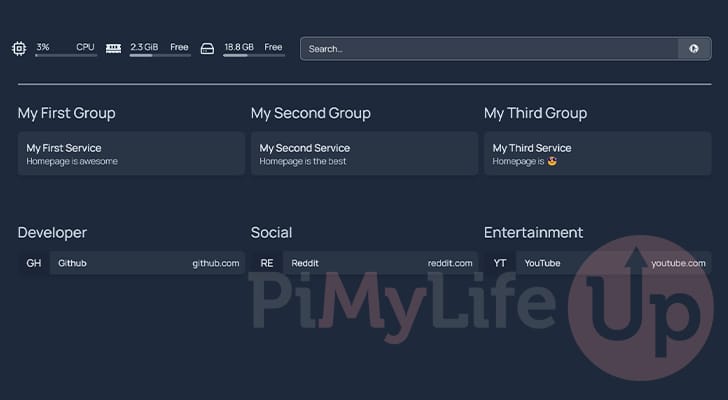
http://<IPADDRESS>:300011. You will now be greeted by the Homepage Dashboard running on your Raspberry Pi.
At the moment, it will only display the default settings. Your next step will be to configure the dashboard.
Configuring your Homepage Dashboard
In this section, we will quickly walk you through how to configure the Homepage Dashboard on your Raspberry Pi.
This dashboard definitely isn’t the easiest to configure, but hopefully, you will have a good idea of how to do this over the next few sections.
Checking out the Homepage Dashboard Configuration Files
12. The configuration for the Homepage Dashboard on your Raspberry Pi is split into multiple files.
We can list all the available configuration files by using the ls command.
ls -l /opt/stacks/homepage/configCopyAfter running the above line, you will see several different files. We will quickly go over each of these files.
bookmarks.yaml– Bookmarks are a simple configuration file that allows you to create simple links within your dashboard.custom.css– The CSS file allows you to inject your own CSS into the Homepage dashboard on your Raspberry Pi. You can use this to adjust the visuals to match your liking.custom.js– The Homepage Dashboard also allows you to inject custom JavaScript. Any code written into this file will be included on your dashboard.docker.yaml– To configure the Homepage dashboard to talk with other Docker instances, you will want to use this configuration file.kubernetes.yaml– This dashboard can also talk with Kubernetes so that you can include services hosted through that.services.yaml– The services file is one that you will likely use quite often. Defining services within this file allows you to monitor whether they are online, and if they are a Docker container, you can track their CPU, Memory, and Network Activity.settings.yaml– The settings configuration file allows you to adjust the Homepage Dashboard on your Raspberry Pi.
For example, you can use this file to change the title of your home page, set a background image, and more.widgets.yaml–The widgets config file allows you to add any of the numerous supported services directly to Homepage.
Example of Modifying the Bookmarks Configuration
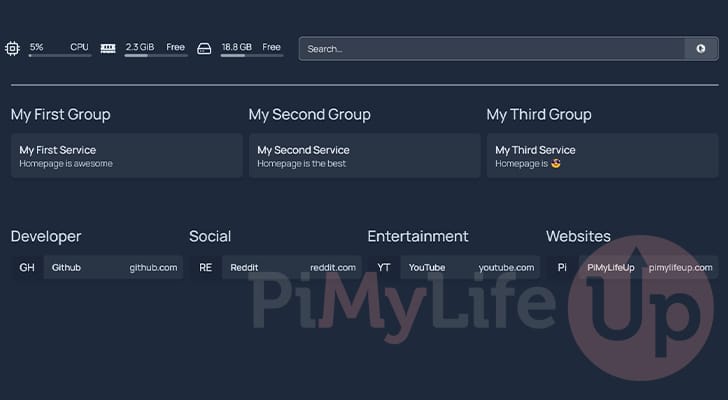
13. To give you an example of how to modify the configuration, we will add a bookmark to our website.
That means we need to modify the “bookmarks.yaml” file by using the following command in the terminal.
sudo nano ./config/bookmarks.yamlCopy14. Within this file you will want to add the following lines to the bottom of the file.
- The first line is the name of the group. You can have multiple bookmarks within a single group.
- The second line defines the name of the bookmark. It must be indented from the first line.
- Next, we define the attributes for our bookmark:
A bookmark is expected to have a two-letter abbreviation (abbr) and a link to the website (href).
- Next, we define the attributes for our bookmark:
- The second line defines the name of the bookmark. It must be indented from the first line.
- Websites:
    - PiMyLifeUp:
        - abbr: Pi
          href: https://pimylifeup.com/Copy
15. After adding the lines above to the file, you can save and quit by pressing CTRL + X, Y, and then ENTER.
16. If you return to your Raspberry Pi’s Homepage Dashboard in your web browser, you can now see our new bookmark appearing within the dashboard.
Updating the Homepage Dashboard Container on the Raspberry Pi
In this section, we will be showing you how to update your Homepage Dashboard container on your Raspberry Pi.
Being a Docker container makes updating this software something you can do in a few short steps.
1. Your first step is to change to the same directory in which we wrote the Docker Compose file earlier in this guide.
cd /opt/stacks/homepageCopy2. Once you are in the correct directory, you will want to tell Docker to pull the new version of Homepage to your Raspberry Pi.
You can easily do this by using the following command within the terminal.
docker compose pullCopy3. After updating the Homepage Docker container, you will want to get Docker to utilize it.
If you use the following command, Docker will detect the new image and restart the container using the new version.
docker compose up -dCopyConclusion
Hopefully, at this stage, you will have the Homepage Dashboard up and running on your Raspberry Pi.
This incredibly fast and lightweight dashboard makes it a perfect fit for the Pi’s limited resources.
Once you have wrapped your head around how the configuration works for this dashboard, you will find it super flexible and powerful.
Please feel free to comment below if you have any questions or concerns about running this software on your Pi.
If you found this tutorial helpful, we highly recommend checking out our many other Raspberry Pi projects.