In this guide, we will be showing you how to set up a headless Raspberry Pi.
A Raspberry Pi is considered headless when you have no monitor or keyboard connected to it.
A headless Raspberry Pi can be useful for any situation where you don’t want or need access to a monitor and keyboard. For example, the Plex Media Server, NAS Server, or Transmission projects don’t need a monitor to be able to function.
Usually, setting up a device without a monitor or keyboard can make things a little complicated. Luckily for us, there is a couple of things we can do to reduce that.
The Raspberry Pi OS has the functionality to set up networking and SSH access without physically connecting to the device.
For this guide on setting up a headless Raspberry Pi, we recommend that you use the Lite version of the operating system. The lite version of the OS does not come with the GUI, which is unneeded in a headless setup unless you are using remote desktop software.
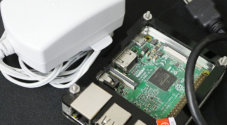
Once you have written the Raspberry Pi OS to your SD Card, make sure you keep it connected to your device as we will need to add some additional files to it..
Enabling SSH for your Headless Raspberry Pi
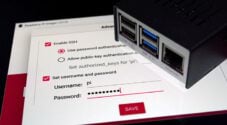
In our first section, we will show you how you can enable SSH without needing access to your Raspberry Pi’s interface.
We can do this by creating an empty file named ssh in the /boot folder of your SD Card.
Make sure when you create this file that you do not give it a file extension.
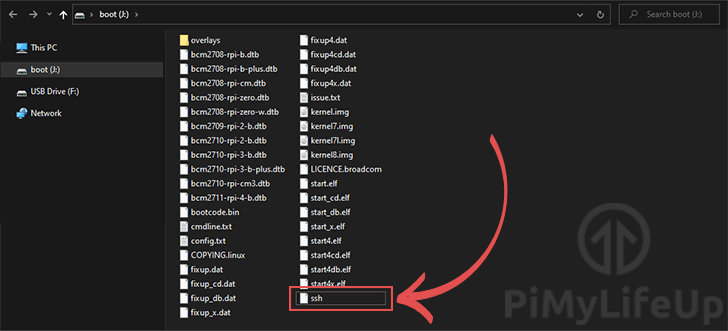
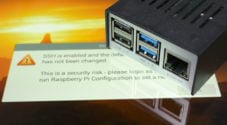
When you start up your Raspberry Pi, the operating system will find the ssh file and automatically start the process of activating SSH on your device.
The ability to enable SSH through this method was implemented in Raspberry Pi OS after they disabled SSH from being enabled on a fresh install.
Setting up Networking for a Headless Raspberry Pi
Alongside the ability to enable SSH without needing a monitor or keyboard, you can also set up your networking.
While an ethernet connection tends to work out of the box, a wireless connection will always need to be configured manually.
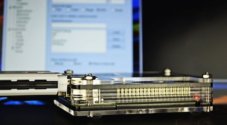
To set up our WiFi connection on a headless Raspberry Pi, we will need to create a file within the /boot folder.
1. First, open the boot directory for your Raspberry Pi’s SD Card.
Within this SD card, create a file called “wpa_supplicant.conf” and begin editing it in your favorite text editor.
2. Within this file, we can enter the configuration details for our network.
Before we do this, you must first work out the 2 letter ISO 3166-1 country code.
As an example of a valid country code, the code for Australia is “AU“. For the United Kingdom, this code is “GB“, and for the United States, the country code is “US“.
In addition to the country code, you must also know the SSID and the password for the WiFi network you want to connect to.
3. Once you have the required information, go ahead and enter the following text into the file.
Make sure you fill in the correct information within this file. We have highlighted the sections that need you to fill in your information.
ctrl_interface=DIR=/var/run/wpa_supplicant GROUP=netdev
update_config=1
country=[WIFI COUNTRY CODE]

network={
 ssid="[NETWORK SSID]"
 psk="[NETWORK PASSWORD]"
}
Once you are done, you can save the file and insert the SD card into your Raspberry Pi.
4. If you are wondering how this all works, the Raspberry Pi OS detects that this file exists within the boot directory.
Once it detects the file, it copies it from the boot drive to the correct location on the root file system. It then uses these settings to start up the wireless network connection.
Setting up Additional Remote Access
Once you have SSH access to your Raspberry Pi and a network configuration, you can set up additional ways of remotely accessing your Raspberry Pi.
You can set up TeamViewer so you can access your Raspberry Pi through their servers.
Alternatively, you could set up a VNC server on your device. This software will allow you to gain access to your desktop using any VNC compatible client.
It is also possible to add support for the remote desktop protocol that Windows utilizes.
What to do Next
You can now start exploring the various projects on the Raspberry Pi that you can do without needing a monitor or keyboard.
You may be wondering how you connect to your Raspberry Pi now that you have connected it to your network and have SSH enabled.
There are two possible ways to do this. The first is to try connecting to the raspberrypi hostname. The other way is to retrieve your Pi’s IP address.
To connect to the Raspberry Pi using the hostname, you can use raspberrypi or raspberrypi.local within the IP field of Putty or MobaXTerm.
Using the hostname does not always work, so there are times where you will need to get the IP address of your Raspberry Pi.
There a few different methods that you can use to work out the IP Address of your Raspberry Pi that will go in to in our guide.
Hopefully, at this stage, you will now have successfully set up your Raspberry Pi completely headlessly.
If you have run into any issues with setting up your Pi without a monitor or keyboard, feel free to comment below.