In this tutorial, we will be setting up a network-wide ad blocker called Pi-hole on your Raspberry Pi.

Pi-hole works by acting as your DNS server and blocking domain names that are often affiliated with advertising.
Your computers and routers can connect to this DNS server for their requests. These DNS requests will then be filtered by the Pi-hole installation running on your Raspberry Pi.
DNS requests that match a known ad host will be rejected, meaning the connection will never meet your computer. Therefore, your devices will never load the ads. Additionally, these requests will be cached so the next time a device sends the same DNS query, Pi-hole can respond instantly.
Network-wide adblocking is a useful tool for stopping ads from appearing on devices that don’t have any easy-to-use adblock tool such as a smart TV.
Running Pi-hole on your Pi also has the added side effect of potentially improving the security and the privacy of your network, as some sites use relatively dodgy ad providers.
You can install Pi-hole on other operating systems other than Raspberry Pi OS. They support Ubuntu, Debian and Fedora. It is even possible to set up Pi-hole on your Raspberry Pi using Docker.
Before continuing there are some other solid alternatives to Pi-hole that you can run on your Raspberry Pi such as Adguard Home.
If you decide to use the network-wide ad blocker, please consider subscribing to our ad-free service to help support the site and allow us to continually grow.
Equipment List
Below are all the pieces of equipment that I made use of when setting up Pi-hole on our Raspberry Pi.
Recommended
- Raspberry Pi Amazon
- Micro SD Card Amazon
- Power Supply Amazon
- Ethernet Cable Amazon (Recommended) or Wi-Fi Amazon
Optional
- Raspberry Pi Case Amazon
This guide was last tested on a Raspberry Pi 5 running the latest version of Raspberry Pi OS Bookworm.
Installing Pi-Hole on to a Raspberry Pi
Over the following steps, we will be showing you how to install the Pi-hole network-wide ad blocker to your Raspberry Pi.
We ran these steps from a fresh image of Raspberry Pi OS to stop other software from interfering with the installation.
Preparing your Pi to Run Pi-Hole
1. Before you begin to set up Pi-hole on your Raspberry Pi you should ensure that your operating system is up-to-date.
You can update the package list cache and upgrade any out-of-date packages by running the following command.
sudo apt update
sudo apt upgrade -yCopy
2. We will need the curl package to run the Pi-hole installation script. You can enure this package is installed by running the following command within the terminal.
sudo apt install curlCopy3. Your next set up step is to set up your Raspberry Pi to use a static IP address. A changing IP address would quickly break the functionality of Pi-hole and break name resolution for your configured devices.
The best way to set a static IP address is using your router but we have a guide on how you can set your Pi up with a static IP address as well.
https://pimylifeup.com/raspberry-pi-static-ip-address/Running the Pi-hole Install Script on your Raspberry Pi
4. To set up our network-wide adblocker, we are going to utilize a piece of software called Pi-hole.
Pi-Hole is the software package that will be handling everything for us. It sets up and configures a DNS server that can be configured to whitelist and block individual domain names.
It also provides a fancy web frontend to the whole system. This frontend allows you to see the statistics in real-time and make changes to the Pi-hole configuration. This includes the ability to block list specific URLs.
The Pi-hole install script automatically installs the Lighttpd web server. You don’t have to worry about setting your own up beforehand.
We can run this single command to download and run the Pi-hole install script.
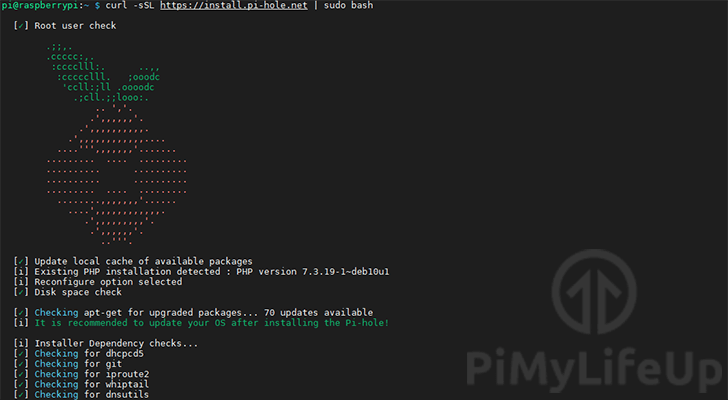
curl -sSL https://install.pi-hole.net | sudo bashCopyWhile we know Pi-hole is safe, if you want to check the script that we will be running yourself, go to the Pi-hole install domain in your web browser.
5. Once you have run the command, it will download and run the script that begins setting up your device for Pi-hole.
A few of the tasks it does are verifying the amount of available free disk space, updating the package list, and several other things.
Welcome to Pi-hole
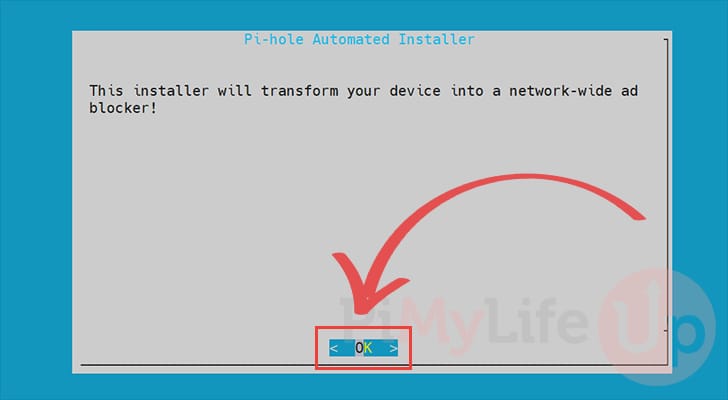
6. The first screen informs you that that the Pi-hole installer is about to transform your Raspberry Pi into a network-wide adblocker.
Before you continue, please note that you can navigate this interface using the ARROW keys. To select an option, you will need to press the ENTER key.
Press the ENTER key to continue to the next screen.
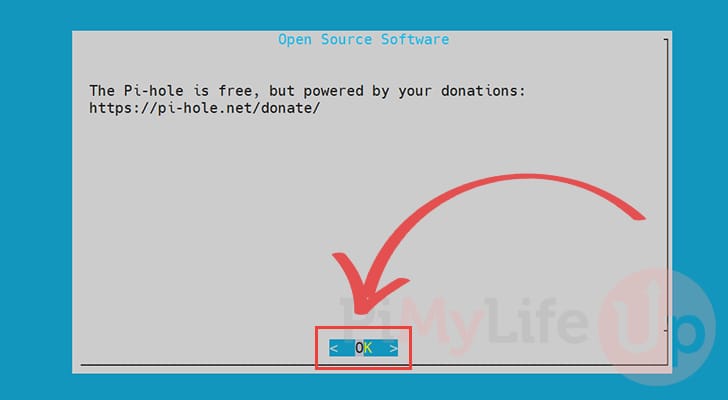
7. You will be informed that you can donate to help with the development of Pi-Hole.
If you would like to help the team out, follow the link shown within this step.
Press the ENTER key to continue with the setup process.
Static IP Address Required for Pi-hole
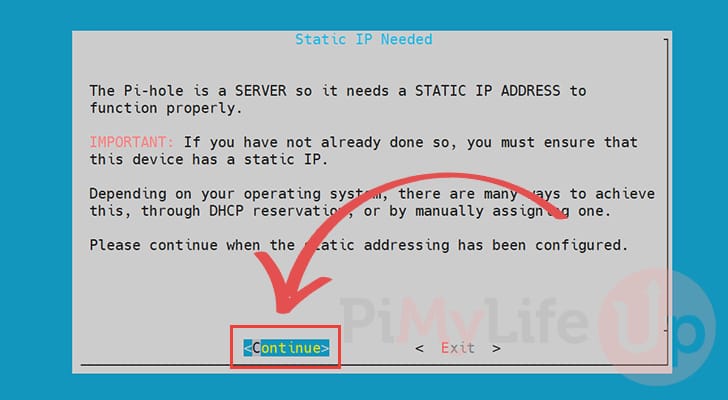
8. Next, is a screen informing you that you must have a static IP address.
The installation script will handle this process for you. However, it is best to set the IP through your router using DHCP reservation as well.
To continue with the setup of Pi-Hole on your Raspberry Pi, select the “Continue” option then press the ENTER key.
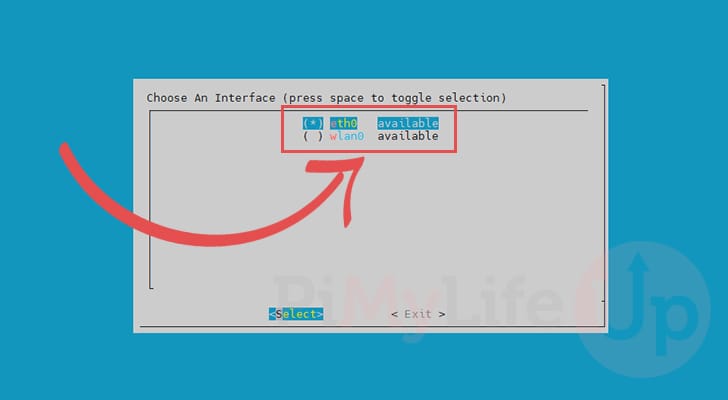
Select Network Interface
9. With this next screen, you will need to select the network interface that your Pi-hole server will be listening on. You can press the SPACEBAR to toggle the selection.
If you are using an ethernet connection, select “eth0“. If you are using Wi-Fi, select “wlan0“.
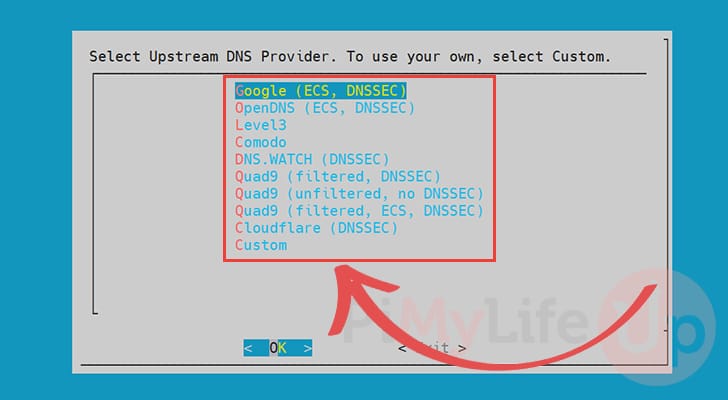
Choose Upstream DNS provider for Pi-hole
10. You can now choose an upstream DNS provider for Pi-Hole to use on your Raspberry Pi. Whenever Pi-hole has a request that isn’t cached or blocked, it will contact the upstream provider for the IP address.
For our tutorial, we will be using Cloudflare as our DNS provider.
You can select your option by using the ARROW keys. Once chosen, press the ENTER key.
Enable Default Block List
11. Here you will be asked if you want to add the recommended blocklist during the installation process.
A block list is what Pi-Hole uses to know what domain names should be prevented from loading.
If you are happy to use the default Pi-Hole block list on your Raspberry Pi, select “<Yes>” and then press the ENTER key.

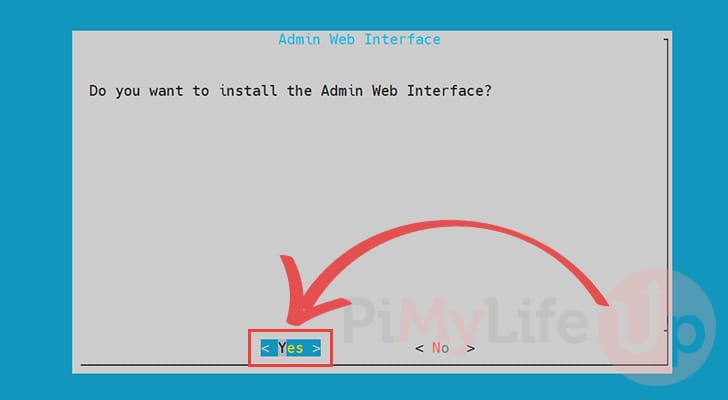
Installing the Pi-Hole Web Interface on the Raspberry Pi
12. You will now be asked if you want to set up the Pi-hole web admin interface on your Raspberry Pi.
We recommend installing the web interface as it gives you access to an easy way to configure Pi-hole and check on statistics.
To proceed with the installation of the admin web interface, select the “< Yes >” option and press ENTER to continue.
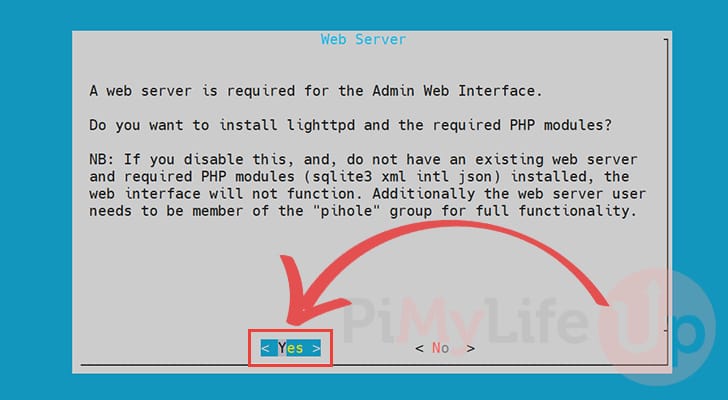
13. You will now be prompted if you want to install the Lighttpd web server to run Pi-Hole’s web interface.
Unless you have a web server installed that you want to use and know how to configure it, select the “< Yes >“option.
Once selected, press the ENTER key.
Configure Query Logging
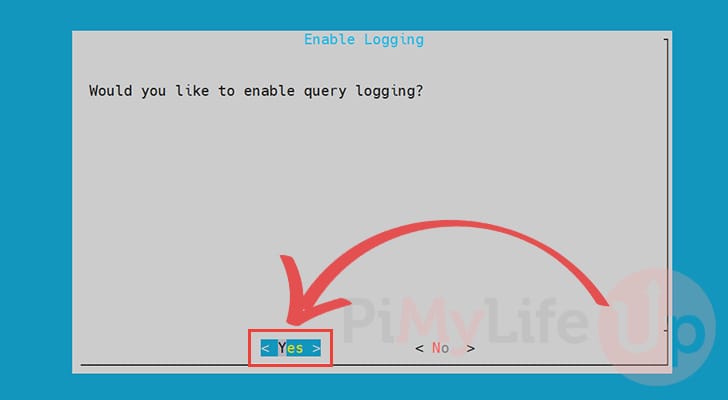
14. Now you will be asked if you want to log the DNS queries.
We recommend that you select the “Yes” option as it allows you to keep track of the domain names loaded and have some neat statistics. However, if you prefer your privacy select the “< No >” option instead.
Press the ENTER key to continue with the installation.
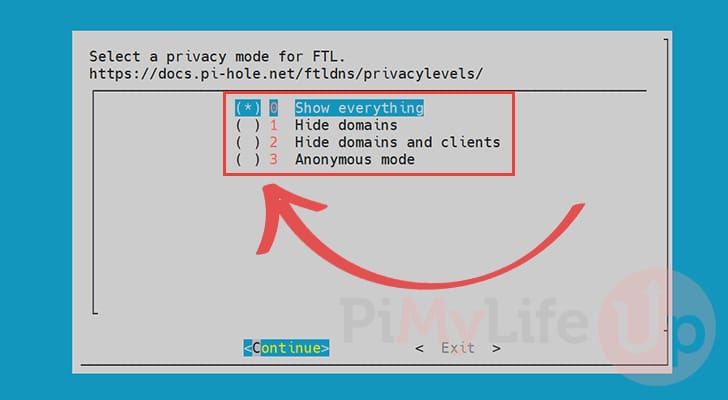
15. We can configure the level of privacy we want our Raspberry Pi’s Pi-hole DNS server to have.
For our guide, we will be sticking with “0 Show everything“. This setting allows us to retain the most statistics.
Use the ARROW keys, and SPACEBAR to select your privacy setting. Once set, press the ENTER key.
Finished Installing Pi-Hole
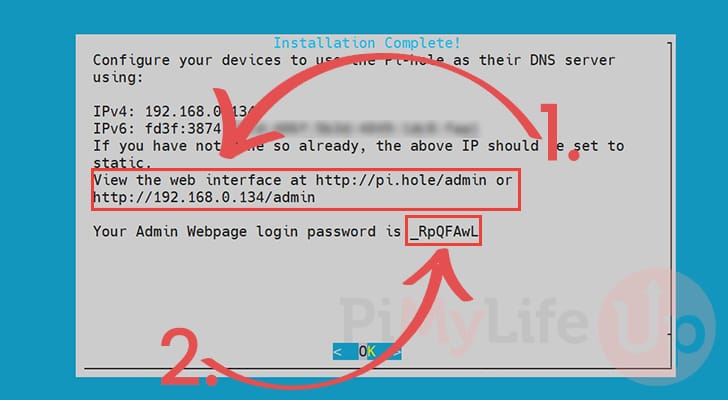
16. Installation of the Pi-hole server on your Raspberry Pi has now completed.
This screen will tell you how you can gain access to the Pi-hole web interface (1.).
As well as show you the password that you need to use to log in to the admin account (2.).
17. Now that you have Pi-hole up and running you can begin to configure your other devices to start using it as the DNS server.
All you need to do is adjust your devices DNS options to point to your Raspberry Pi’s IP adddress. Operating system wise, we have a guide that shows you how to configure the DNS settings on Ubuntu and also on Raspberry Pi OS itself.
A Quick Look into the Pi-hole Web Interface
1. To access the Pi-hole web interface you will need to know the IP address of your Raspberry Pi.
If you are unsure what it is, you can always use the hostname command.
hostname -ICopy2. To get to the Pi-hole web interface running off your Raspberry Pi, all we need to do is go to the following web address in your favorite web browser.
Make sure you swap out 192.168.1.105 with the IP address that was displayed in the last step of the previous section.
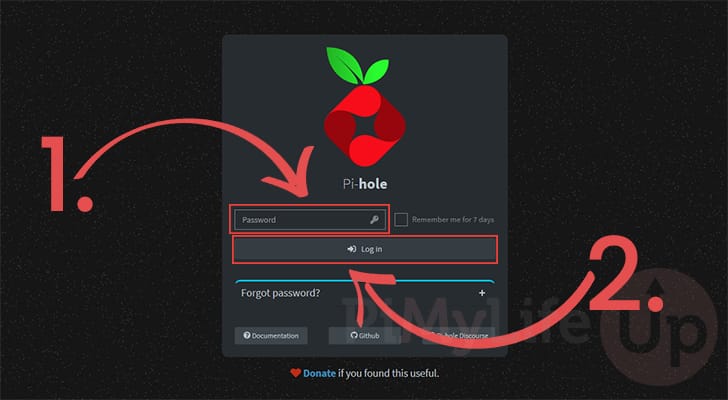
http://192.168.1.105/admin/3. You will be greeted with the following screen asking you to login to the Pi-hole web admin interface.
To login to this interface you will need to enter the password (1.) you got at the end of the last section.
With the password typed in, you can now login by clicking the “Log in” button (2.).
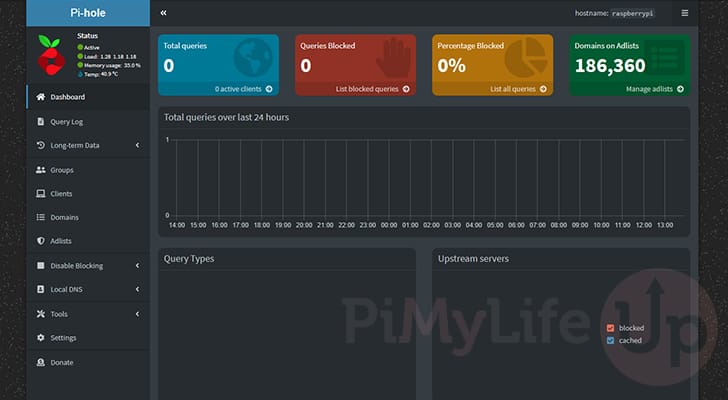
4. You will now be presented with the admin dashboard.
This dashboard is just like the normal one with a couple more graphs and access to all of the configuration pages.
Quick Overview of Pi-holes Menus
5. Below we will go through some of the pages that are available within the Pi-hole interface. For the average user, you will not need to change these options unless you made a mistake in the initial installation.
Logs
- Query Log: The query log shows all the most recent queries that have been made to the DNS server. It is an easy way to find a recent address that may have been loaded and blocklist them.
- Long Term Data: This menu contains tools that allow you to easily see how your Raspberry Pi Pi-hole installation has been performing over time.
Users and Adlists
- Groups: Pi-Hole allows you to separate clients into different groups. This feature is useful if you only want certain clients to have ads or domain names blocked from loading.
- Clients: The clients interface is where you can add a particular client to a specific group.
- Domains: This screen allows you to add certain domain names to Pi-hole’s whitelist or blacklist. They can even be assigned to particular groups.
A whitelist means those websites will no longer be blocked by the DNS server. However, if that domain is blocked by a wildcard, then it will continue to be blocked.
Being on the blacklist means that Pi-Hole will block that particular DNS request. - Adlists: Pi-Hole on the Raspberry Pi allows you to add third-party blocklists through its Adlists interface. Use this interface to add or remote additional blocklists from Pi-Hole.
Like the domain interface, the adlists interface allows you to apply a blocklist to a specified group.
Manually Controlling Pi-hole
- Disable Blocking: These options allow you to temporarily or permanently disable the blocking functionality of Pi-hole. It will continue to function as a normal DNS server while disabled but will no longer block DNS requests.
- Local DNS: Another feature of Pi-Hole is that it lets you specify your own DNS records. This is useful if you want a particular domain name to be routed elsewhere. It is also useful if you have local domain names.
Tools
- Update Lists: This tool allows you to trigger an update of the ad blocking lists. It is useful for ensuring you are running the latest versions of the ad block lists.
- Search Adlists: This tool allows you to find out if a certain URL is being included in the ad blocking lists, it is useful for checking why a certain URL might be getting blocked.
- Tail pihole.log: This tool shows the last lines of the
pihole.logfile and continually updates live, this is useful for checking to see what Pi-hole is doing to requests.
Settings
- Settings: This section contains some configurable settings, this allows you to change the way your DNS works, what upstream DNS providers you want to use among several other options. You can even enable DNSSEC in the options.
Conclusion
If you love your privacy, then other Pi projects might take your fancy. Something like the VPN access point is great if you want to add an option for people to hook into a VPN by simply joining a Wi-Fi access point.
You also may want to try improving the privacy of Pi-Hole on your Raspberry Pi by setting up Unbound.
I hope this tutorial on installing Pi-Hole has helped you be successful in your set up on your Pi.
If you have any thoughts, feedback, or anything else, then be sure to leave a comment below.


Thank you, this was really helpful!
Brilliant tutorial, I followed along and everything worked and is working as expected. In future I would like to incorporate a nordVPN installation, and while I have installed nord in past pi projects I am uncertain how to have both working together. If you’re up for it that might make a good follow up tutorial.
I appreciate your work.
Thanks
By the way, I found some specific German blacklists and I went with the strategy to block much and then add needed domains to my whitelist, which is really done quick with the pihole gui or the command line.
During working time PiHole blocks about 25% of the web traffic, at night around 40%. Amazing!!! And most of them are trackers and advertising nets.
I had dnsmasq already installed on my pi5 and just followed this instruction, everything fine 😉
Maybe add Adlists links like https://firebog.net/ https://github.com/lightswitch05/hosts https://github.com/blocklistproject/Lists and of course the famous Steven Black’s: https://github.com/StevenBlack/hosts
And for whitelists something like: https://github.com/anudeepND/whitelist
Anyway thanks for the tutorial and your work!!!
What are the memory requirements for the raspberry pi 4B to run this? This will be my first pi purchase and I don’t won’t go over buy (money is tight lately) but also really don’t want to underbuy. Also as a noob, could I use the same pi to be an AirPrint server as well as a pi-hole? Anyone have a memory suggestion to run both on same pi (if it’s even possible). Thx in advance
Hi Dean,
Pi-hole is actually a pretty lightweight bundle of software so it doesn’t consume that much RAM or processing power. As long as the Raspberry Pi has at least 512mb of RAM then you are good to go.
So in the case of the Raspberry Pi 4B you can very easily go with the 2GB version and have plenty of room to go for some additional.
On the case of using the AirPrint server software you should be completely fine to run both Pi-Hole and that. They both operate on different ports so their should be no conflict. It also doesn’t consume a huge amount of RAM and a 2GB Raspberry Pi 4B should be more then enough to run both sets of software.
Let me know if this answers all of your questions.
Cheers,
Emmet
I just installed this today. Its was easy peasy as some kids say. Thanks!!
It’s a nice project, tried this with dietpi + pi-hole, the problem is it won’t block youtube ads on iphone’s app and like 1/3 is going to block it when using browser. I cannot say I care that much about other ads.
Hi Gus,
this is a very nice summary and really helpful. I’m a total newcomer in this area. I just followed your instructions to set up a pi-hole with my new Raspberry pi 4 B and all worked well. My intention is then to connect with my router.
May I ask you a dumb question: how do you suggest connecting the Raspberry to the router (in my case an Asus RT-A68U). Is an ethernet connection preferable over a wif-fi?
Thanks in advance,
Fritz.
Hi Fritz,
An ethernet connection is preferable as it is typically the fastest and most reliable connection.
While you can use Wi-Fi if you want, having the Raspberry Pi lose connection while working as your DNS server is not something you want.
Cheers,
Emmet
Thanks – very helpful and clearly presented.