In this project, we will explore how to install and run Immich on the Raspberry Pi.
Immich is a self-hosted photo and video backup software with a great web interface and useful mobile application.
Using this software, you can very easily back up your photos and videos directly from your Mobile phone to Immich. People often use this software as an alternative to Google Photos or iCloud. This software allows you to retain control over your images and saves you a monthly subscription.
Immich even has some of the fancier features of iCloud and Google Photos, with it able to automatically process your images with facial recognition, geolocation, and more.
This software is also a solid alternative to the self-hosted photo app called PhotoPrism.
Setting up Immich on your Raspberry Pi is a very simple process. The reason for this is that it is available as a Docker container that has support for ARM.
One thing to warn you is that when you first sync all your photos into Immich, your Raspberry Pi will be pushed pretty hard. The reason for this is that it needs to process all of the images. However, after the initial sync it uses minimal resources outside of processing new images.
For the best performance, we recommend using at least a Raspberry Pi 4. However, the faster the Pi, the faster Immich can process your images.
Additionally, Immich requires you to be running the 64-bit version of Raspberry Pi OS. 32-bit operating systems will not work.
Equipment
Below, you can find the list of equipment we used when installing Immich on our Raspberry Pi.
Recommended
- Raspberry Pi Amazon
- Micro SD Card Amazon
- Power Supply Amazon
- Ethernet Cable Amazon or Wi-Fi Amazon
- External Hard Drive Amazon or USB Drive Amazon
Optional
This tutorial was last tested on a Raspberry Pi 5 running Raspberry Pi OS Bookworm 64-bit.
Installing Immich on the Raspberry Pi
Over the following sections, we will be showing you how to install Immich on your Raspberry Pi.
Thanks to us being able to use Docker, this process is relatively straightforward. All we need to do is install Docker, pull some configuration files, and adjust some settings slightly.
For most of the following steps we will be using the terminal. If you are using the desktop variant of Raspberry Pi OS, you can open the terminal by pressing CTRL + ALT + T.
Preparing your Raspberry Pi for Immich
1. Before we install Immich on our Raspberry Pi, we should ensure our current system is up to date.
We can update the package list and then upgrade any out-of-date packages by using the following command.
sudo apt update
sudo apt upgradeCopy
2. Our next step is to ensure that the wget package is installed on our system by using the command below.
We will use wget later to grab the Docker compose file and the environment configuration file.
sudo apt install wgetCopy3. We now need to install Docker so that we can easily run Immich on our device.
Please follow our guide on installing Docker to the Raspberry Pi to get this set up correctly.
4. After installing Docker, we can now create some directories where we will store the configuration files for Immich.
Create a directory called immich within the “/opt/stacks/” directory by using the mkdir command.
sudo mkdir -p /opt/stacks/immichCopy5. With the directory now created, we can change into it by using the cd command.
cd /opt/stacks/immichCopySetting up the Docker Compose File
6. Luckily, the Immich team provided the Docker Compose file for us. All we need to do is download the file from their GitHub.
You can use wget to save this Docker compose file by running the command below.
sudo wget https://github.com/immich-app/immich/releases/latest/download/docker-compose.ymlCopyWriting the Environment File for Immich
7. Now that we have the Docker compose file for Immich saved to our Raspberry Pi, we can move on to its environment file.
Immich’s Docker container uses this environment file to set itself up. Download the placeholder version of this file to your Pi by using the command below.
sudo wget -O .env https://github.com/immich-app/immich/releases/latest/download/example.envCopyWe use the “-O” option so we can save this file as “.env” rather than “.example.env“.
8. Our next step is to begin editing this environment file to suit our needs better. The default settings will work but can be insecure and might save your images to a location you don’t want to use.
sudo nano .envCopya. The first setting you will likely want to change is the upload location. This setting tells Immich where it should save files on your Raspberry Pi.
As images can very quickly take up a large amount of space, you will likely want to set this location to an external drive with ample space.
UPLOAD_LOCATION=./libraryCopyb. The final value you need to set is the password Immich will use to interact with the Postgres database.
You will want to replace “postgres” with a secure long password.
DB_PASSWORD=postgresCopy9. After making these changes to the environment file, you can save and quit by pressing CTRL + X, followed by Y, and then the ENTER key.
Starting Immich on your Raspberry Pi
10. We can now finally start up Immich on our Raspberry Pi by using the following command.
After running this, Immich will be downloaded to your Pi alongside the various services that it relies on. Depending on your internet connection, this may take a few minutes to complete.
docker compose up -dCopyBy using the “-d” option, we are telling Docker to detach from the current terminal after it has started.
Accessing the Immich Web Interface
11. With Immich now up and running on your Raspberry Pi, we can access its web interface.
Ensure you replace “<YOURIPADDRESS>” with the IP of your Raspberry Pi. If you are unsure what your IP is, you can use the “hostname -I” command.
http://YOURIPADDRESS:228312. When you first access Immich, you will be greeted with the following screen.
To proceed, you must click the “Getting Started” button.

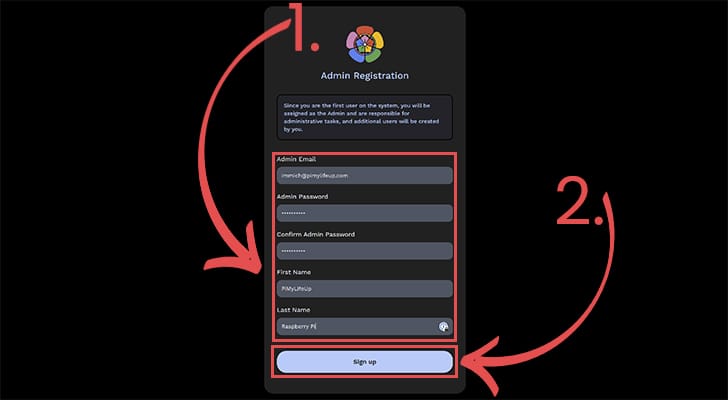
13. Next, you will be asked to create your admin account for Immich. Use the boxes to fill in the details for your admin account (1.).
After filling out your information, click the “Sign up” button (2.).
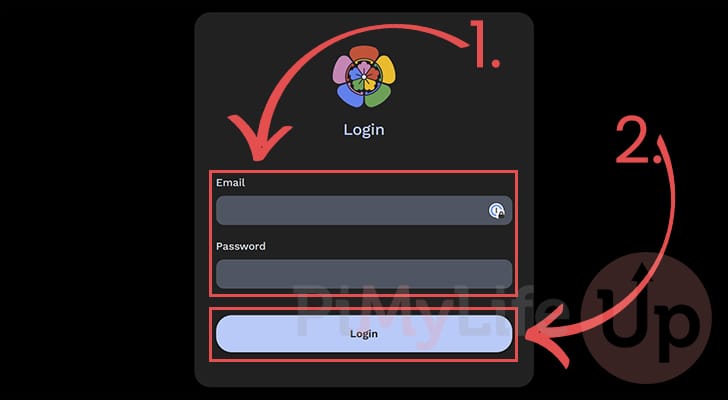
14. At this point, you can now log in to your new admin account by using the email and password you just set (1.).
After filling out your information, click the “Login” button (2.).
15. You now have access to Immich running on your Raspberry Pi.
You can start uploading your images, create new accounts, and more.

Updating Immich on your Pi
Immich is a software that gets updated fairly often, so you will want to know how to update it.
Luckily, since we are running it as a Docker container, updating Immich on your Raspberry Pi is a really simple process.
1. First, you need to ensure you are in the Immich directory we created earlier on in this guide.
Change to this directory by running the command below.
cd /opt/stacks/immichCopy2. Once we are in the correct directory, we can use Docker compose to pull the new Immich container to your Raspberry Pi.
All we need to do to pull the new images is to use the following command.
docker compose pullCopy3. After pulling a new version of the container, you need to restart Immich by using the command below in your terminal.
docker compose up -dCopyConclusion
Hopefully, at this point in the tutorial, you will now have Immich up and running on your Raspberry Pi.
Immich is a great solution for storing your photos and videos in one central location. It even has additional function such as grouping photos based on facial recognition or location they were taken.
Please feel free to leave a comment below if you have any questions about getting this software running on your Pi.
If you found this tutorial to be useful, be sure to check out our many other Raspberry Pi projects.


Hello Emmet,
I am stuck at the “Writing the Environment File for Immich” Step 7. It is trying to connect but keeps timing out. It reads: Connecting to gethub.com (gethub.com) | 203.242.255.30| :443…
Do you have any suggestions?
Thank you in advance for your help.
David
Hi David,
From that error you have shown us, it looks that you have accidentally typed in “gethub” instead of “github”. Correcting that should solve the isses you are running into.
Kind regards,
Emmet
Good and helpful guide. What is still missing is a step-by-step guide for creating a backup and restoring it. It would be nice if a guide for that could also be provided.
Hello Emmet,
Thank you for the Immich setup, it went really smoothly. I wanted to ask if its possible to run Immich with https rather than http? I did give it a try with NGINX but I couldnt resolve the setup problems after a lot of effort, searching and trying things out.
I could share with you some of the setup steps and edits that I tried or if its a fast setup would you be able to direct the setup?
Many thanls for taking time to consider the request.
Best wishes Ken
Wondering how you solve this:
https://github.com/typesense/typesense/issues/969
As typesense container is unable.to start on newest Pi OS and keep restarting.
Hi David,
Just wondering is that an issue with using Immich? Or is it an unrelated Docker container.
If you are using a Raspberry Pi 5 with the new Pi OS, it is possible to work around the “jemalloc unsupported page size” issue by changing the kernel. I actually had to do this to use Geekbench when benchmarking my Pi 5.
Cheers,
Emmet
hi!
In step 10 I get the error message:
“no matching manifest for linux/arm/v8”
on a Raspi4. Any ideas?
Thanks!
Hi Daniel,
Sorry I forgot to write at the start of the tutorial that you must be running a 64-bit version of Raspberry Pi OS (ARM64).
32-bit operating systems (ARMv8) will unfortunately not work. I have quickly added a note to the opening segment to mention this.
Kind regards,
Emmet
I am getting the error message: “no matching manifest for linux/arm/v8” too, but on a Raspberry Pi 5 running Raspbian GNU/Linux 12 (bookworm), is this not a 64-bit version?
Hi Kim,
That particular error would indicate that you are running a 32-bit operating system.
You would need to install a 64-bit OS to install Immich to your Raspberry Pi.
Kind regards,
Emmet
Thanks.
Have now installed a 64-bit OS, but have got stuck at Step 11, I can’t establish a connection to the server at 192.168.**.***:2283.
The odd thing is that I can access Portainer on the same device which tells me that Immich server is running and that the published port is 2283
Where am I going wrong?
Hi Kim,
That is indeed unsusual and not something I have personally ran into issues with. Are you sure that Immich is actually up and running?
You can verify it is by using the “
docker compose ps” command within the directory where you saved the “compose” file to. You should see the status marked as “up” if it is actually running.If the status is exited or anything else, you will want to check the logs to see what might be causing Immich to crash. You can get the logs from a Docker Compose stack by using “
docker compose logs”Kind regards,
Emmet
I get this same error, but I am most definitely running the 64-bit os. The output of uname -m is “aarch64”. It’s a Pi 5 with 8GB RAM.
What else could be wrong?
Hi John,
Raspberry Pi OS can be a bit tricky with working out if you are using a 64-bit system due to its kernel. Even if you are running a 32 bit system the uname command will return aarach64.
Use the command below to check if you are running a 64 bit OS.
You should see something like arm64 from this command.
If that still returns a 64 bit response, please let me know.
Kind regards,
Emmet
That command returns “armhf”
Hi John,
That would indicate you are running a 32-bit operating system.
Kind regards,
Emmet