In this tutorial, we will show you how to set up and run Zigbee2MQTT on your Raspberry Pi.
Zigbee2MQTT is a super useful and powerful software that bridges the Zigbee and MQTT protocols.
Zigbee is a popular wireless technology designed to be low-cost and low-powered, making it perfect for many smart devices. For example, the popular Philips Hue light range uses Zigbee for their wireless communication.
On the other hand, MQTT is a messaging protocol that allows you to easily subscribe and send messages based on a topic.
The Zigbee2MQTT software bridges both of these protocols. This allows your Raspberry Pi to receive messages over a connected Zigbee USB and output them through the MQTT protocol.
Since the Raspberry Pi does not come with a Zigbee transceiver, you will need to buy a USB one to plug in. You can get these relatively cheaply but refer to the list of supported devices on the Zigbee2MQTT website before investing in one.
By the end of the following section, you will have the Zigbee2MQTT bridge running on your Raspberry Pi.
Equipment
Below is a list of the equipment we used when setting up the Zigbee2MQTT bridge on the Raspberry Pi.
Recommended
- Raspberry Pi Amazon
- Micro SD Card Amazon
- Power Supply Amazon
- Ethernet Cable Amazon or Wi-Fi Amazon
- USB Zigbee Dongle Amazon
Optional
This tutorial was tested on a Raspberry Pi 5 running the latest version of Raspberry Pi OS Bookworm 64-bit.
Installing and Setting up Zigbee2MQTT on the Raspberry Pi
This section will cover installing and setting up Zigbee2MQTT on your Raspberry Pi. This process can be a bit involved as a couple of pieces of software are required for all of this to work.
Preparing your Raspberry Pi
1. Before proceeding, we must update the package list and upgrade any out-of-date packages using the following two commands.
The first command updates the package list cache, and the second will upgrade any old packages.
sudo apt update
sudo apt upgrade -yCopy
2. The main thing that we will need to install to our Raspberry Pi is Docker.
Docker makes running Zigbee2MQTT on your Raspberry Pi easy and straightforward. It will also allow us to set up an MQTT server with ease.
Finding your Zigbee Adapter Port
3. Once Docker is installed, we can continue preparing for Zigbee2MQTT.
Our next step is determining where your Zigbee adapter was mounted on your Raspberry Pi. Before continuing to the next step, plug in your Zigbee adapter. If it is already plugged in, unplug it and plug it back in.
4. Our next step is to use the dmesg command to output the kernel buffer. Using this, we can easily find where this device was mounted.
sudo dmesgCopy5. Below, you can see our Raspberry Pi detected and mounted the adapter on our device.
In particular, the last line is the one we are after, as that is what gives us the mount name.
[1067876.235950] usb 1-1.3: new full-speed USB device number 6 using xhci_hcd
[1067876.352763] usb 1-1.3: New USB device found, idVendor=1a86, idProduct=55d4, bcdDevice= 4.42
[1067876.352780] usb 1-1.3: New USB device strings: Mfr=1, Product=2, SerialNumber=3
[1067876.352786] usb 1-1.3: Product: SONOFF Zigbee 3.0 USB Dongle Plus V2
[1067876.352792] usb 1-1.3: Manufacturer: ITEAD
[1067876.352797] usb 1-1.3: SerialNumber: 20231031163548
[1067876.360193] cdc_acm 1-1.3:1.0: ttyACM0: USB ACM device
6. Looking at the last line, you want the name before “USB ACM device“. In our case, that means our device name is “ttyACM0“.
Please note this device name, as you will need it later in this guide.
[1067876.360193] cdc_acm 1-1.3:1.0: ttyACM0: USB ACM deviceCreating a Directory for Zigbee2MQTT on the Raspberry Pi
7. Our next step requires creating a directory to store the Compose file for Zigbee2MQTT and its configuration.
You can create this directory by using the mkdir command within the terminal.
sudo mkdir -p /opt/stacks/zigbee2mqttCopy8. After creating the directory, change to the directory by using the cd command below.
cd /opt/stacks/zigbee2mqttCopyWriting a Docker Compose file For Zigbee2MQTT
9. We can now begin running the Compose file that will run Zigbee2MQTT on our Raspberry Pi.
You will also use this same compose file to start an MQTT server. It is easier to run MQTT within the same Compose file as it is easier for the Zigbee2MQTT software to talk to it from its own container.
You can begin writing this Compose file by using the nano text editor.
sudo nano compose.yamlCopy11. Within this compose file, enter the following lines.
While typing out these lines, you must replace two things that we will quickly go over.
<TIMEZONE>: You must first replace the time zone. This needs to be specified using a TZ Identifier.
You can find the relevant one for your local time zone by visiting Wikipedia. This page gives you a list of every time zone and its TZ Identifier.<DEVICENAME>: You need to replace this value with the device name you got earlier in this guide.
The value you enter here should look like “ttyACM0” or “ttyUSB0“.
version: '3.8'
services:
  mqtt:
    image: eclipse-mosquitto:2
    restart: unless-stopped
    volumes:
      - "./mosquitto-data:/mosquitto"
    ports:
      - "1883:1883"
      - "9001:9001"
    command: "mosquitto -c /mosquitto-no-auth.conf"
  zigbee2mqtt:
    container_name: zigbee2mqtt
    restart: unless-stopped
    image: koenkk/zigbee2mqtt
    volumes:
      - ./zigbee2mqtt-data:/app/data
      - /run/udev:/run/udev:ro
    ports:
      - 8080:8080
    environment:
      - TZ=<strong><TIMEZONE></strong>
    devices:
      - /dev/<strong><DEVICENAME></strong>:/dev/<strong><DEVICENAME></strong>Copy
12. After typing out the above lines, you can save and quit by pressing CTRL + X, followed by Y, and finally the ENTER key.
Writing the Configuration File for Zigbee2MQTT
13. Our next step requires creating a directory to store the Zigbee2MQTT configuration on our Raspberry Pi.
This config is how we will point it to our Zigbee device and the MQTT server.
sudo mkdir /opt/stacks/zigbee2mqtt/zigbee2mqtt-dataCopy14. The command below lets you write the configuration file in the terminal.
sudo nano /opt/stacks/zigbee2mqtt/zigbee2mqtt-data/configuration.yamlCopy15. Within this file, you must type in the following lines. Since we are running the MQTT container within the same Compose file we can reference it in this configuration file using the “mqtt” hostname.
You must replace “<DEVICENAME>” with the name you got in this guide for your Zigbee adapter.
permit_join: true

mqtt:
  base_topic: zigbee2mqtt
  server: mqtt://mqtt

serial:
  port: /dev/<strong><DEVICENAME></strong>

frontend:
  port: 8080

advanced:
  network_key: GENERATECopy
16. Once you have finished writing out this configuration file, save and quit by pressing CTRL + X, followed by Y, and then the ENTER key.
Starting up Zigbee2MQTT on your Raspberry Pi
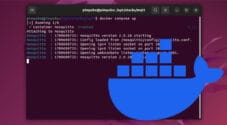
17. With the Compose file created, we can start the Zigbee2MQTT server on our Raspberry Pi by running the following command.
Docker will download the containers and start them based on the configuration we wrote. in the previous section.
docker compose upCopyWe highly recommend setting up Dockge on your Raspberry Pi to make managing these Docker containers a breeze.
Accessing the Web Interface
18. To access the Zigbee2MQTT web interface, go to your Pi’s IP address followed by the port “8080“.
If you don’t know your Raspberry Pi’s IP address, you can quickly get it using the hostname command.
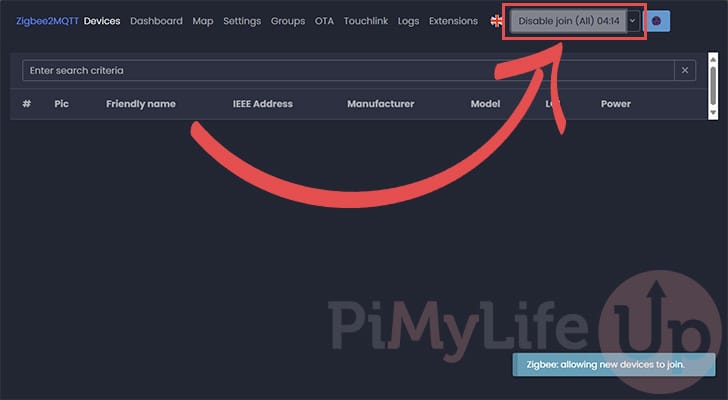
http://<IPADDRESS>:808019. With the web interface open, you can easily control the Zigbee2MQTT bridge.
You can disable and re-enable the joining of devices by clicking the button in the top-right corner.
20. At this point, you will want to pair your Zigbee devices with the Zigbee2MQTT bridge.
This process differs significantly between Zigbee-compatible devices, so we won’t cover how to do this. Most devices will enter pairing mode after they have been factory reset.
You can consult the Zigbee2MQTT list of compatible devices for steps on how to pair devices.
Conclusion
At this stage you should now have the Zigbee2MQTT bridge up and running on your Raspberry Pi.
This bridge lets you connect your Zigbee devices easily with services such as Home Assistant.
Please feel free to leave a comment below if you have any issues with getting this bridge working on your Pi.
If you found this tutorial to be useful, we highly recommend checking out our many other Raspberry Pi projects.


Hey, The tutorial is in depth and is great. Can you make an extended tutorial on getting this working with homeassistant?
When it comes to HomeAssistant is there any benefit to this over using the already available Zigbee2MQTT addon that HA has? The addon is super simple to configure and lets me manage everything from within HA (im running supervisor on my pi) so trying to understand the use case of doing it this way.
Hi Adam,
In that use case you are better off just using the Home Assistant addon as it is, as you said, easier to just use that and it makes the whole setup process simple.
However, there are a few other use cases for Zigbee2MQTT. For example, you might want to use Zigbee2MQTT to control your Philips hue lights through the DiyHue software.
Additionally, in the case of Home Assistant, you might be running a version that does not contain supervisor meaning you lose access to addons. The most obvious case where this exists is when you are running Home Assistant through Docker.
Kind regards,
Emmet