In this tutorial, we will show you how to set up the Zigbee2MQTT add-on in Home Assistant.
Zigbee2MQTT bridges the Zigbee wireless communication technology and the MQTT messaging protocol.
The advantage of using this bridge is that it makes it easier to use your Zigbee devices within Home Assistant. MQTT is a straightforward protocol to read messages from and is easy to integrate into Home Assistant and its automation.
One popular brand of products that uses Zigbee for communication is the Philips Hue line of smart lights. By setting up Zigbee2MQTT on Home Assistant, you can control these lights without relying on the Philips Hue hub.
Of course, to use this bridge, you will need a Zigbee adapter to plug in to your smart home server. Luckily, USB Zigbee adapters are relatively affordable.
Installing and Setting Up Zigbee2MQTT on Home Assistant
This section will show you how to install and set up the Zigbee2MQTT Home Assistant add-on.
Before proceeding with setting up Zigbee2MQTT, we recommend checking out the list of supported devices. This list will let you know whether your Zigbee device will work with the bridge, and also any steps you might need to take to pair the device.
Most devices can be paired with Zigbee2MQTT by factory resetting them. However, some devices have other things you must do to get them into pairing mode.
Preparing Home Assistant for Zigbee2MQTT
1. We need a few pieces in place before we can set up Zigbee2MQTT on Home Assistant.
The first piece we need is for the MQTT addon to be installed and configured. Our guide that we have linked will walk you through the whole process.
If you already have MQTT set up, you can skip straight to step 3.
2. After installing and configuring the MQTT server, you may proceed with this tutorial.
Finding the Zigbee USB Adapter
3. Our next step is finding your Zigbee adapter’s device path. You should plug the device in now if you haven’t plugged it in.
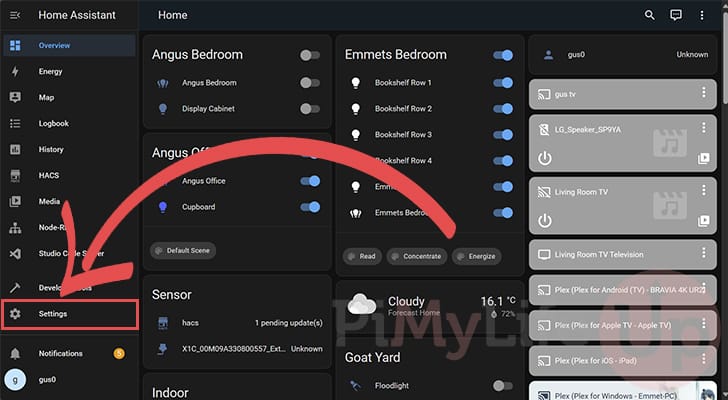
Once plugged in, change to the “Settings” screen using the sidebar.
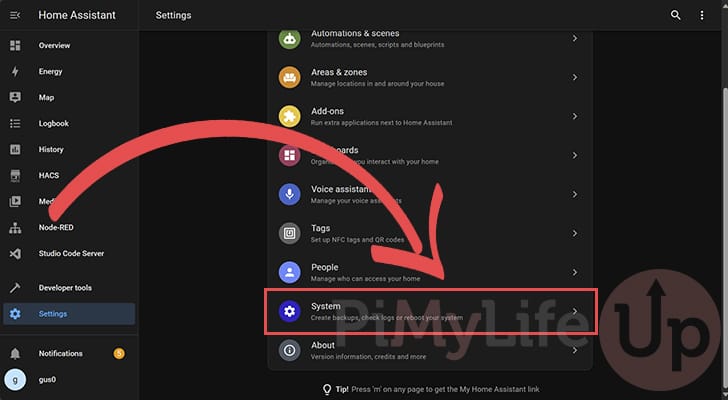
4. Once on the settings screen, scroll down and click the “System” option.
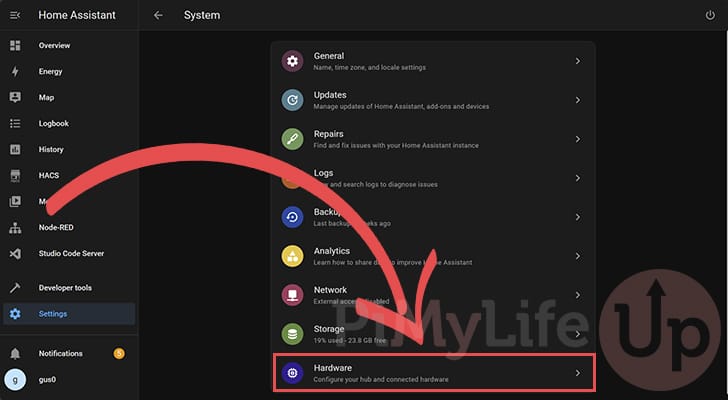
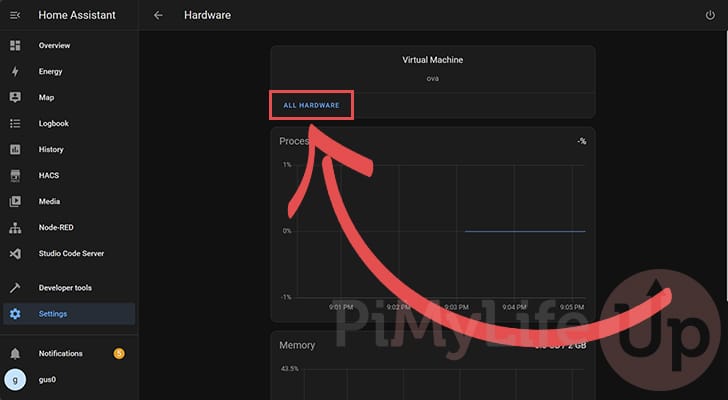
5. The next option we are after is the one labeled “Hardware“. Typically, you will find the option at the bottom of this page.
This allows us to find any hardware attached to your Home Assistant server.
6. Now that we are on the hardware page, click the “ALL HARDWARE” button.
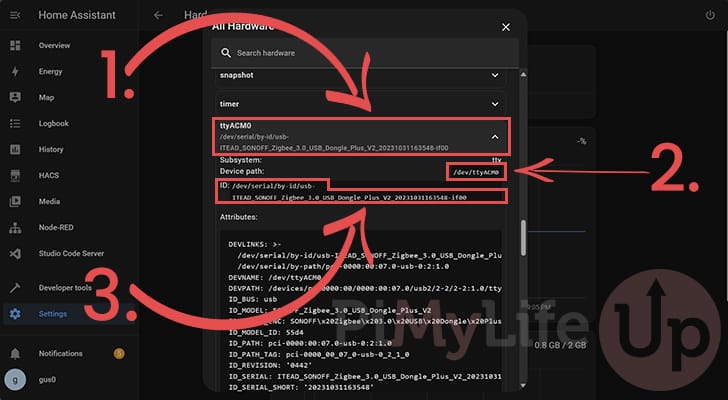
7. In the “All Hardware” pop-up, scroll down until you find your Zigbee adapter (1.). Typically, the adapter will be mounted to a device using a name starting with “ttyACM” or ttyUSB.
Our Zigbee adapter was easy to identify thanks to the “Zigbee” name being used in its ID.
After you have found your adapter, make a note of the “Device path” (2.) and the “ID” (3.). You will need these values later in the guide.
Adding the Repository the Zigbee2MQTT Repository
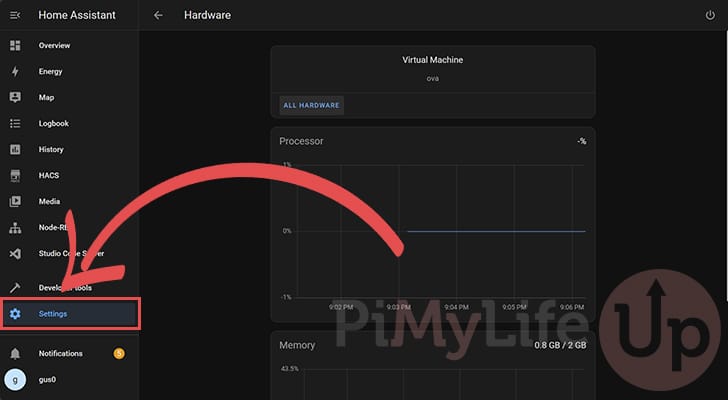
8. The Zigbee2MQTT add-on isn’t distributed with Home Assistant by default. We will need to add the Zigbee2MQTT repository to install and use this add-on.
To start this process, change to the settings screen by clicking “Settings” in the sidebar.
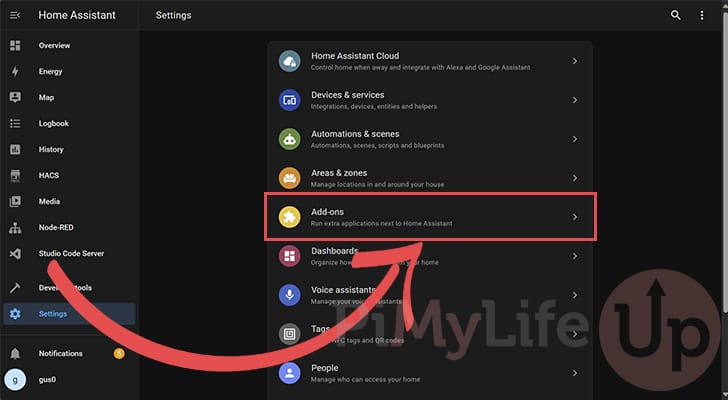
9. Once you are on the settings page, select the “Add-ons” option.
If this option is missing, you may be running a version of Home Assistant without supervisor. In that case you can’t proceed with this guide and must set up Zigbee2MQTT separately.
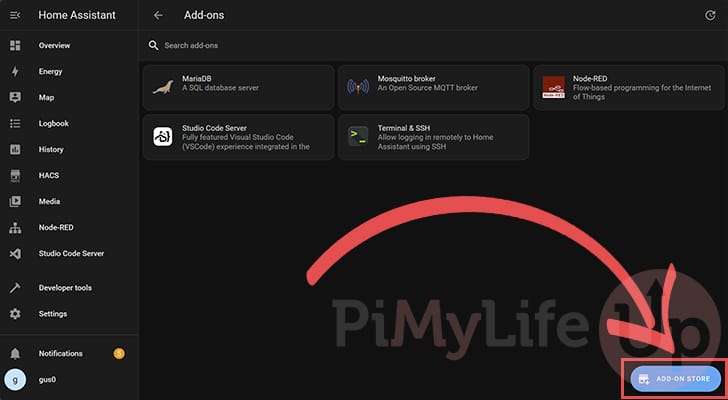
10. Next, you must click the “ADD-ON STORE“, button in the bottom right corner of the screen.
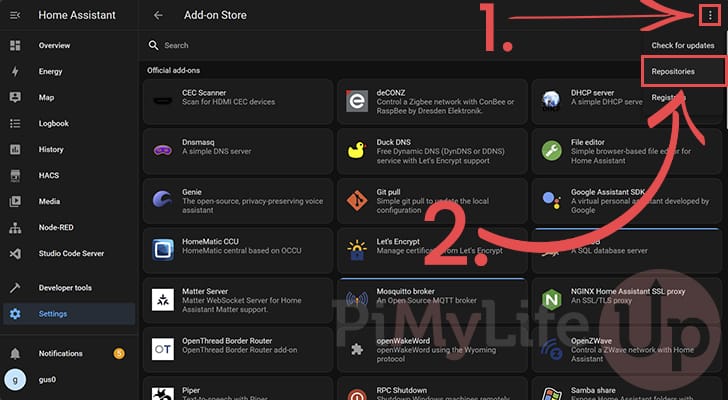
11. Once you are within the “Add-on Store” you need to click the kebab icon (Vertical three dots) in the top-right corner (1.).
You will want to click the “Repositories” (2.) option in the pop-up menu.
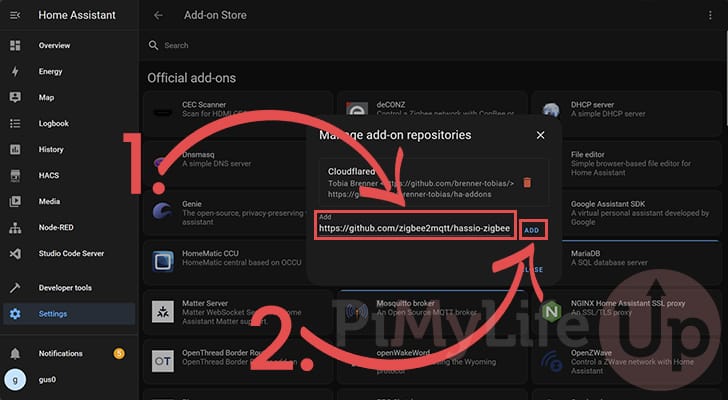
12. On this screen, type “https://github.com/zigbee2mqtt/hassio-zigbee2mqtt” into the text box (1.).
https://github.com/zigbee2mqtt/hassio-zigbee2mqttAfter typing out the link to the repository, click the “ADD” button (2.).
Installing the Zigbee2MQTT Add-on to Home Assistant
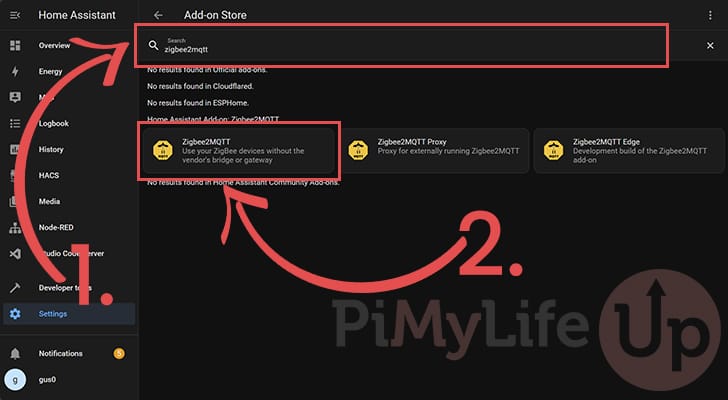
13. After adding the repository, type “zigbee2mqtt” into the search box (1.). If you don’t see any add-ons, refresh the page.
You should eventually see three options appear in the list. The one you want to click is labeled “Zigbee2MQTT” (2.).
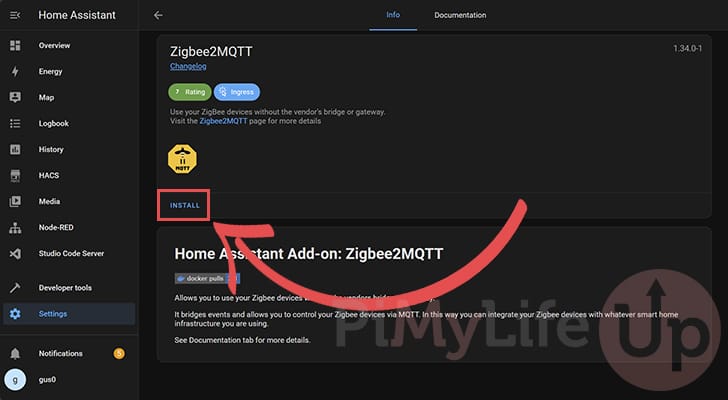
14. Now that you are on the add-on page for Zigbee2MQTT, you only need to click the “Install” button to install the add-on to Home Assistant.
This process shouldn’t take super long to complete.
Configuring Zigbee2MQTT
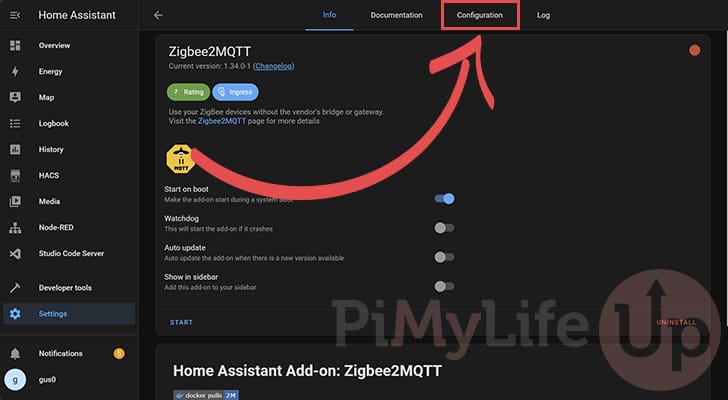
15. Now that you have the Zigbee2MQTT add-on installed on your Home Assistant server, we must configure it to use your Zigbee adapter.
To begin this process, click the “Configuration” tab.
16. Now that we are on the configuration page, there are potentially two settings you must configure. We will break this down into “MQTT” (1.) and “serial” (2.).
Once you have filled out these two fields, you can click the “SAVE” button (3.) and return to the “Info” screen.
mqtt: If you use the Home Assistant MQTT add-on, you can skip this step. That will be automatically connected to Zigbee2MQTT.
However, if you use an outside MQTT server, you must specify the server by entering the following into the “mqtt” box.
Replace “<IPADDRESS>” with the IP of your outside MQTT server.
If you have authentication set up, you must specify the username and password. Remove the last two lines if you aren’t using authentication on your MQTT server.
server: 'mqtt://<IPADDRESS>:1883'
user: <USERNAME>
paassword: <password>
serial: The serial setting is super important as it tells Zigbee2MQTT what adapter it should utilize.
At its most basic usage, you must specify “port” followed by the device ID you got earlier. It is also possible to use the path, but that isn’t guaranteed to be the same between restarts.
port: <DEVICEPATH>Another thing you might want to consider specifying is the adapter type. In our case, Zigbee2MQTT would not start on our Home Assistant server until we set its type to “ezsp” as shown below.
If you are having similar issues, the other two types that you can try are “zstack” and “deconz“.
adapter: ezsp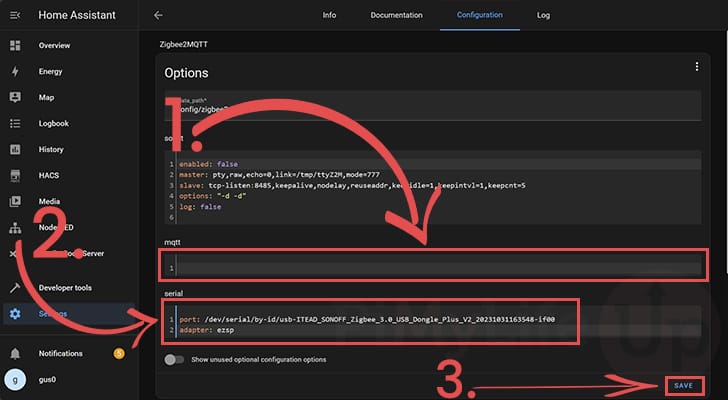
Starting Zigbee2MQTT on Home Assistant
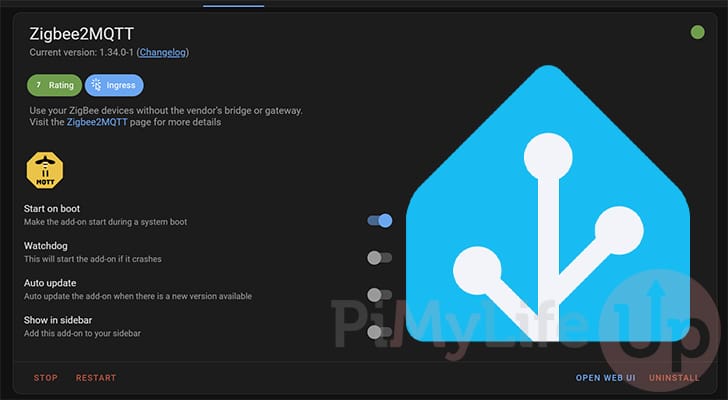
17. With the Zigbee2MQTT add-on now configured, we can get Home Assistant to start up the add-on.
You must click the “START” button on the info screen.
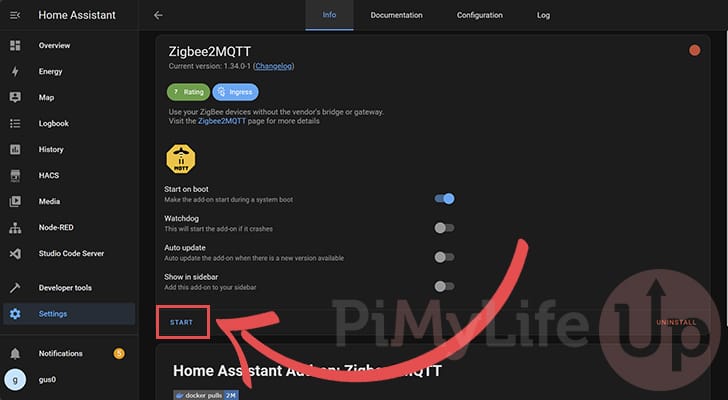
If everything is working fine, Zigbee2MQTT should start up and remain started. Give it a minute or two to settle to ensure it works properly.
If the add-on crashes, return to the configuration screen and check over your settings. There is a chance you may have mistyped the “port” or that you need to specify the “adapter” type.
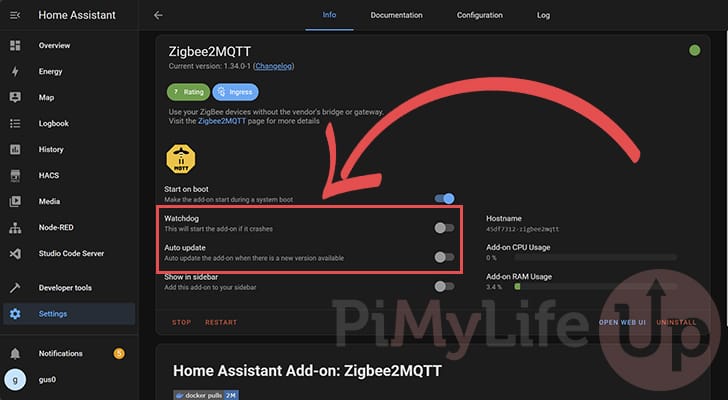
18. Once you are confident that the Zigbee bridge is working, you should enable both the “Watchdog” and “Auto update” options.
You can add this add-on to the sidebar by toggling the “Show in sidebar” option.
To enable these options, you need to click their toggles.
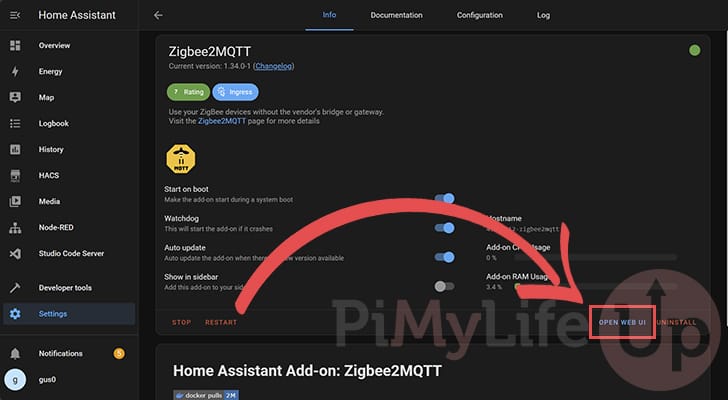
19. Finally, to control Zigbee2MQTT from your Home Assistant installation, you will want to click the “OPEN WEB UI” button.
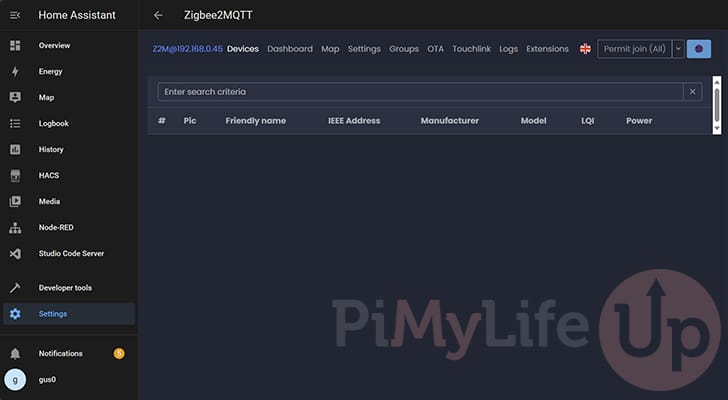
20. You are now on the Zigbee to MQTT bridge’s web interface. You can use this to control the settings of Zigbee2MQTT without ever leaving Home Assistant.
In particular, the main thing you will want to do within this interface is to turn the bridges’ auto-join functionality on and off. This functionality automatically pairs your Home Assistant server with any pending devices.
Conclusion
Hopefully, you will have successfully installed and configured the Zigbee2MQTT add-on on Home Assistant.
This add-on makes setting up this Zigbee to MQTT bridge a straightforward process; you don’t have to leave the web interface to utilize it either.
Please feel free to leave a comment below if you have had any issues with getting this Home Assistant add-on to work.
If you found this tutorial useful, we recommend you check out our other Home Assistant tutorials.