In this tutorial, we will show you how to set up the Mosquitto MQTT broker using Docker Compose.
Mosquitto is a popular open-source message broker for the MQTT protocol developed by the Eclipse Foundation.
It has become one of the most used MQTT brokers because it is completely free, lightweight, and fast.
The MQTT protocol is often used by IoT devices as it is lightweight and doesn’t require much processing power to send and receive messages.
Docker is an excellent solution for running the Mosquitto MQTT broker since it allows you to get it up and running quickly and makes updating the broker straightforward.
By the end of this tutorial, you will have the Mosquitto MQTT broker up and running within a Docker container.
Installing the Mosquitto MQTT Broker using Docker
In the following sections, we will walk you through the process of using Docker to set up the Mosquitto MQTT broker.
We tested these particular steps on Ubuntu, but they will work for almost any Linux operating system.
Additionally, the Mosquitto MQTT Broker container that we are using has builds for both x64, ARM, and ARM64 operating systems, so it will work on almost any device that you throw at it as long as it supports Docker.
If you prefer video content to written, then be sure to watch the video that we have embedded below. Of course, as always, we have our written steps on installing MQTT using Docker.
Installing Docker
1. Before you can set up your Mosquitto MQTT Broker using Docker, you must install the Docker runtime itself.
If you already have Docker installed, you can safely skip to step 2 and continue. Alternatively, you can our guide that shows you how to install Docker on Linux.
https://pimylifeup.com/linux-docker-install/Preparing to Set Up the Mosquitto MQTT Broker
2. We can now begin preparing your system so that we can set up the Mosquitto MQTT Broker using Docker Compose.
Our first step is to create a directory to store the MQTT Brokers data and its Compose file. You can create this directory by using the mkdir command within the terminal.
sudo mkdir -p /opt/stacks/mqttCopy3. Once you have created the directory, you will want to change in to it. We will be using this directory for the rest of the guide.
You can change into the directory by utilizing the cd command.
cd /opt/stacks/mqttCopyWriting a Docker File for the Mosquitto MQTT Broker
4. We can now begin writing the Compose file to install the Mosquitto MQTT Broker Docker container.
To begin writing this file, use the command below in the terminal. We use the nano text editor as it is one of the easiest terminal-based editors.
sudo nano compose.yamlCopy5. Within this file, you will want to type out the following lines.
The configuration of Mosquitto itself will happen later on and is controlled within its own file.
services:
  mosquitto:
    image: eclipse-mosquitto
    container_name: mosquitto
    volumes:
      - ./config:/mosquitto/config
      - ./data:/mosquitto/data
      - ./log:/mosquitto/log
    ports:
      - 1883:1883
      - 9001:9001
    stdin_open: true
    tty: true
Copy
6. After filling out the Compose file, you can save and quit by pressing CTRL + X, Y, and then ENTER
Writing a Config File for Mosquitto
7. Our next step is to write the configuration file for the Mosquitto MQTT broker.
Before we do that, however, we must create the config directory where the file will be set. To do so, type the command below to create this directory.
sudo mkdir configCopy8. Now begin writing the configuration file by using the following command.
sudo nano ./config/mosquitto.confCopy9. Within this file you will want to type in the following lines. These lines tell the Mosquitto MQTT Broker where to listen and where to store data.
Please don’t change the paths specified in this configuration file, as they are specific to the Docker container and not your system.
listener 1883
listener 9001
protocol websockets
persistence true
persistence_file mosquitto.db
persistence_location /mosquitto/data/

#Authentication
allow_anonymous false
password_file /mosquitto/config/pwfile
10. If you want to allow your Mosquitto MQTT Broker to send and receive messages from anyone, set the “allow_anonymous” option to “true“.
Setting this value to true will allow someone without a user to send and receive messages from your broker.
11. After filling out the file, save and quit by pressing CTRL + X, Y, and then ENTER.
Preparing the Password Database File
12. Even if you don’t intend on using a password it doesn’t have the file set up just in case.
Since the Docker container will expect this file to exist, we can use the touch command to create an empty file.
sudo touch ./config/pwfileCopy13. Once the file is created our next step is to change the files permissions to “0700” as expected the MQTT software.
sudo chmod 0700 ./config/pwfileCopyStarting up the Mosquitto MQTT Broker using Docker
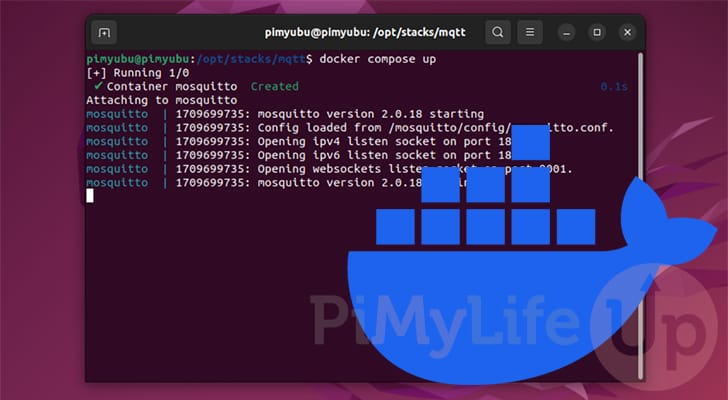
14. Since you spent the time writing out a Compose file, starting up the Mosquitto MQTT Broker Docker container is as simple as using the command below.
When you run this command, Docker will download the latest version of the Mosquitto container and immediately begin to run it.
docker compose up -dCopyBy using the “-d” option, Docker will detach itself from the current terminal session once the MQTT broker is running. This allows it to continue to run in the background.
Creating a User for your MQTT Broker
15. If you have chosen to enable authentication for your MQTT broker, we must perform some additional configuration.
To create a user that you can use to talk with the broker, we will need to interact with the container itself. Luckily, we can use the command below to use sh within the container.
docker compose exec mosquitto shCopy16. To begin creating a new Mosquitto user, you will want to use the following command.
Ensure that you replace “<USERNAME>” with the name you want to give this user.
mosquitto_passwd -c /mosquitto/config/pwfile <USERNAME>CopyAfter running the above command, you will be prompted to type in a password for this user. Make sure you set it to something secure and remember it for later.
Password:
Reneter password:
17. After creating your additional Mosquitto MQTT Broker users, you can exit the interaction session with the Docker container.
All you need to do to return to the normal terminal is run the command below.
exitCopy18. Unfortunately, for the new Mosquitto MQTT user to be usable, we must restart the Docker container.
Luckily, we can achieve this by using the following command. Once the broker starts up again, you will be able to send and receive MQTT messages through the broker.
docker compose restart mosquittoUpdating your MQTT Broker
One key advantage of using Docker containers is that they are typically very easy to update to the latest release.
This quick section will show you how you can update to the latest version of the Mosquitto MQTT Broker container with just a few short commands.
1. Our next step is to change into the directory where we wrote the Compose file earlier in this tutorial.
You can change to the correct directory by running the command below.
cd /opt/stacks/mosquittoCopy2. Once we are in the correct directory, we can use Docker Compose to pull the latest version of the Mosquitto MQTT Broker container.
All we need to do to download the latest release is to use the following command.
docker compose pullCopy3. Even if Docker downloaded a new version of the container, it won’t automatically restart a running container.
You must run the command below to get Docker to update the running container to the new release. Docker will detect the new image is available, stop the current running container, and then start it using the new release.
docker compose up -dCopyConclusion
At this point in the tutorial, we hope you have managed to get the Mosquitto MQTT Broker up and running within a Docker container.
Docker is an excellent way to run this software. It allows you to get the MQTT broker up and running in no time and makes managing it a breeze.
Please comment below if you have encountered any issues with getting this broker up and running within a Docker container.
If you found this tutorial helpful, we highly recommend checking out our numerous other Docker tutorials.