In this tutorial for the Raspberry Pi, we will show you how to install and set up the popular automation tool Home Assistant.
Home Assistant is an open-source home automation software with devices like the Raspberry Pi in mind.
The software is designed to protect your privacy and keep control in the user’s hand.
Using Home Assistant, you can track the state of all the devices in your home. You can even set up an automation to interact with them.
For example, you can set it so that the Home Assistant will automatically turn on all your lights when it gets dark and while you’re at home. You can even set it up to dim the lights in your living room when you cast a movie on your Chromecast.
Thanks to the great community, the Home Assistant software can successfully integrate with a wide range of devices, including Phillips Hue and Ring.
The Raspberry Pi is a great device for running your home automation. It is small, affordable, packs a ton of connectivity features, and uses a relatively small amount of power.
If you want to continue to use your Raspberry Pi for other functions instead of just Home Assistant, you can always use the Docker container. However, there are some drawbacks of using Docker to run Home Assistant.
Equipment List
Here is a list of the equipment we recommend for setting up Home Assistant on the Raspberry Pi.
Recommended
- Raspberry Pi Amazon
- Micro SD Card Amazon
- Power Supply Amazon
- Ethernet Cable Amazon or Wi-Fi Amazon dongle
Optional
- Raspberry Pi Case Amazon
We tested this tutorial on setting up Home Assistant on a Raspberry Pi 4 running the latest version of the Home Assistant software.
Installing Home Assistant OS onto your Raspberry Pi
In this section, we will be covering the steps for installing Home Assistant OS onto your Raspberry Pi. To achieve this, we will be using the Raspberry Pi imager as it is the easiest process.
Below we have embedded a video that walks you through the process of installing and using Home Assistant OS on your Raspberry Pi. If you prefer written content, then just scroll on to the next section.
Using Raspberry Pi Imager to Install Home Assistant
1. The first thing you must do is download and install the Raspberry Pi Imager on to your machine. Luckily, the Imager supports basically all operating systems.
You can download the imager directly from the Raspberry Pi’s website.
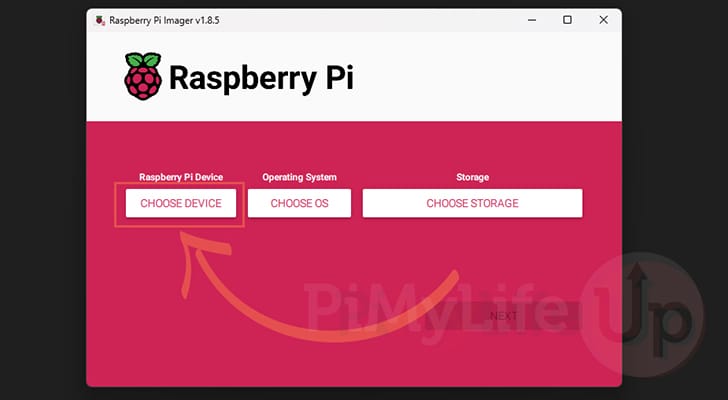
https://www.raspberrypi.com/software/2. With the Raspberry Pi Imager now open, you will want to click the “CHOOSE DEVICE” button.
Clicking this button will bring up a list of the different Raspberry Pis. Select the Pi that you intend to install Home Assistant on.
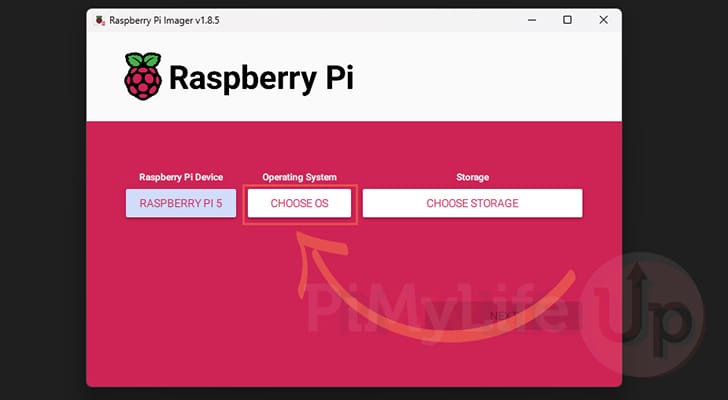
3. With your Pi now selected, click the “Choose OS” button.
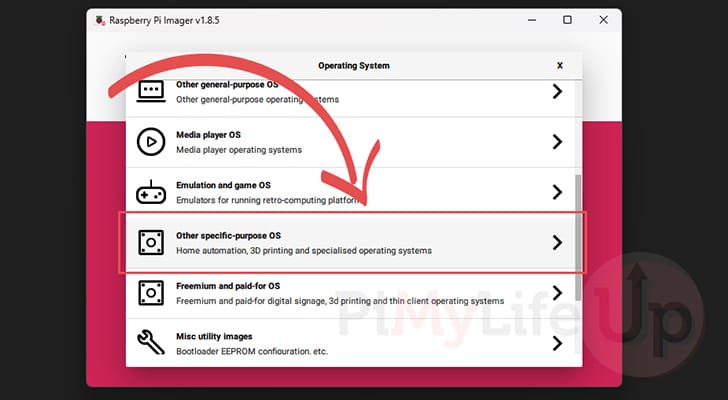
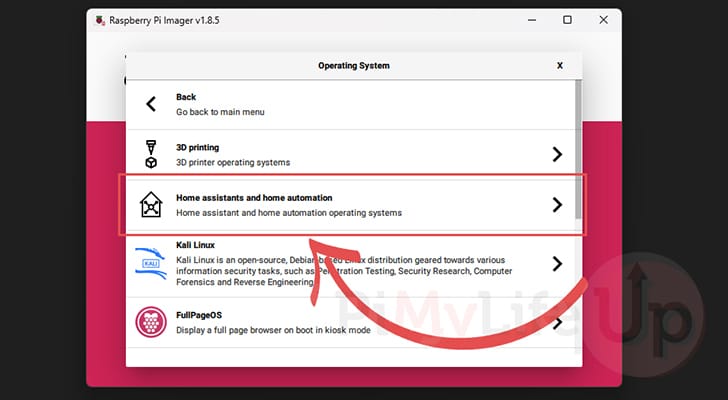
4. Within this menu, select the “Other specific-purpose OS” option.
5. You should now see a list of a few operating systems, but the option you want to select is the “Home assistants and home automation” option.
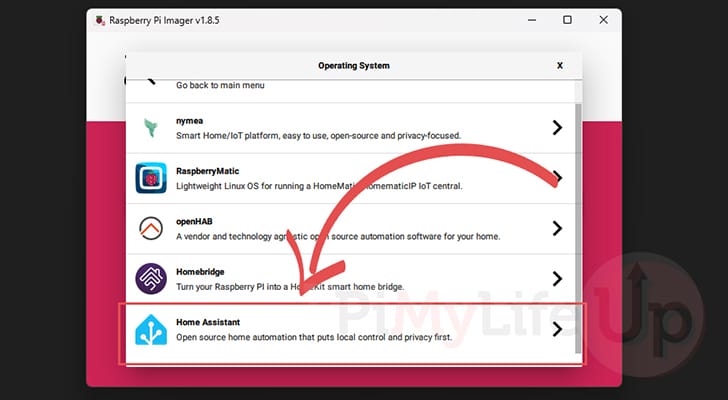
6. At the bottom of this list, you should see an option labeled “Home Assistant“. Click this option to continue to a list of versions of Home Assistant OS that you can install to your chosen Raspberry Pi.
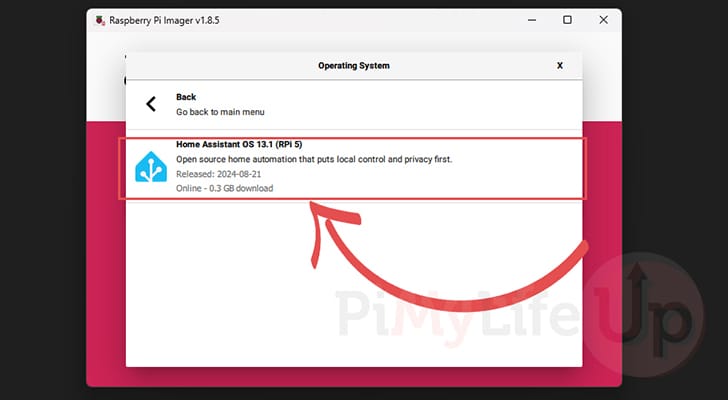
7. Since we selected the Raspberry Pi 5 earlier on in this section, we should now see the correct version of Home Assistant OS that we can install.
Select the version of Home Assistant specified here to continue.
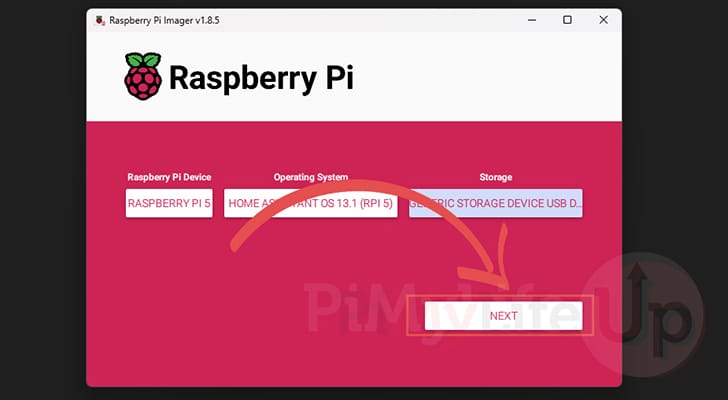
8. The last task we need to do is click the “CHOOSE STORAGE” button and select the SD card or drive that we want to write the Home Assistant operating system to.

9. To begin the image writing process, you will want to click the “Next” button.
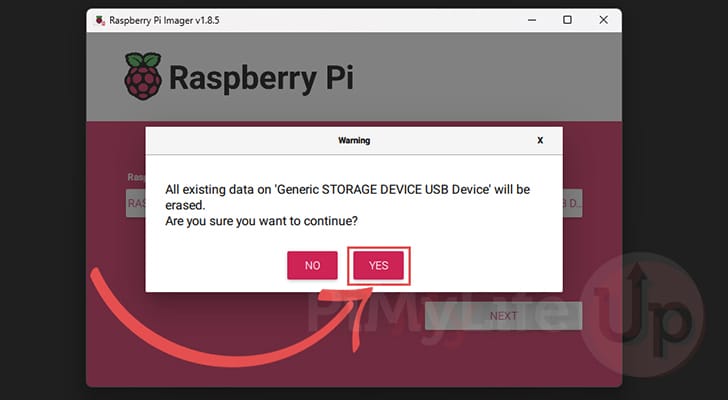
10. You will now see a warning that the Raspberry Pi Imager will overwrite all existing data on your chosen storage device to install Home Assistant.
To continue with this process, click the “YES” button.
11. At this point, you have successfully installed Home Assistant OS on your Raspberry Pi.
If you need Wi-Fi or a static IP address, go to the Extra Steps for Home Assistant section. Otherwise, you can skip to our first boot section.
Extra Steps for your Home Assistant OS Installation
This section will be covering two different things. Both of these are completely optional and are only needed for specific use cases. if you don’t need Wi-Fi or a static IP address, skip to our first boot connection
The first section will cover how you can connect your Raspberry Pi Home Assistant OS installation to your Wi-Fi. Where possible you should be using an Ethernet connection as it is significantly more reliable and less prone to problems. However, Ethernet will of course not will work with all setups
The second connection is for those who need to set a static IP address for their Home Assistant installation. The best way to set a static IP is using DHCP reservation but it is still possible to get your Pi to request a static IP. Our normal guide won’t work in this situation as HASS OS requires some different steps.
For this section, you will require direct access to your Raspberry Pi using both a monitor and a keyboard.
Setting Up Wi-Fi for Home Assistant on your Raspberry Pi
In this section, we will be showing you how to set up Home Assistant on your Raspberry Pi to connect to your Wi-Fi network.
If possible, we highly recommend that you try and stick with using an Ethernet connection is it is significantly more reliable.
1. Once your Raspberry Pi is powered on and running Home Assistant OS we will be able to use its terminal interface to turn on Wi-Fi.
You will know that everything is ready as the terminal prompt will start with “ha >” and the text “Welcome to the Home Assistant Command line” will be displayed on the screen.
2. With access to the terminal, switching on Wi-Fi within the Home Assistant OS is as simple as using the following command in the terminal.
While typing out this command there is two things that you will be required to replace.
<SSID>: Replace this text in its entirety with the SSID for your Wi-Fi network.<PASSWORD>: This text must be replaced with the password you use to connect to your Wi-Fi.
network update wlan0 --ipv4-method auto --wifi-auth wpa-psk --wifi-mode infrastructure --wifi-ssid "<SSID>" --wifi-psk <PASSWORD>CopySetting a Static IP Address for Home Assistant
With this section, we will show you the steps for setting a static IP address for your Raspberry Pi that is running Home Assistant OS. Ideally, you would set this static IP using your routers DHCP reservation functionality but not everyone has access to their router.
The one downside of the method that we are showing you here is that if your router assigns your IP address to a different device, you may run into connection issues.
These steps will be assuming that you are using an Ethernet connection.
1. With the Home Assistant CLI open on your Raspberry Pi, you will need to exit out and return to the normal terminal.
To access the normal terminal, you will want to use the following command within the terminal.
loginCopy2. Now that we are within the normal terminal, we can begin to edit the default ethernet connection by using the following command in the terminal.
nmcli con edit "Supervisor end0"Copy3. To set the static IP address for your Home Assistant OS installation on your Pi, all you need to do is run the following command in the terminal.
You must replace “<IPADDRESS>” with the static IP that you want assigned to your Pi.
set ipv4.addresses <IPADDRESS>/24CopyFor example, if we were to set the static IP to “192.168.0.32” you would use the following.
set ipv4.addresses 192.168.0.32/244. You will now be prompted as whether to set the IPv4 to method. This allows us to manually control the IP of Home Assistant as well as set things like the DNS.
Type in “yes” and then press ENTER to continue.
Do you also want to set 'ipv4.method' to 'manual'? [yes]:5. The next thing you will want to do is set the IP for the DNS server that Home Asssistant will utilize.
Replace “<DNSIP>” with either the IP address of your router or an external DNS service like Cloudflare.
set ipv4.dns <DNSIP>CopyFor example, setting our DNS IP to our Router would mean we would use the command below.
set ipv4.dns 192.168.0.1Copy6. With the DNS now set, we must set the gateway IP address. This IP address is typically the IP of your router. This IP will differ depending on how your router has been setup but a common one is “192.168.0.1“.
Ensure that you replace “<GATEWAYIP>” with the IP of your router.
set ipv4.gateway <GATEWAYIP>CopyFor example, since our routers IP address is 192.168.0.1 we would use the command below.
set ipv4.gateway 192.168.0.1Copy7. With all of these changes made, we will want to now save them by simply typing in the following command.
saveCopy8. We have now finished reconfiguring Home Assistant OS to retrieve a static IP address for yoru Raspberry Pi.
Since we are done with this tool, we can now quit out of it by simply typing in quit.
quitCopy9. To ensure that this change sticks and that your Home Assistant installation can get a static IP address you must restart your Raspberry Pi by using the following in the terminal.
rebootCopyFirst Boot of Home Assistant on Your Raspberry Pi
Now that you have the Home Assistant operating system installed and running on your Raspberry Pi, you will want to know how to access it.
This section will show you how you can access this web interface and go through the initial setup experience.
Accessing the Home Assistant Web Interface
1. With the Home Assistant operating system now running on your Pi, you will want to access its web interface.
To do this, we will need to go to one of the following web addresses in your favorite web browser.
For most users, you should be able to get to the Home Assistant homepage by using the following URL.
http://homeassistant.local:8123Alternatively, if that doesn’t work, you can also try going to the following URL. Sometimes strict network configuration can block these hostnames from working correctly.
http://homeassistant:8123The last option requires you to know your Raspberry Pi’s IP Address. As you can’t use the terminal at this stage, you will need to likely retrieve this from your router.
Replace “[IPADDRESS]” with the IP address of your Raspberry Pi.
http://[IPADDRESS]:8123Initial Setup of Home Assistant on your Raspberry Pi
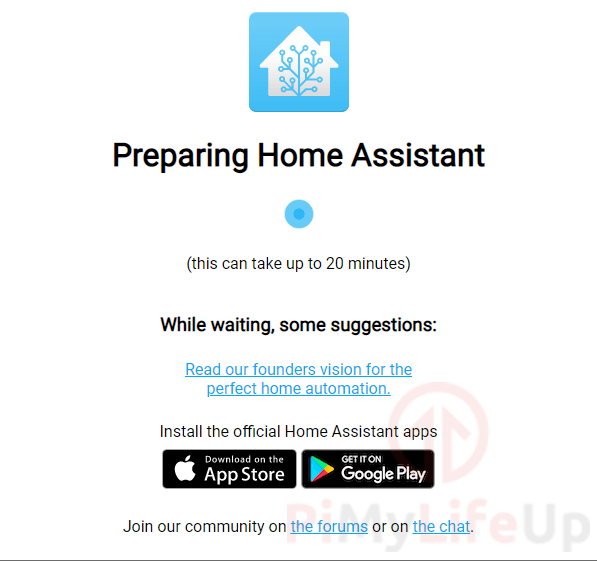
2. The initial boot of Home Assistant on your Raspberry Pi can take some time.
If you see a “Site Can’t Be Reached” error or a screen as we have below, then try and wait at least 20 minutes.
The reason this process takes so long is that the software is downloading the latest available version of Home Assistant as well as preparing everything for you.
3. Once the initial boot of Home Assistant has finished, you may need to refresh your web browser.
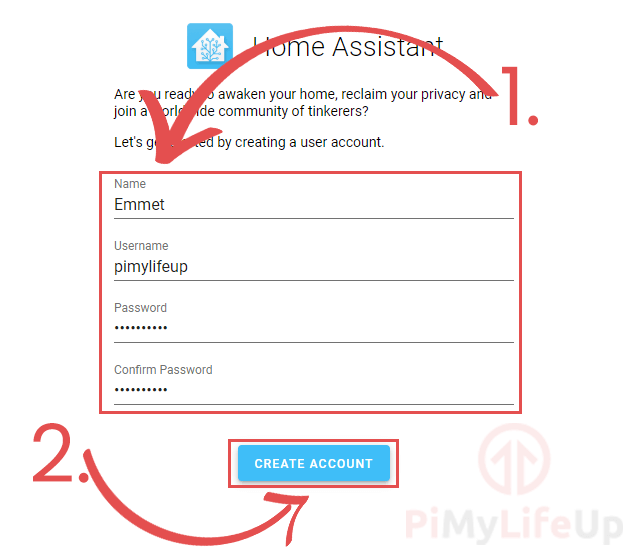
The first thing you will be asked to do is to create a user for the Home Assistant software.
Enter the details for your user (1.) then click the “CREATE ACCOUNT” button (2.)
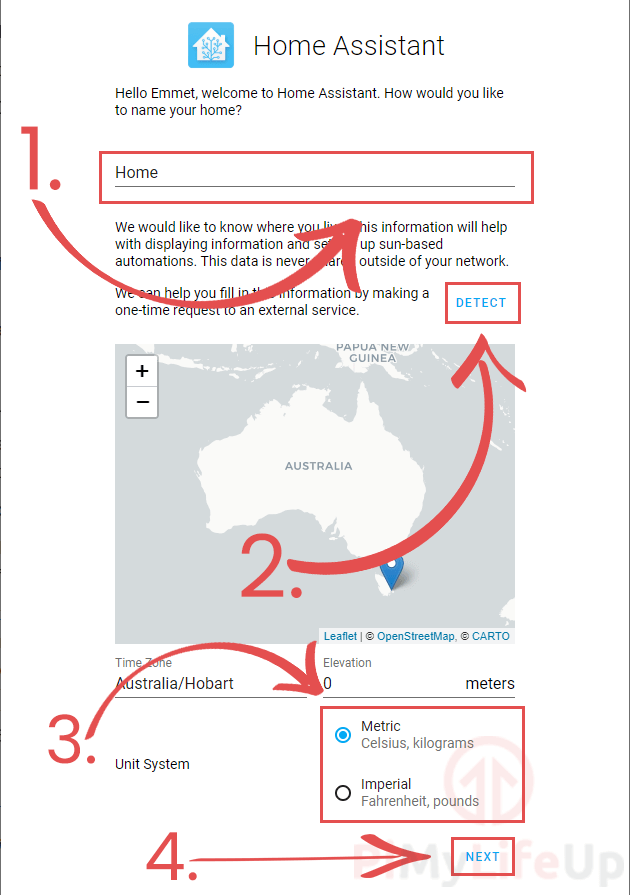
4. This next screen will ask you to give a name to your “home” (1.)
You will also need to set your location. Setting your location helps the software handle automation tasks that take into account the sun’s position.
To make this process easy, you can click the “DETECT” button (2.). This button will try to automatically work out where you live and configure the location and time zone for you.
Next, you need to select the unit system (3.) that you use. By default, this is set to “Metric“.
Once done, click the “NEXT” button (4.) to proceed.
5. You will now be shown a list of devices that the Home Assistant software has already detected.
You can either set them up now by clicking the + icon (1.) above the device name or finish up the initial setup by clicking the “FINISH” button (2.).

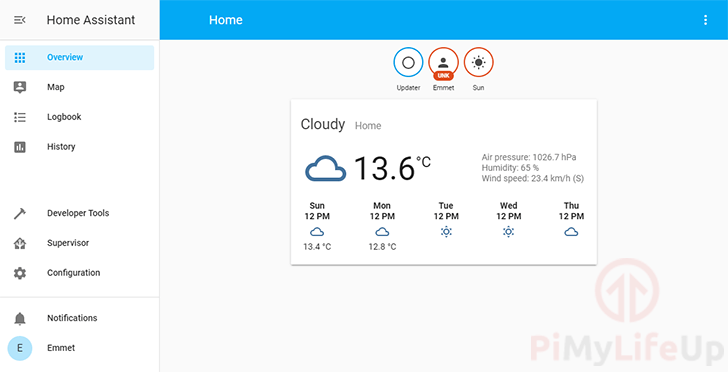
6. You have now successfully finished the initial setup of the Home Assistant software on your Raspberry Pi.
You will now see the default Home Assistant dashboard, the more integrations you add, the more information you will see on your dashboard.
Adding Additional Integrations to Home Assistant on your Raspberry Pi
Now that you have Home Assistant up and running on your Raspberry Pi, you will want to expand the devices it is monitoring by adding additional integrations.
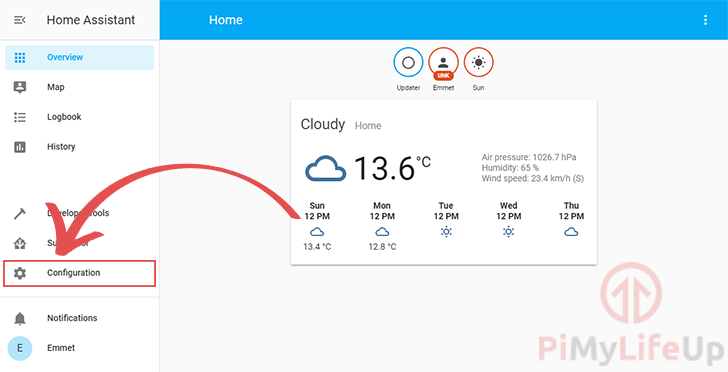
1. To add additional integrations, click “Configuration” in the sidebar.
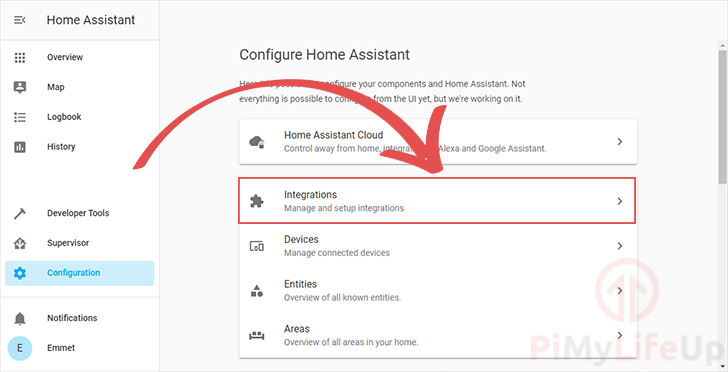
2. Next, click the “Integrations” option.
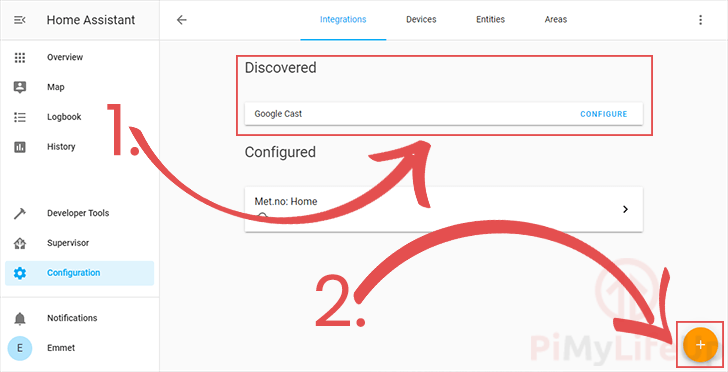
3. On this next screen, you will see all the devices that Home Assistant has automatically detected from your Raspberry Pi (1.)
If you don’t see a particular device or integration, you can add them yourself by clicking the plus icon in the bottom right-hand corner of the screen. (2.)
This will bring up a search menu that allows you to look up the different integrations available through the Home Assistant software.
Conclusion
At this point, you should now have the Home Assistant software successfully running on your Raspberry Pi.
Home Assistant has become one of the go-to pieces of software for introducing automation to a home. This is helped largely by its huge community of third-party developers that basically integrate any device you can think of.
If you want to see what else you can do with this software, we have a bunch of guides dedicated to Home Assistant.
Please feel free to post a comment below if you have had any issues with getting this home automation software up and running.
If you liked this project, we recommend exploring the many other Raspberry Pi projects we have on offer.


Oh man, this took hours of banging my head against the wall. Two *very* important clarifications about the “my-network” (no file extension) file that needs to be created. 1) It *must* be ANSI encoded (not UTF-8); 2) it *must* have Linux style (LF) line endings (not Windows style CRLF). Both of these choices can be made in Notepad++, and you need to get both right. Confirming, no double quotes around either the SSID or the password…they go in quote-free. But without the two little tweaks above, the file won’t be interpreted correctly.
Hi, I have downloaded a RPi3 Hassio OS image and am running this on my Pi3B+.
However my Pi is not headless, it has the standard 7″ touchscreen attached.
How would I add the required dependencies to run a Kiosk view of the homeassistant app on a touchscreen on the same pi that the hassio OS is running on?
I tried the apt-get commands but it says this cmd is not recognised. I am trying to follow this article ([SNIP]) to get chromium installed but having no luck.
Any help appreciated.
Thanks
Brian
Hi Brian,
As we are using the home assistant OS in this guide it is not possible to install any additional packages.
HASSIO OS is a very slimmed down operating system and does not actually feature a package manager or even a text editor.
Cheers,
Emmet
I would ask this on the Home Assistant forums at community.home-assistant.io as I’m sure it’s a common requirement. Probably you can do it via a Home Assistant integration or something.
How do I protect the SD card from eventual corruption? I don’t want to pour time into configuration only to have it wiped in case of unexpected power outage.
Hi Daniel,
You can always try setting up your Raspberry Pi to boot from a USB device instead as from my experience they aren’t as prone to corruption.
Alternatively you can try keeping backups of your SD card so you can always restore those.
If you want to stick with a SD card there is also ways you can reduce the amount of wear and tear by using stuff like Log2RAM. That software works by moving log writes to RAM, and saving them to the disk once every day rather than constantly writing to the SD Card.
Cheers,
Emmet
Hello How do you create a configuration file ! in the step setting up for Wifi!
++++
4. Inside the “my-network” file, we need to insert the configuration that will define our network for the Home Assistant software.
+++++
is it a TXT file or ?
Hi Gerard,
The file shouldn’t have a file extension on the end of it.
All you need to do is create a file called “my-network”
And open it within notepad or a similar program that deals with plain text, then enter the configuration using that.
Cheers,
Emmet