In this tutorial, we will show you how to set up and run DiyHue on the Raspberry Pi.
DiyHue is an emulator of the official Philips Hue Bridge. This software lets you turn your Raspberry Pi into its own Hue Bridge.
There are various reasons you might want to use this software, for example you can integrate non-Hue products into the Hue app. If the light supports Zigbee then it can connect to your self-hosted Hue bridge.
DiyHue then emulates these lights so that anything connecting to your bridge would believe them to be an official Philips Hue product.
If you have a Zigbee USB plugged into your Raspberry Pi, DiyHue even allows you to connect to the official Philips Hue lights without needing their hub. However, this will require you to set up Zigbee2mqtt as well.
This Hue bridge emulator also allows you to integrate the official Philips Hue Hub if you own one. This saves you from pairing all your lights to the new hub.
Over the following steps, we will walk you through installing and running DiyHue for the first time.
We will also show you how you can link DiyHue to the official Hue Bridge.
Before you proceed any further, there is one thing that we must note is that DiyHue requires port 80 and port 443. If you run software that uses these, you must change their port. This is due to the way it emulates the behaviour of the official hub.
Equipment
Below if a list of the equipment we used when setting up DiyHue on the Raspberry Pi.
Recommended
- Raspberry Pi Amazon
- Micro SD Card Amazon
- Power Supply Amazon
- Ethernet Cable Amazon or Wi-Fi Amazon
- USB Zigbee Dongle Amazon
Optional
This tutorial was tested on a Raspberry Pi 400 running the latest version of Raspberry Pi OS Bookworm 64-bit.
Installing and Setting up DiyHue on the Raspberry Pi
We will use a Docker container to make running DiyHue a super simple process on our Raspberry Pi. This container makes installing and updating the software incredibly simple.
Additionally, we don’t have to worry about messing up any of its dependencies when we upgrade our operating system. Getting a Docker container back up and running is also super simple if you ever suffer data loss.
Preparing your Raspberry Pi for DiyHue
1. Before we do anything, we must ensure that the Raspberry Pi’s operating system is up to date.
We can update the package list and upgrade any out of date packages by running the command below within the terminal.
sudo apt update
sudo apt upgrade -yCopy
2. After the update, you must follow our guide on installing Docker to the Raspberry Pi.
This guide will have everything configured right, so the rest of the tutorial should work smoothly.
3. Once you have Docker installed, we can create a folder to store DiyHue on our Raspberry Pi.
We will store DiyHue and its configuration within our Pi’s “/opt/” directory. You can create this directory by using the mkdir command.
sudo mkdir -p /opt/stacks/diyhue/Copy4. Now that you have created a directory for DiyHue, we must change to it by running the cd command.
For most of the following steps, you will be expected to be within this directory to work.
cd /opt/stacks/diyhueCopy5. The final step we must do before moving on is to get the MAC address of our active network connection.
DiyHue needs the MAC address to generate a valid Philips Hue certificate on our Raspberry Pi.
Whether you are using Wi-Fi or Ethernet, the value you want is located after the word “ether” and will look like “XX:XX:XX:XX:XX:XX“.
a. If you use a Wi-Fi connection, use the following command to get your MAC address.
ifconfig wlan0Copyb. Alternatively, if you are using the Ethernet connection on your Raspberry Pi, you can use the following command instead to get the MAC Address.
ifconfig eth0CopyWriting the Docker Compose File for DiyHue on the Raspberry Pi
6. We can now start writing a Docker Compose file to run DiyHue on our Raspberry Pi.
This compose file is basically a set of instructions for Docker so that it knows how to launch the software. It is an easier way to manage containers on your system.
Begin writing this Compose file on your system by using the following command. We use the nano text editor, but you can use whatever you feel comfortable with.
sudo nano /opt/stacks/diyhue/compose.yamlCopy7. Within this file, add the following lines.
The one thing you must do while typing out this file is replace “<MACADDRESS>” with the MAC address you got earlier in this guide.
This address is crucial to the way DiyHue works on your Raspberry Pi.
version: '3'
services:
  diyHue:
    image: diyhue/core:latest
    container_name: diyHue
    restart: unless-stopped

    environment:
      MAC: <strong><MACADDRESS></strong>
    volumes:
      - /opt/stacks/diyhue/config:/opt/hue-emulator/config
    ports:
      - '80:80'
      - '443:443'
      - '1900:1900/udp'
      - '2100:2100/udp'
      - '1982:1982/udp'Copy
8. After typing out the previous lines, you can save and quit by pressing CTRL + X, Y, and finally ENTER.
Starting the Phillips Hue Bridge Emulator on the Raspberry Pi
9. Using the command below, we can finally start up DiyHue on your Raspberry Pi.
Using this command, Docker will start DiyHue utilizing the information we specified in the “compose.yaml” file.
You can use the “-d” option to detach from the current terminal session once the container has started.
docker compose up -dCopyIf you want a better way of managing Compose files like this, we highly recommend installing Dockge on your Raspberry Pi. It gives you a simple web interface that you can use to manage services such as DiyHue.
Accessing the DiyHue Web Interface
10. Since DiyHue operates on port 80 and port 443, all you must do is go to your Raspberry Pi’s IP address.
You can find this if you don’t have your IP using the hostname command.
http://<IPADDRESS>Correcting the DiyHue Philips Hue Bridge Settings
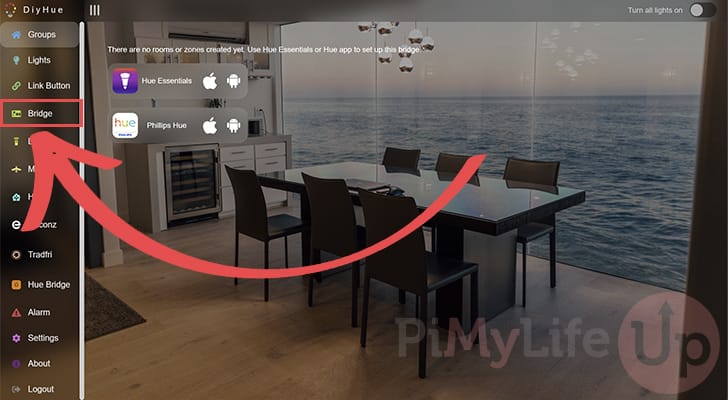
11. When you connect to your Raspberry Pi’s DiyHue Philips Hue Bridge, you might encounter an issue about the bridge needing upgrading.
Solving this issue is relatively straightforward, as DiyHue spoofs the version number. Use the sidebar to go to the “Bridge” settings page.
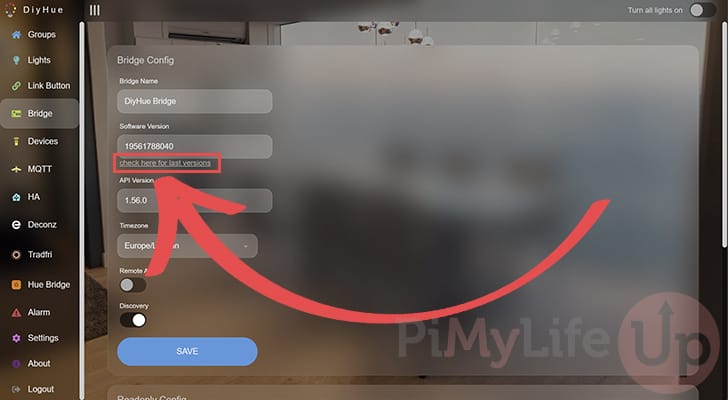
12. Now that you are on the bridge configuration page, CTRL + CLICK the “Check here for last versions” link.
This will open a page in a new tab, so switch to that tab temporarily.
13. On this page, you will want to look for the release at the top of the list and copy down the version number.
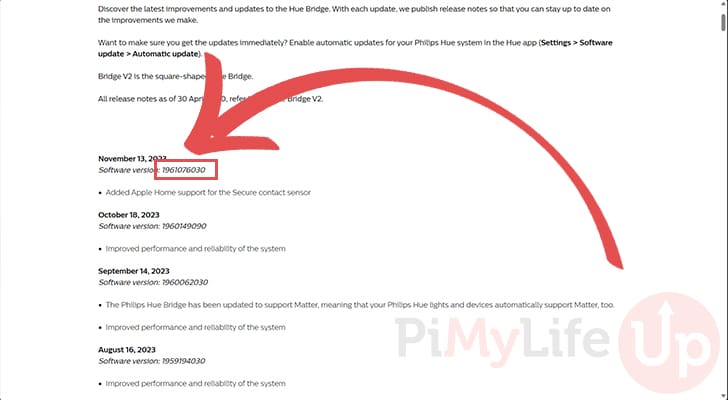
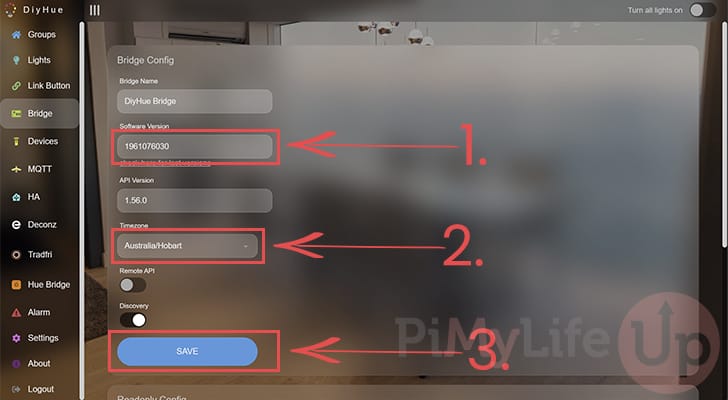
14. Back on the Bridge Config page, change the version number (1.) to the one you got from the previous website.
While on this page, you might want to change the timezone (2.) to match where you live.
Finally, with all the settings changed, click the “SAVE” button (3.).
Connecting an Official Hue Bridge
15. DiyHue on your Raspberry Pi can connect to the official Hue bridge. This allows you to easily include your existing hub in one place and not have to go and pair each light again.
To begin this process, click the “Hue Bridge” option in the sidebar.
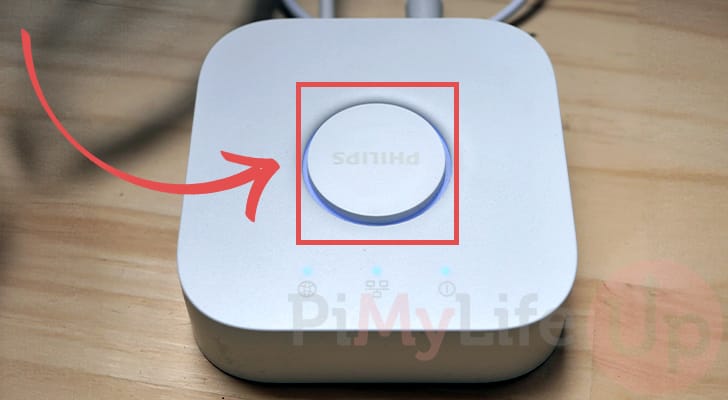
16. Now that you are on the right page, press the big physical button on your Philips Hue Bridge to put it into pairing mode.
If we don’t do this, it will refuse the connection from our Raspberry Pi.
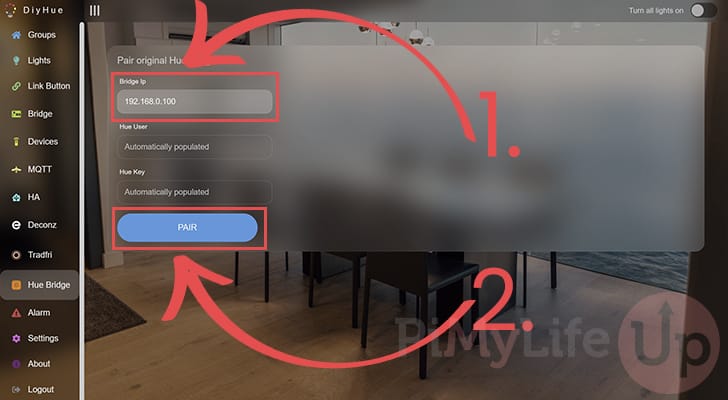
17. Back on the DiyHue web interface, fill out the IP address (1.) of your Philips Hue Bridge.
After typing in the IP, click the “PAIR” button (2.). If everything works fine, you should see the “Hue User” and “Hue Key” fields get updated automatically.
Scanning for Lights from DiyHue on your Raspberry Pi.
18. In this next section, we will quickly cover how you can add lights that DiyHue can automatically find from your Raspberry Pi.
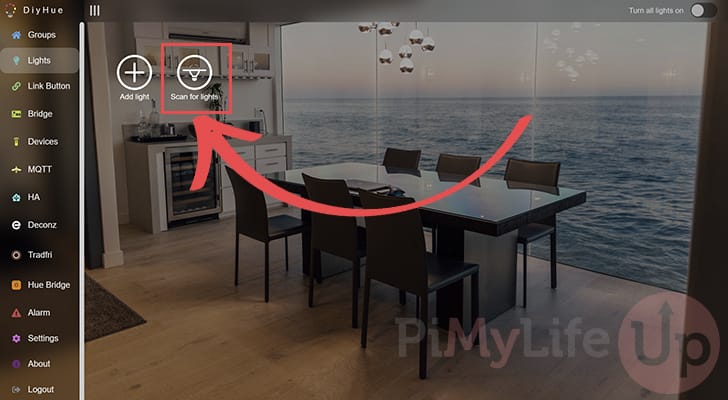
Swap to the “Lights” page using the sidebar to begin this process.
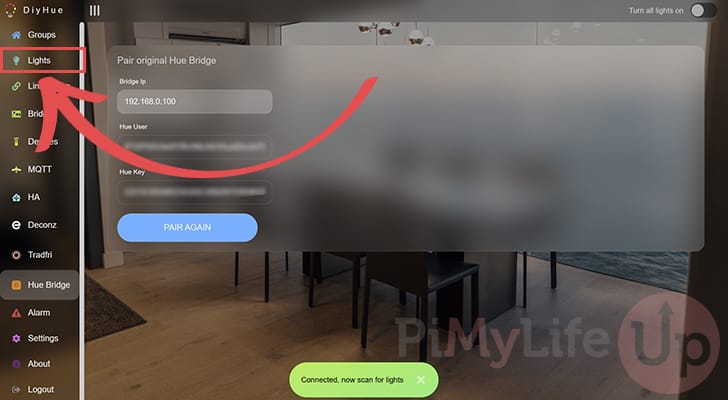
19. Once you are on the “Lights” page, all you need to do is click the “Scan for lights” button.
It might take a few minutes before your lights appear on the screen. You can manually add lights by clicking the “Add light” button and filling out the relevant details.
Linking DiyHue to Other Apps
20. TThe DiyHue software on your Raspberry Pi just works as a Philips Hue Bridge.
You must either install one of the recommended apps or set up the Home Assistant integration to use all your lights
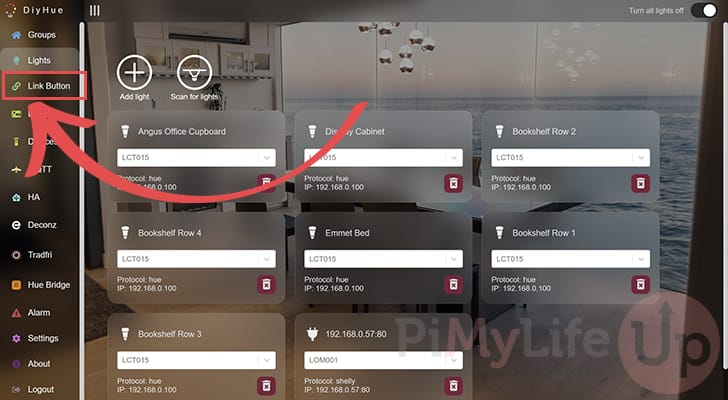
To link a device to DiyHue, swap to the “Link Button” page using the sidebar.
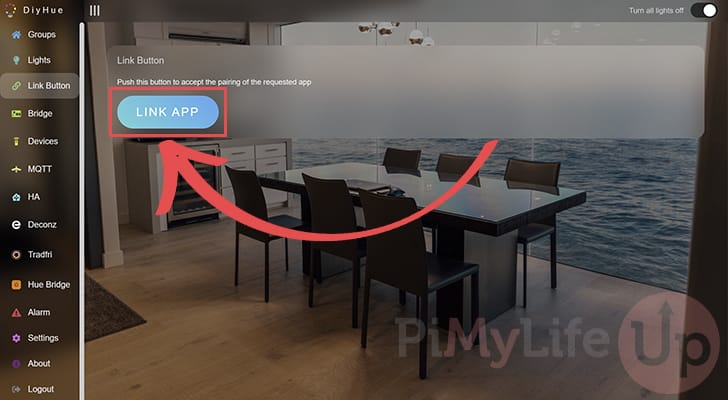
21. Whenever an application asks you to press the button on your Philips Hue Bridge, this is the screen you want to be on.
All you need to do is click “LINK APP” button for this bridge emulator to accept a pairing request.
Updating DiyHue on the Raspberry Pi
Luckily, the update process is super simple thanks to us running DiyHue on the Raspberry Pi as a Docker container.
1. First, we must change to the directory where we wrote the compose file earlier in this guide.
cd /opt/stacks/diyhueCopy2. Once in the correct directory, we can tell Docker to re-pull the DiyHue image to our Pi.
All we need to do to do this is use the following command in the terminal.
docker compose pullCopy3. After Docker has pulled the latest version of the image, we now need to tell it to restart DiyHue.
The simplest way to do this is to use the following command. If Docker detects a new image, it will restart the container using the new image,
docker compose up -dCopyConclusion
Hopefully, at this point in the tutorial, you will have DiyHue up and running on your Raspberry Pi.
This software lets you connect your Philips Hue lights without needing the official bridge. It also means you can add other smart lights and use them all within the same Hue apps you might be familiar with.
Please feel free to comment below if you have any issues using this software on your Raspberry Pi.
We highly recommend checking out our many other Raspberry Pi projects to see what else you can do with this tiny computer.


Is it possible to connect DiyHue to Google Assistant? I am hoping to do a seamless replacement of my existing Hue Bridge that works with my Google Assistant.
Hi Adam,
Doing some research on this it doesn’t appear that DiyHue by itself supports Google Assistant.
The solution to this would be to integrate DiyHue into Home Assistant, and then use the Google Assistant integration with that to control your lights.
Kind regards,
Emmet