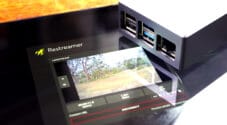
This tutorial will take you through how to set up a webcam server on the Raspberry Pi. You can have your very own Webcam visible on a web page.
In this tutorial, we will be using a package called Motion. If you want to learn more about it, you can check out their website at Motion. This software will allow us to stream footage from a webcam connected to the Raspberry Pi. You will be able to view the stream via a web page in your favorite browser.
If you’re after more of a security-like system, check out the Raspberry Pi security camera tutorial as it features fully-fledged web streaming, motion detection, recording, and multi-camera functionality.
This tutorial is marked intermediate as it can be challenging to get it working, especially if you have hardware that differs to the versions used in this tutorial. If you can’t get this to work, the security camera solution linked above is much easier to get going.
Equipment
Below are some of the pieces of equipment that you will need to be able to complete this tutorial.
Recommended
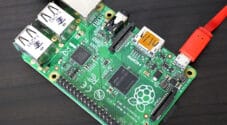
- Raspberry Pi Amazon
- Micro SD Card Amazon
- Ethernet Cable Amazon or Wi-Fi Amazon
- Raspberry Pi Camera Amazon or USB Webcam Amazon
Optional
This tutorial was last tested on the Raspberry Pi 5 running the full version of Raspberry Pi OS Bookworm.
Setting up the Webcam Server on the Raspberry Pi
Firstly, we will need to install Raspberry Pi OS onto the Raspberry Pi. If you haven’t already done this, check out our guide on installing Raspberry Pi OS. It will take you through all the steps that you will need to do to get up and running.
1. We will be using the terminal, so open the terminal on the Pi or connect to it via SSH.
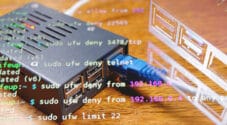
2. To begin, first, update the Raspberry Pi OS, so you’re running on the latest packages.
sudo apt update
sudo apt upgradeCopy
3. Next, install the following packages. This command will work on the full and lite versions of Raspberry Pi OS.
sudo apt install autoconf automake build-essential pkgconf libtool git libzip-dev libjpeg-dev gettext libmicrohttpd-dev libavformat-dev libavcodec-dev libavutil-dev libswscale-dev libavdevice-dev default-libmysqlclient-dev libpq-dev libsqlite3-dev libwebp-dev libcamera-v4l2Copy3. To make things a little easier later on, let us create a Bash variable called “MOTION_VERSION” that will store the version of Motion we want to install to our Raspberry Pi.
With this particular command, we will be setting it up, so we install Motion 4.7.0. You can view all the releases for Motion over at their Github.
MOTION_VERSION=4.7.0Copy4. Next, use the following command to download the Motion package to your Raspberry Pi from GitHub. We will be using the wget command alongside a few others to ensure we get the correct release.
wget https://github.com/Motion-Project/motion/releases/download/release-$MOTION_VERSION/$(lsb_release -cs)_motion_$MOTION_VERSION-1_$(dpkg --print-architecture).deb -O motion.debCopy5. Once downloaded, all we need to do to install Motion on to our Raspberry Pi is to use the following command.
This command will use the dpkg tool to install the package we downloaded in the previous step.
sudo dpkg -i motion.debCopyThat’s all you need to do before moving on to configuring Motion so that it will run on your Raspberry Pi.
Configuring Motion
1. We need to edit the configuration file, motion.conf. To do this, open the file in the nano text editor.
sudo nano /etc/motion/motion.confCopy2. Find the following lines and ensure they are set to the values below.
daemon offstream_localhost off
Note: Change the following two lines from on to off if you have issues with the stream freezing whenever motion occurs.
picture_output offmovie_output off
Optional (Don’t include the text after the #)
stream_maxrate 100# This change will allow for real-time streaming but requires more bandwidth and resources. It needs to be added to the config file. Default is 1framerate 100# Changing this option will allow for 100 frames to be captured per second, allowing for smoother video. Default is 50width 640# This line changes the width of the image displayed. Default is 640height 480# This option changes the height of the image displayed. Default is 480
Altering these options can drastically affect the performance. You may need to tinker to get the best results.
3. Once done, save and exit by pressing CTRL + X then Y.
4. We need to enable the Motion service by running the command below.
This command will make Motion start when your Raspberry Pi powers on.
sudo systemctl enable motionCopy5. Ensure the camera is connected and run the following line.
sudo systemctl start motionCopyIf you need to stop the service, run the following command.
sudo systemctl stop motionCopy6. You should be able to check out the webcam stream at the IP address of the Raspberry Pi. To get the IP address, use the hostname command.
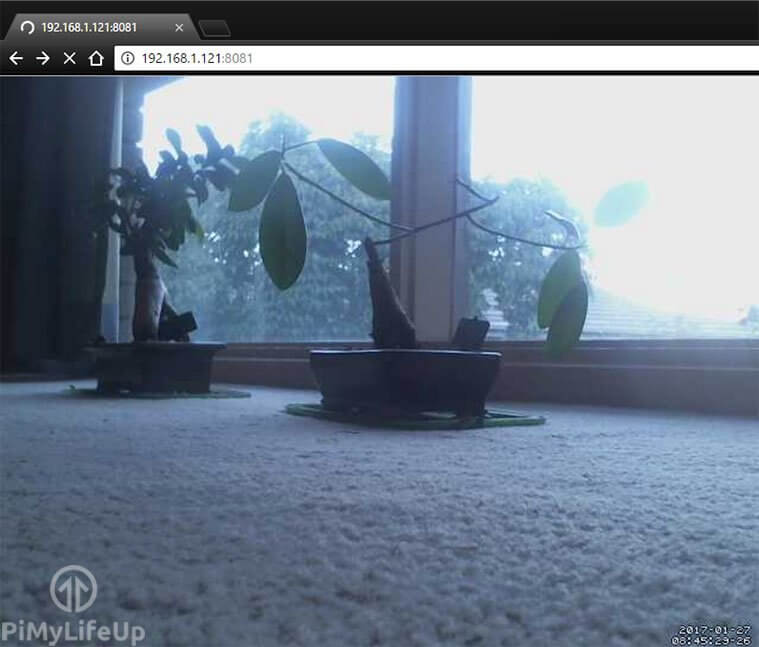
hostname -ICopy7. In your browser, go to the IP address of your Raspberry Pi, followed by the port 8081.
192.168.1.121:8081If you are using a Raspberry Pi camera, you will need to do a few extra steps, mentioned further down the page. You will see a grey box with an error if you do not do these steps.
8. If the web page isn’t loading, try restarting the service.
sudo systemctl restart motionCopy9. You should now have a fully working Raspberry Pi Webcam server that you can place wherever you would like (Given it is within Wi-Fi range) and be able to view the stream via the web browser.
If you want to allow external access to the camera, check out my instructions at the bottom of this tutorial.
Additional Steps for Using a Raspberry Pi Camera
If you want to use the Raspberry Pi camera module, you will need to do a few additional steps to set it up.
A Raspberry Pi 5 uses a different port, so you may need to acquire a ribbon cable (Amazon) designed to fit into the new ports.
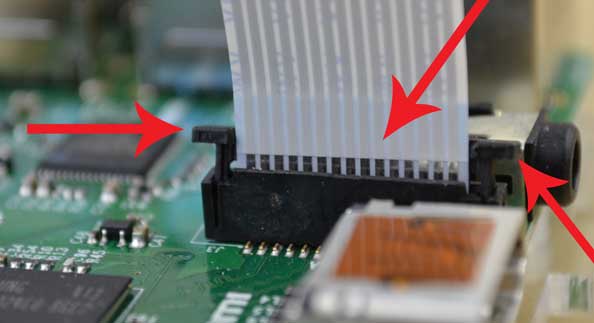
1. First, go to the CSI (Camera Serial Interface) ribbon cable slot on the Pi and with two fingers on each side of the connector, pull up. This technique should now open the connector. This port is labeled CAM/DISP 0 on the Raspberry Pi 5.
2. Insert the ribbon cable with the metal leads facing away from the Ethernet Port. If you are using a Raspberry Pi 5, the metal leads must face toward the ethernet port.
3. Once you have lined it up, gently press the connector back down, and the cable will lock in place.
4. Since the Raspberry Pi camera relies on a library called libcamera we will need to edit the service file. To do this, enter the following line.
sudo nano /lib/systemd/system/motion.serviceCopy5. In this file, find the line that contains the following text.
ExecStart=/usr/bin/motionCopyUpdate the line to the following text.
ExecStart=/usr/bin/libcamerify /usr/bin/motionCopyOnce done, exit the file by pressing CRTL + X and then Y.
6. Since we just changed the source service file, we will need to reload the systemctl daemon. You can do this by running the following command.
sudo systemctl daemon-reloadCopy7. Lastly, restart the motion service to ensure our changes have taken effect.
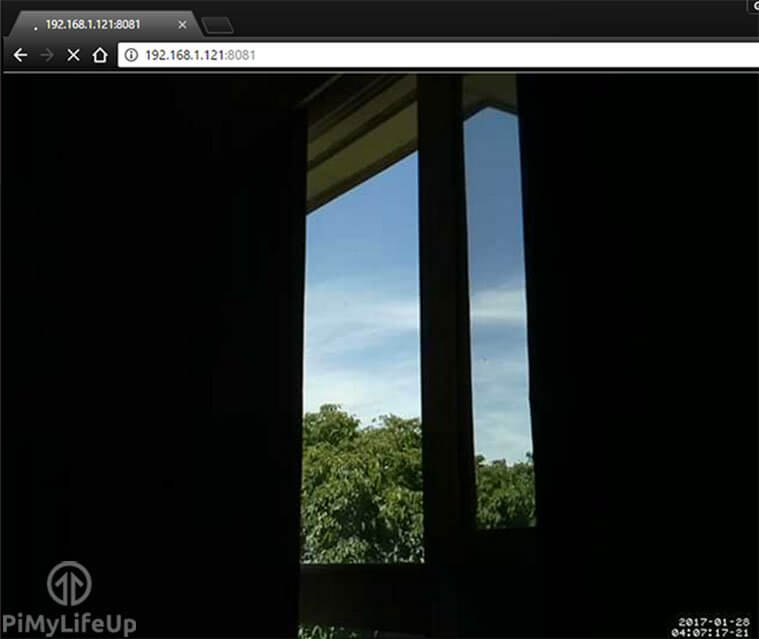
sudo systemctl restart motionCopy8. You should now be able to access the Raspberry Pi webcam stream by going to the Pi’s IP address on port 8081.
192.168.1.121:8081You should now have a fully working Raspberry Pi camera server accessible within your local network. If you want to allow external access to the camera, please follow my instructions below.
Saving Motion Footage and Photos
By default, you will likely have permission problems when saving the photos and video triggered by motion. I go through the steps below on how to set this up to work correctly.
1. Firstly, let’s make a new directory for our photos and videos.
sudo mkdir /motionCopy2. Next, we need to change the group of the motion folder so motion can write into it. After that, we give the group; read, write, and execute permissions using the chmod command.
sudo chgrp motion /motion
sudo chmod g+rwx /motionCopy
3. We need to go back into the motion configuration file and change the target_dir to our new directory. First, open up the file with the nano text editor.
sudo nano /etc/motion/motion.confCopy4. Update the target_dir line so it looks like the one below. Ensure you remove the ; from the start of the line.
target_dir /motion5. Next, restart the motion service to load the configuration correctly.
sudo systemctl restart motionCopy6. When the camera detects motion, it will be saved into the specified folder. You can check this by running the following command.
ls /motionCopyCheck out our Linux permissions guide for more information on setting permissions correctly.
Setting Up External Access
To enable external access to the Raspberry Pi webcam server, we will need to change some settings on the router. However, all routers are designed differently, so you may need to look up instructions for your router brand.
Please note that opening ports to the internet comes with a security risk. Please use strong security measures to prevent unauthorized access to your local network.
If you need a more in-depth guide, be sure to look at my guide on how to set up Raspberry Pi port forwarding and dynamic DNS.
If you’re unable to connect outside your local network, then you can try the following.
- Check your router settings and confirm they are correct.
- Check your IP hasn’t changed. Some internet service providers will provide you with a dynamic IP rather than a static IP. You can set up dynamic DNS to counter this.
- Ensure that the port mapping matches correctly with the motion port. For example, the internal port must be set to 8081.
- Restart the router.
Conclusion
I hope you enjoyed this tutorial on how to build a Raspberry Pi webcam server. You should now be able to view your camera stream using a web browser.
If you want more projects, please check out all our Raspberry Pi projects. We are always working on more, so be sure to check back in the future or stay up to date by signing up to our newsletter.
Please feel free to use the comment section below to provide feedback for this tutorial.

What do I need to access this off my home network? It works fine as long as both are connected to home wireless. However, if I try to access via my phone on mobile network it times out every time. Any thoughts?
Hi Cliff,
You will need to portforward the port used by the webcam server on your Raspberry Pi. In the case of this tutorial that port should be 8081.
You will also need to make sure that you connect using your actual IP address and not the local IP address.
Cheers,
Emmet
Will disabling localhost throughout the config file yeild better results for remote viewing? See below from another forum.
forgot to say the motion.conf file seems to have changed since this article has been posted the first time so llok for every occurence of localhost and turm them to off
# Restrict stream connections to localhost only (default: on)
stream_localhost off
# Restrict control connections to localhost only (default: on)
webcontrol_localhost off
Hi Cliff,
That should definitely help with gaining remote access.
I will have to look into updating this tutorial over the next few weeks.
Cheers,
Emmet
Hello!
I try to configure Pi3 for web camera by using your Guide. I have troubles since “sudo nano /etc/motion/motion.conf” – I don’t know how to work it. I try to write and save
daemon on
stream_localhost off,
but I didn’t find the necessary strings, I put F1, but it looks like the man.
Please help! May be there is expanding upon.
Hi,
Assuming you’re using the nano editor you can search for text using ctrl+w then trying your search phrase, then enter. You can do this multiple times until you find your word.
Once you have updated the file, press ctrl+x, then y and finally enter. The file should now be updated and saved.
If they don’t exist, you can add them, and the program will pick them up.
Hope that helps.
This is working great for me! I work from my home and it’s not easy for me to know when the mail has arrived. But with this set up, I have a little window open on my desktop and I can see when the mail carrier shows up. Because he takes a very specific route, I can set up the camera to monitor that and send me a notification when the mail is here.
It saves me checking half a dozen times between 3:00 and 5:00 (the range of times he might arrive).
Hi,
Thanks for this post. It helped a lot. I followed the procedure and everything was working fine.
After a couple of days, the Pi would not reboot and gave a blank screen. The reason was due to low storage. I had to flash the pi again and set up everything from scratch. Again after a few days, the issue happened.
Is it because the video is logged to a file? how do I avoid this?
Thanks
Hi,
Yes, it is logged. I recommend switching both the picture_output and movie_output options from on to off. These options should be in the motion.conf file.
I hope that helps.
Thanks for providing this information, it worked first time for me! Other coding did not work.
I might have missed this, but next step for me, how do I add scrolling text to this video stream?
Hi Geoff,
As for as I am aware scrolling text is currently not supported by the Motion software package.
Awesome tutorial! Worked on the first try. Thanks for the great instructions.
Next to look into setting up recording to network storage!
New to Linux, new to Raspberry Pi, old-hand at MS DOS & Windows. Got a Pi 3, installed Raspbian using NOOBS, started cutting and pasting the commands in the article into the Terminal window, seemed to be going well for a long time. First hint of a possible problem was with the “sudo apt-get remove libavcodec-extra-56 libavformat56 libavresample2 libavutil54” command when the system was unable to locate four packages; libavcodec-extra-56, libavformat56, libavresample2, libavutil54. Proceeded from there in the same manner, got occasional errors. When done, motion service was not found. What did I do wrong? (I captured the complete trace if that would help.) I’ve got a USB camera I want to be able to monitor on-demand and having a web server port I can tap into seems ideal.
Hey Gene,
Errors occuring from
sudo apt-get remove libavcodec-extra-56 libavformat56 libavresample2 libavutil54about packages not existing is not a bad thing, as this command is trying to remove them anyway.It would be helpful to know what these others errors you ran into were? If you intend on sending the complete trace i recommend you utilize a service such as gist.github.com and linking from there rather then pasting the whole thing here.
Cheers
Hello Gus
I have stretch and made with you wrote but the USB Cam which is connected to an USB-switch (with own and good net aggregate) shows only a blank grey screen with time and date. What could have went wrong ? Do you have an idea?
Thanks from Sweden
Jörg
Sounds like it could be an issue with the webcam drivers or something similar.
Does it have the same issue if you connect it directly to the Raspberry Pi?
Hej Gus
Thank you for answer. I must test it tomorrow 😉
WBR
Jörg
How is the progress with multiple USB cams setup? Is it possible? Any tutorial?
Using your tutorial I have one USB cam working flawlesly. THANKS A LOT.
What is this mmal folder that everyone has? I went through the tutorial and get an empty gray screen when I look in my browser, but I don’t even have this folder that I am seeing discussed in the comments
….and I had a typo. I typed “bcm2835-v4l2” as “bcm2835-v412.” Thanks for the tutorial!
well, its sept 2017 – using raspbian 9 – once i started thinking, saw where i was screwing up. this works like a charm. i’m using a ps3 motion camera – its a little choppy – may have to work on the refresh rates to see what happen.
Hi sir. Your work is awesome!
And I want to do it in 2 usb webcam. How can I access to view it simultaneously in my web browser.
Hey there!
Just tried this out on a Pi 2 model B and the video is a bit choppy still.
Is the bottleneck the Pi or my LAN in this case? I’m only doing 480p at 40fps.
Most likely the Pi, I have to run mine on a Pi 3 to get smooth video playback.
My USB webcam has also a microphone.
Is there a way to blend in sound?
How can I run 2 or more cams in one time? Please tell me in detail.
3.8.2017
Hi Gus,
I see that this article is from 2015. The latest Jessie 2017 seems to have some problems with motion, so I have heard.
I would love to see an updated version and seventh heaven would be adding control for pan/tilt servos.
Hey Nigel,
I have tested and updated this tutorial since its initial release and have made several adjustments to it a couple of months ago for Raspbian Jessie. It should work perfectly fine on Raspbian Jessie.
Cheers
Works great on Chrome and FireFox, but I can’t seem to figure out how to display live video in MS Edge or MS Explorer?
27.7.2017
mmm,I had submitted a comment but it appears to be lost.
WIn 10 Firefox Browser, RPI 3 + 16GB + latest Jessie OS , Microsoft HD Web Camera plugged directly in the RPI USB.
I performed steps 1-12 and double-checked the conf files.
After entering ip-address:8081 I get
1) A “Not connected ” message
OR
2) a video with a slow frame rate of say 1-3 seconds although in .conf framerate is set to 100.
Worse is that the video exists for 2-20 seconds then I get a “non connected “message .
Is it motion, my WebCam, perhaps tweeting another conf file?
Someone please assist. I cannot use this product as it is.
Thank you
BD
I
Hi Gus. Very interesting and detailed tutorial, but i cant make it work with RPi2 🙁
Maybe it wont work at all with this model?
thanks 🙁
Javi (Spain)
Hi Javi,
It should work just fine, I tested it a few weeks ago with the RPi2. What kind of issues/errors are you facing?
Thank you. This was a well written tutorial. Everything came up as advertised. Next is to learn more about MotionEye.