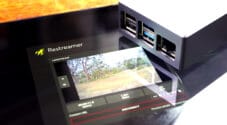
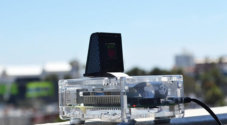
This tutorial will take you through how to set up a webcam server on the Raspberry Pi. You can have your very own Webcam visible on a web page.
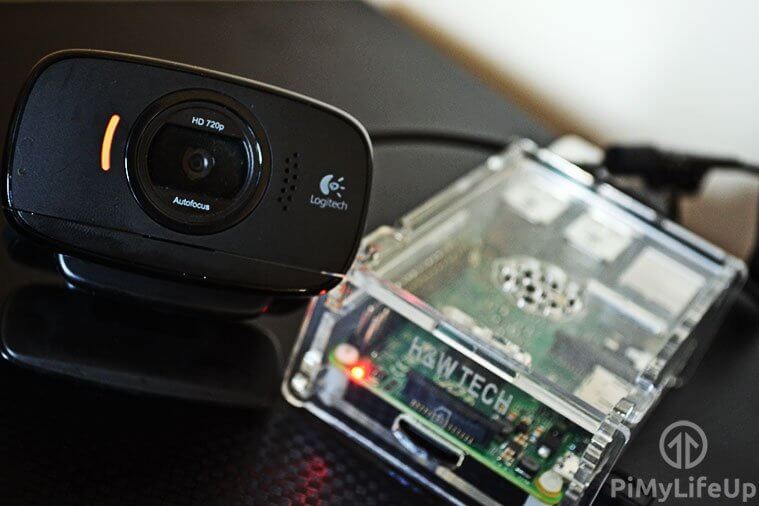
In this tutorial, we will be using a package called Motion. If you want to learn more about it, you can check out their website at Motion. This software will allow us to stream footage from a webcam connected to the Raspberry Pi. You will be able to view the stream via a web page in your favorite browser.
If you’re after more of a security-like system, check out the Raspberry Pi security camera tutorial as it features fully-fledged web streaming, motion detection, recording, and multi-camera functionality.
This tutorial is marked intermediate as it can be challenging to get it working, especially if you have hardware that differs to the versions used in this tutorial. If you can’t get this to work, the security camera solution linked above is much easier to get going.
Equipment
Below are some of the pieces of equipment that you will need to be able to complete this tutorial.
Recommended
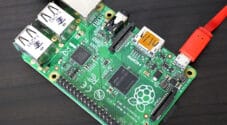
- Raspberry Pi Amazon
- Micro SD Card Amazon
- Ethernet Cable Amazon or Wi-Fi Amazon
- Raspberry Pi Camera Amazon or USB Webcam Amazon
Optional
This tutorial was last tested on the Raspberry Pi 5 running the full version of Raspberry Pi OS Bookworm.
Setting up the Webcam Server on the Raspberry Pi
Firstly, we will need to install Raspberry Pi OS onto the Raspberry Pi. If you haven’t already done this, check out our guide on installing Raspberry Pi OS. It will take you through all the steps that you will need to do to get up and running.
1. We will be using the terminal, so open the terminal on the Pi or connect to it via SSH.
2. To begin, first, update the Raspberry Pi OS, so you’re running on the latest packages.
sudo apt update
sudo apt upgradeCopy
3. Next, install the following packages. This command will work on the full and lite versions of Raspberry Pi OS.
sudo apt install autoconf automake build-essential pkgconf libtool git libzip-dev libjpeg-dev gettext libmicrohttpd-dev libavformat-dev libavcodec-dev libavutil-dev libswscale-dev libavdevice-dev default-libmysqlclient-dev libpq-dev libsqlite3-dev libwebp-dev libcamera-v4l2Copy3. To make things a little easier later on, let us create a Bash variable called “MOTION_VERSION” that will store the version of Motion we want to install to our Raspberry Pi.
With this particular command, we will be setting it up, so we install Motion 4.7.0. You can view all the releases for Motion over at their Github.
MOTION_VERSION=4.7.0Copy4. Next, use the following command to download the Motion package to your Raspberry Pi from GitHub. We will be using the wget command alongside a few others to ensure we get the correct release.
wget https://github.com/Motion-Project/motion/releases/download/release-$MOTION_VERSION/$(lsb_release -cs)_motion_$MOTION_VERSION-1_$(dpkg --print-architecture).deb -O motion.debCopy5. Once downloaded, all we need to do to install Motion on to our Raspberry Pi is to use the following command.
This command will use the dpkg tool to install the package we downloaded in the previous step.
sudo dpkg -i motion.debCopyThat’s all you need to do before moving on to configuring Motion so that it will run on your Raspberry Pi.
Configuring Motion
1. We need to edit the configuration file, motion.conf. To do this, open the file in the nano text editor.
sudo nano /etc/motion/motion.confCopy2. Find the following lines and ensure they are set to the values below.
daemon offstream_localhost off
Note: Change the following two lines from on to off if you have issues with the stream freezing whenever motion occurs.
picture_output offmovie_output off
Optional (Don’t include the text after the #)
stream_maxrate 100# This change will allow for real-time streaming but requires more bandwidth and resources. It needs to be added to the config file. Default is 1framerate 100# Changing this option will allow for 100 frames to be captured per second, allowing for smoother video. Default is 50width 640# This line changes the width of the image displayed. Default is 640height 480# This option changes the height of the image displayed. Default is 480
Altering these options can drastically affect the performance. You may need to tinker to get the best results.
3. Once done, save and exit by pressing CTRL + X then Y.
4. We need to enable the Motion service by running the command below.
This command will make Motion start when your Raspberry Pi powers on.
sudo systemctl enable motionCopy5. Ensure the camera is connected and run the following line.
sudo systemctl start motionCopyIf you need to stop the service, run the following command.
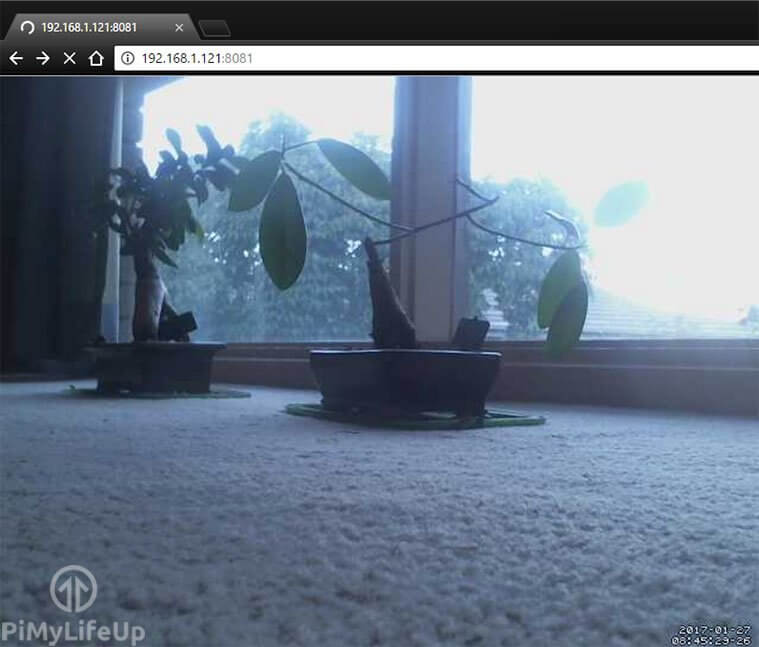
sudo systemctl stop motionCopy6. You should be able to check out the webcam stream at the IP address of the Raspberry Pi. To get the IP address, use the hostname command.
hostname -ICopy7. In your browser, go to the IP address of your Raspberry Pi, followed by the port 8081.
192.168.1.121:8081If you are using a Raspberry Pi camera, you will need to do a few extra steps, mentioned further down the page. You will see a grey box with an error if you do not do these steps.
8. If the web page isn’t loading, try restarting the service.
sudo systemctl restart motionCopy9. You should now have a fully working Raspberry Pi Webcam server that you can place wherever you would like (Given it is within Wi-Fi range) and be able to view the stream via the web browser.
If you want to allow external access to the camera, check out my instructions at the bottom of this tutorial.
Additional Steps for Using a Raspberry Pi Camera
If you want to use the Raspberry Pi camera module, you will need to do a few additional steps to set it up.
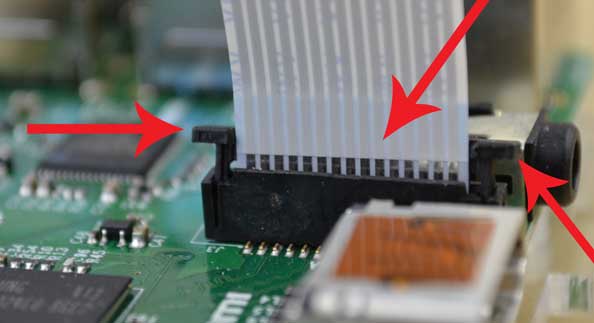
A Raspberry Pi 5 uses a different port, so you may need to acquire a ribbon cable (Amazon) designed to fit into the new ports.
1. First, go to the CSI (Camera Serial Interface) ribbon cable slot on the Pi and with two fingers on each side of the connector, pull up. This technique should now open the connector. This port is labeled CAM/DISP 0 on the Raspberry Pi 5.
2. Insert the ribbon cable with the metal leads facing away from the Ethernet Port. If you are using a Raspberry Pi 5, the metal leads must face toward the ethernet port.
3. Once you have lined it up, gently press the connector back down, and the cable will lock in place.
4. Since the Raspberry Pi camera relies on a library called libcamera we will need to edit the service file. To do this, enter the following line.
sudo nano /lib/systemd/system/motion.serviceCopy5. In this file, find the line that contains the following text.
ExecStart=/usr/bin/motionCopyUpdate the line to the following text.
ExecStart=/usr/bin/libcamerify /usr/bin/motionCopyOnce done, exit the file by pressing CRTL + X and then Y.
6. Since we just changed the source service file, we will need to reload the systemctl daemon. You can do this by running the following command.
sudo systemctl daemon-reloadCopy7. Lastly, restart the motion service to ensure our changes have taken effect.
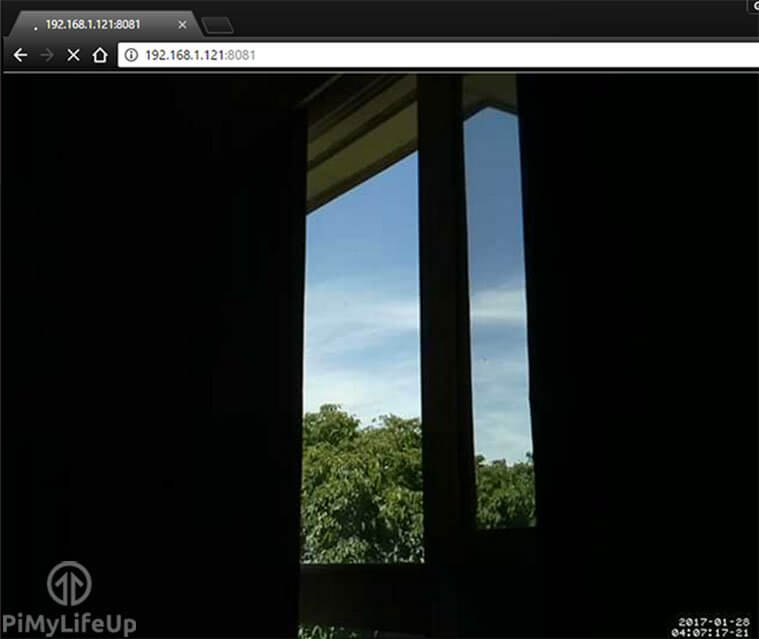
sudo systemctl restart motionCopy8. You should now be able to access the Raspberry Pi webcam stream by going to the Pi’s IP address on port 8081.
192.168.1.121:8081You should now have a fully working Raspberry Pi camera server accessible within your local network. If you want to allow external access to the camera, please follow my instructions below.
Saving Motion Footage and Photos
By default, you will likely have permission problems when saving the photos and video triggered by motion. I go through the steps below on how to set this up to work correctly.
1. Firstly, let’s make a new directory for our photos and videos.
sudo mkdir /motionCopy2. Next, we need to change the group of the motion folder so motion can write into it. After that, we give the group; read, write, and execute permissions using the chmod command.
sudo chgrp motion /motion
sudo chmod g+rwx /motionCopy
3. We need to go back into the motion configuration file and change the target_dir to our new directory. First, open up the file with the nano text editor.
sudo nano /etc/motion/motion.confCopy4. Update the target_dir line so it looks like the one below. Ensure you remove the ; from the start of the line.
target_dir /motion5. Next, restart the motion service to load the configuration correctly.
sudo systemctl restart motionCopy6. When the camera detects motion, it will be saved into the specified folder. You can check this by running the following command.
ls /motionCopyCheck out our Linux permissions guide for more information on setting permissions correctly.
Setting Up External Access
To enable external access to the Raspberry Pi webcam server, we will need to change some settings on the router. However, all routers are designed differently, so you may need to look up instructions for your router brand.
Please note that opening ports to the internet comes with a security risk. Please use strong security measures to prevent unauthorized access to your local network.
If you need a more in-depth guide, be sure to look at my guide on how to set up Raspberry Pi port forwarding and dynamic DNS.
If you’re unable to connect outside your local network, then you can try the following.
- Check your router settings and confirm they are correct.
- Check your IP hasn’t changed. Some internet service providers will provide you with a dynamic IP rather than a static IP. You can set up dynamic DNS to counter this.
- Ensure that the port mapping matches correctly with the motion port. For example, the internal port must be set to 8081.
- Restart the router.
Conclusion
I hope you enjoyed this tutorial on how to build a Raspberry Pi webcam server. You should now be able to view your camera stream using a web browser.
If you want more projects, please check out all our Raspberry Pi projects. We are always working on more, so be sure to check back in the future or stay up to date by signing up to our newsletter.
Please feel free to use the comment section below to provide feedback for this tutorial.

great project!can we send video stream with audio?
Great project, works directly.
Now I’m going to test it and see if it is possible to record motion. 🙂
where do i view the stream….the pi looks like its doin what it should be with no errors…just cant view…any help ??? cheers
Hi Kenny,
You should be able to view the stream at your Pi’s IP address followed by the port 8081.
For example my Pi address is 192.168.1.103 so if I typed 192.168.1.103:8081 into the browser I will be able to see my stream. If that doesn’t work try replacing 8081 with 8080. If that still doesn’t work try a different browser.
Let me know how you go!
it now says the connection is too busy does the camera have to be on first ??
Hey Gus, how are you coming with your project using multiple cameras. Anxious to see this in action.
Have a great day.
Hi Danny,
I am currently working on it, I am hoping to have it up by the end of this week or sometime next week!
When using Multiple cameras will that be one usb and one rapberry pi cam, or many usb cams
At the moment I have only tested with one Raspberry Pi camera + 1 USB camera but I am pretty sure you could add more.
You will be able to also run other Pi camera setups and then hook them up all under the one interface.
I should have the full tutorial + video up over the weekend
Besides having trouble figuring out what to specifically put in my Netgear Blackhawk router, I am also having trouble following the directions which seem very clear. Any help would be appreciated. BTW, I am not Linux savvy. I am running Raspbian on my Pi and using my Ubuntu desktop with Putty. Looks like thing aren’t going to well for me. I would appreciate any help given.
Regards,
SD:
Hi SD,
Can you please let me know if you have this running on the Raspberry Pi 2? There is an issue with dozencrow’s motion program on the new Pi. I am looking into a solution for this.
If you’re running anything before Raspberry Pi 2 then please let me know and I will look into the problem!
Would it be possible for someone to tell me how to setup my Netgear Blackhawk R7000 as outlined in “Setting up outside External Access” mentioned above? I think Netgear calls it port forwarding. Here’s a screen capture of the fields I need to fill in.
Regards,
-SD:
HI Gus,
This is perfect. Works great for me.
Any way I can get the cd mmal and ./startmotion to start at reboot?
Thanks
Wade
Hey Wade,
Great question, If you do the following it should start back up on reboot. I have tested it and it worked for me, please let me know how you go with it.
sudo nano /etc/rc.localAnd add the following line just before the exit 0. (If your path to the startmotion is different then make sure you update the following so it’s the same)
su - pi -c /home/pi/mmal/startmotion &Save the file and reboot. The motion service should now start.
Hey Gus thanks again for the tutorial. I got everything working now even being able to access the camera remotely. I have an ASUS router and had to enable DMZ to make it work. Is there anyway to improve the stream coming out of the camera, such as what you might see with raspivid?
Thanks,
Danny
Hi Danny,
In the
sudo nano /etc/motion/motion.conffile try changing the following settings. (Changing these should allow for a much smoother playback like you will find from raspvid.webcam_maxrate 100
framerate 100
Let me know how you go, if you’re still having trouble Ill look further into it for you!
Gus, thanks a lot for posting this great tutorial. Had 1 question for you. I went through steps 12-17, but after running ./startmotion my webcam is working as expected, but I’m not able to do anything else on the Pi. My screen shows “nohup: ignoring input and appending output to ‘nohup.out'” The only way I can exit that is Ctrl+C, which also disconnects my camera. I thought the point of the startmotion file was to allow use of the Pi while the camera is running?
Thanks,
Dan
Hi Dan, The startmotion file is meant to prevent the command line from locking up. I’ll take another look at it and find out what is going wrong.
Did you ever figure out why some of use are getting the “nohup: ignoring input and appending output to `nohup.out’ [/n] Segmentation fault” message from the ./startmotion command?
Hi Nick,
Yes! This is because the package I used for the Pi camera isn’t supported on the Raspberry Pi 2 and looks unlikely to be updated for it.
If you check out my Raspberry Pi Security camera tutorial this will give you pretty much the same thing (Raspberry Pi Webcam Server) but with a nicer UI.
Any word on a tutorial for a full security like setup. I am looking at embarking on such an evdevor in about a month. Thanks !
Hi Cuyler, I have it scheduled to be worked on after the next couple of projects. I aim to do about a Raspberry Pi project a week so I should have it ready within 2 months.
Have working webcam portion of tutorial. While doing second part upon entering command “sudo apt-get install motionsudo apt-get install libjpeg62″I get the following message:
Reading package lists…Done
Reading state information… Done
E: Unable to locate package motionsudo
E: Unable to locate package apt-get
E: Unable to locate package install
Can you give me some insight what the problem is?
Thanks,
Hi Danny,
Sorry there was a formatting issue with that line (It should’ve been two lines) I have fixed it now.
It should have been the following:
sudo apt-get install motion
sudo apt-get install libjpeg62
didn’t twice… still same error :/
pi@raspberrypi ~/mmal $ ./motion -n -c motion-mmalcam.conf
[1978606456] [NTC] [ALL] conf_load: Processing thread 0 – config file
motion-mmalcam.conf
[1978606456] [NTC] [ALL] motion_startup: Motion mmaltest Started
[1978606456] [NTC] [ALL] motion_startup: Logging to file
(/home/pi/mmal/motion.log)
mmal: mmal_vc_component_create: failed to create component
‘vc.ril.camera’ (1:ENOMEM)
mmal: mmal_component_create_core: could not create component ‘vc.ril.camera’ (1)
Segmentation fault
pi@raspberrypi ~/mmal $
Hi Nahcofly,
Are you doing this on the Raspberry Pi 2 ? I think there may be an issue with the package on the pi 2. I am looking into it.
I’m on the Pi 2 and am getting this output as well, any news on a workaround?
After 3 attempts with RPi2 getting nowhere….
/startmotion
sudo: unable to execute ./startmotion: No such file or directory
Perhaps this only works with RPi 1 Models B+ or A+…
which do you recommend?
Thanks for helping me learn Linux!
Hey Marco,
That error is claiming the file isn’t there.
If you try the following it should work:
sudo /home/pi/mmal/startmotionIt is highly likely that you will get a segmentation fault when trying to run this. (An issue with the motion package on the Pi 2)
I recommend taking a look at the security camera tutorial. It works on the Pi 2 and you get a pretty good stream from it!
Hope this helps
I had this problem too on my B+. I tried running raspivid and got an error about the vchiq. vchiq (in /dev) is in the video group. Anyone who created a separate user from the default pi is not part of video group. Fix this by typing:
usermod -G video (username). Then reboot.I found another user on another site that used the LD_PRELOAD command to point to libuv4lext.so prior to execution. This worked for me.
Just stop the motion service and run the command
"LD_PRELOAD=/usr/lib/uv4l/uv4lext/armv6l/libuv4lext.so"and restart the service.For more info go to https://www.raspberrypi.org/forums/viewtopic.php?f=43&t=50639&start=25
Trying to set up webcam with your configuration. I get all the software installed and updates run and successfully start motion. However I cannot see anything on my PC using 192.168.2.137:8081 (this is my Hostname for the Pi). Must I use a browser other than IE or is there some additional software needed to be installed on the Pi? I have a Microsoft webcam and it has worked with other applications. Hope you can help.
Thanks,
Danny
Thanks Gus for this tutorial, I did get the first part working, after I installed Firefox. Still a little confused on how to access from the internet (outside my network). Thanks in advance
Hi Danny,
On your router you will need to port forward to port 8081 to 192.168.1.137 (eg. your Pi).
If you router varies way too much from what I have explained you can try googling port forwarding “your router model here”.
Gus when I have all the port forwarding correct what address to I type into a web browser to access my Pi from outside the network?
Try this website – https://www.whatismyip.com/ – find out what your IP is and then enter that “:8081” (without the quotes, assuming you’re using that port) in the URL of you browser and it should work. Only seems to work with Firefox, not sure why.
As dan already mentioned check out the what is my ip website to get your external IP. Then use that IP to connect outside your network (with the relevant port)
If you have a dynamic IP (an ip that changes often) you can setup dynamic DNS by following my other tutorial here: Raspberry Pi Dynamic DNS
Just to throw in my 2 cents. Depending on your Router, even if you have EVERYTHING 100% configured correctly, some just do not like it. I had a router I struggled with for a long time, thinking I was the problem. When it died and I bought a higher end router port forwarding was never a problem.
Just keep that in mind. Routers are designed to be secure and some companies don’t want people exposing risk even at their own peril.
Hi Gus,
Thanks for the great tutorial, but it’s not working for me. I think I must be doing something wrong. I can see the control page at port 8080 but when I try going to port 8081 it gives me the error “unable to load the webpage because the server sent no data.” I really don’t know why it’s doing this, do you have any idea what I could have configured incorrectly?
Thanks a lot
Hi!
Mine does the exact same thing! Any ideas how to fix?
Is there any way to get up to 800×600 or even 1024×768 or better using the picam module? As soon as I change the values in the conf file the page stops loading.
Thanks for all of your work!
Gus, Thanks for the instructions. I can watch my stream in VLC, but not in my web browser on my pc or tablet. Any thoughts?
Interesting, can you please let me know the browser you’re using and Ill take a look and see if I can reproduce the problem. Are you getting any errors at all ?
Very nice and clear post. great!
I followed all the instructions but the result is a gray rectangle with the text:
(so something is arriving)
i suppose that the streaming (as itself) is working and then camera doesn’t.
How may i test the webcam directly on then raspberry with a player (possibly oxmplayer) to see if the camera works?
Another possibility can be that, for my webcam(an old one) the settings in the file /etc/motion/motion.conf are different from those you posted.
note aside:
– the webcam is a creative ct6840.
– the pc from where i want to see the stream is on the same subnet of the raspberry.
– i see the gray rectangle with FireFox and Vlc player.
– with InternerExplor i see a black page but starts automatically the downlod (i think this proves that some packets are coming).
– with crome doesn’t happen anything .
– if can be useful, the output of the command: ls -ltr /dev/video* is crw-rw—-+ 1 root video 81, 0 Nov 11 09:06 /dev/video0
I have having the same issue. I am using a Rasperry Pi 3 with a Rasperry Pi v2.1 camera and just get the gray box. If I use a USB webcam it works tho.
Have you completed the extra steps for the Raspberry Pi camera? If not then you will get errors.
Hello Gus. Yes I did the rest of the steps for adding a PI camera. Still get a gray box with it. A Logitech camera works no problem. Just the PI camera v2.1 doesn’t.
Thanks
Has anyone solved this issue? I have the same problem.
I am having the same issue. USB camera works, PI v2 camera does not.
Also ls /dev/video* — No such file or directory.
I think that I did all of the steps.
Sorry, I found a typo. Pi camera is now working 🙂
I had this problem and it may have been due to other Motion processes that were not shut down properly. I found this suggestion:
Note that Motion occasionally fails to start up due to previous Motion processes that have failed to shut down properly and are running in the background. If you suspect this, try running the following:
ps aux | grep motion
sudo kill -9 [pid]
pid refers to the Process ID that you get from the ps aux command.
It worked for me.
Go to : sudo nano /etc/modules,
add : bcm2835-v4l2
save and reboot 😉
I also had a typo and initially only got a grey screen.
Be careful – it’s an l (ell) not a 1 (one) in bcm2835-v4l2
Trying to unpack motion-mma1.tar.gz as per your project instructions but get this error message:
gzip: stdin: not in gzip format
tar: Child returned status 1
tar: Error is not recoverable: exiting now
any suggestions?
Just been testing it out again for you. Did you copy and paste the command ? I have found that has been causing issues for me. I have fixed this now and should work correctly.
If that doesn’t work can you type
lsand let me know the contents of that directory.Hi Gus
Thanks for reply. Afraid it still doesn’t work – I get the same error message. I did ls and the directory contains only motion-mma1.tar.gz. There seems to be an issue with the file format as my Pi keeps reporting the error not in gzip format. So for now my webcam project is on hold until I can work out what is wrong.
rm motion-mmal.tar.gz
check your address for the file for typos, download and try again
Thanks for the walk through! I am trying to locally view the video but my browser will not display the video. I am using Chrome. Am i missing an extension?
Thanks
Hi Zach,
The stream should work without any modification to chrome, can you please let me know the exact error(if any) you’re getting?
Thanks for the reply Gus. I am able to view the stream locally but not from a different PC. I think this has something to do with my router settings. I do not quite understand the 48461 port use. Will this be different in each application?
Thanks for you help,
Zach
Hi Zach,
The port 48461 is an example if you want to access the stream outside your network. Port 8081 is a common port thus probably should be avoided if port forwarding from the outside world.
If you’re on another PC within your local/home network you should be able to type the IP of your Raspberry PI with the port 8081 and get the stream.
For example: 192.168.1.103:8081
Hey, great guide. I’ve been breaking my head the whole day trying to make this thing work with old guides. I am glad to have found yours but I am stuck on step 9. I’m using the rpiB with the camera module. I was doing okay until it was time to test it using ./motion -n -c motion-mmalcam.conf . Running the commands basically tells me that I am missing libavformat.so.53 . I am stuck here for the day. Can’t think anymore. Already did all the updates and rechecked my work to make sure I did everything okay. I’ll give it another go tomorrow but any tips or help would be appreciated. Thanks!
Hi Gus,
Thanks for great guides and I’ve tried the first one today!
But I didnt get it to work and I was stuck at the same place as Isaac (from October 31) and I couldn’t run the test: ./motion -n -c motion-mmalcam.conf and I get the same fault message.
I tried to look after a ‘solution’ or some guiding from you that may help me get on with my camera project.
Thanks in advance,
Stefan
Because, as usual, nothing EVER works first time in a Linux operating system. If this was Windows it would have worked first time. I am also stuck and am unable to connect to: IP:8081 after following this guide to the letter.
Another failed Linux / PI project that will no doubt never get up and running.
Linux….great.
You’re probably right. Of course, had this been a Windows project, you wouldn’t be using a $40 Pi, since just the copy of Windows by itself is $100. Then also because Windows is more resource intensive, you’d need more RAM, a better processor, much more storage, all of which rack up the cost and size of the device. The entire point of the Pi is to have a small, cheap, easy-to-replace platform that encourages exploration and experimentation. So experiment a little instead of giving up the moment you run into something that the tutorial doesn’t explain. Isn’t that the fun part?
Did you try typing “localhost:8081” instead of the provided IP address?
I have several of these little cameras running on different Pi’s. Both with webcams and the Pi Cams.
Yes they do work. Chances are Windows would work the first time as well (Assuming you could set it up correctly the first time). Difference here is that After it works in Windows the first time, MS would add a security update, patch or enhancement that would kill the video and other aspects of the OS.
Or the more I understand Windows the more I like Linux. 🙂
Have a nice day!!
Tristan For The Win!
localhost worked for me!
Awesome project I need a webcam server to keep an eye on our new puppie when we are out the house.
Thank!