In this tutorial, you will learn how to install and configure the RecalBox software on your Raspberry Pi.
The RecalBox software package is very much like RetroPie. Both software packages are built on top of the Raspberry Pi operating system and make use of EmulationStation as their visual frontend.
However, they both run different forks of EmulationStation and come with different configurations out of the box, giving slightly different experiences when playing your favorite games.
RecalBox’s copy of the EmulationStation frontend is packed with more features than RetroPie’s. It allows you to configure more of the operating system without having to resort back to the command line like in RetroPie.
Like most emulator packages, RecalBox also comes pre-loaded with emulators for popular systems such as SNES, GBA, N64, and the PS1.
Equipment
Below is all the equipment that you will need for setting up RecalBox on your Raspberry Pi.
Recommended
- Raspberry Pi Amazon (The latest will provide the best experience)
- Micro SD Card Amazon
- USB Keyboard Amazon
- USB Mouse Amazon
- HDMI Cable Amazon
- Monitor Amazon
Optional
- Retro USB Controllers or Joysticks Amazon
- PlayStation Controller Amazon
- Xbox Controller Amazon
- Ethernet Cable Amazon or Wi-Fi Amazon
Installing RecalBox to the Raspberry Pi
1. The only way to easily install and setup RecalBox on a Raspberry Pi is by utilizing their official image.
You can download the RecalBox image by going to the RecalBox’s archive website.
Once on the RecalBox website, you should see a table of different architectures that the RecalBox team have created images for.
Within this table look for the version of your Raspberry Pi, click the download link for your system under the “Burnable Image” column.
The image should download as a file called “recalbox.img.xz“. Don’t worry about extracting the image as the Etcher software we use in the next step will handle this.
2. With the RecalBox image downloaded to your computer, you will now need a way of burning that image to an SD Card.
In this guide we will be making use of an image writing tool called “Etcher“, you can download the installer for Etcher direct from their website.
Once downloaded, install the software and run it.
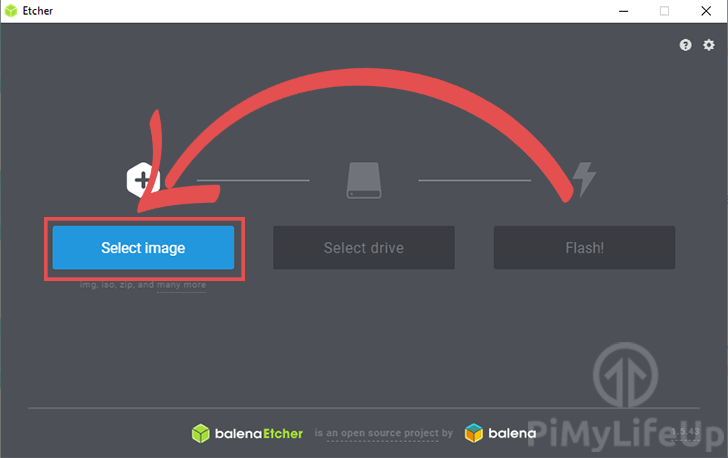
3. With the Etcher software open and the SD Card inserted into your computer, click the “Select Image” button.
Clicking the button will open up a file browser, find and locate the RecalBox image you downloaded in step 1 of this tutorial. This file should be called “recalbox.img.xz“
4. With the RecalBox image now selected, we need to go ahead and choose the drive that you want to write to.
Click the “Select drive” button and then select the drive that you want to write the image to.
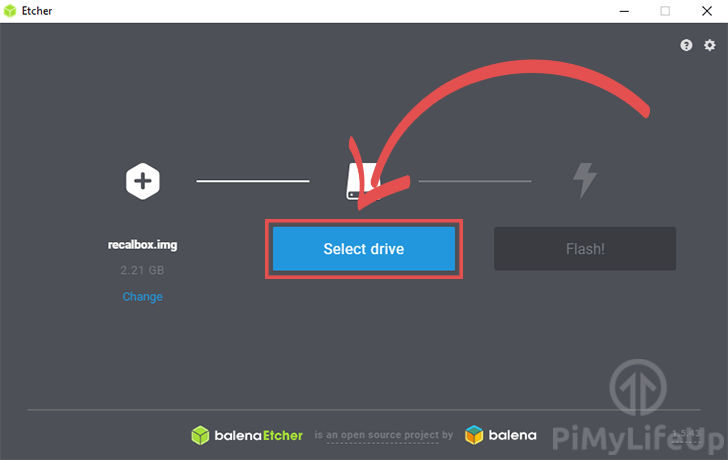
Make sure you choose the correct drive as Etcher will completely erase what was previously on it.
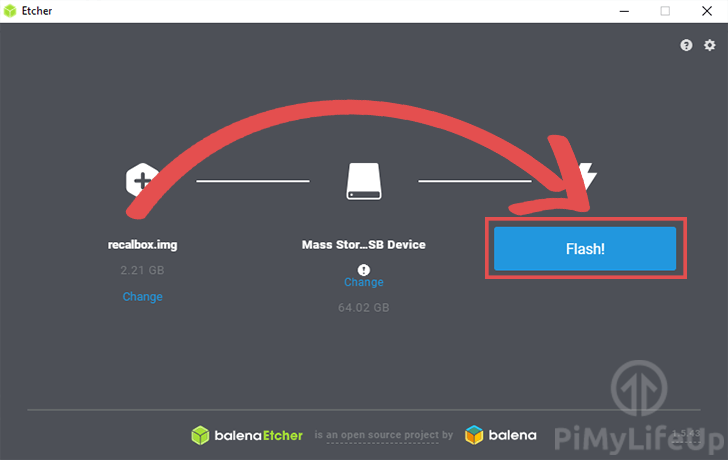
5. Finally, we can begin the writing process. Click the “Flash!” button to write the RecalBox image to your Raspberry Pi’s SD Card.
Configuring Controllers on Raspberry Pi RecalBox
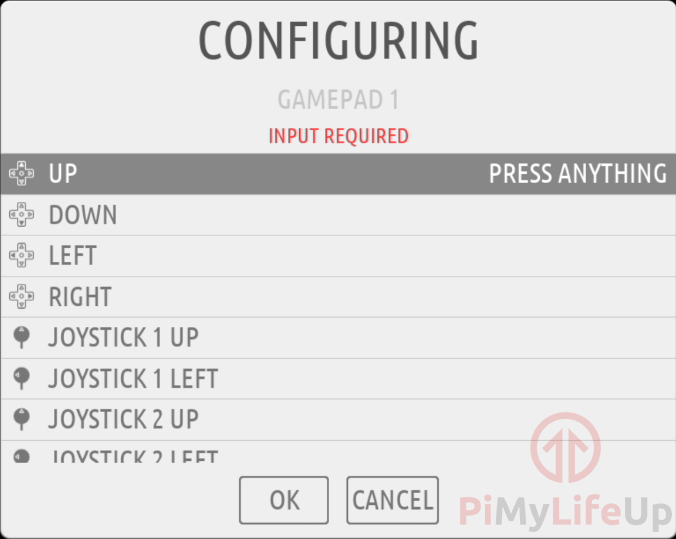
1. When you first start up your Raspberry Pi that is running the RecalBox software, you will be asked to configure a controller for the RecalBox interface.
Hold down a button on either your keyboard or a controller you have plugged in to begin the configuration process.
We have included a screenshot of what this dialog box looks like when you have a gamepad plugged into your device running the RecalBox software.

2. Next, you will be asked to configure the device that you just held the button down on. Just press a button on your controller to map it to that action.
For example, for an Xbox 360 controller, you would map the first four inputs shown below to the D-PAD on the controller.
If there is any button that you can’t map to your controller you can skip setting that input by holding down a button.
Configure your controller as best as possible as the RecalBox software will reuse these button mappings for the various emulators.
3. If you ever need to configure an additional controller, you can do this again within the RecalBox software.
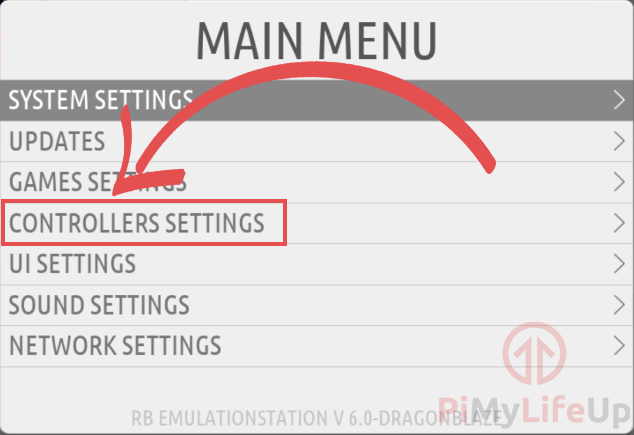
Begin by pressing either the “ENTER” key on your keyboard or the “START” button on your controller to bring up RecalBox’s main menu as shown below.
Once on this screen, select the “Controller Settings” option.
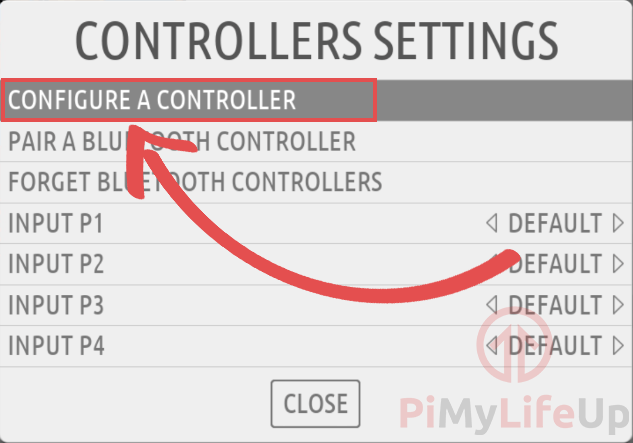
4. You will now be shown the “CONTROLLER SETTINGS” menu screen. On this screen, you want to select the “CONFIGURE A CONTROLLER” option at the top of the list.
This option will bring you back to the dialog displayed to you when you first started your Raspberry Pi RecalBox. Configure your next input device as you did your last one.
Connecting to Wi-Fi on RecalBox
1. Unlike RetroPie, you are able to connect to Wi-Fi without leaving RecalBox’s EmulationStation frontend.
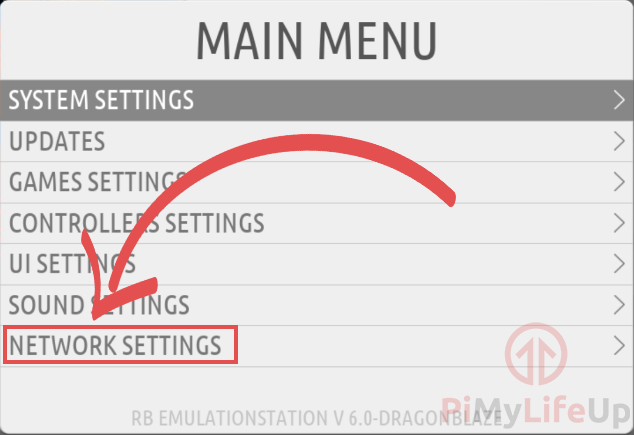
To begin, you must first bring up the RecalBox main menu. You can do this by either pressing “ENTER” on your keyboard or the “START” button on your controller.
With the main menu screen up, go ahead and select the “NETWORK SETTINGS” option.
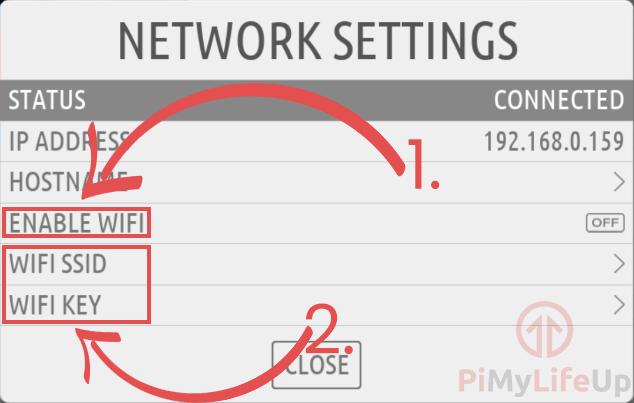
2. Within the “NETWORK SETTINGS” submenu, you will be shown information about the network state.
If you are like us and already have an ethernet connection you will see “STATUS” marked as “CONNECTED” and an IP Address shown below it.
To make a connection to a Wi-Fi connection, you will have first to select “ENABLE WIFI” (1.), the box next to it should change from “OFF” to “ON“.
Next, you need to specify both the “WIFI SSID” and “WIFI KEY” (2.). Once specified, you can close out of the menu box.
Configuring SAMBA on RecalBox
1. Luckily for us, RecalBox comes with SAMBA (Network attached storage software) shares set up out of the box. SAMBA allows you to access the vital folders for RecalBox over a local network so you can easily and copy over the roms to your device from another device.
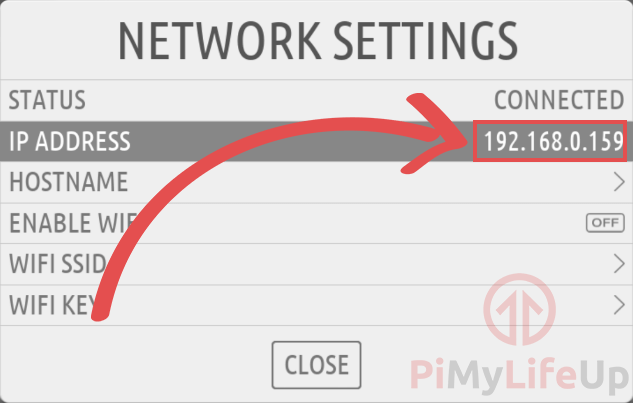
To utilize this, you will first need to know your Raspberry Pi’s IP Address.
You can obtain this IP Address by loading up the main menu by pressing the “START” button on your controller or the “ENTER” key.
Within this menu load up the “NETWORK SETTINGS” submenu and make a note of the IP address displayed there.
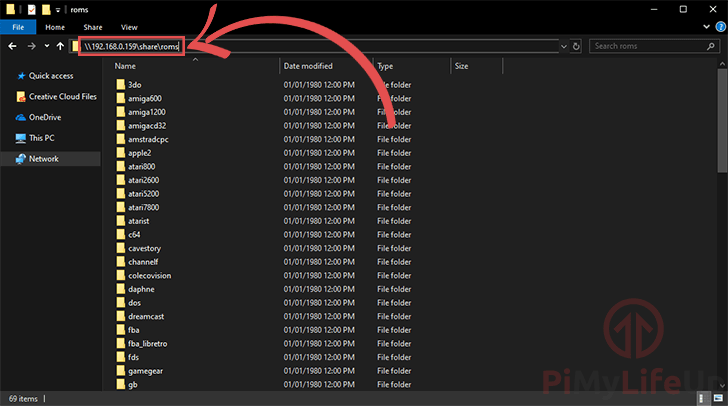
2. Now that we have grabbed our Raspberry Pi’s IP address, we can now connect to the SAMBA share.
In Windows, you can use the File Explorer, and on MAC systems you can use the Finder application.
Within the Windows file explorer, type “\\” followed by your IP Address followed by the directory “\share\roms“. A complete path should end up looking like “\\192.168.0.159\share\roms“.
Copy your roms to their respective folders. For example, SNES roms go in the “snes” folder.
Connecting to the RecalBox Manager
1. The RecalBox software package for the Raspberry Pi comes with a web frontend that acts as an easy way of managing your RecalBox.
Using this web frontend, you can manage various RecalBox settings as well as upload BIOS files and ROMs to your Raspberry Pi.
This web frontend greatly simplifies configuring RecalBox without having physical access to the device.
You can connect to this web frontend by going to either “recalbox\” or your Raspberry Pi’s IP Address.
The UI shown in the screenshot below will greet you upon your first connection to the RecalBox device.

Conclusion
I hope that this tutorial on setting up Recalbox on the Raspberry Pi has helped out with configuring everything correctly. You should now be able to jump in and start playing some of those awesome classic games.
If you have any feedback, tips, or anything else, then please don’t hesitate to leave a comment below.


Hi Emmet,
I love your tutorials! You guys are truly AWESOME!
Currently running two RPi4 with:
Pi-hole, SMB file server, web server and pivpn server of course.
Do I need a static IP address once this is all set up? Lets say in case the dhcp from router lease expires and gives it another IP address
Best,
you-already-know
Hi,
Yes I would recommend that you setup your Raspberry Pi to use a static IP address’s especially when dealing with stuff such as pi-hole.
Cheers,
Emmet