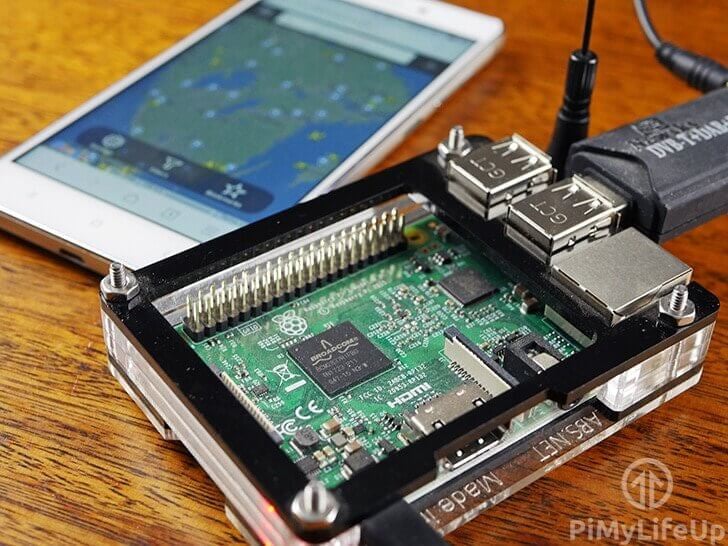
In this tutorial, I go through the steps to set up a flight tracker that feeds data from the Raspberry Pi to the FlightRadar24 service.
I had covered an ADS-B tracker before, but utilized the FlightAware software. Depending on personal preference, you may prefer to use Flightradar24 instead. Both have their pros and cons.
One of the most significant benefits of running your own flight tracker is that you get the Flightradar24 contributor account. That’s a pricey yearly subscription you will get for free in exchange for sharing the ADS-B data. Perfect if you love tracking flights around your house.
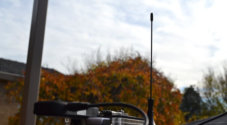
The distance that your ADS-B tracker will be able to see depends on the location and line of sight of your DVB-T antenna. It should cover roughly 140-480 km (87-300 miles), maybe more or less.
Equipment
All the equipment that you need to setup this Flightradar24 tutorial is listed right below.
Recommended
- Raspberry Pi Amazon
- Micro SD Card Amazon
- Ethernet Cable Amazon or Wi-Fi Amazon
- Power Supply Amazon
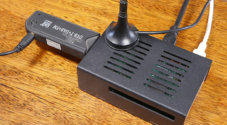
- Mini DVB-T Digital TV USB Dongle Amazon
Optional
This tutorial was last tested using a Raspberry Pi 5 running the latest version of Raspberry Pi OS Bookworm.
Video
The video below walks you through all the steps to set up FlightRadar24 on the Raspberry Pi. Alternatively, a full written tutorial is immediately below the video.
The method described in the video will require you to have Raspberry Pi OS bookworm setup and ready to use on your Pi.
Signing up to Flightradar24
Before you get started, you will want first to sign up Flightradar24. It’s a pretty simple process and will make things a little easier later. You can sign up to Flightradar24 at their website.
You will need to confirm your email once you have signed up. Just select the basic (free) plan while we set up the Raspberry Pi.
Installing FlightRadar24 on Raspberry Pi OS
If you already have Raspberry Pi OS installed and don’t wish to start from scratch, then this is the best option for you. The process is easy, and you shouldn’t run into any issues. It might be a good idea to backup your SD card before you start if you do not want to risk data loss.
1. Enter the following command into the terminal on the Raspberry Pi.
sudo bash -c "$(wget -O - http://repo.feed.flightradar24.com/install_fr24_rpi.sh)"Copy2. You will next be asked some questions, such as the fr24 sharing key, antenna position, and some other details.
3. Please proceed to the next section on how you should fill out the questionnaire.
FlightRadar24 Configuration
In this section, I go through all the configuration questions that you will be asked at setup or when you run the following command.
sudo fr24feed --signupCopyEmail Address: Enter the same email you signed up for Flightradar24 using. This email address is also where your FR24 key will be sent. Once your feed is up and running, it should appear in your account automatically.
FR24 Key: If you have never used Flightradar24 to feed data, then you will not have an FR24 key. Leave this question blank unless you have an FR24 key.
MLAT Calculations: Enter yes for this question.
Latitude & Longitude: Use a website like latlong.net to calculate your latitude and longitude of the antenna. Try to be as accurate as possible. Latitude is in the format of xx.xxxx, and longitude is xx.xxxx (Leave out any extra numbers)
Altitude: Use a website like whatismyelevation.com to determine how high the antenna is above sea level.
Receiver Selection: If you’re using the DVB-T stick, then select 1. Otherwise, observe the other choices you have here.
Dump1090 Arguments: Leave this blank and proceed by pressing enter.
Raw Data Feed: Enter no, unless you know you will need it.
Basestation data feed: Enter no, unless you know you will need it.
Logfile mode: Set this to 48-hour, 24 rotation.
Logfile path: If you want a specific path for where you want the log files to be stored then enter something here otherwise just press enter to proceed.
1. The program should now return that the process has been completed and provide you with a sharing key. Save this key as you may need it in the future.
2. To start sending data, enter the following command.
sudo systemctl restart fr24feedCopy3. You can check the status of your feed by running the following command.
fr24feed-statusCopy4. If you go to the data sharing page on the FlightRadar website, you should also now see your feed.
5. If you want to see the web interface of your feed, then go to its IP in the web browser followed by the port 8754. Below is an example of mine.
http://192.168.0.143:87546. You should now have a fully functional Raspberry Pi Flightradar24 feed up and running. If you run into any issues, then check out the FlightRadar24 forums for some help.
Troubleshooting
If you’re having trouble with this tutorial, then the tips below should help solve some of the most common issues.
- It might take some time before your feed will show as online on the Flightradar24 website. It took roughly 30 minutes until it showed up online.
- MLAT initially wasn’t working, but eventually started working within a few hours without any extra configuration.
- Antenna location dictates how many planes you will be able to track. Try to get it so that the tracker will have an ideal line of sight of the sky. Hills, building and anything substantial will block the ADS-B receiver from tracking accurately.
- It is highly recommended that you update the default password of the Raspberry Pi OS. This change will help secure your Pi against hackers.
- You can install more than one feed to the Raspberry Pi. If you also want to feed to FlightAware, you can set that up too. However, dump1090-mutability will need to be installed before either of the feeds.
- Low power to the Raspberry Pi can cause issues. If you notice your Pi is having power issues, then try replacing the power supply with something more powerful and stable.
Conclusion
I hope that this Raspberry Pi Flightradar24 tutorial has helped you with setting up an ADS-B flight tracker. If you’re interested in other flight tracking software, I recommend taking a look at our Raspberry Pi FlightAware tutorial.
We are constantly working on more Raspberry Pi projects, so be sure to check back later for some new ideas on what you can do with the incredible device.
If you have some feedback, tips, or anything else, then feel free to leave a comment below.


I upgraded my pi image and reloaded everything on my pi. I could not get my contributor plan to kick in even though I know that I was sending good data. The solution is to log out of your FR24 account and then log back in and you should see your account come up as a contributor account….. cheers.
If you set this up, it is easy to feed other flight tracking services such as flightaware and adsbexchange. The advantage of the last one is that they do no filter out any flights as the others do.
Hi John,
It is possible to feed to multiple different povdiers at once as thats what we do with our own personal setup, however, from memory I don’t think you can do that with the Flightradar24 software. I should of written down the steps as it would of been a good tutorial to do.
Kind regards,
Emmet
IS the RPi3 B with FR24 and the USB dongle a unit that can be reliably powered by POE?
Hi John,
It should be fine. We changed ours to run off a PoE HAT a few months ago and so far, we haven’t had any issues. The ADS-B dongles don’t tend to be super power hungry.
Kind regards,
Emmet
Hola, despues de ver la guía me e preguntado si existe algo así pero para buses, estoy interesado en hacerlo en mi pais chile con las lineas de buses de la zona
—
Hello, after seeing the guide I asked if there is something like that but for buses, I am interested in doing it in my country Chile with the bus lines of the area
Hi,
Sadly unless the bus service in your country provides data on bus locations, there isn’t much you can do.
Tracking flights is an easier process as all commercial flights are meant to actively broadcast their location.
Cheers,
Emmet
After many hours searching I found the fix.
open terminal window.
type
sudo nano /etc/gai.confyou need to edit this file.
scroll down to
# For sites which prefer IPv4 connections change the last line to
#precedence ::ffff:0:0/96 100 and remove the # to uncomment the line.
write out, exit, reboot, and it worked!
Thank you Hugh for sharing this! Glad you worked out a solution.
This is a cool project and I ordered my USB stick from your link. After I enter my info about lat/long/alt I get an error message: “Could not connect to feed.flightradar24.com, errno 101” I have internet connection and when I googled this error I found some issues around 1pv6 conflicts from routers, but I do not know if that is related, or not. No luck finding help at flightradar24.com. Any ideas are appreciated!