In this guide, I will show you how to set up the Wi-Fi on your Raspberry Pi using the terminal or the Raspberry Pi OS interface.
I go into several topics in this guide that will help anyone grasp an understanding of how to set up Wi-Fi on the Raspberry Pi.
I also touch on setting up the Wi-Fi country and predictable network interface names. These two topics are important if you need to tweak your Wi-Fi for your needs.
This tutorial is pretty straightforward, but for anyone who is entirely new to the Pi, these are vital steps that you will need to undertake to be able to setup your Raspberry Pi correctly.
Equipment
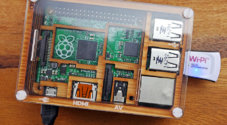
Below is a list of the equipment I used for this guide on setting up Wi-Fi on the Raspberry Pi.
Recommended
Optional
In this guide, I use the default operating system for the Pi. This operating system (OS) is known as Raspberry Pi OS. If you haven’t got it installed, then you can follow my guide on how to install Raspberry Pi OS.
Video
If you want to see how to do this visually then check out the video I have prepared below.
As always if you like what you see, then please subscribe or follow us on social media so you can stay up to date with all the latest and greatest Raspberry Pi projects, guides and much more.
Setting up Wi-Fi on your Raspberry Pi using the Terminal
In this section, we will be showing you an easy way of setting up Wi-Fi on your Raspberry Pi entirely from the terminal. Even if you don’t have access to the desktop interface, setting up Wi-Fi is made a breeze thanks to the use of network manager.
All versions of Raspberry Pi OS since Bookworm now use Network Manager for handling its network connections. If you use an older release of Raspberry Pi you can follow our guide on installing Network Manager.
1. Raspberry Pi OS comes bundled with a tool that makes connecting to Wi-Fi networks from the terminal a really easy process.
This tool is called nmtui and can be launched by using the following command within the terminal.
sudo nmtuiCopy2. With nmtui now open on your Pi, you will want to navigate down and select the “Activate a connection” option.
You can navigate these menus by using the ARROW keys. To select an item, press the ENTER key.

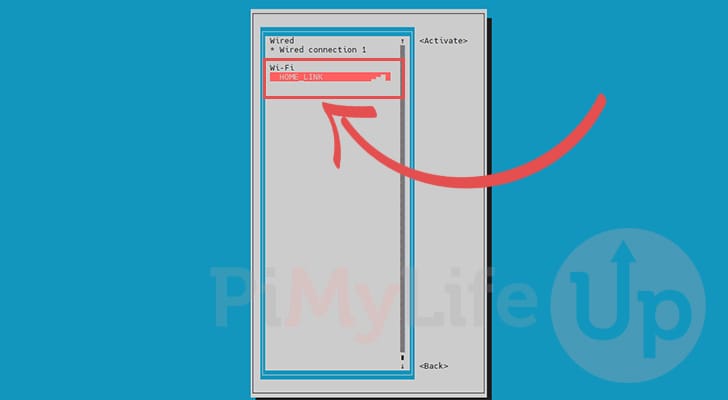
3. On this screen you should see a list of the Wi-Fi connections that your Raspberry Pi is capable of connecting to.
Highlight the Wi-Fi you want to connect to and press the ENTER key to begin the connection process.
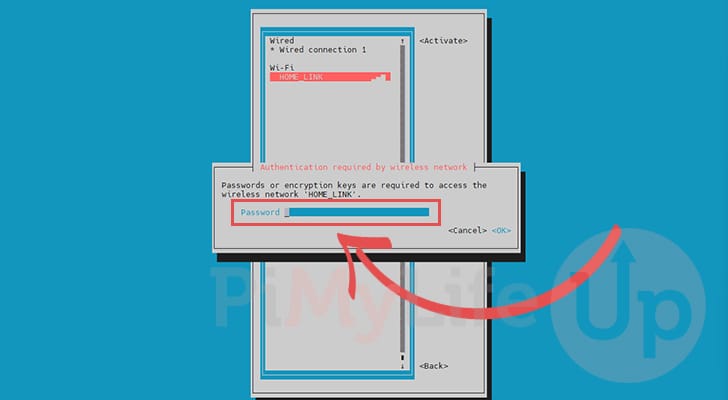
4. If you are connecting to a passworded Wi-Fi connection you will now be prompted to enter the password.
Type in the password for the Wi-Fi network and then press the ENTER key to connect.
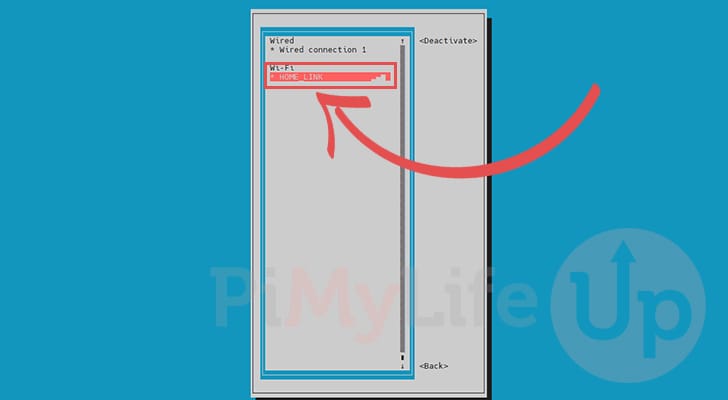
5. Your Raspberry Pi should now be connected to your desired Wi-Fi network. If the connection is active, you should see the asterisk symbol (*) next to it.
6. Once you have finished setting up Wi-Fi on your Pi, you can quit out of this tool by pressing the ESC key on your keyboard.
7. After setting up Wi-Fi you may want to consider configuring a static IP address, especially if you intend on running any web server off of your Pi.
By default, most routers will automatically assign you a new IP address every time you connect.
Setting up Raspberry Pi Wi-Fi via GUI
Using the GUI (Graphical User Interface) is the easiest way to set up Wi-Fi for the Raspberry Pi as everything can be done quickly within the interface.
1. You will need to have your Raspberry Pi connected to a monitor with a mouse and keyboard.
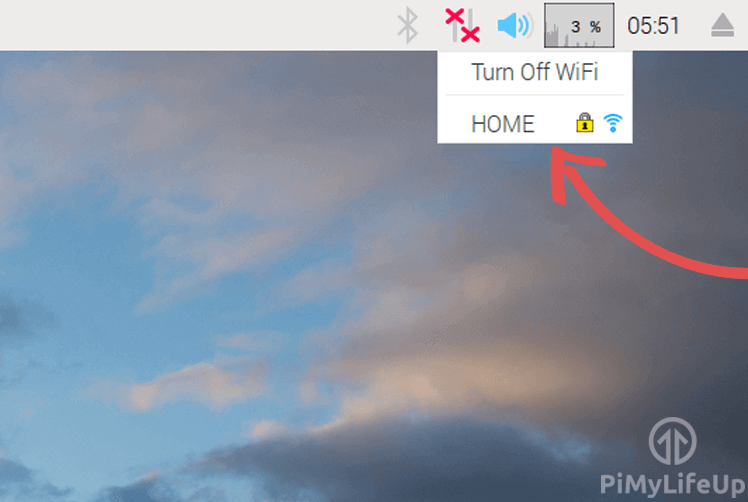
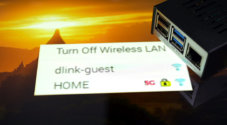
2. On Raspberry Pi OS desktop locate the Wi-Fi icon in the upper right-hand corner of the desktop.
3. It will now scan for Wi-Fi networks and display any that it can find. Click on the network that you wish to connect to.
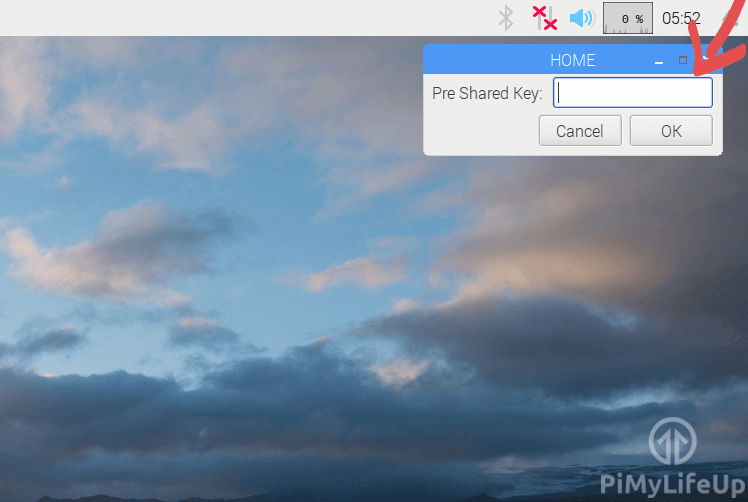
4. If your network is password protected, then you will be prompted to enter a password. Enter the relevant password to connect to the Wi-Fi network.
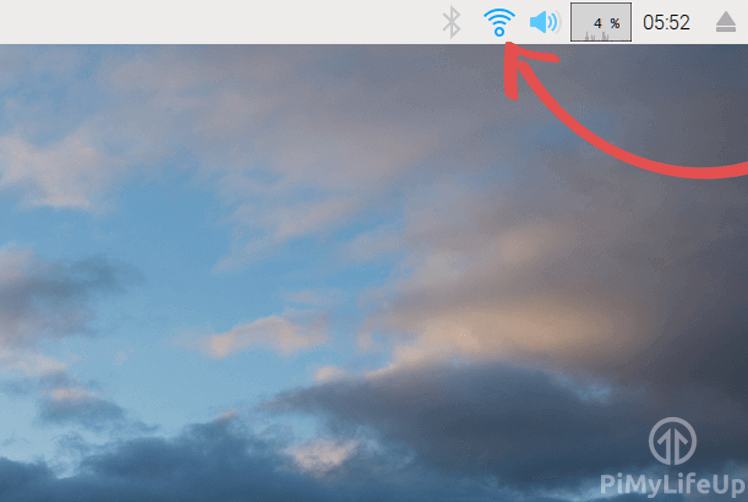
5. The Pi should now connect to the Wi-Fi network, and the icon should have now changed to a blue Wi-Fi logo.
Updating Wi-Fi Country
It is also a good idea to set the country for your Wi-Fi signal. Selecting the country in the GUI is pretty easy to do.
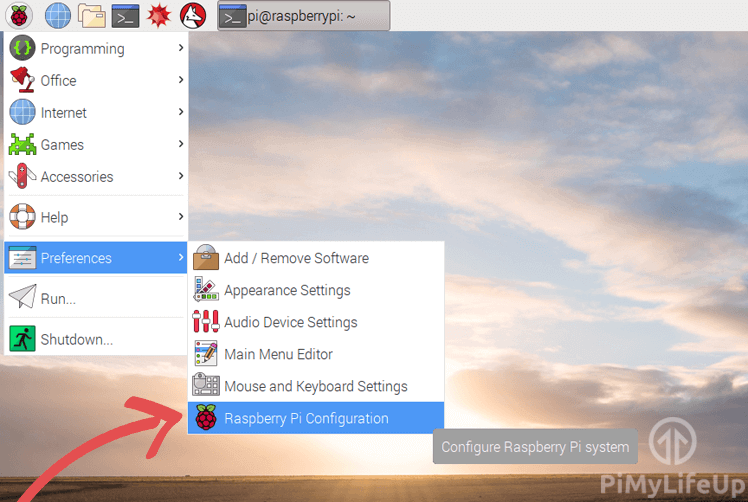
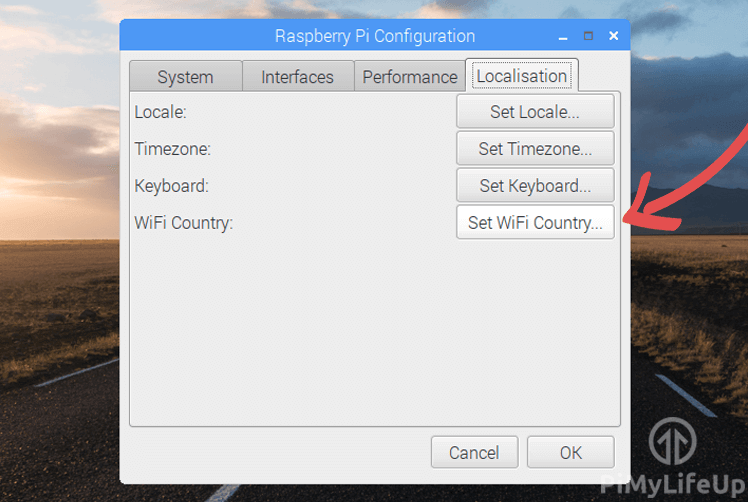
1. Go to the menu icon, then preferences then select Raspberry Pi configuration.
2. In this menu, go to the localization tab and select “Set WiFi Country“
3. Select your country and click save.
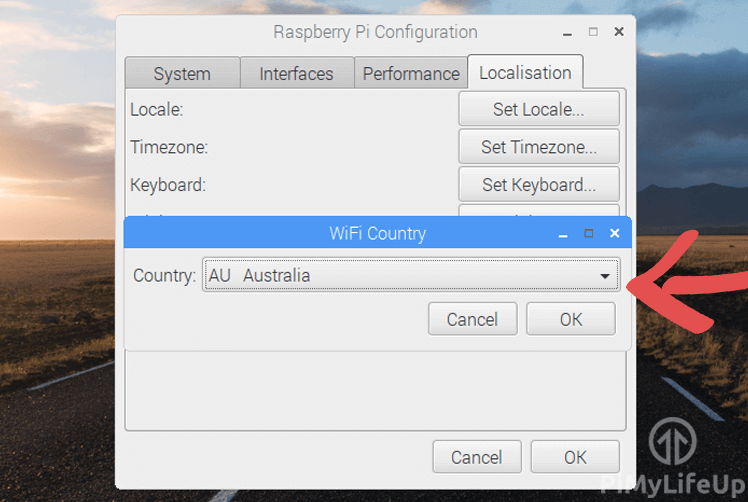
4. Your Wi-Fi country should now be updated.
Predictable Network Names
Predictable network names caused quite a bit of confusion when it was first introduced to Raspberry Pi OS in the Stretch update. Since then, it’s been rolled back and can be activated manually.
You will find that predictable network names are useful when a device has multiple network connections. Instead of naming the interfaces wlan0 or eth0, it instead names them en (ethernet) or wl (wlan) followed by an x. It is lastly followed by a mac address (without any colons). For example, a wlan connection with a predictable network name would be called wlx6c198f049e5c
The naming was rolled back because most Raspberry Pi setups will only use a single ethernet and Wi-Fi connection. Also, a lot of tutorials rely on the naming of wlan0 or eth0. A lot of these tutorials weren’t updated to reflect the new naming which led to a lot of headaches.
The predictable naming comes in handy if you have three or more network interfaces. For example, on reboot, wlan0 might become wlan1 and vice versa. This switch of interface names may cause a lot of issues for people who rely on the interface names in their programs.
Predictable network names provide a naming convention that makes sense and is easy for a developer to predict.
If you wish to turn predictable network names on for use with the Raspberry Pi Wi-Fi or ethernet, then do the following steps.
1. In the terminal, enter the following command.
sudo raspi-configCopy2. Go to network options, then select network interface names. In here, select yes to turn on predictable network interface names.
3. Now exit raspi-config. You can test to see if predictable network names are working by entering the following command after you have plugged in a new network device. Devices that are currently connected might still have the old name, and a restart will fix this issue.
sudo ifconfigCopy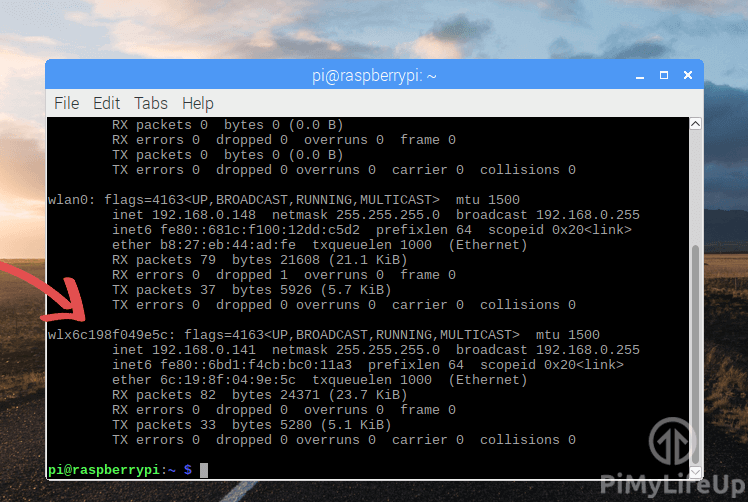
It is important to note that the onboard Wi-Fi for the Raspberry Pi 3, and zero will continue to use wlan0. Despite whether predictable naming is turned on or off.
Conclusion
Now that you have your Wi-Fi setup you might be interested in doing a bit more with it. For example, setting up a Raspberry Pi Wi-Fi access point is a great way to help extend Wi-Fi coverage throughout your house. You will need to have ethernet connected to the Pi as a Wi-Fi to Wi-Fi setup isn’t great for speed.
If you’re having trouble getting the Wi-Fi to connect, then be sure to check that the Pi supports the dongle. This issue is one of the most common problems when setting up the Raspberry Pi Wi-Fi.
I hope that this guide has been able to show you all the steps to set up Wi-Fi on the Raspberry Pi and you haven’t run into any issues. If you require further assistance, I highly recommend that you leave a comment below.


Use command to enable wifi via cli:
sudo rfkill unblock 0Note: I think this should be added to the tutorial 😉
Gus, I have a RPi 3 and would like to install an 802.11ac USB adapter. I have tried an Edimax EW-7822UAC and a Netgear A6200. I’ve plugged each into a powered hub to make sure that the power draw required isn’t the issue. Each shows up in the result of a dmesg command, but I can’t get either to show up as a wlanx device. I did a speed test with the built in WiFi and got 5.1 Mbps down, but a wired connection gives me 86 Mbps down. On my Intel based computers, I can get speeds close to a wired connection with those same adapters – even with a USB 2.0 connection.
Gus, since I made the post, I got a reply from Edimax. They gave me a link to a web page that has instructions for another Edimax model, but it worked for my unit. I did a speed test on the Netflix site, fast.com, and got a download speed of 110 Mbps.
https://edimax.freshdesk.com/support/solutions/articles/14000032146-how-to-install-ew-7811-ac600-series-adapter-on-raspberry-pi
My pi wont work on any wifi receiver help
I tried in the past to get both connections, LAN and WLAN. The descriptions in the past are always very difficult.
But this works very quick and very easy.
Great job / Thanks