In this guide, you will learn how to connect to an NFS share on your Raspberry Pi using an NFS client.

NFS stands for network file system and is a protocol used for distributed file systems.
To connect to an NFS server, we will need to install and configure an NFS client on our Raspberry Pi.
It is commonly used to connect to a NAS as it is a very well supported protocol.
You can even set up your Raspberry Pi to act as an NFS server if you wanted to share files from it.
As you will soon see, the steps to set up the NFS client is reasonably straightforward and will only take a few minutes.
Equipment
Below is a list of all the equipment we used for setting up an NFS client on the Raspberry Pi.
Recommended
Optional
We tested this tutorial on a Pi 400 running the latest version of Raspberry Pi OS Buster.
Installing an NFS Client on the Raspberry Pi
Before connecting to an NFS share, we must first install and set up an NFS client on our Raspberry Pi.
Luckily for us, all of the packages needed to connect to an NFS server are available within the package repository.
1. Before we install the NFS client, let us perform an update on our operating system.
To achieve this, we can make use of the two commands below.
sudo apt update
sudo apt full-upgrade
2. With our operating system up to date, we can now install the NFS client to our Raspberry Pi.
All we need to do is run the following command on your Pi.
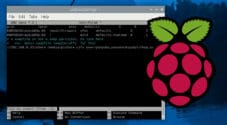
sudo apt install nfs-commonThis command will install the nfs-common package. This package contains everything we need to connect to an NFS server from our device.
3. With the NFS client now installed on our Raspberry Pi, we can now show you how to use it.
Continue to the next section to learn how to connect to an NFS server from your Raspberry Pi.
Connecting to an NFS Server using the Client
With the NFS client installed on your device, we can now show you how you can use it to make a connection to a remote NFS server.
Please note that you will need to know the IP address or hostname of the NFS server that you are connecting to.
To connect to the NFS server, we will be using the mount command on our Raspberry Pi.
Mounting the Entire Directory Tree
The basic command for mounting all exported directories from the server is below.
When entering this command, you need to replace “<NFSSERVERIP>” with your NFS servers’ IP address.
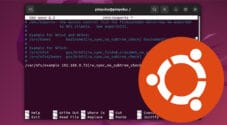
mount -t nfs -o proto=tcp,port=2049 <NFSSERVERIP>:/ /mntWith this command, we can specify the type as nfs using the -t argument.
We also need to specify the protocol as tcp and the port as 2049. This is the port that NFS typically operates on.
Next, we define the IP address or hostname of the NFS server that we are connecting to.
By using :/ after this IP, we are specifying that we want to mount the upmost directory exported by the server.
Finally, we specify the location in which we want to mount this directory tree. For our example, we are using the “/mnt” directory.
Mounting a Specific Directory
In some cases, you may only want to mount a specific directory exported by the NFS server.
This only requires some slight modifications to the previous command.
Make sure that you replace “<NFSSERVERIP>” with your NFS server’s IP address and replace “<DIRECTORYTOMOUNT>” with the directory name.
mount -t nfs -o proto=tcp,port=2049 <NFSSERVERIP>:/<DIRECTORYTOMOUNT> /mntAs you can see from the command above, all you need to specify is the exported directory’s name after “:/“.
The rest of the command is the same as the previous command, with the IP, mount type, and the mount location specified.
Mounting an NFS Share at Boot
Having to run the mount command every time you want to connect to your NFS share from your Raspberry Pi will quickly become a tedious process.
To get around this, we can modify the fstab file. This file allows us to get the operating system to mount our network share when it starts up automatically.
1. Let us begin editing the fstab file.
We can edit this file using the nano text editor by running the following command.
sudo nano /etc/fstab2. At the bottom of this file, you need to enter the following line.
When entering this line, make sure that you replace “<NFSSERVERIP>” with your NFS server’s IP address.
You should also replace “<DIRECTORYTOMOUNT>” with the networked directory’s name that you want to mount. If you want to mount the entire directory tree then replace this with nothing.
Finally, if you want to change the location in which the networked directory is mounted, you will need to change “/mnt” to the location.
<NFSSERVERIP>:/<DIRECTORYTOMOUNT> /mnt nfs auto 0 03. You can now save the file by pressing CTRL + X, then Y, followed by the ENTER key.
4. You can verify that this is working by restarting your Raspberry Pi.
You can restart the device by using the command below.
sudo rebootConclusion
At this stage, you should have installed and configured an NFS client on your Raspberry Pi.
You should also now have an idea of how you can connect to an NFS server with ease.
If you have run into any issues with this guide, feel free to leave a comment below.
You can also check out some of our other great Raspberry Pi tutorials, such as setting up a print server or using Nextcloud for a cloud styled storage system.