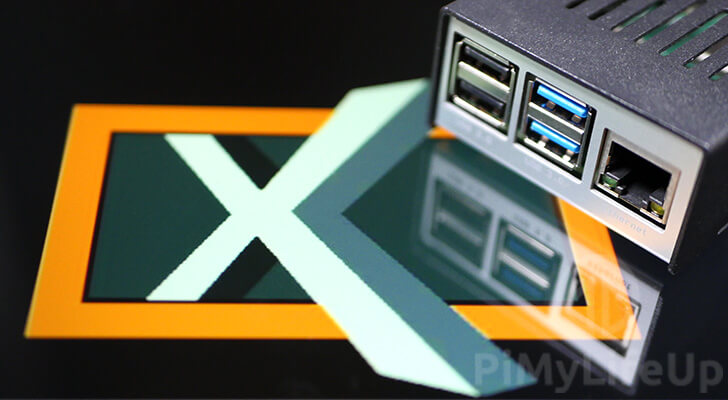
In this tutorial, we will be showing you how to install XBian to a Raspberry Pi
XBian is a distribution of the popular media center Kodi that has been specifically put together to be small, fast, and lightweight.
One of the biggest advantages of using XBian is that the team regularly updates it so you can always expect to be running the latest software.
XBian comes packed with a variety of additional packages that help improve Kodi’s out of box experience on your Raspberry Pi.
These additional features that are built into the XBian image are the following.
- Samba – Improves file sharing with devices running the Windows operating system.
- CEC & LIRC – Allows you to control your Raspberry Pi XBian set up by using your TV’s remote.
- AutoFS – Handles the automatic mounting of network shares and USB drives.
- AirPlay – Allows you to send video to and from Apple devices.
- VNC Server – It gives you the ability to control your XBian installation on your Raspberry Pi remotely.
- BTRFS-Tools – Helps with handling snapshots of XBian’s filesystem.
XBian is an alternative to the two other major Kodi distributions, OSMC and LibreELEC.
Equipment List
Below we have made a list of the parts that you will need to set up XBian on your Raspberry Pi.
Recommended
- Raspberry Pi Amazon
- Micro SD Card Amazon
- Power Supply Amazon
- Ethernet Cable Amazon or Wi-Fi Amazon
- HDMI Cable Amazon
- Monitor Amazon
Optional
We tested the following steps on the latest available distribution of XBian installed on to a Raspberry Pi 4.
Downloading XBian for your Raspberry Pi
In this section, we will be pointing you in the right direction to download the latest version of XBian for your Raspberry Pi.
Before you begin this section, first work out what Raspberry Pi that you want to use XBian on, once you know the model follow one of the following download links.
Download XBian for the original Raspberry Pi
For the original Raspberry Pi, you need to download a separate version of the XBian image.
Download the latest version of XBian for the Raspberry Pi 1.
Download XBian for the Raspberry Pi 2, 3, 3B+ or 4
To make it easier, the XBian team has released a unified image that works across all other Raspberry Pi’s.
If you are running the Raspberry Pi 2, 3, 3B+, or 4, you can download that image from SourceForge.
Writing XBian to an SD Card
In this section, we will be walking you through the process of writing the XBian image to your Raspberry Pi’s SD Card.
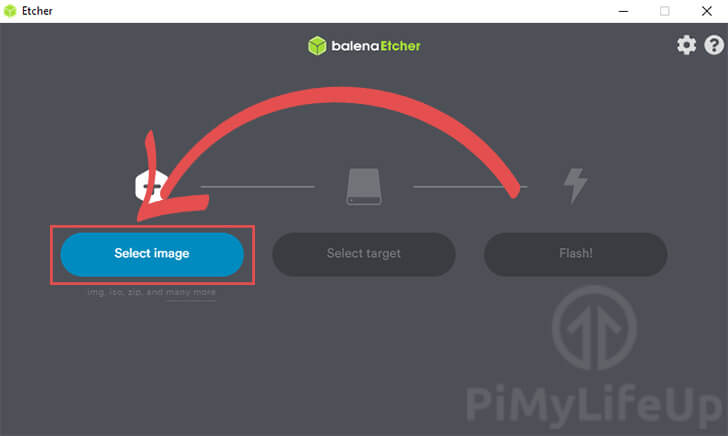
1. Before you get started, make sure that you have the Etcher software installed on your device.
Etcher is available to download and install for the Windows, macOS, and Linux operating systems.
2. With the Etcher tool opened, we can now write our XBian image to your SD Card.
To start this process, click the “Select image” button to bring up the file dialog.
Use this file dialog to find the XBian image you downloaded in the previous section and select it.
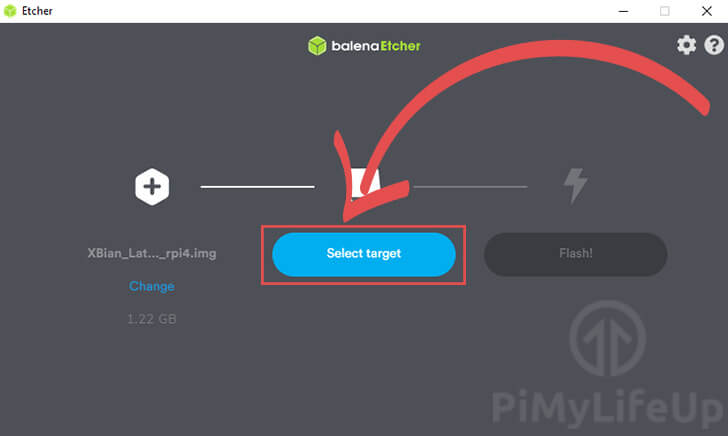
3. Next, we need to select the drive/SD card that we want to write the XBian image to.
If you only have one compatible SD card plugged in, the Etcher software will automatically select it.
Alternatively, you will have to click the “Select target” button to select the drive.
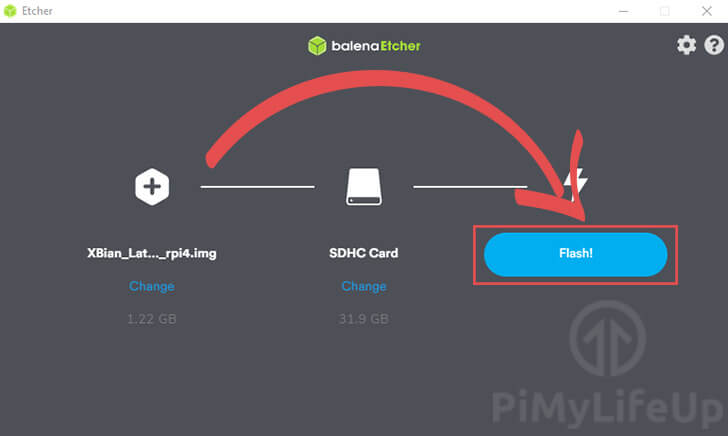
4. You can now begin to flash the image to your SD Card by clicking the “Flash!” button.
First Boot of XBian
In this section, we will be walking you through the first startup sequence of XBian on a Raspberry Pi.
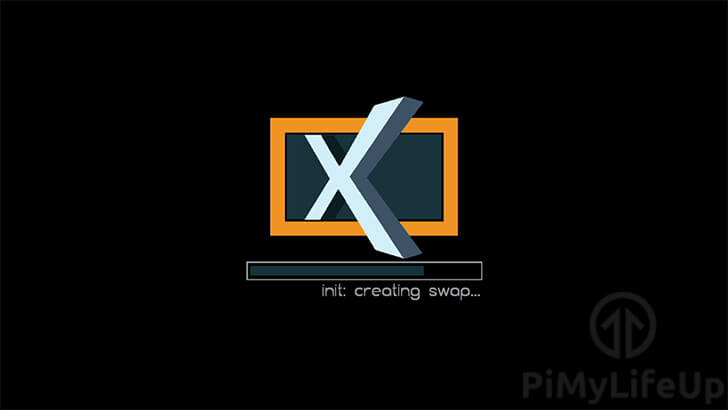
1. When you first start up XBian, it will need to complete a couple of tasks.
The first is to resize the filesystem to match your SD Card as well as create a swap file.
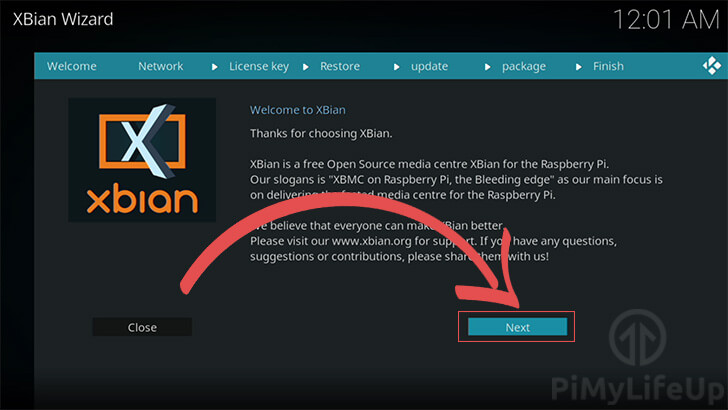
2. The first time you load XBian, you will need to go through a welcome setup sequence.
To begin the setup process, click the “Next button.
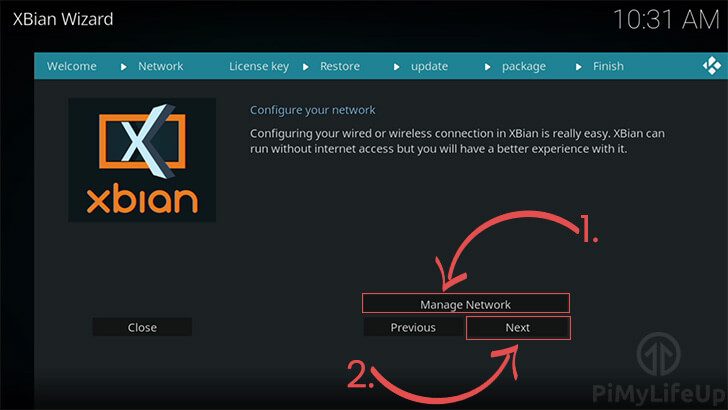
3. The first prompt will allow you to configure your network settings.
If you need to connect to WiFi, click the “Manage Network” button (1.) and use the prompts.
To continue, click the “Next” button.
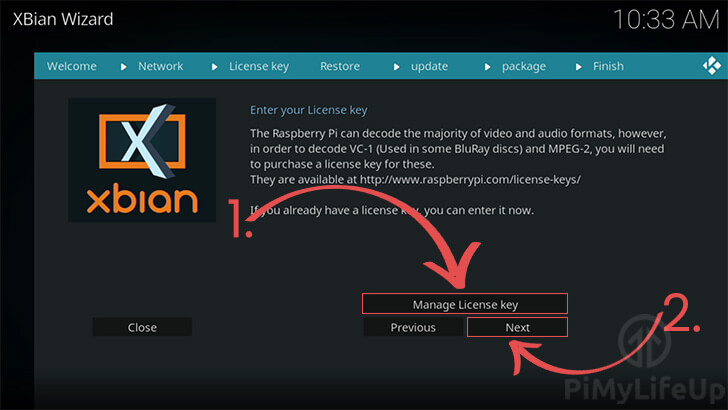
4. This screen will allow you to set a license key for the VC-1 and MPEG2 decoder.
The Raspberry Pi has a hardware decoder for the VC-1 and MPEG2 codecs; however, you need a license key to use it.
To insert a license key, click the “Manage License Key” button (1.).
Once done, click the “Next” button (2.) to continue.
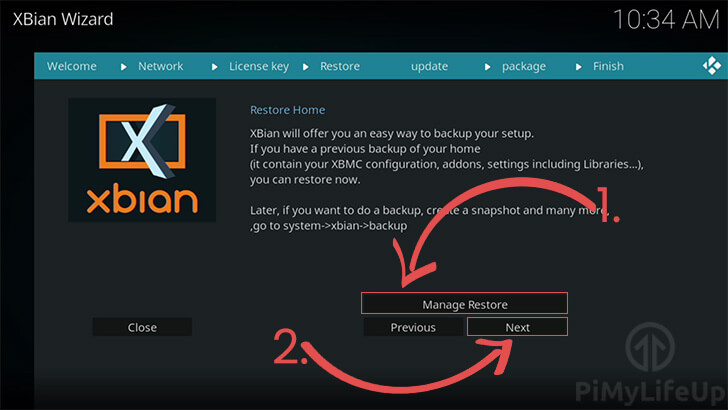
5. XBian has the ability to restore backups. This menu is only useful if you have installed XBian previously and made a backup.
If you want to restore a backup, click the “Manage Restore” button (1.).
Continue with the setup process by clicking the “Next” button (2.).
6. The last set up step will ask if you want to install any additional packages.
If you want any extra features such as a torrent client, click the “Manage package” button (1.).
Once done, click the “Next” button (2.).
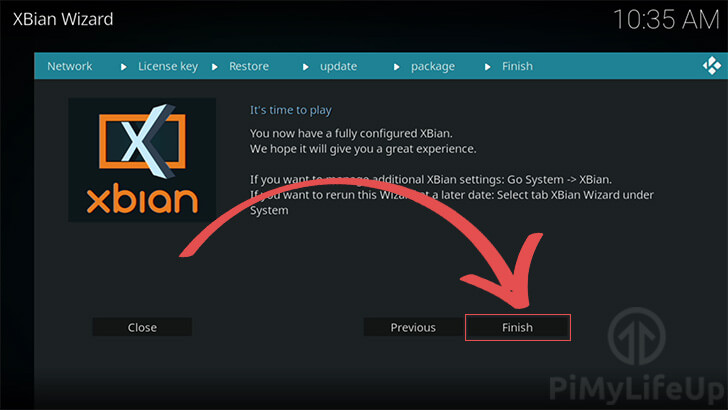
6. You have successfully completed the initial Xbian setup steps.
You can click the “Finish” button to finalize your changes.
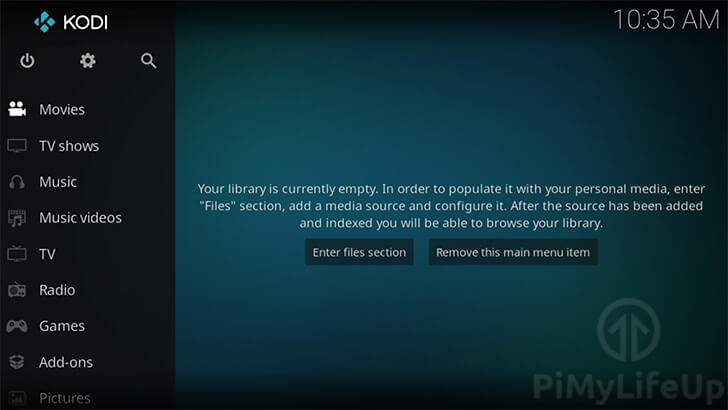
7. You can now proceed to add folders for Kodi to scan.
Hopefully, at this point, you will now have successfully set up Xbian on your Raspberry Pi.
If you have run into any issues with setting up XBian on your Pi, feel free to leave a comment below.