In this project, we will show you how to install and run the Plexamp music player on the Raspberry Pi.
Plexamp is a special version of the standard Plex client. It has been rebuilt from the ground up to be a perfect client for playing music. Like the standard Plex client, it only supports music streamed directly from a Plex Media Server.
The advantage of using Plexamp over the normal Plex is that it has a pure focus on music, you don’t have to worry about any of your movies or tv shows cluttering up the interface and you can get straight to your music.
The advantage of setting up Plexamp on your Raspberry PI is that it allows you to easily convert any speakers into a receiver for your Plex music. Using the supported apps or its web interface, you can stream music straight to an older set of speakers.
This guide will set up Plexamp as a headless client. A headless client works well in this case as it allows you to turn any speaker into one you can stream your Plex music files to without requiring a screen to control it.
If you want to expand upon this, you could connect a touchscreen and set set up a Chromium kiosk that loads the Plexamp web interface. This will make it feel like you have a native client running, and it could be great for setting up a streaming jukebox with your Pi.
Of course, like most audio projects with the Raspberry Pi, you will get a significantly better audio experience by combining it with one of the many high-quality DACs. A DAC is a piece of hardware that converts the digital signal from the Pi to an analog signal that a speaker can utilize.
The one caveat to running Plexamp on your Raspberry Pi is that you must have a Plex Pass subscription. Without one, this guide will not work.
You Might Also Like


Equipment
Below is a list of the equipment we used when setting up Plexamp on our Raspberry Pi.
Recommended
- Raspberry Pi Amazon
- Micro SD Card Amazon
- Power Supply Amazon
- Ethernet Cable Amazon or Wi-Fi Amazon
- Speakers Amazon
- Raspberry Pi DAC HAT Amazon
Optional
We tested this tutorial on a Raspberry Pi 5, running the latest version of the Raspberry Pi OS Bookworm 64-bit.
Installing Plexamp on the Raspberry Pi
In the following sections, we will show you how to install the Plexamp media player on your Raspberry Pi.
This software is relatively easy to set up but isn’t provided through the Plex package repository.
Preparing your Raspberry Pi
1. Before we begin setting up Plexamp on our Raspberry Pi, we will want to update the software running on it.
We update the package list cache with the first command, and the second command upgrades any out-of-date packages.
sudo apt update
sudo apt upgrade -yCopy
2. Once your Pi is updated, we will want to install the wget package by running the following command.
We will use the wget package to download the Plexamp package later in this guide.
sudo apt install wgetCopy3. The Plexamp client that we are using requires you to have NodeJS installed.
If you don’t this runtime installed, follow our guide on how to install the NodeJS runtime. You will want to install version 20.
https://pimylifeup.com/raspberry-pi-nodejs/4. Please note that Plexamp still requires the Plex Media server to be able to operate. Plexamp is simply a client that focuses on playing music files from your media server.
You can also run the Plex server on your Raspberry Pi if you like, and we have a guide that covers the entire installation process.
Once you have the server installed, you will need to add at least a music library. This library can point to an empty folder if you want to transfer your music later.
https://pimylifeup.com/raspberry-pi-plex-server/Creating a User to Run Plexamp on your Raspberry Pi
5. Our next step is to create a user that we will use to run the Plexamp player on the Raspberry Pi.
We can create this user by using the useradd command within the terminal. This user that we are creating will be called “plexamp“. By using the “-m” option we will also create a home directory for this user.
sudo useradd -m plexampCopy6. With our “plexamp” user created, we will need to add it to the “audio” group. This group will allow the user to access audio devices on your Pi.
To make this change to the user group, we will be using the usermod command.
sudo usermod -aG audio plexampCopy7. To install and complete the initial set up steps of Plexamp on our Raspberry Pi, we will want to change to the new user we just created.
You can use the sudo command to swap to this new user within your current shell session.
sudo -u plexamp -sCopy8. Since we have changed to our new user, we will want to use the cd command to swap to its home directory.
The tilde symbol (~) is automatically interpreted as the current user’s home.
cd ~CopyDownloading and Installing Plexamp onto the Raspberry Pi
9. We are finally at the point where we can download and install the Plexamp client on our Raspberry Pi. Using the following command, you can download the archive for version 4.10.1 to your current directory.
There may be a newer version of Plexamp released since we published this tutorial. You can find the latest release on the official Plexamp download page.
wget -O plexamp.tar.bz2 https://plexamp.plex.tv/headless/Plexamp-Linux-headless-v4.10.1.tar.bz2Copy10. Once downloaded, all you need to do to “install” the audio player is to extract the archive’s contents to the current directory.
You can extract this archive by using the tar command within the terminal.
tar -xvf plexamp.tar.bz2CopyPerforming the Initial Setup of Plexamp
11. Before using Plexamp on your Raspberry Pi, you must claim the new client with your Plex account.
Start this process by running the Plexamp client using the following command.
node plexamp/js/index.jsCopy12. Once the Plexamp client has started up, you will see the following message appear within the terminal.
You will want to go to the Plex claim website. This website will give you a code that you will need to type into the terminal.
Starting Plexamp 4.10.1
Please visit https://plex.tv/claim and enter the claim token:
13. After specifying your Plex claim token, you will be prompted to give this Plexamp client a name. This name is how you will see this client within Plex and the Plexamp app.
For this example, we will be simply naming ours “pimylifeup“.
Please give the player a name (e.g. Bedroom, Kitchen): PiMyLifeUp14. Once you see the message below, you will know that you have successfully installed Plexamp on to your Raspberry Pi.
The next time we run the “index.js” file using Node, the music player will start properly.
Plexamp is now signed in and ready!If you see the following messages appear within the terminal, don’t worry. These won’t prevent the actual client from working.
DEVICE: Error loading cloud players from plex.tv HTTP status 403
DEVICE: Did not find a working server.
Writing a Service to Manage Plexamp on the Raspberry Pi
15. Our next step is to write a service to manage and start Plexamp on our Raspberry Pi.
Before we can begin writing this service, you will want to use the exit command to return to your normal user.
exitCopy16. After switching back to your user, you can begin writing a service file for Plexamp by running the following command within the terminal.
We use the nano text editor as we find it relatively easy to use, especially for beginners.
sudo nano /lib/systemd/system/plexamp.serviceCopy17. Within this file, you will want to enter the following lines.
This service is super simple and uses Node.JS to run the Plexamp client when your Raspberry Pi powers on.
[Unit]
Description=Plexamp
After=network-online.target
Requires=network-online.target

[Service]
Type=simple
User=plexamp
WorkingDirectory=/home/plexamp/plexamp
ExecStart=/usr/bin/node /home/plexamp/plexamp/js/index.js
Restart=on-failure

[Install]
WantedBy=multi-user.targetCopy
18. After writing the service file, you can save and quit by pressing CTRL + X, Y, and then ENTER.
19. Now that we have written a service to manage Plexamp, we will want to enable the service so that the audio player will start when our Pi does.
All you need to do to enable the “plexamp” service is to use the command below.
sudo systemctl enable plexampCopy20. With the service started, you can start Plexamp immediately by running the following command within the terminal
sudo systemctl start plexampCopyAccessing the Plexamp Web Interface
21. Now Plexamp is up and running on your Raspberry Pi, you will want to access it’s web interface.
Before you can access this web interface, you will need to know the IP address of your Raspberry Pi. One of the easiest ways to get your IP is to use the hostname command.
hostname -ICopy22. Now, in your favorite web browser, go to the following address. Ensure that you replace “<IPADDRESS>” with the IP of your Pi.
http://<IPADDRESS>:32500Initial Setup of the Plexamp Client
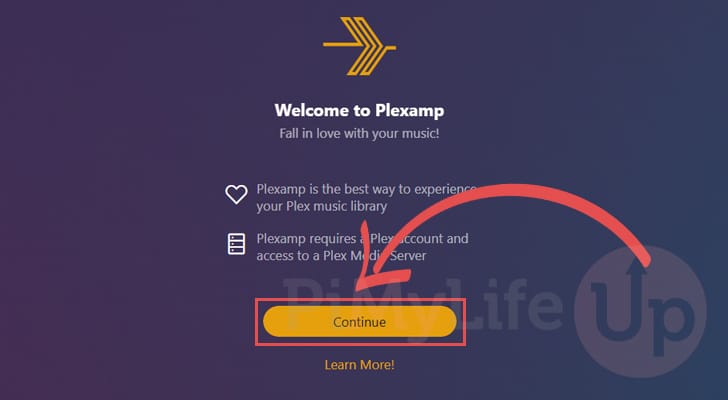
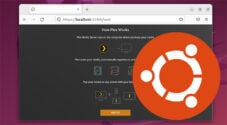
23. When you access the Plexamp web client, you will see a quick welcome screen that provides a very simple overview of Plexamp.
To start the initial configuration process, click the “Continue” button.
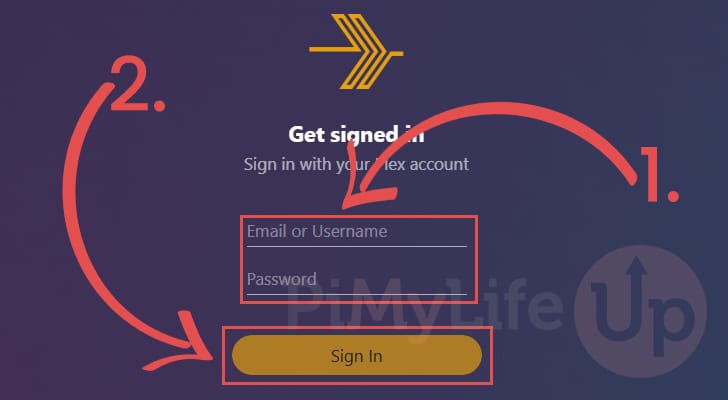
24. You must log in to your Plex account before you can use and configure your Plexamp client on your Raspberry Pi.
The Plex account should be the same one you generated the claim code for earlier in this guide.
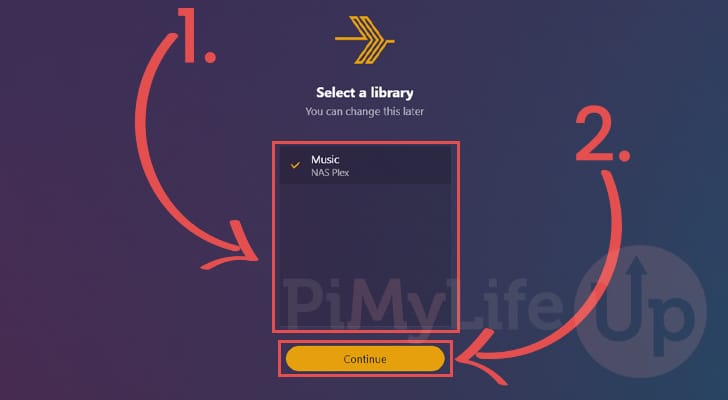
25. Once logged in, Plexamp will present you with a list of music libraries you have set up on your connected Plex Media Server.
Select the library you want to play music from (1.) and then click the “Continue” button (2.). In our example, we only have the one library to choose from.
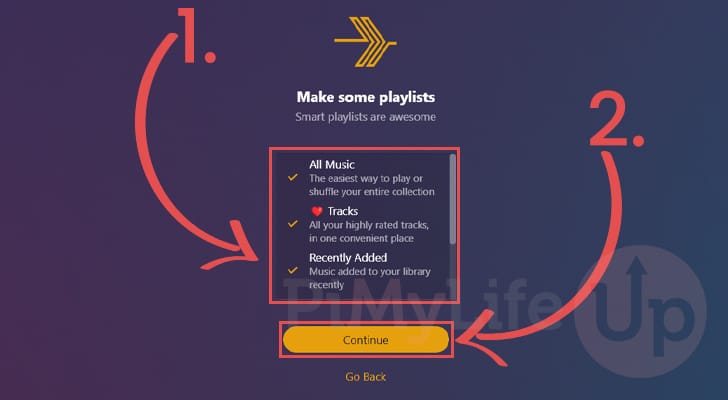
26. One of the features of Plexamp is that it has what is called Smart playlists. You can turn any of these playlists on or off (1.).
Once you are happy with the playlists you have enabled, click the “Continue” button (2.).
27. You now have Plexamp fully configured on your Raspberry Pi. Now, you can play any music you would like through the provided web client. It should immediately begin to play through any attached speakers.
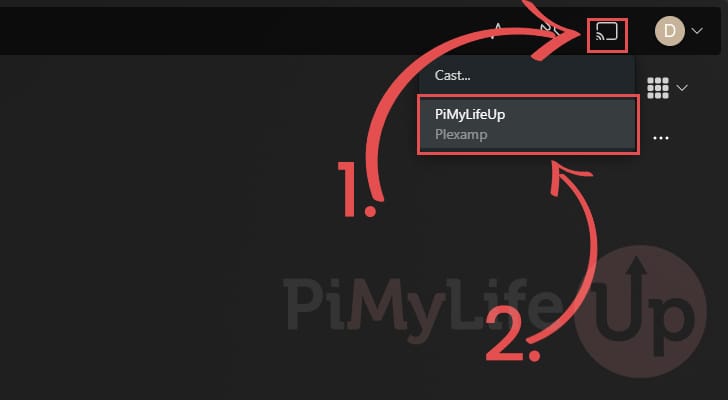
It is also possible to cast audio to your Plexamp from the standard Plex clients. By clicking the screen icon in the top-right corner of the Plex client, you should see a list of devices you can stream to. In this list, you should see your newly set-up Plexamp client.
Conclusion
Hopefully, at this point in the project, you will have successfully set up the Plexamp client on your Raspberry Pi.
This client is one of the best ways to stream music from your Plex Media Server. It boasts an intuitive interface and great native device support thanks to the Plexamp app.
Please feel free to comment below if you have had any issues with getting this audio client to run on your Pi.
If you liked this tutorial, we highly recommend that you check out our many other Raspberry Pi projects.


Been waiting for this. Thanks