In this guide, we will be showing you the straightforward steps to installing NodeJS on the Raspberry Pi.
NodeJS is an open-source platform that allows you to run JavaScript outside of a web browser. It has quickly become popular amongst developers for command-line tools and server-side scripting to drive dynamic web pages.
Thanks to its event-driven architecture, it is a capable runtime that can achieve high throughput. Additionally, it uses the speedy V8 JavaScript engine, initially developed for the Chrome web browser.
Installing the NodeJS runtime on your Raspberry Pi is a straightforward process and only takes a couple of commands.
Alongside NodeJS, you will also install NPM to your Raspberry Pi. NPM is the default package manager for NodeJS and is what you will use to install additional modules.
As the software doesn’t require a GUI to operate, you can install this JavaScript runtime on a headless Raspberry Pi.
Equipment
Below is the list of equipment we used for installing NodeJS on the Raspberry Pi.
Recommended
Optional
This tutorial was last tested on a Raspberry Pi 400, running the latest version of Raspberry Pi OS Bullseye.
Video Tutorial
Below is a short video that will take you through the steps to setting up NodeJS on the Raspberry Pi. Alternatively, a full written version is immediately below the video.
How to Install NodeJS to the Raspberry Pi
This section will show you how easy it is to install the latest versions of NodeJS on the Raspberry Pi.
To make this process as easy as possible, we will be using the distributions provided by NodeSource. In addition, this team provides builds for Debian, which is what Raspberry Pi OS is built upon.
Additionally, these NodeJS builds are also available for both 32-Bit and 64-bit ARM systems, perfect for our Raspberry Pi.
Preparing for the Node.JS repository
1. Before we begin installing NodeJS to our Raspberry Pi, let us first update the packages running on our operating system.
We can update the package list and upgrade existing packages using the following two commands.
sudo apt update
sudo apt upgradeCopy
2. Our next step is ensuring we have all the packages we need to access the Nodesource repository.
Install these packages by using the following command in the terminal.
sudo apt install -y ca-certificates curl gnupgCopySetting up the NodeSource Repository on the Raspberry Pi
3. With our Raspberry Pi up to date, we can now set up the NodeSource repository.
This repository will allow us to install the latest versions of NodeJS to the Raspberry Pi easily.
Let us start this process by downloading the Nodesource GPG key and storing it within the “/usr/share/keyrings” directory.
curl -fsSL https://deb.nodesource.com/gpgkey/nodesource-repo.gpg.key | sudo gpg --dearmor -o /usr/share/keyrings/nodesource.gpgCopy4. With the GPG key stored on our Raspberry Pi, we can now the Nodesource Node.JS repository to the sources list.
Before we do this, you must decide what NodeJS version you want to install. Use the relevant line for which version you would like to install. If a newer release exists, replace the number with that version.
These lines simply set an environment variable we will reference in the next step.
- LTS Release
NODE_MAJOR=20Copy- Current Release
NODE_MAJOR=22Copy5. Using the following command, You can now add the Node.JS repository to your Raspberry Pi’s sources list.
echo "deb [signed-by=/usr/share/keyrings/nodesource.gpg] https://deb.nodesource.com/node_$NODE_MAJOR.x nodistro main" | sudo tee /etc/apt/sources.list.d/nodesource.listCopy6. Since we made changes to your sources list you will need to run an update of the package list again.
Update the package list on your Raspberry Pi by using the following command.
sudo apt updateCopyInstalling Node.JS on the Raspberry Pi
7. With the NodeJS repositories added to our Raspberry Pi, we can proceed to install the runtime to our device.
As the script we ran in the previous step runs a package update, we simply need to install the package.
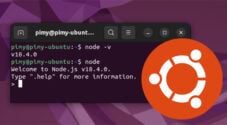
sudo apt install nodejsCopy8. To verify that we have now successfully installed NodeJS, we can run the following command.
This command will retrieve the version number from the runtime environment.
node -vCopyAs we are running the LTS release (v16 at the time of Publish) of NodeJS, we got the following version string in our command line.
v16.14.2CopyInstalling Additional Development Tools
When using NPM to install additional modules you may have issues when the module needs compiling to support the native hardware.
We can install the “build-essential” package to solve most of these issues. This package contains various tools used to compile software.
You can install this package to your Raspberry Pi by using the following command on your device.
sudo apt install build-essentialCopyConclusion
You should now have successfully installed NodeJS on your device at this point in the tutorial.
NodeJS is a powerful JavaScript runtime environment that allows you to run JavaScript natively without a web browser.
Thanks to its speed and relative ease of use, it is a fantastic framework to run on the Raspberry Pi.
If you have had any issues installing the software, please leave a comment below.
Be sure to check out our numerous other Raspberry Pi tutorials and guides.


Does not work.
Hi Peter,
I quickly re-ran through this tutorial and everything is still working as intended.
This will only happen if you failed to follow step 4 which leads to step 5 inserting an empty variable.
Please try following step 4 and step 5 again. You can verify that the variable is being set properly by using the command “
echo $NODE_MAJOR“.Kind regards,
Emmet
This was exactly what I was looking for! Easy to follow and straight to the point. Thanks for the info!
Hi again Emmet,
Thanks for getting back to me. I don’t see a reply button for your message so I’m writing again in the Leave a Reply section for fear a reply to my own message won’t find its way to you. I’m running the 32 lite version with no desktop environment for a headless zero.
Hi Cristian,
Unfortunately, the Raspberry Pi Zero is where you would be having your issue. The Pi Zero only supports ARMv6 which many packages no longer provide builds for. One of those packages just happens to be Node.JS.
There is a workaround to this and that is to use unofficial builds. These are unsupported and are marked as “experimental” but it is a solution. I haven’t tested the following steps myself but they are a combination of what I’ve seen people use around the internet, so please let me know if they work for your or not.
1. You will need to uninstall the version of Node.JS you installed through the guide above, then you must remove the nodesource repository. This is as simple as deleting the sources file we created during the guide and running another “apt update”.
2. Once you have cleaned up after the tutorial above you can download the ARM V6 version of Node.JS to your Raspberry Pi Zero.
3. Next, you need to extract the contents of this archive.
4. once it has finished extracting, we will move it onto the “/opt/” directory. Storing it here should keep it out of the way of other applications on your Pi OS.
5. Finally, we need to link everything to where it would be expected under a normal installation of Node.JS.
Hi,
Thanks for the article. On step 8, when I tried to run node -v, it returned “illegal instruction”. Any thoughts on this? I followed all the previous steps!
Hi Cristian,
Typically that issue is caused by either using to old of a Raspberry Pi. Or an architecture that isn’t supported.
What Raspberry Pi are you using, also what version of the OS are you using? 32-bit or 64-bit.
Cheers,
Emmet
I followed your tutorial twice with fresh versions of RPi OS. It installs node, but not npm!
Hi jhoybs,
I just quickly ran through the tutorial and npm seems to be still getting installed fine. At least with installing Node.JS 20.x.
Have you ran into any errors in particular while following the guide?
Cheers,
Emmet
You may need to logout and login again.
Thanks !
Thanks. But I’ve just tried this and the instructions for ‘current LTS release’, the message is showing ‘deprecated link’.
Hi G,
Thank you for alerting us to this. I have updated the tutorial to use the newer method for setting up NodeJS on the Raspberry Pi.
Please let me know if you have any issues.
Cheers,
Emmet
Thanks a lot.