In this guide, we will be showing you how to use the useradd command to create users in Linux.
Linux is an operating system that supports and uses multiple users. Being a multi-user system means that more than one person can be interacting with the operating system at any one time
When you are managing a Linux system, you will need to learn how to add and remove users and create groups and assign users to them.
Users are also a crucial part of the Linux permission system, with every file and directory needing to be owned by a user.
Within this guide, you will learn how to create new users on your Linux system by using the useradd command.
The command is quite powerful and can perform quite a few different actions when creating a new user.
Syntax of the useradd Command
The syntax of the useradd command is relatively simple to follow. All it requires is two arguments. One is required. The other is optional.
The first argument is entirely optional. This argument is where you can specify options that control the behavior of the command.
The second argument is required and is where you specify the username of the user you want to create.
useradd [OPTIONS] USERNAMECopyTo add a new user to this Linux system using this command, you will need to either be a root user or have superuser privileges.
When creating a new user, the command will take a couple of things into account. The first is the options that you specified when you called the command.
Secondly, it will read the contents of the file located at /etc/default/useradd and utilize these as defaults.
The variables defined within this file will differ depending on the Linux distribution.
Thirdly, the useradd command will also read in the contents of the /etc/login.defs file. It uses this file to set up numerous things, including the password expiration policy and the user ID range.
Adding a New User in Linux
To start this section, we are going to show you the most basic usage of the useradd command to create a user on your Linux system.
The most basic usage involves using useradd, followed by the name for the user you want to create.
useradd USERNAMECopyWhen you run the command, it will create an entry in four different files. These files are /etc/password, /etc/group, /etc/shadow and /etc/gshadow we can run the following command
The system will use these files to set up and handle our users and to see how to authenticate them.
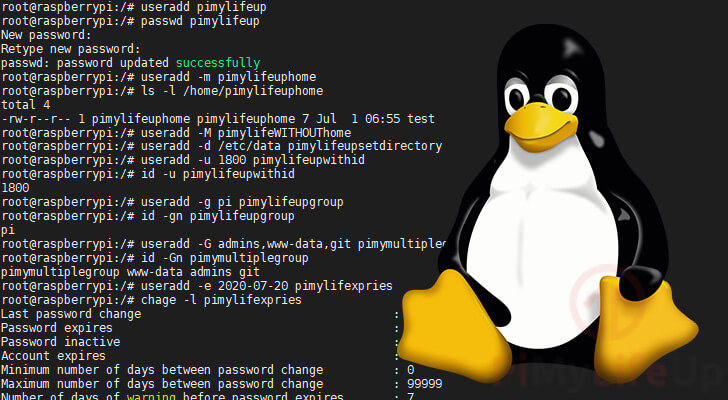
For example, if we wanted to create a user called pimylifeup, we can run the following command
useradd pimylifeupCopyAs we didn’t specify any options, the user will be created without a password meaning you won’t be able to login to it.
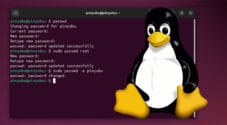
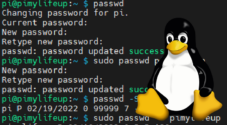
To solve this issue, we can utilize our superuser privileges to set a password for the user by using the command below.
passwd pimylifeupCopyThe passwd command will prompt you to specify the password for the user. Make sure that you set this to something secure.
Creating a Home Directory for the New User
When you run the useradd command on some Linux operating systems, you will find that it does not automatically create a home directory.
We can use an option to get around this behavior called the create home option. This option is symbolized by a lowercase m (-m or --create-home).
useradd -m USERNAMECopyThis option will create the home directory using the same name as the username.
For example, with a user called pimylifeup, the command will create a directory at /home/pimylifeup.
When creating this new directory, the useradd command will copy the files and directories from the /etc/skel folder to it.
You can use this folder to set up files and directories you want to be created for every new user’s home directory.
You can observe the layout of the new users home directory by making use of the list files command.
For example, if we were to observe our newly created pimylifeup users.
$ ls -l /home/pimylifeup
-rw-r--r-- 1 pimylifeup pimylifeup 3771 Jul  1  2020 .bashrc
-rw-r--r-- 1 pimylifeup pimylifeup  807 Jul  1  2020 .profileCopy
From this, we can see that our new user is the owner and group of the file and has received read and write privileges.
Creating a User Without a Home Directory
There are certain cases where you will want to add a new user without creating a home directory.
While some Linux systems do not create a home directory when using the useradd command by default, some do.
To disable the automatic creation of home directories, we can use the no create home option (-M or --no-create-home).
useradd -M USERNAMECopyAs you can see, disabling the home directory creation is reasonably straightforward and requires just adding an option.
Adding a New User with a Custom Home Directory
Now that we understand how to create a home directory when adding a new user, we can now learn how to set a custom directory.
To be able to specify the directory, we can use the home dir option (-d or --home-dir).
By using this option, you will be able to choose any directory as your user’s home. This directory can even exist outside of /home/
useradd -d DIRECTORY USERNAMECopyWhen you use this option, make sure the directory that you are specifying already exists.
The command will not try and create this folder itself. It will also not use any of the files and directories from the /etc/skel/ folder.
For example, if we had a directory called /data/website where we wanted our new user pimylifeup‘s home to exist, we can run the following command.
useradd -d /data/website pimylifeupCopyCreating a User with a Specific User ID
In Linux users are identified by two different identifiers, the first is a unique ID (Referred to as the UID), and a username.
The user identifier (UID) is a unique positive number assigned to every user by the Linux operating system.
The UID forms part of the Linux permission system and is used to determine what files the user can access as well as what actions they can perform.
When a user is created using the useradd command, they are automatically assigned the next available UID. The range of available user ID’s is defined within the login.defs file.
It is possible to override the automatically selected user id by using the -u (or --uid) option. With this option, you can specify the ID that you want to give to your new user.
useradd -u USERID USERNAMECopyFor example, if we were to create a user with the name pimylifeup and wished to assign it to the UID 1800, we can use the following command.
useradd -u 1800 pimylifeupCopyWe can verify that our new user has been given the correct ID by using the id command.
$ id -u pimylifeup
1800Copy
Make sure that the ID you are trying to assign is not already used when you use this option. These IDs must be unique.
Setting a Specific Group ID for a New User
Just like how we can specify a specific ID for a user, it is also possible for us to select the group that we want the new user to belong to.
Groups are used within Linux as a way of organizing users together. Using the Linux permission system, you can give entire groups the right to read, write, or execute certain files and directories.
This means if you want multiple users to modify or use a specific set of files and directories, you should add them within the same group.
By default, when you use the useradd command to create a new user on your Linux system, it will automatically create a group with the same name as your username and use the same ID as your user.
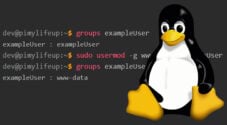
You can override this behavior by using the group id option (-g or --gid).
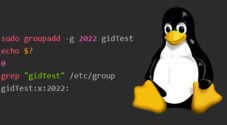
useradd -g GROUPNAME/GID USERNAMECopyThis option allows you to specify the group that you want to assign to your new user. This group can be defined by either using the group’s name or its unique identifier (GID). The groups you specify must already exist on your system.
For example, if we wanted to create a new user called pimylifeup, that belongs to our already existing pi group, we can use the command as we have below.
useradd -g pi pimylifeupCopyLike verifying the UID, it is also possible to see what group our user now belongs to be using the id command and the group name option (-gn).
$ id -gn pimylifeup
piCopy
Creating a User with Multiple Groups
It is also possible to use the useradd command to create a user that belongs to multiple groups.
To specify multiple groups, we will need to make use of the -G option.
useradd -G GROUP1,GROUP2,... USERNAMECopyEach group name should be separated by using a comma (,). Make sure that you do not use spaces between any of the group names. If there is a space, the useradd command will think that you are specifying the username to use.
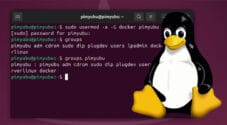
For example, if we were to create our user called pimylifeup and wanted to add it to multiple groups such as admins, www-data, and git.
useradd -G admins,www-data,git pimylifeupCopyYou can check that your user has been created with each of these groups by using the id command.
To make the id command print the name for all of the groups, we will be using the -Gn option.
$ id -Gn pimylifeup
pimylifeup3 www-data admins gitCopy
Adding a User in Linux that Expires
By default, the accounts that are created by the useradd command are set never to expire (The expiry date is set to 0).
However, in some cases, you may want to create a temporary account.
Creating an account with an expiry date means it will cease to function once that date passes. An expired user becomes no longer functional.
To specify an expiry date, we will need to use the expire option (-e or --expiredate).
useradd -e YYYY-MM-DD USERNAMECopyThe expiry date must be set in the YYYY-MM-DD format. For example, the date of the 1st of July 2020 would become 2020-07-01 when used with this format.
If we wanted to create a user called pimylifeupexpires that will expire at the end of July 2020, we would use the following command.
useradd -e 2020-07-31 pimylifeupexpiresCopyWe can verify our user’s age and check when the account expires for our new user by using the chage command.
Like creating a user, to check the age of a user, you will need to have superuser privileges or be a root user.
$ chage -l pimylifeupexpires
Last password change                                    : Jul 01, 2020
Password expires                                        : never
Password inactive                                       : never
Account expires                                         : Jul 31, 2020
Minimum number of days between password change          : 0
Maximum number of days between password change          : 99999
Number of days of warning before password expires       : 7Copy
You can also use this command to modify the expiry date of a user, but we will explain that in another guide.
Hopefully, at this stage, you will now understand how to use the useradd command on your Linux system.
It is a powerful command that can be used to configure numerous settings for your new users.
Be sure to view some of our other command guides to learn how to manage Linux easier.
If you feel like we have missed something or misdescribed the command, then feel free to leave a comment below.