In this tutorial, we will be showing you how to self-host the comic and eBook reader Kavita on your Raspberry Pi.
Kavita is library software for storing and reading comics, eBooks and Manga. If you are familiar with Plex, you will definitely be familiar with how Kavita works.
This software can handle almost all of the popular manga/comic and eBook formats. For example, it has full support for PDF, epub, cbr, cbz, and even raw images. Its reader is even built to be super responsive, so it will display your chosen book or comic well, no matter what device you use.
The Kavita software even has a scraper built in, so it can gather extra information about your books and improve the way they are displayed through the software’s slick web interface.
Kavita is a heavily optimized eBook reader and library that runs perfectly on the Raspberry Pi. The Docker container even has 32-bit builds, so you don’t have to worry about whether you are running a 32-bit or 64-bit operating system.
We will use Docker to set up and run Kavita on our Raspberry Pi, as it makes the whole process relatively simple. Also, thanks to the way containers work, we don’t have to worry about certain packages being available through Raspberry Pi OS.
Please note that the Kavita requires at least ARMv7, so you must use a Raspberry Pi 3 or newer.


Equipment
Below is a list of equipment we used when setting up Kavita on our Raspberry Pi.
Recommended
Optional
This tutorial was last tested on a Raspberry Pi 5 running the latest version of Raspberry Pi OS Bookworm.
Installing and Running Kavita on your Raspberry Pi
Over the next few sections, we will walk you through installing and running the Kavita eBook library and reader on your Raspberry Pi.
These initial steps are run entirely within the terminal. If you are using the desktop variant of Raspberry Pi OS, you can bring up the terminal by pressing CTRL + ALT + T. However, this digital library is perfect for a headless setup.
Preparing your Raspberry Pi
1. Before we install Kavita to our Raspberry Pi, we must ensure that the underlying operating system is up-to-date.
You can update the package list and upgrade any out-of-date packages using the following two commands within the terminal.
sudo apt update
sudo apt upgrade -yCopy
2. After updating your device, your next step is to install Docker on your Raspberry Pi. If you already have this runtime installed, you can skip to step 3.
Docker will make setting up and keeping Kavita updated super easy.
https://pimylifeup.com/raspberry-pi-docker/3. Once you have Docker installed, you will next need to create a directory where we will store the Compose file for Kavita on our Raspberry Pi.
You can create this directory by utilizing the mkdir command followed by the “-p” option. The option we are using will ensure the entire path is created.
sudo mkdir -p /opt/stacks/kavitaCopy4. Now that we have created our directory, let us change into it by using the cd command.
cd /opt/stacks/kavitaCopyWriting a Docker Compose file for Kavita
5. We can now move on to writing a Docker Compose file for Kavita on our Raspberry Pi. A Compose file is like a set of instructions for Docker to follow.
Begin writing this file using the nano text editor by running the following command.
sudo nano compose.yamlCopy6. Within this file, you will want to enter the following lines. Kavita requires a bit of extra configuration that you will need to consider. Mainly, you need to specify where your eBook files are stored.
<DIRECTORYNAME>: Replace this value with the path to where your type of book is stored. The left-side value is where the folder is located on our host machine, and the value on the right side is where it is located in the container.
You can specify as many directories as you would like within the volumes section.
Some examples are the following:- ./manga:/manga- ./ebook:/ebook- ./comics:/comics
<TIMEZSONE>: After specifying your volumes, you must specify your time zone. This value uses a TZ identifier and is written like “Australia/Hobart“.
You can find the correct values for the timezone option by viewing the Wikipedia page on TZ Databases.
services:
    kavita:
        image: ghcr.io/kareadita/kavita:latest
        container_name: kavita
        volumes:
            - ./<DIRECTORYNAME>:/<DIRECTORYNAME>
            - ./data:/kavita/config
        environment:
            - TZ=<TIMEZONE>
        ports:
            - "5000:5000"
        restart: unless-stoppedCopy
7. After writing out the Compose file, you can save and quit by pressing CTRL + X, Y, and then ENTER.
Starting up Kavita on your Raspberry Pi
8. With the Compose file now written, all you need to do to get Kavita up and running on your Raspberry Pi is to run the following command within the terminal.
You can make managing Compose files on your Pi easier by installing software like Dockge or Portainer.
docker compose up -dCopyAccessing the Kavita Web Interface
9. To access the Kavita web interface, you will need to know the local IP address of your Pi.
It is possible to get the IP address of your Raspberry Pi by using the hostname command.
hostname -ICopy10. Within your favorite web browser, you will want to go to the following address.
Ensure that you replace “<IPADDRESS>” with the IP of your Pi.
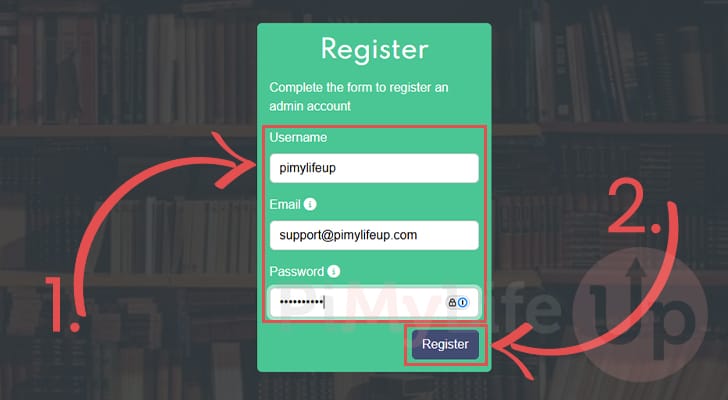
http://<IPADDRESS>:500011. When you first access the Kavita web interface, you must register an account (1.). This first account you create will become your admin user.
After entering your username, email, and password, you can create an account by clicking the “Register” button (2.).
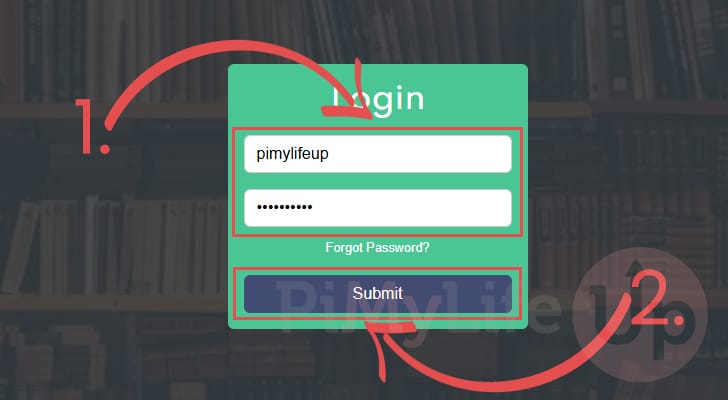
12. After registering your account, use the textbox to fill out the information of your new Kativa admin account (1.).
Once you have entered your username, and password, click the “Submit” button to login (2.).
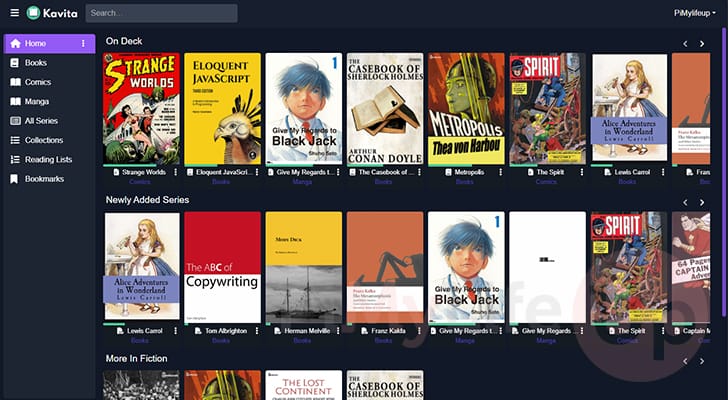
13. Below, you can see that we have successfully installed Kavita on our Raspberry Pi.
You can now configure the software to best suit your needs.
Updating Kavita on your Raspberry Pi
A key advantage of using Docker to run Kavita on your Raspberry Pi is that we can easily update to the latest version with just a few simple commands.
The next few steps will show you how easy it is to move to the newest version of Kavita.
1. Before we can update Kavita we must change to the directory where we wrote the Compose file earlier in this guide.
If you used the same directories as we did, you should be able to change to the correct directory by running the command below.
cd /opt/stacks/kavitaCopy2. Now that you are in the correct place, we need to tell Docker to pull the latest version of the Kavita image to our Pi.
We can do this by using the following command within the terminal. This will download a new image but not upgrade the running container.
docker compose pullCopy3. With a new Docker image saved to your Pi, you can upgrade Kavita to the new release by running the command below.
Docker will detect a new image is available for your Kavita container and automatically restart it.
docker compose up -dCopyConclusion
By this point in the tutorial, you should have the Kavita eBook reader and library installed on your Raspberry Pi.
You can use this server to read and manage your eBooks, comics, and Manga in one place.
Please feel free to post a comment below if you have had any issues getting this eBook server to run on your Pi.
If you liked this tutorial, we recommend that you explore our numerous other Raspberry Pi projects that we have on offer.


I’m having trouble understanding the statement below.
The left-side value is where the folder is located on our host machine, and the value on the right side is where it is located in the container.
My comic files are located on an HDD that has been mounted at “/mnt/usbhdd/comics“ – I assume this goes to the left of the colon in
– ./:/
What goes on the right. Would really appreciate some help here.
Hi Aman,
The right side of the colon represents where that directory will be mounted to within the Kavita container.
For example, for example, if you wanted your comics to be findable at a”/comics” within Kavita you would use the following
Hopefully that makes it a bit clearer, I can try thinking of a different way of explaining it if need be.
Kind regards,
Emmet
Hello and thank you for the Kavita setup, I have been looking for a modern replacement to Calibre books for hosting my electronic books at home with a plex style interface.
I did notice that it can manage books, but I am assuming that this is epub format? A lot of my technical books are pdf format, would you know if it can manage pdfs?
I do know epub will provide a better experience, is there a way to convert pdf to epub, maybe even having the raspberry pi do the heavy lifting to do the conversion for example?
Many thanks and look forward to your thoughts on this.
Hi Ken,
Unless I’m mistaken Kavita is meant to support PDF files.
We have actually converted PDF files to epub in the past for our own book and found the experience to be quite a bit of a mess. I would need to try and dig up the software we were using for it as it has been a couple of years.
Hopefully Kavita will be able to just handle the PDF files natively.
Kind regards,
Emmet