In this tutorial, we will show you how to run Forgejo on a Raspberry Pi.
Forgejo is a self-hosted, lightweight Git service that offers many of the services and features you expect from cloud services like GitHub.
This particular software package is actually a fork of the popular Gitea project. This fork was created after key changes in how Gitea was managed.
Being lightweight makes Forgejo an excellent solution for self-hosting your code repositories on your Raspberry Pi. It can easily run on the Pi’s limited hardware without consuming all the resources.
Please note that, since the Forgejo container we are using only supports ARM64, you must be running a 64-bit operating system. Additionally, you will need to be running a Raspberry Pi 3 or newer.
Equipment
Below is a list of the equipment we used when setting up Forgejo on the Raspberry Pi.
Recommended
Optional
This tutorial was last tested on a Raspberry Pi 5 running the latest version of Raspberry Pi OS Bookworm.
Setting up Forgejo on a Raspberry Pi
In the following steps, we will walk you through all of the steps needed to get Forgejo running on your Raspberry Pi.
Before proceeding, remember that you must be running a 64-bit operating system for this guide. Additionally, you should set your Pi up with a static IP address.
Preparing your Raspberry Pi for Forgejo
1. Before we can install Forgejo on the Raspberry Pi, we need to perform some initial setup steps.
We will update the package list cache to the latest version with the first command. The second command will use this updated list to upgrade out-of-date packages.
sudo apt update
sudo apt upgradeCopy
2. After updating, you must install the Docker runtime to your Raspberry Pi.
If you already have Docker installed, you can skip straight to the next step. Alternatively, follow the guide we have linked below.
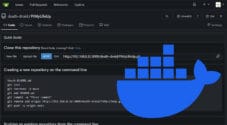
https://pimylifeup.com/raspberry-pi-docker/3. With the Docker runtime installed, our next step is to create a directory to store the Compose file for Forgejo on our Raspberry Pi.
To create this directory, we will use the mkdir command alongside the “-p” option.
sudo mkdir -p /opt/stacks/forgejoCopy4. With the directory created, we can change into it by using the cd command.
cd /opt/stacks/forgejoCopyWriting a Docker Compose File for Forjo
5. Now that we are in the directory we created, we can move on to writing the Docker Compose file for Forgejo on our Raspberry Pi.
A Compose file is a set of instructions Docker will follow to install one or multiple containers. We will use the nano text editor to write this file as it is relatively easy-to-use.
sudo nano compose.yamlCopy6. Within this Compose file, you must fill out the following lines. We will use this Compose file to run both Forgejo and Postgres on our Raspberry Pi.
Within this file, there is one placeholder that you must replace.
<DBPASSWORD>: Replace this placeholder with the password that Forgejo will use to interact with the database. There are two occurrences of this placeholder within the file.
If there is a specific place you want to store your repositories on your Raspberry Pi, replace “./forgejo” with the full path.
services:
  server:
    image: codeberg.org/forgejo/forgejo:16
    container_name: forgejo
    environment:
      - USER_UID=1000
      - USER_GID=1000
      - FORGEJO__database__DB_TYPE=postgres
      - FORGEJO__database__HOST=db:5432
      - FORGEJO__database__NAME=forgejo
      - FORGEJO__database__USER=forgejo
      - FORGEJO__database__PASSWD=<DBPASSWORD>
    restart: always
    networks:
      - forgejo
    volumes:
      - ./forgejo:/data
      - /etc/timezone:/etc/timezone:ro
      - /etc/localtime:/etc/localtime:ro
    ports:
      - "3000:3000"
      - "222:22"
    depends_on:
      - db

  db:
    image: postgres:14
    restart: always
    environment:
      - POSTGRES_USER=forgejo
      - POSTGRES_PASSWORD=<DBPASSWORD>
      - POSTGRES_DB=forgejo
    networks:
      - forgejo
    volumes:
      - ./postgres:/var/lib/postgresql/data

networks:
  forgejo:
    external: falseCopy
7. Once you have filled out this Compose file, save and quit by pressing CTRL + X, Y, and then ENTER.
Starting Forgejo on your Raspberry Pi
8. We now have everything set up and can start Forgejo on our Raspberry Pi by running the command below.
The startup process can take a few minutes as the Pi needs to download both the Forgejo and Postgres containers.
docker compose up -dCopyAccessing the Forgejo Web Interface
9. With Forgejo now running on the Raspberry Pi, you will want to know how to access its web interface.
To access the web interface, you must know your Pi’s IP address. You can easily get this address by using the hostname command.
hostname -ICopy10. Once you know the IP of your Raspberry Pi, go to the following address to access Forgejo.
Ensure that you replace “<IPADDRESS>” with the IP of your Pi,
http://<IPADDRESS>:3000Running through the Initial Setup Screen
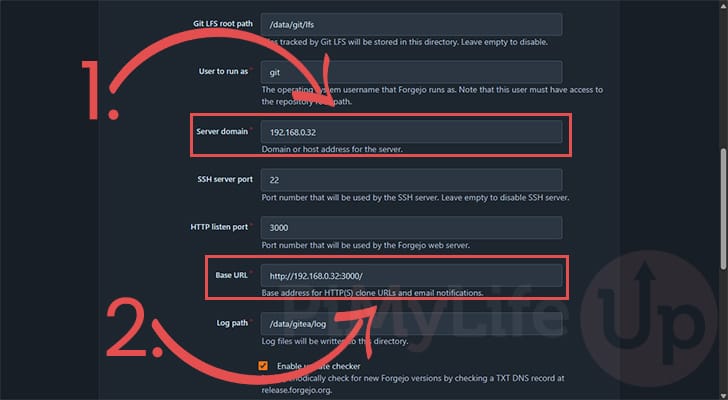
11. When you first access Forgejo, you will need to complete some initial setup steps. Most of these settings must be left as the default; however, there are a couple of options you will want to change.
- The first option you might want to adjust is the “
Server domain“. Using this option, you will want to set either the IP of your Raspberry Pi, your external IP address, or a domain name you have pointing to your Pi.
In this tutorial, we are just running Forgejo for our local network, so we kept this to our Pi’s local IP. - The other option you will want to adjust is the “
Base URL“. This URL will be used to build paths for email notifications and clone URLs.
Typically, this will start with the protocol (http,https), followed by the IP or domain name you plan on using to access your Forgejo installation.
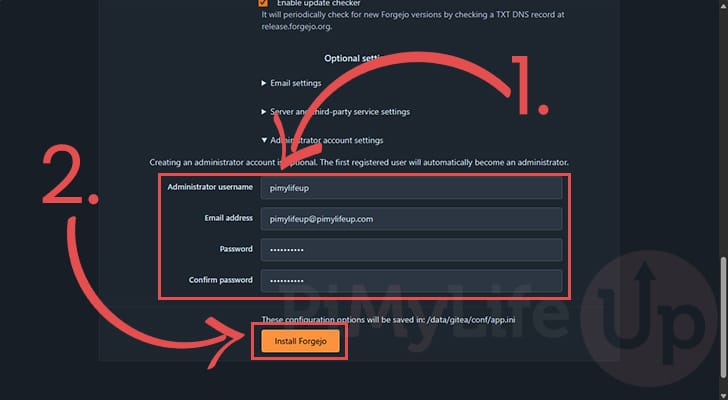
12. You will want to configure the admin username and password next. Bring up these options by clicking the “Administrator account settings” dropdown.
You should now be able to use the text boxes (1.) to fill out the information you want to use for your admin account.
Once you have entered a username and password, click the “Install Forgejo” button (2.) to complete the installation.
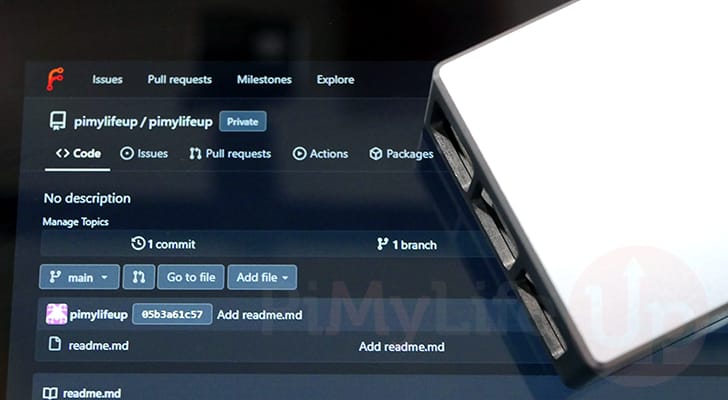
13. At this point, you successfully have Forgejo running on your Raspberry Pi. You can now begin adding repositories and storing your code.

Updating Forgejo on your Raspberry Pi.
In this section, we will show you simple steps to update your Forgejo container to the latest version on your Raspberry Pi.
1. Before we update Forgejo to the latest version, you must change to the directory where we originally wrote the Compose file.
If you followed this guide previously, you can change to the correct directory using the following command.
cd /opt/stacks/forgejoCopy2. Once you are in the right place, you can get Docker to download the latest version of Forgejo using the command below in the terminal.
This command will download a new image but won’t update your running containers.
docker compose pullCopy3. Luckily, Docker also makes moving containers over to a new image simple.
Using the following command, Docker will check all containers mentioned within the Compose file. If Docker sees that a new image is available for a container, it will stop and restart it using the new release.
docker compose up -dCopyConclusion
At this stage in the guide, you should now have the Forgejo Git server up and running on your Raspberry Pi.
Forgejo is an excellent solution for self-hosting your code repositories, as it is lightweight while remaining feature-packed.
Please comment below if you have had any issues running this software on your Pi.
If you liked this guide, we recommend browsing the many other Raspberry Pi projects we have on offer.