In this guide, we will be showing you how to improve the security of your Raspberry Pi.

Improving the security of your Raspberry Pi is a critical task, especially when it is exposed to the internet.
Out of the box, the Raspberry Pi’s main operating system is not very secure, especially when you allow outside networks to access your device.
Within this guide, we will be walking you through some of the best suggestions for improving your Raspberry Pi security.
These suggestions range from changing the default users’ password to set up a firewall to protect your connections.
Equipment List
Below is the equipment we will be using in this guide to improve the security of your Raspberry Pi.
Recommended
Optional
For this guide, we will be assuming that you are running the latest version of Raspberry Pi OS.
These steps were tested on a Raspberry Pi 4 but should work on older versions of the device.
Changing the Default Password
The first and most significant security risk with running Raspberry Pi OS is the default password.
A quick search on the internet will allow anyone to find the default password in seconds, so changing the password is critical.
1. Changing the password of your pi user is a super simple process.
All we need to do is make use of the passwd command.
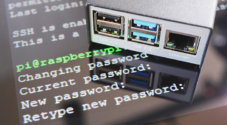
passwd2. You will see the name of the user that you are changing as well as a prompt asking you to enter is password.
Type in the password for the pi user to begin. The default password should be “raspberry“.
Changing password for pi.
Current password:
3. Next, you will be prompted to enter the new password, then re-enter it again.
Whatever password you set, make sure it is somewhat secure.
New password:
Retype new password:
3. Your password should now be successfully updated.
Changing the password will have strengthened your Raspberry Pi’s security. Users will no longer be able to use the default password to gain access.
We can also do a few other things to increase our Raspberry Pi’s security, especially when it comes to the SSH connection.
Keeping the OS Updated
You should always try to keep your operating system up to date as possible to maintain your Raspberry Pi’s security.
Keeping your OS up to date ensures that you should always have the latest fixes, stopping people from exploiting old bugs in software running on your device.
It is recommended that you use the following two commands regularly to update your operating system.
sudo apt update
sudo apt full-upgrade
It is also possible to get your Raspberry Pi to update itself when using either Raspberry Pi OS or other Debian based operating systems such as Ubuntu.
Automatically Upgrading Packages
If you are running Raspbian or Ubuntu, you can set up a package called “unattended-upgrades“.
This package allows you to have your system periodically update the package list then upgrade your packages.
We take a deep dive into installing this and upgrading the packages in our unattended upgrades on Debian and Ubuntu guide.
This guide will also work fine on the Raspberry Pi as most of it’s operating systems are either Debian or Ubuntu based.
Securing your Raspberry Pi’s SSH Connection
In this section, we will walk you through a couple of methods you can use to secure your Raspberry Pi’s SSH connection.
SSH is what you can use to access your Raspberry Pi’s terminal remotely. As helpful as SSH can be, it can become a significant security vulnerability when exposed to the internet.
With a weak password or limited security, someone could potentially gain access to your device and take it over.
Both SSH authentication and two-factor authentication are two great ways of securing your SSH from outside attacks.
Using SSH Key Authentication
One of the biggest ways to help protect your Raspberry Pi’s SSH connection is to use key authentication.
These keys act as a way of identifying yourself to the server. They are considered a safer way of connecting to SSH, especially when paired with a passphrase.
SSH keys are typically much harder for an attacker to interpret and perform a man in the middle attack. You need the public key that matches the private key you are sending.
Additionally, SSH keys are far longer than a typical 32 character password. A standard sized SSH key will be at least 2048 characters long. This key is generated using cryptographically secure methods making it incredibly hard to replicate randomly.
If you combine this with a passphrase, an attacker needs to steal both your private SSH key and work out your password for that key.
You can find out how to use SSH keys to secure your Raspberry Pi by following our guide.
Adding Two-Factor Authentication to SSH
Another way of securing your Raspberry Pi’s SSH connection is to add two-factor authentication.
Using two-factor authentication means a user will have to enter a time-based code from one of the many 2-Auth apps such as Authy.
A user will not be able to gain access to your SSH connection without having to enter a code from your app.
As a bonus, two-factor authentication will work alongside SSH keys, so you can get the security benefit of both.
Be sure to check out our guide on adding two-factor authentication to SSH.
Setting up a Firewall on your Raspberry Pi
A critical part of maintaining the network security of your Raspberry Pi is to make use of a firewall.
A firewall is used to block and allow incoming connections to your device. This will enable you to stop outside users from accessing
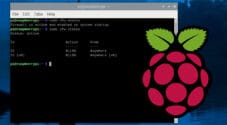
One of the easiest ways of setting up and configuring a firewall is by using UFW.
By default, most firewalls will block all inbound traffic for any port that hasn’t been explicitly opened.
1. Before you begin, make sure you have UFW installed to your Raspberry Pi.
You will find that UFW makes your life easier when dealing with the firewall.
2. Next, we need to open up the SSH port. Otherwise, we won’t be able to access the Raspberry Pi over SSH.
For the SSH port, we can use the limit functionality within UFW.
Limiting the connection will reduce the ability of someone trying to brute force your SSH connection while still allowing access.
sudo ufw limit 22/tcp3. If you are using your Raspberry Pi to host something like an NGINX or Apache web server, then there are a couple more ports you need to open.
We can open up the HTTP (80) and HTTPS (443) ports by running the following commands.
sudo ufw allow 80
sudo ufw allow 443
4. Once you have configured your firewall, you can switch it on by using the command below.
sudo ufw enableIf you want to configure UFW further, be sure to check out our guide on that.
Using Fail2Ban to Block Attackers
Fail2Ban is a tool designed to continually scan your application log files to look for the signs of a potential attacker.
Using a program like fail2ban can help improve your Raspberry Pi’s security as it makes it harder for someone to gain access by brute-forcing the connections.
Bruteforcing is when a user attacks something such as your SSH login and continually tries different passwords attempting to gain access.
Long passwords and SSH keys make it much harder for someone to brute force a connection, Fail2Ban just adds another layer of protection.
To set all of this up, be sure to check out our Raspberry Pi Fail2Ban guide. This guide will show you how to install and configure the software on your Raspberry Pi.
Hopefully, at this point, you will now have some ideas on how to improve the security of your Raspberry Pi.
If you have any suggestions, feel free to leave a comment below.


One more tool to put on this great list: logwatch. This tool will analyze the logs of your services so you can have a good view of what’s going on your server.