In this guide, we will be showing you how to add two-factor authentication to your SSH connection.
Two-Factor authentication is one of the best ways of adding extra security to your SSH connection.
By adding two 2FA to your SSH connection, a user will need to enter a generated one-time password to proceed.
This means that if someone were able to work out your password or steal your SSH keys, they would need to have the two-factor authentication code.
To add 2FA support, we will be using a package that implements the Google Authenticator protocol in a way that it can be used as part of thfe SSH authentication stack.
The package that we are using is available on numerous operating systems, ranging from Debian based systems such as Ubuntu to CentOS or Fedora.
Using 2FA is a fantastic way to help secure your IoT devices such as the Raspberry Pi.
Please note, make sure you have an alternative way of accessing your device before following these steps. Like with any changes to SSH, if you make a mistake it can potentially lock you out of your device.
Installing the Google Two-Factor Authenticator SSH Module
In this section, we will be showing you how to install the pluggable authentication module (PAM) that implements the Google Two-Factor protocol.
Using this module, we will be able to make users have to enter a 2FA token to log in. This extra bit of protection can help improve security where users have had their password or SSH key stolen.
This module will work on any Linux operating system that utilizes SSH. While we tested this tutorial on a Raspberry Pi running the Raspbian operating system, this will work on any operating system.
We have included the steps for operating systems that make use of the apt, dnf, and yum package managers.
apt Based Systems (Debian, Ubuntu, Raspbian)
This section will walk you through the process of installing the 2FA module on an operating system that uses the apt package manager.
Debian based operating systems such as Ubuntu or Raspbian use this package manager.
1. To install the required two-factor authentication module for SSH, we need to update the package list.
Updating the package list will ensure we don’t try to download a package from a non-existent mirror.
sudo apt updateCopy2. Once your package list has finished updating, install the needed 2FA module by using the command below.
Luckily for us, the Google authenticator PAM is available through both the official Debian and Ubuntu repositories.
sudo apt install libpam-google-authenticatorCopyOnce the module has finished installing you can now move on to the next section
yum Based Systems (CentOS, RHEL)
In this section, we will show you how you can install the SSH two-factor authentication module on systems that use the yum package manager.
1. Before installing the 2FA Pluggable authentication module (PAM), we need to add the Extra Packages for Enterprise Linux (EPEL) repository.
This repository contains a range of different packages, including the google-authenticator that we are after.
Make sure you use the correct command for the version of CentOS or RHEL that you are using.
CentOS/RHEL 6
sudo yum install https://dl.fedoraproject.org/pub/epel/epel-release-latest-6.noarch.rpmCopyCentOS/RHEL 7
sudo yum install https://dl.fedoraproject.org/pub/epel/epel-release-latest-7.noarch.rpmCopyCentOS/RHEL 8
sudo yum install https://dl.fedoraproject.org/pub/epel/epel-release-latest-8.noarch.rpmCopy2. Now that we have added the repository, we can now move on to installing the SSH 2FA module we require.
Install the Google Authenticator PAM module by running the following command on your device.
sudo yum install google-authenticatorCopyOnce the package has been installed, you can move on to the next section.
dnf Based Systems (Fedora)
For this section, you will learn how to use the dnf package manager to install the required two-factor authentication SSH module. Fedora is the main operating system that makes use of this package manger.
1. To install the Google Authenticator package, all we need to do is run the following command.
The Google Authenticator package is already available through the Fedora package repository.
sudo dnf install -y google-authenticatorCopyOnce dnf has finished installing the package, we can move on to setting up the two-factor authentication.
Setting up the Two-Factor Authentication SSH Module
Now that we have installed the 2FA module we require for SSH, we can now configure it.
During these steps, we will be generating the code that you will enter into your 2FA application.
1. To begin the setup process, you need to run the following command on your system.
This command will begin the process of creating the authentication token for the current user.
google-authenticatorCopy2. The first question will ask if you want to use time-based authentication tokens.
As most 2FA applications expect your tokens to be timed based, make sure you answer y to this question.
Do you want authentication tokens to be time-based (y/n) y3. You will now be shown a QR code alongside other bits of information.
You can scan this QR code using a 2-Factor app on your phone. If you don’t currently use an application, the Authy, Duo Security, or Google Authenticator.

You should also make a secure backup of the emergency scratch codes.
These scratch codes are the only way of gaining access to your account again if you somehow lose access to your two-factor authenticator. Please note that these codes can only be used once.
4. For the next question, you will be asked if you want to update the current user’s authenticator configuration file.
This file will be saved in your user’s home directory with the name “.google_authenticator“.
Type in y and press the ENTER key to proceed.
Do you want me to update your "/home/pi/.google_authenticator" file? (y/n) y5. You will next be asked if you want to disallow multiples uses of the same token.
This means that two people cannot login to the same account using the same token. You would need to wait another 30 seconds to get a new two-factor token to log in.
We recommend that you enable this option as it will significantly improve your account protection when facing a man-in-the-middle attack.
Type in y and press the ENTER key to proceed.
Do you want to disallow multiple uses of the same authentication
token? This restricts you to one login about every 30s, but it increases
your chances to notice or even prevent man-in-the-middle attacks (y/n) y
6. The next option is whether you want to increase the amount of time the generated code is considered valid.
By default, it is set up so that an additional 30 seconds is allowed on either side of the current time. This means that the previous code will continue to function for the next 30 seconds.
It is possible to increase this so that there is a 4-minute time skew, which greatly increases the number of codes that will be considered valid at any one time.
Unless you have issues with synchronizing the time on your computer, we recommend that you do not answer yes to this option.
To not change the default time skew, type in n then press the ENTER key to proceed.
By default, a new token is generated every 30 seconds by the mobile app.
In order to compensate for possible time-skew between the client and the server,
we allow an extra token before and after the current time. This allows for a
time skew of up to 30 seconds between authentication server and client. If you
experience problems with poor time synchronization, you can increase the window
from its default size of 3 permitted codes (one previous code, the current
code, the next code) to 17 permitted codes (the 8 previous codes, the current
code, and the 8 next codes). This will permit for a time skew of up to 4 minutes
between client and server.
Do you want to do so? (y/n) n
7. Finally, the last question will ask if you want to enable the rate-limiting functionality built into the two-factor authentication SSH module.
With the rate-limiting enabled, a user will not be able to perform more than 3 login attempts every 30 seconds.
To help increase the security of your device, enable this functionality by typing in y then pressing the ENTER key.
If the computer that you are logging into isn't hardened against brute-force
login attempts, you can enable rate-limiting for the authentication module.
By default, this limits attackers to no more than 3 login attempts every 30s.
Do you want to enable rate-limiting? (y/n) y
We can now move on to making SSH make use of two-factor authentication module we just finished setting up.
Making SSH use the Two-Factor Authentication Module
In this section., we will be showing you how to tell SSH to make use of the Two-Factor authentication we set up in the previous section.
Once we enable this, you will be required to make use of the one-time passwords that are now being generated.
Please note that you should not close this SSH session while we configure the SSH daemon.
1. Our first job is to modify the sshd configuration file.
We can begin modifying this file by running the following command.
sudo nano /etc/pam.d/sshdCopy2. Add the following line to the bottom of the file.
This line tells the daemon that it requires the Google Authenticator PAM.
auth required pam_google_authenticator.soOnce you have made this change, save the file by pressing CTRL + X, followed by Y, then the ENTER key.
3. We now need to enable the challenge-response system of the SSH protocol.
Enabling this system will allow SSH to prompt for your two-factor authentication code.
Begin modifying the configuration file that stores this setting by running the following command.
sudo nano /etc/ssh/sshd_configCopy4. Within this file, find and replace the following line. Please note that if your file is missing the “KbdInteractiveAuthentication” option, try looking for “ChallengeResponseAuthentication” instead.
Find
KbdInteractiveAuthentication noReplace With
KbdInteractiveAuthentication yesOnce done, save the file by pressing CTRL + X, followed by Y, then the ENTER key.
5. For our changes to take effect, we need to restart the SSH service.
You can do that by running the following command.
sudo systemctl restart sshdCopyYou should now be asked to enter your two-factor authentication code whenever you try to log in.
Testing the Two-Factor Authentication Login
Now that we have set up SSH to make use of the two-factor authentication PAM, we can move on to testing to make sure it all works.
To test the SSH 2FA functionality, we need to make a new SSH connection to our device.
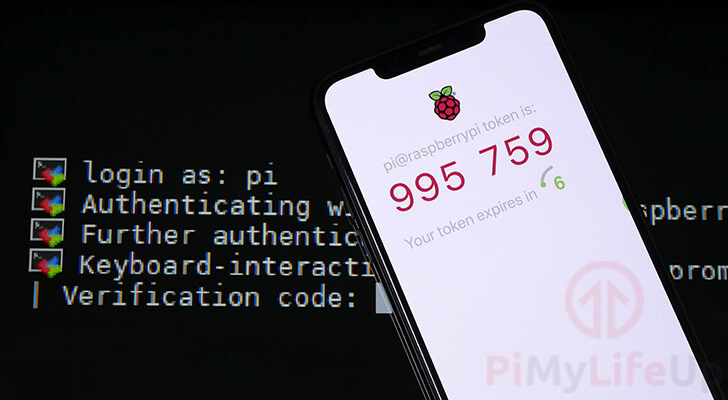
When you try to make a connection, you will be asked to enter your two-factor authentication code to log in.

You will be able to find this token within whatever app you set up. For example, here is a screenshot of our 2FA code being generated within the application Authy.
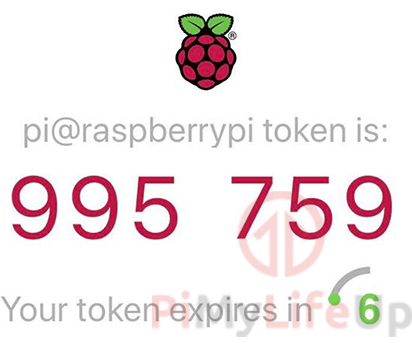
A valid code should be six numbers long.
Adding 2FA Support for SSH Keys
By default, SSH is set up so that an SSH Key supersedes any other form of authentication, including our 2FA tokens.
If you are not using SSH keys, do not follow this section.
1. To solve this problem, we will need to modify our SSH daemon configuration again by running the following command.
sudo nano /etc/pam.d/sshdCopy2. Within this file, we need to find and replace the following line.
By commenting out the line, we will be disabling the default UNIX configuration. We to stop the prompt from asking for our password instead of the 2FA token.
Find
@include common-authReplace With
#@include common-authSave the file by pressing CTRL + X, followed by Y, then the ENTER key.
3. Next, we also need to modify our other SSH configuration file.
In this file, we will be telling SSH that it needs to ask for the 2FA verification code to proceed.
sudo nano /etc/ssh/sshd_configCopy4. To the bottom of this file, add the following configuration line.
This line defines the authentication methods that we need to use.
Specifying the public key first tells SSH that we are expecting an SSH key. The second part says that we need to wait on an interactive keyboard event. In our case, this event will be our 2FA token.
AuthenticationMethods publickey,keyboard-interactiveOnce you have made this change, save the file by pressing CTRL + X, followed by Y, then the ENTER key.
5. Finally, we need to restart the SSH daemon by using the following command. Restarting SSH will make sure that it uses all our changes.
Make sure you do not disconnect from your current SSH connection before you verify everything is functioning.
sudo systemctl restart sshdCopy6. We will also now be asked to enter the two-factor authentication code when we try to make a connection using an SSH key.

At this point, you should now have two-factor authentication set up for your SSH connection.
By adding 2FA, it will be a lot harder for someone to gain access to your device over SSH. A user will have to access both your password and the 2FA secret to be able to breach it.
If you have run into any issues with this guide, feel free to leave a comment below.


The “2FA Support for SSH Keys” section was was slightly incorrect for Raspberry Pi (bookworm) as possibly other distros
The “ChallengeResponseAuthentication yes” (added earlier) has now been deprecated and replaced with
“KbdInteractiveAuthentication” and was set to “no”
Change the line to
KbdInteractiveAuthentication yes
and delete the line “ChallengeResponseAuthentication yes” added previously
Also make sure the option “PasswordAuthentication” is set to no
This is the error message I was getting with “ChallengeResponseAuthentication yes”
Disabled method “keyboard-interactive” in AuthenticationMethods list “publickey,keyboard-interactive”
I found this didn’t work until i set the following setting in /etc/sshd_config
UsePAM yes
If you misplace the emergency scratch codes, is there a way to view them again or do you need to rerun the setup process?
Hi Cosmo,
For security reasons these codes are only generated during the setup process.
To gain access to them you will need to rerun the setup process and generate a new 2FA code.
Cheers,
Emmet
HI There,
Great Tutor…. what will happen when the Pi need to restart or power cut off… If 2Way not work anymore, how can you reach your Pi then?
Hi Peter,
Two factor authentication for SSH should continue to work after your Raspberry Pi restarts.
Unless im misunderstanding you question?
Cheers,
Emmet