In this guide, you will be learning how to enable unattended-upgrades on Debian based operating systems such as Ubuntu.
Unattended upgrades are an incredibly handy feature that you can enable on Debian systems by installing a special package called unattended-upgrades.
The most significant advantage of enabling this is that you can ensure security upgrades are periodically applied to your device.
This feature is useful for devices that you don’t actively manage and need to ensure security vulnerabilities areroutinely patched.
One attack route that many hackers rely on is servers running out of date software that has active exploits. Using something like unattended-upgrades helps reduce the potential attack vector of your system.
Of course, there is one disadvantage to using unattended-upgrades on Debian/Ubuntu. That disadvantage is the small chance that it could cause unplanned downtime.
While unlikely, there is still a chance a package with potential issues gets installed. You may want to avoid using unattended-upgrades on critical services that you can’t afford to suffer downtime on.
Table of Contents
- Installing the unattended-upgrades Package
- Configuring Unattended Upgrades on your Debian System
- Enabling the Automatic Unattended Upgrade
Installing the unattended-upgrades Package
Our first step is to get the unattended-upgrades package installed to your Debian based operating system.
1. Before we continue, we need to make sure that the current system has the latest package list.
You can update the package list by using the update functionality of apt.
While we are at it, we will also be performing an upgrade to ensure all the install packages are up to date.
sudo apt update
sudo apt upgradeCopy
2. With our package list updated we can now proceed to install the unattended-upgrades package.
To install the package, all you need to do is run the following command.
sudo apt install unattended-upgradesCopy3. With the package installed, we can now proceed to configure and enable the package on your Ubuntu or Debian based system.
Configuring Unattended Upgrades on your Debian System
This section will be walking you through some of the steps to configuring unattended-upgrades for your needs.
Within this file, we will be able to modify what packages are automatically updated and
1. You can begin modifying the configuration file by running the following command.
We will be using the nano text editor for our guide, but you can use whatever you feel comfortable with.
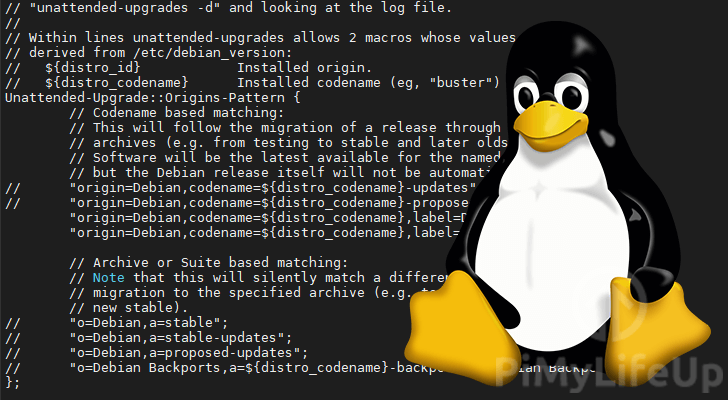
sudo nano /etc/apt/apt.conf.d/50unattended-upgradesCopy2. Within this file, you will see many lines that dictate how the unattended-upgrade package will work.
Any line that has a double forward-slash (//) in front of it are ignored. You can remove these to enable that option.
Amongst all the options, there are two important lists that we will go in to shortly. Using these lists, you can dictate what packages should be automatically upgraded.
Additionally, you can even blacklist specific applications from being automatically upgraded.
3. Remember that when you have finished modifying the file to save it.
If you are using nano, save by pressing CTRL + X, followed by Y, then ENTER.
Macros to Make Configuring Easier
Within the configuration file, you can make use of two handy macros. The values for these macros are automatically retrieved using lsb_release on both Debian and Ubuntu.
These macros allow rules you define to continue to work even if the distributions id or codename changes.
The first macro that we will be looking at is “${distro_id}“.
This macro will be replaced with the ID of the distribution. For example, on Ubuntu, the macro “${distro_id}” would be replaced with “Ubuntu“.
${distro_id}The second macro is the following “${distro_codename}“.
This macro will be automatically replaced with the codename for your distribution. If you are running a Debian system, this will be something like “Buster“.
${distro_codename}Keywords To Look Out For
When configuring the unattended-upgrades package, you will run into some keywords that are used for defining a repository you want automatic upgrades from.
In this section, we will give you a brief overview of these keywords and example values you might see for them.
Using the table below, you can see what each of these keywords is and an example of a correct keyword value.
| Keywords | Example Values |
|---|---|
| a, archive, suite | “stable”, “focal” |
| c, component | “main”, “contrib”, “non-free”, “universe” |
| l, label | “Debian”, “Debian-Security” |
| o, origin | “Debian”, “Unofficial Multimedia Packkages” |
| n, codename | “jessie”, “jessie-updates”, “buster”, “focal” |
| site | “http.debian.net” |
Controlling which Packages are Upgraded
The first thing we will to learn is how to control what packages we wanted to be automatically upgraded.
There are two ways of achieving this. One way gives you more fine-grained control over what packages are automatically upgraded.
The other way is easier to whitelist using the origin name, and the archive name.
Your distributions default configuration file may use either one of these as its base version. Don’t be worried if you see one list but not the other.
Using the Allowed Origins Option
The first method we are diving in to is the easiest one but doesn’t give you much fine grained-control.
This method is called the “allowed origins” method. It allows you to easily specify origins you want packages to be automatically upgraded from.
Using this, you can whitelist an entire repository by referencing the origin’s id name and the archive name.
Within your configuration file, you might see a section as we have below.
Unattended-Upgrade::Allowed-Origins {
        "${distro_id}:${distro_codename}";
        "${distro_id}:${distro_codename}-security";
};
The list of allowed origins is defined by “Unattended-Upgrade::Allowed-Origins { };“.
Each allowed origin is specified on a new line and uses the format of the origin name followed by the archive name. These are separated by a colon (:).
"ORIGIN:ARCHIVE"Retrieving the Origin and Archive Names
You can get the required values for your repositories by making use of the following command.
apt-cache policyThis command will return a list of your package repositories, providing all the details you require.
Below we have an example of what the result of this command would look like.
Package files:
 100 /var/lib/dpkg/status
     release a=now
 500 http://ppa.launchpad.net/ondrej/php/ubuntu focal/main amd64 Packages
     release v=20.04,o=LP-PPA-ondrej-php,a=focal,n=focal,l=***** The main PPA for supported PHP versions with many PECL extensions *****,c=main,b=amd64
     origin ppa.launchpad.net
 500 http://raspbian.raspberrypi.org/raspbian buster/non-free armhf Packages
     release o=Raspbian,a=stable,n=buster,l=Raspbian,c=non-free,b=armhf
     origin raspbian.raspberrypi.org
 500 http://raspbian.raspberrypi.org/raspbian buster/contrib armhf Packages
     release o=Raspbian,a=stable,n=buster,l=Raspbian,c=contrib,b=armhf
     origin raspbian.raspberrypi.org
 500 http://raspbian.raspberrypi.org/raspbian buster/main armhf Packages
     release o=Raspbian,a=stable,n=buster,l=Raspbian,c=main,b=armhf
     origin raspbian.raspberrypi.org
The origin is designated by o= and the archive name is designated by a=.
Make a note of the origin, and the archive for the repository that you want your packages automatically updated from.
Adding a New Allowed Origin to the List
Adding a new allowed origin is an incredibly simple process.
For this example, let’s say that we had a repository with the origin of “LP-PPA-ondrej-php” and the archive name of “focal“.
We can take our previous list that has the following values.
Unattended-Upgrade::Allowed-Origins {
        "${distro_id}:${distro_codename}";
        "${distro_id}:${distro_codename}-security";
};
Then we can add a new line to it, referencing our new origin name and its archive name.
Unattended-Upgrade::Allowed-Origins {
        "${distro_id}:${distro_codename}";
        "${distro_id}:${distro_codename}-security";
        "LP-PPA-ondrej-php:focal";
};
You could adjust this even further by replacing focal with a macro.
As focal is the code name for Ubuntu 20.04, we can use the “${distro_codename}” macro instead.
Unattended-Upgrade::Allowed-Origins {
        "${distro_id}:${distro_codename}";
        "${distro_id}:${distro_codename}-security";
        "LP-PPA-ondrej-php:${distro_codename}";
};
Using the Origin Pattern Option
You can also use the “Origins-Pattern” option to give yourself a bit more control over the selected package.
Below is an example of what the configuration could look like.
Unattended-Upgrade::Origins-Pattern {
        "origin=Debian,codename=${distro_codename},label=Debian";
        "origin=Debian,codename=${distro_codename},label=Debian-Security";
};
The way the unattended-upgrade package works is by checking the package repository’s metadata to see if it matches a defined set of rules.
Each line within this list dictates a new rule to check the repositories against. If a repository’s metadata matches one of the patterns, the packages provided from that repo will be updated.
You can see that the origin, codename, and label have all been defined in the examples ahove. The unattended-upgrades package will only process repositories that match all three conditions.
Retrieving Repository Information
When you want to add a repository to your origin pattern, you may want to retrieve the required information from them.
To be able to get this information, we can make use of the “apt-cache” command.
apt-cache policyCopyThis command will return each repository that has been added to your list.
For each repository you will be able to get the origin(o), archive(a), codename(n), label(l, and component(c).
Using these values, you will be able to create a pattern to match your needs, so make a note of them.
Adding an Origin Pattern to the List
Adding a new origin pattern is a fairly straightforward process.
You can either use the shortened or long names for each keyword. If you are unsure what these are, you can refer to our “Keywords To Look Out For” section above.
To define a new pattern, you need to use the following basic setup.
Your pattern should be surrounded in double quotation marks and be ended with a semicolon(;).
Each keyword that you want to match should be separated by a comma (,). For example, if we wanted to specify an origin and codename we would use something like "origin=VALUE,codename=VALUE";
"KEYWORD=VALUE[,KEYWORD=VALUE ...]";To put this to use, let’s add the popular PHP backport repository to our list by adding the following line.
For this example, we will be specifying the origin, codename, and archive.
"origin=LP-PPA-ondrej-php,codename=focal,archive=focal";When added to the list itself, you should end up with something like we have below.
Unattended-Upgrade::Origins-Pattern {
        "origin=Debian,codename=${distro_codename},label=Debian";
        "origin=Debian,codename=${distro_codename},label=Debian-Security";
        "origin=LP-PPA-ondrej-php,codename=focal,archive=focal"
};
Blacklisting Packages from an Unattended-Upgrade
Suppose you wanted particular packages to be blocked from being automatically upgraded. In that case, you can also do that by using the configuration file.
Within your config file, you might see a block of text, as we have below. This block defines the package blacklist.
Unattended-Upgrade::Package-Blacklist {
    //  "linux-";
};
One thing to note about this list is that it makes use of Python regular expressions. You can read up on these through the official Python 3 documentation.
The format for adding a rule is a relatively simple process. The rule should be on a new line, surrounded in double-quotes (" ") and ended with a semicolon (;)
We aren’t going to dive too far into this but we will be covering some very basic rules that you should know when defining these rules.
A Rule with Just Text Matches All
The first thing to make a note of is that text without the anchor character ($) will match all packages starting with the same text.
If we were to use the text “linux-“, it will match any string starting with it.
For example, if we had a package called “linux-headers” or “linux-kernel“, both would be blocked by our “linux-” blacklist.
Use $ To Define a Rule Explicitly
To stop a rule from matching all text that starts with the same name, we can use the anchor character ($).
By inserting this character at the end of a rule, we tell it that the name should be stopped at that point.
For example, if we wanted to stop the git package from being updated, we could use the rule “git$“.
Using the anchor character at the end of a package with the name of let’s say “gitlab” would not be blocked from being updated.
Escape Special Characters
The last rule we will be touching on is that special characters need to be escaped.
Escaping characters is a relatively simple concept to understand. All you need to do is use a backward slash (\) next to any special character.
If we were to use a plus symbol (+) in the rule name, for example, we would need to use a backward slash (\).
For example, let us say that we wanted to stop the “libstdc++” package from being updated.
To do this, we would need to modify it, so it looks like this, with each plus symbol being escaped.
"libstdc\+\+$";As an extra measure, we also added the anchor character, so it will only block this package from being updated.
Enabling the Automatic Unattended Upgrade
In this section, we will show you how to enable and configure the automatic upgrader’s behavior.
Using this, we can adjust things like the priority of the periodic upgrader and schedule it to clean up old packages.
1. We need to create or modify another file within the “/etc/apt/apt.conf.d” directory.
Let us use nano again to begin writing to the autostart configuration file.
sudo nano /etc/apt/apt.conf.d/20auto-upgradesCopy2. Within this file, you should at least have the following two lines.
If they do not exist, make sure you add them as these two are required to make the unattended-upgrade package work.
APT::Periodic::Update-Package-Lists "1";
APT::Periodic::Unattended-Upgrade "1";
THe first line is telling the package manager that it should periodically upgrade the package list. If we don’t update the package list, the package will never know that new updates are available.
The second line tells the package manager to run the unattended-upgrade package. This is the package that will check for updates for your specified repository and automatically upgrade them.
The number referenced at the end of each line is the number of days before it should be executed again. So 1 is every day, 2 is every two days and so on. If you set this value to 0, it will disable that option.
3. There are also a couple of additional configurations that you can use that we will quickly explore.
APT::Periodic::Download-Upgradeable-Packages "NUMDAYS";The first of these options allows you to get the apt package manager to download upgradeable packages every certain number of days.
Even though the packages are downloaded automatically, it will not install them until either the unattended-upgrades package installs them or an upgrade is manually ran.
Typically you will probably want this to run daily.
APT::Periodic::AutocleanInterval "NUMDAYS";This option allows you to run an auto-clean on your package cache.
An auto clean will remove any obsolete packages that are no longer in use from your system. The auto-clean helps stop your APT cache from becoming bloated.
The auto-clean does not need to be executed daily, typically once a month or every 21 days is more than enough to keep the cache clean.
4. Once you have made the changes to the file, you can now save it.
To save the file using nano, you can press CTRL + X, followed by Y, then ENTER.
5. At this point, you should now have the unattended-upgrade package successfully set up and configured on your Ubuntu or Debian based device.
You can test your configuration by running the following command.
sudo unattended-upgrade -dCopyThis command launches the upgrade tool in debug mode allowing you to check for any errors.
At this point, you should hopefully have set up automatic updates on your Debian or Ubuntu-based device.
If you have run into any issues with configuring the unattended-upgrades package, feel free to leave a comment below.

I think i found the solution for those who are wondering
edit the file:
For those looking for more granular control for when unattended-upgrades executes, you can specify exact times if you use systemd timers.
There are two systemd timers used to control this,
apt-daily.timer(for updating apt) andapt-daily-upgrade.timer(for apt upgrades and cleaning).1. To do this, first, in
/etc/apt/apt.conf.d/20auto-upgrades, set each numerical value to the word “always” example:2. Make sure to CTRL + x and save.
3. Then, run the following command:
4. Add the following information above the line “
### Lines below this comment will be discarded” –NOTE: You need to include the first blank “
OnCalendar=” line, as you need to reset any previous timer.OnCalendar is a fully configurable field with numerous syntax options. This particular configuration says to run the timer on every Saturday at 10pm. See https://wiki.archlinux.org/title/systemd/Timers for more options
The “
Persistent=true” line states that in case of failure (i.e., power outage), the timer should trigger at next available opportunity.5. Make sure to exit and save via CTRL + X. It will save it to an “override” file, so don’t worry if the filename it shows doesn’t match up.
6. Then, run the following command:
7. Add the following information above the line “
### Lines below this comment will be discarded” –8. Make sure to CTRL + X and save.
NOTE: This will cause the upgrade and cleaning processes to execute (as setup in your 50unattended-upgrades configuration file) every Sunday morning at 1am.
9. When finished, run:
10. To check the status of each timer and to verify next trigger, run:
Log files of activity are stores under
/var/log/unattended-upgrades/And there you go. Enjoy!
Nicely done!
I cannot see any option where i can get the machine to reboot when a new kernel has been updated?
Very good explanation! Thanks you so much.