In this guide, you will learn how to install the Ubuntu Server operating system to your Raspberry Pi.
Ubuntu Server is a stripped-back version of the Ubuntu operating system, designed for a server environment where there is no real need for a desktop GUI.
Despite the lack of a graphical interface, there is no other big item that differentiates Ubuntu Server from Ubuntu Desktop as they both make use of the same kernel.
One of the advantages of using the Ubuntu Server operating system over Raspbian is that it comes with 64-bit enabled builds.
If you are used to using Raspbian, then you will be okay with using Ubuntu Server as they are both Debian based.
Equipment List
Here is a list of the equipment we recommend for this guide on installing Ubuntu Server on your Raspberry Pi.
Recommended
- Raspberry Pi Amazon 1, 2, 3 or 4
- Micro SD Card Amazon
- Power Supply Amazon
- Ethernet Cable Amazon or Wi-Fi Amazon
Optional
Downloading Ubuntu Server for your Raspberry Pi
In this section, we will show you the different versions of the Ubuntu Server that you can download for your Raspberry Pi.
You need first to decide whether you want to run Ubuntu Server 18.04 LTS or Ubuntu Server 20.04 LTS.
The next thing you need to decide is whether you want to run a 32-bit or 64-bit version on your Raspberry Pi.
There are some advantages to a 64-bit build of Ubuntu, such as access to more of the Pi’s RAM within 64-bit applications. Using 64-bit builds is especially useful for the 4GB models of the Raspberry Pi 4.
Ubuntu Server 20.04 LTS for the Raspberry Pi
We have split the images below in to both the 32-bit and 64-bit versions.
The 32-bit version of Ubuntu Server 20.04 supports the Raspberry Pi 2, 3, and 4.
The 64-bit version only supports the Raspberry Pi 3 and 4. Despite supporting the Pi 3, you will see most improvements of using 64-bit when using the newer Pi 4 and its increased RAM amounts.
ARM 32-bit
Download Ubuntu Server 20.04 for Raspberry Pi 2, 3 and 4 (ARM 32-bit)
ARM 64-bit
Download Ubuntu Server 20.04 for Raspberry Pi 3 and 4 (ARM 64-Bit)
Ubuntu Server 18.04 LTS for the Raspberry Pi
Below you can find the latest available downloads of Ubuntu Server 18.04 for your Raspberry Pi.
We have provided you all of the official versions of the OS for all supported Raspberry Pi’s. These versions include both the 32-bit and 64-bit operating systems.
ARM 32-bit Builds
Below you can find the 32-bit builds of Ubuntu 18.04 for your Raspberry Pi. For these, there are separate builds for the Raspberry Pi 2, 3, and 4.
Raspberry Pi 2
Download Ubuntu Server 18.04 LTS for the Raspberry Pi 2 (ARM 32-bit)
Raspberry Pi 3
Download Ubuntu Server 18.04 LTS for the Raspberry Pi 3 (ARM 32-bit)
Raspberry Pi 4
Download Ubuntu Server 18.04 LTS for the Raspberry Pi 4 (ARM 32-bit)
ARM 64-bit Builds
Below you can find the 64-bit builds of Ubuntu 18.04. These builds are only available for the Raspberry Pi 3 and 4.
These 64-bit builds are useful for those using the Raspberry Pi 4 with a more considerable memory.
Raspberry Pi 3
Download Ubuntu Server 18.04 LTS for the Raspberry Pi 3 (ARM 64-bit)
Raspberry Pi 4
Download Ubuntu Server 18.04 LTS for the Raspberry Pi 4 (ARM 64-bit)
Installing Ubuntu Server to your Raspberry Pi
In this section, we will be showing you how to write your downloaded image to your Raspberry Pi.
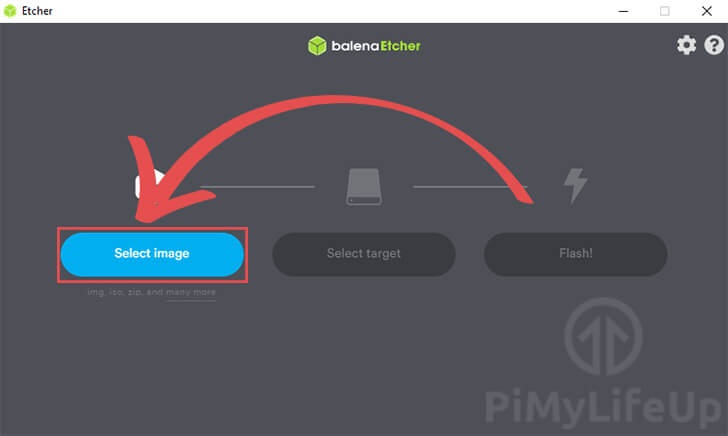
1. To write the image to an SD card, we are going to make use of the tool called Etcher.
If you don’t already have Etcher installed, you can download it from the Balena Etcher website.
2. Within the Etcher software, click the “Select Image” button.
This button will bring up a file dialog box, use it to select the version of Ubuntu that you want to install.
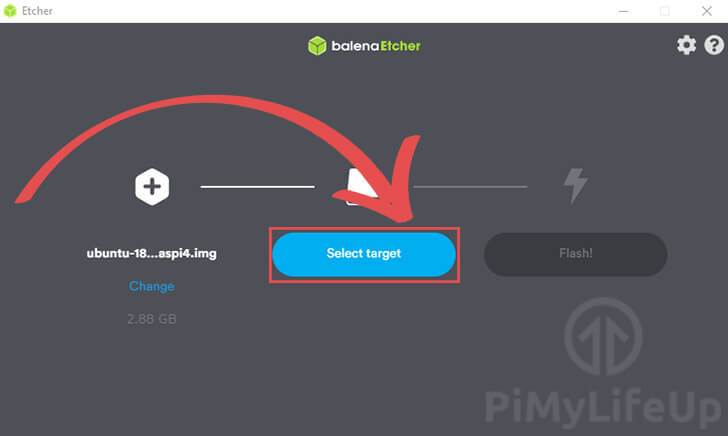
3. With the image selected, we need to click the “Select target” button.
This button will get you to select the SD card you want to write to. Make sure you choose the correct one as Etcher will format the device before writing to it.
4. Finally, click the “Flash!” button to begin writing the operating system to the SD card.

5. Once the writing process has completed, all you need to do is transfer the SD card to your Raspberry Pi and turn it on.
You should now have a copy of the Ubuntu Server operating system running on your Raspberry Pi.
Default Login Details for Ubuntu Server on the Pi
To login to your new installation, you will need to use the default login details.
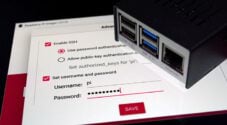
The default username is “ubuntu“.
The default password is “ubuntu“.
When you first log in using these details, you will be asked to change the password to something more secure.
Enter a secure alternative password to continue using the operating system.
Upon changing your password, you will be required to log in again using the new password you set.
Setting up SSH for Ubuntu Server
Luckily for us, the Ubuntu Server distribution for the Raspberry Pi already has SSH installed. However, SSH is not enabled by default.
There are a couple of ways to enable SSH on your device.
Enabling SSH using the Boot Directory
The first way is to add a file called ssh to the “system-boot” directory. You can access this directory even while the SD Card is plugged into your computer.
This is the same directory where the “config.txt” and “cmdline.txt” files sit.
Enabling SSH this way is helpful as it means you can run your Raspberry Pi completely headless.
Enabling SSH from your Raspberry Pi
If the ssh file method doesn’t work, you can also install and enable SSH on your Raspberry Pi itself.
However, you will need a keyboard, mouse, and screen for this method as you will need to access the command line.
1. The first thing we should do is make sure that all the packages are up to date.
To update all packages, all you need to do is run the following two commands.
sudo apt update
sudo apt upgrade
2. Let’s make sure that the OpenSSH server is installed by running the following command.
sudo apt install openssh-server3. Our next step is to enable and start up the SSH service.
sudo service ssh enable
sudo service ssh start
Once you have completed these steps, you should now be able to SSH into your Raspberry Pi.
At this stage, you should now have successfully installed the Ubuntu Server operating system to your Raspberry Pi.
If you have run into any issues with running Ubuntu Server on your Raspberry Pi, then feel free to drop a comment below.


Thank you for having updated instructions that actually work and didn’t lead me down a 3 or 4 day rabbit hole. I cannot begin to explain how many sleepless nights (often in a row) I’ve spent typing “sudo” this and “install” that to find out that the instructions I’ve followed were old, wrong, or written by someone who was or should be dropped on their head several times. My gratitude for simple, straight-forward instructions cannot be expressed appropriately by the words thank you, but that’s all I can do right now. I’m new to the Pi-niverse and I’ve already followed the dumbest instructions that I’ve ever ready on Ubuntu’s site. For the server installation, they seriously have the user type in commands and then afterwards instruct them to install the program that runs the commands. Once again, where a technical writer is needed, a programmer has failed.
you should update this article to reference links to Ubuntu Server 20 not 19 as 19 no longer exists
Hi Jay,
Thank you for the heads up.
We have updated the article with the latest links.
Cheers,
Emmet