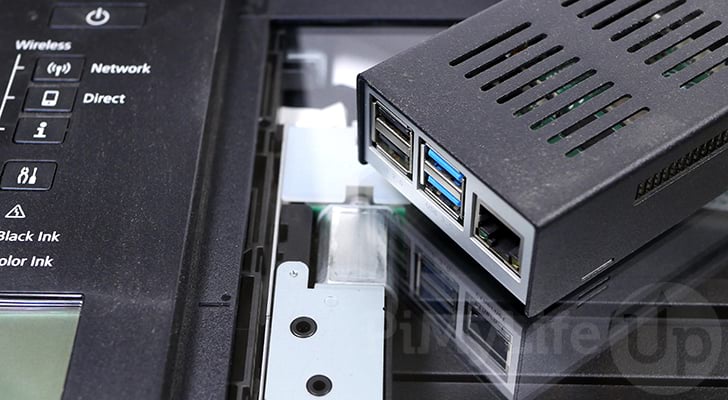
This tutorial will show you how you can set up your Raspberry Pi as a scanner server by using the SANE software.
For those who have never heard of this software before, SANE stands for Scanner Access Now Easy. This software acts as a standardized way for accessing scanners.
Within this guide, you will learn how to use SANE to talk with a supported scanner connected to your Raspberry Pi.
We will even show you how to take this a step further by turning your Raspberry Pi into a scanner server, allowing you to scan documents from an unconnected computer.
Setting your Pi up as a scanner server is a great way to modernize your aging scanner. For example, instead of buying a Wi-Fi enabled scanner you can instead introduce that functionality by using a device like the Raspberry Pi Zero.
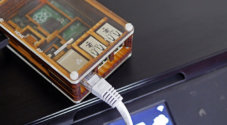
This project is a perfect accompaniment for those already using their Raspberry Pi as a print server.
Please note that as Windows uses its own proprietary API, SANE does not work natively with the built-in utilities. Instead, you will need to use a 3rd party client that supports the SANE protocol.
Equipment
Below is a list of the equipment we used when setting up our Raspberry Pi as a scanner server.
Recommended
- Raspberry Pi Amazon
- Micro SD Card Amazon
- Power Supply Amazon
- Ethernet Cable Amazon or Wi-Fi Amazon
- Scanner Amazon
Optional
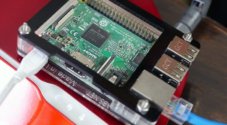
This tutorial was tested on a Raspberry Pi 400 running the latest version of Raspberry Pi OS Buster.
Installing the SANE Software on the Raspberry Pi
Installing the SANE software to a Raspberry Pi is a straightforward process as it is available from the official package repository.
The only downside of this is that the version of SANE on the Pi’s repository is usually much older than the official release.
1. At the time of publishing, the version of the scanner software provided through the repository is 1.0.27. You can check the list of supported scanners by this version on the official SANE website.
If this version does not support your scanner, then check the latest compatibility list. If the latest version supports the scanner, please skip to the “Compiling SANE from Source Code” section.
2. Before installing SANE, we should update the package list and upgrade any out-of-date packages.
We can perform both of these actions by using the following two commands on your device.
sudo apt update
sudo apt upgrade -y
3. With the package list up to date, we can now install SANE using the command below.
sudo apt install saneThis is all you need to get SANE running on a Raspberry Pi. Most scanners will hopefully work out of the box.
However, some brands will require some additional drivers to be installed. One of the most prominent scanner and printer manufactures that have this requirement is HP.
4. If you are using an HP scanner, you will need to install additional drivers for it to work with the SANE software. on your Raspberry Pi
You can install the package that contains the required drivers by running the command below.
sudo apt install hplip5. With the scanner server installed on your Raspberry Pi, you can now skip to the section titled “Testing your scanner with SANE“.
Compiling SANE from Source Code
To get the latest version of SANE onto our Raspberry Pi, we will need to compile it from the source code. Compiling this software will require us to install several new packages and complete a few extra steps.
However, by the end of this section, you should have a version of the scanner server with the best available compatibility.
1. Our first step is to make sure our package list is entirely up to date. Updating the package list should stop us from trying to download packages from mirrors that are not currently available.
Update the package list on your Raspberry Pi by using the following command.
sudo apt update2. Now that we have our package list updated we need to install several libraries and compilers required to compile the “sane-backend” to our Raspberry Pi.
Install all of the required libraries by running the command below in the terminal of your Raspberry Pi.
sudo apt install libusb-dev libjpeg-dev libgphoto2-dev libieee1284-3-dev git build-essential autoconf autoconf-archive automake libtool autopoint3. Let us start by putting one of our new packages to use by cloning the SANE backend code to our Raspberry Pi.
Clone this code using the git package by using the following command.
git clone https://gitlab.com/sane-project/backends.git sane-backend4. We need to change into the directory containing our newly cloned code by using the command below.
cd sane-backend5. As we are cloning SANE directly from their public repository to our Raspberry Pi, we need to run their “autogen.sh” script before continuing.
This script helps prepare the code so that it can be compiled on the system.
./autogen.sh6. Our next step is to run the configure script by using the command below.
This script will prepare, the code for our current system setup. It will enable or disable features depending on whether the required package exists on the current system.
./configure \
    --prefix=/usr/local \
    --libdir=/usr/local/lib \
    --sysconfdir=/etc \
    --localstatedir=/var
7. You can now compile the SANE code to our Raspberry Pi by entering the command below into the terminal.
Please note that the compilation process can take considerable time, even on a Raspberry Pi 400.
make -j$(nproc)If you experience issues where your Raspberry Pi hangs during compilation, please try the following command instead.
make8. Once SANE has finished compiling, you can install it to your Pi with the following command.
This command will copy everything to the correct places on your system so that you can run it
sudo make install9. As we have added a new library, we need to refresh the systems link cache. Without refreshing the run-time linker will be unaware of the SANE library that we just installed.
To refresh the link cache, all you need to do is use the following command on your system.
sudo ldconfig10. Next, we need to copy the “udev” rules from the SANE repository to the config directory on our Raspberry Pi.
All we need to do is run the following command to copy the file to the correct location.
sudo cp tools/udev/libsane.rules /etc/udev/rules.dudev is the device manager for the Linux kernel. These rules that we are copying over tell “udev” what permissions, group, and environment variables should be set when a particular device is inserted.
11. For our next task, we need to create a group called “scanner“. Any user added to this group will have access to the scanner through the SANE software.
Create the “scanner” group on your Pi by using the “addgroup” command below.
sudo addgroup scanner12. With the group created, we will need to add our Pi user to it. This will ensure you can access the scanner without having to utilize the superuser.
Add the “pi” user to the “scanner” group by using the following command.
sudo adduser pi scanner13. Finally, you will need to either log off or restart your Pi for the changes to take effect.
Restarting the Raspberry Pi is as straightforward as typing in the command below.
sudo rebootTesting your Scanner with SANE on your Raspberry Pi
With the SANE software installed on your Raspberry Pi, you can finally if your scanner will work with the software.
Before proceeding, make sure that you have now plugged in your scanner to the Raspberry Pi.
1. Our first step is to check if the scanner software can detect the device connected to your Raspberry Pi.
To achieve this, we will be using the following command within the terminal.
sudo sane-find-scanner -qIf SANE can find your scanner, then you should end up seeing a message like below. Please note that this isn’t an indication that SANE will work just that it can see your scanner
found USB scanner (vendor=0x04a9 [Canon], product=0x1827 [TS3100 series]) at libusb:001:006If no message appears, then SANE can not find your printer. Try using a USB 2.0 port or cycling your scanner off and on.
2. Now that you know SANE can see your scanner, you can use the “scanimage” tool to list all supported devices.
By using the “-L” option, we are telling the tool, we want to list all supported devices
scanimage -LIf your printer is successfully identified as something that SANE can use, you should see a message as below.
device `pixma:04A91827' is a CANON Canon PIXMA TS3100 Series multi-function peripheralThis message identifies our scanner successfully as a Canon Pixma TS3100 series printer/scanner.
Alternatively, if no message is displayed, your scanner may not be supported by SANE. You can try power cycling the device or checking the official compatibility documentation.
3. Now that we know our scanner works with our Raspberry Pi, we can tell it to scan and save it as an image that we can view.
Scanning an image from your Raspberry Pi is as simple as using the following command.
scanimage > pimylifeup.jpg --format jpeg --resolution=300 -pThere is a couple of things we do when using this command. First, we tell it to output the contents of the scan to a file called “pimyllifeup.jpg.
Secondly, we set the format (--format) option to the “jpeg” image format as it is one of the most widely supported.
Thirdly, by using the resolution (--resolution) option, we set the scan to a resolution of 300 DPI.
Finally, we use the progress (-p) option to display the progress of the current scan in the command line.
4. While this command runs, you should hear your scanner begin to work, and once completed, you will have a file called “pimylifeup.jpg” on your Raspberry Pi.
You can copy this file from your Pi if you want to view and verify the result of the image.
Alternatively, you can use the “file” command to print out information about the image.
file pimylifeup.jpgUsing this command, you should see something like what we have below.
pimylifeup.jpg: JPEG image data, JFIF standard 1.01, resolution (DPI), density 300x300, segment length 16, baseline, precision 8, 2552x3508, components 3This information will let you know stuff such as the resolution of the image, codec, and size.
Turning your Raspberry Pi into a Scanner Server
Now that we have SANE running on our Raspberry Pi, we can configure it to operate as a scanner server.
Setting up SANE to act as a scanner server requires us to modify a few different files, so we will split this into a couple of sections.
Creating the SANED Service
Our first task is to create a service that will run the SANE daemon on our Raspberry Pi when it starts up. If we don’t set up this service, you would have to manually start SANE every time your device restarts.
1. The first file we need to create is a Systemd socket file for SANE. A systemd socket allows a service to be started when data is sent to a particular socket, which in SANE’s case is port 6566.
Begin creating this new socket file by using the following command.
sudo nano /etc/systemd/system/saned.socket2. Within this file, you will want to enter the following lines.
[Unit]
Description=saned incoming socket

[Socket]
ListenStream=6566
Accept=yes
MaxConnections=1

[Install]
WantedBy=sockets.target
These lines set out the port on which this service will listen, whether to accept the incoming connections and the maximum number of connections.
3. Once you have made these changes to the file, save and quit by pressing CTRL + X, then Y, followed by the ENTER key.
4. A socket file must always have an accompanying service file. This service will tell the system how to run and handle SANE on our Raspberry Pi.
You can start editing this file by running the command below.
sudo nano /etc/systemd/system/@saned.service5. You will need to type the following lines into the file before proceeding.
[Unit]
Description=Scanner Service
Requires=saned.socket

[Service]
ExecStart=/usr/local/sbin/saned
User=saned
Group=saned
StandardInput=null
StandardOutput=syslog
StandardError=syslog
Environment=SANE_CONFIG_DIR=/etc/sane.d
6. Once done, save your changes by pressing CTRL + X, then Y, then the ENTER key.
Configuring SANE for Remote Access
Now that we have created the service file for SANE, we will need to configure it so it knows who can access the server on your Raspberry Pi.
1. To configure the SANE daemon, we will need to edit the “saned.conf” file.
You can edit this configuration file using nano by running the following command on your device.
sudo nano /etc/sane.d/saned.conf2. Within this file, you will need to look for the following section.
If you are using the nano text editor, you can use the CTRL + W hotkey to search the file.
## Access list3. Below this heading, you will need to add the IP or IP range that you want to access your Raspberry Pi SANE scanner server.
For this example, we will be assuming that your local network uses the “129.168.0.0” subnet.
192.168.0.0/244. Once you have made these edits to the file, you can save and quit by pressing CTRL + X, the Y key, and finally ENTER.
Starting the Scanner Server on your Raspberry Pi
Now that everything is finally configured, we can start up the SANE service that we created earlier. Once this service is started, you should be able to use a SANE compatible frontend to scan images across your network.
1. Let us start by enabling the SANE service. Enabling the service is what will allow it to start at boot automatically.
We can use systemctl to enable the sane service by running the following command.
sudo systemctl enable saned.socket2. With the service now enabled, we can also start it using systemctl as well.
You can start up the scanner service on your Raspberry Pi by using the command below in the terminal.
sudo systemctl start saned.socket3. You can verify that the SANE daemon is now running on your Pi using the “status” option with systemctl.
systemctl status saned.socketIf everything is working as it should, you will see that the status is listed as “Active: active (listening)“.
Additionally, you can use this command to monitor how many connections have been accepted by SANE.
4. You should now be able to start remotely scanning thanks to your Raspberry Pi scanner server.
All you need to do is use a client with SANE compatibility. If you are prompted to enter an IP address, then use your Pi’s local one.
You can retrieve the IP address of your Raspberry Pi by using the following command.
hostname -IConclusion
At this point in the tutorial, you should now have SANE compiled and running on your Raspberry Pi.
SANE is one of the best ways of getting your Raspberry Pi to scan images from a connected USB scanner.
You can even configure SANE so that it allows other devices to connect to your scanner remotely.
If you have run into issues with getting SANE to run on the Raspberry Pi, please leave a comment below.
Be sure to check out our many other Raspberry Pi projects, such as our guide on running a Plex server.


Thanks for this article. Your guide did not work for me (RPi 4, newest RP OS) but I found a very simple way in the end. Therefore, I want to share my experience, as well.
My scanner is the Canon CanoScan LiDE 300 which supports IPP-over-USB. Furthermore, on my RPi, all necessary components were already installed OOTB and I only had to change the following config:
– in `/etc/ipp-usb/ipp-usb.conf` : replace `interface = loopback` with `interface = all`
After this change I rebooted the RPi and when it came back up, my MacBook discovered the scanner right away.
Hope this helps!
Thank you for this excellent article!
It worked like a charm.