In this project, we will be showing you how to install and run Redis on the Raspberry Pi.
Redis is a fast, powerful data store that stores all of its data within memory. Storing data in memory allows the server to fetch and store data incredibly fast.
The Raspberry Pi is a fantastic device for Redis since it has low memory and CPU footprint. Basically, this means that Redis can make the most of the Pi’s hardware.
You can even run this server software on a tiny device such as the Raspberry Pi Zero. However, if you plan on dealing with a ton of data, the more memory and CPU cores the better.
The Redis team officially tests their software on the Pi, so you can be assured that the software will run well for its limited hardware.
If you are using a Raspberry Pi that has more than 2GB of memory, we recommend you use a 64-bit OS for the best experience.
Equipment
With the list below, you can see what we used when installing Redis to our Raspberry Pi.
Recommended
Optional
This tutorial was tested on a Raspberry Pi 400 running the latest 64-bit version of Raspberry Pi OS Bullseye.
Installing Redis to the Raspberry Pi from the Pi Repository
Redis can be installed on the Raspberry Pi directly from the official package repository. The downside of installing the server from the repository is that it is not the latest release of Redis.
If you rely on new features or require the speed improvements of newer releases of Redis, skip to our “Installing Redis from the Source Code” section.
1. The first task we need to perform when installing Redis to the Raspberry Pi is to update the package list.
The package list tells us the package version and where the package manager can download them from. Update this list by using the following command.
sudo apt updateCopy2. Once the package list finishes updating, all we need to do now to install Redis is run the following command.
It will then be grabbed and installed on our Raspberry Pi from the package repository.
sudo apt install redis-serverCopy3. Once the installation finishes, you will want to enable its service so that Redis starts up when your Raspberry Pi does.
Enabling the service is as simple as using the following command within the terminal.
sudo systemctl enable redisCopy4. Finally, start up the Redis server by using the command below within the terminal.
sudo systemctl start redisCopy5. At this point, the Redis server should be up and running on your Raspberry Pi and ready for connections.
To continue with this guide, skip down to our “Testing your Redis Installation on the Raspberry Pi” section.
Installing Redis from the Source Code
While we can install Redis to the Raspberry Pi directly from the command line, it will leave you with an older server version. So basically, you miss out on all the performance improvements introduced in newer releases.
Luckily for us compiling Redis on the device is a super straightforward process and can be completed in a few minutes.
Preparing your Raspberry Pi to Compile Redis
1. We should perform an update before installing any of the packages we require to compile Redis on the Raspberry Pi.
Using the following two commands, you can update the package list and any outdated packages.
sudo apt update
sudo apt upgradeCopy
2. Once the update completes, we can move on to install the two packages that we require for compilation.
You can install the “wget” and “build-essential” packages using the command below.
sudo apt install wget build-essentialCopywget– The wget package allows us to very easily grab files from a remote destination.build-essential– The build-essential package installs several other packages. These packages are all to do with building software such as Redis.
3. Our next step is to download the latest version of the Redis code to our Raspberry Pi using the following command.
We use the wget command to download the latest code archive directly from the official website.
wget http://download.redis.io/redis-stable.tar.gz -P ~/CopyUsing the “-p” option, we ensure that the Redis archive is downloaded to your home directory.
4. Once the archive finishes downloading, we can extract its contents using the following command in the terminal.
tar xvf ~/redis-stable.tar.gz -C ~/CopyThe “-C” option allows us to select the directory where we extract Redis. In our case was the home directory.
Compiling and Installing Redis from Source Code
5. Before compiling Redis, we will need to ensure we are in the correct directory.
Use the cd command to move to where we extracted the Redis source code.
cd ~/redis-stable/Copy6. Now that we are in the correct directory, we can compile the Redis source code on our Raspberry Pi using the following command.
By using “-j$(nproc)“, we are telling make to run as many jobs as we have cores. Doing this will speed up the compilation performance. However, if you run into issues try using just “make“.
make -j$(nproc)CopyPlease note that the compilation process will take a few minutes, so please be patient.
7. Once the compilation process finishes, you can install the newly compiled version of Redis to your Raspberry Pi.
All you need to do is use the following command within the terminal.
sudo make installCopy8. You have now successfully installed Redis to your Pi.
You can verify this by getting the Redis server to output its version with the following command.
redis-server --versionCopyConfiguring Redis
9. With Redis finally installed on our Raspberry Pi, we will need to do a few more things.
The first is to copy the Redis configuration from the source code to where it should sit on the Pi.
Use the following command to create the directory where we will store our Redis config files.
sudo mkdir -p /etc/redis/Copy10. You can now copy the default configuration from the source archive to our newly created directory using the command below.
sudo cp ~/redis-stable/redis.conf /etc/redis/Copy11. We now need to make some changes to the config file so that we will be able to run Redis as a service on our Raspberry Pi.
Begin editing this file by using the following command within the terminal.
sudo nano /etc/redis/redis.confCopy12. Within this file, you need to find and replace the following line within the config file. You can use CTRL + W to search this file easier.
Find the following line within the file.
# supervised autoReplace with the following line.
supervised systemd13. Our next step is to replace the working directory line. We want Redis to run within the “/var/lib/redis” directory and not just where we executed it.
Find the following line.
dir ./Replace the line with the following.
dir /var/lib/redis/14. Once you have finished making these changes to the file, you can save and quit.
You can save and quit by pressing CTRL + X, followed by Y, then the ENTER key.
Setting up a User to Run Redis on the Raspberry Pi
15. We now need to create a user that Redis will run under on our Raspberry Pi. This user will be purely responsible for handling the Redis server, separating it from the rest of your services.
We can create a user called “redis” by using the useradd command.
sudo useradd --system redisCopyBy using the “--system” option, we are disabling the ability for anyone to be able to log in with this user.
16. With the user created, we now need to make a directory where our Redis data will be stored.
Again, we will use the mkdir command to create a directory.
sudo mkdir /var/lib/redis/Copy17. Since we created the directory using sudo, the owner will currently be the “root” user. We will need to change this so the Redis server can access it.
We can change the owner from “root” to “redis” by using the chown command as we have done below.
sudo chown redis: /var/lib/redis/Copy18. Now, the last thing we need to do is make sure our Redis directory has better permissions. At the moment, its set so that any user can read data from it.
Change it so only the user and group that owns the folder can read data within it using the chmod command.
sudo chmod 770 /var/lib/redis/CopyRunning the Redis Server as a Service
19. Our final task is to create a service to start Redis at boot and keep it in the background.
Let us use the nano text editor to create this file with the below command.
sudo nano /etc/systemd/system/redis.serviceCopy20. Within this file, enter the following lines. These lines tell the system how it should manage Redis when running it as a service.
[Unit]
Description=Redis data structure server
Wants=network-online.target
After=network-online.target

[Service]
User=redis
Group=redis
ExecStart=/usr/local/bin/redis-server /etc/redis/redis.conf
Restart=always
LimitNOFILE=10032
NoNewPrivileges=yes

[Install]
WantedBy=multi-user.targetCopy
21. Once you have entered all the lines defining your Raspberry Pi’s Redis service. you can save and quit.
Save and quit by pressing CTRL + X, followed by Y, then the ENTER key.
22. With the service created, there are two final tasks that you will want to complete.
The first of these is to enable the service. By enabling the service, Redis will automatically start at boot.
sudo systemctl enable redisCopy23. Next, we want to start the Redis server on our Raspberry Pi.
Like enabling the service, we will be utilizing systemctl to manage it. Start the Redis service by using the following command.
sudo systemctl start redisCopyTesting your Redis Installation on the Raspberry Pi
At this point, you should now have Redis installed on your Raspberry Pi, whether that be from the package repository or code.
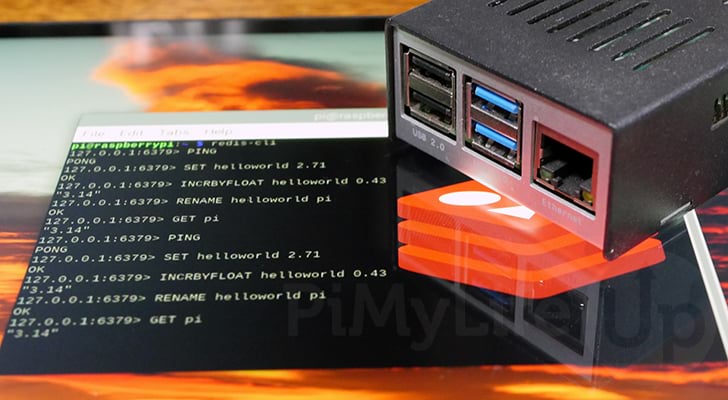
We can now move on to testing to ensure the installation works by breaking out the “redis-cli“. This tool allows us to talk with the server and issue commands.
1. Start by loading up the Redis command line interface using the following command.
By default, it will attempt to connect to a Redis server on the localhost.
redis-cliCopy2. With the interface now open, we can start testing to see if everything works. The simplest way to check if the server is receiving connections is to issue a “ping” command.
To do this, all you need to do is use the following command within the Redis CLI.
pingIf the server accepts connections and responds to them, you should see a response message like the one below.
pong3. Next, let us try using the CLI to set a new value within the Redis data store.
To store a value, you will want to use “set” followed by the key, then the value you want to be stored.
set test pimylifeup4. With a value set within our Raspberry Pi’s Redis data store, we can now grab it.
To grab a value back out of the data store, we will want to use “get” followed by the key name, which in our case is “test“.
get testAfter running the above command within the Redis CLI, we got the following result back.
pimylifeup5. Once you are done with the command line interface, you can quit by typing in “quit” or pressing CTRL + C.
Conclusion
In this tutorial, we showed you two ways to get Redis running on your Raspberry Pi. You can either rely on an old version by installing it from the Pi repository or compiling the latest version of the code.
Redis is an open-source, efficient data store that allows you to store and retrieve text data very quickly and easily.
Please comment below if you have had any issues getting Redis running on your Raspberry Pi.
Be sure to check out our many other Raspberry Pi projects, including our many server guides.


Great article! The step-by-step worked flawlessly. That in and of itself is a tribute to the author’s quality of attention to detail. Thank you again!